
Guides
Feb 26, 2025

Albert Mao
Co-Founder
Transform your organization with AI
Discover how VectorShift can automate workflows with our Secure AI plarform.
Use Case Overview
VectorShift helped a national primary care provider (30+ locations) deploy a HIPPA-compliant physician co-pilot for internal and patient data.
Modern healthcare requires providers to maintain extensive medical knowledge while delivering timely patient care. With the physician copilot, doctors receive answers to questions about standards of procedure (SOPs) and patient medical history, without having to open and read dozens of data sources.
Today, the co-pilot averages over >250 queries daily from physicians, allowing them to spend more time focusing on their patients.
Building Steps
Step 1: Create a knowledge base and add relevant data.
Step 2: Design the “backend” pipeline that orchestrates the chat conversation.
Step 3: Export the pipeline as a chat assistant.
1. Creating a Knowledge Base
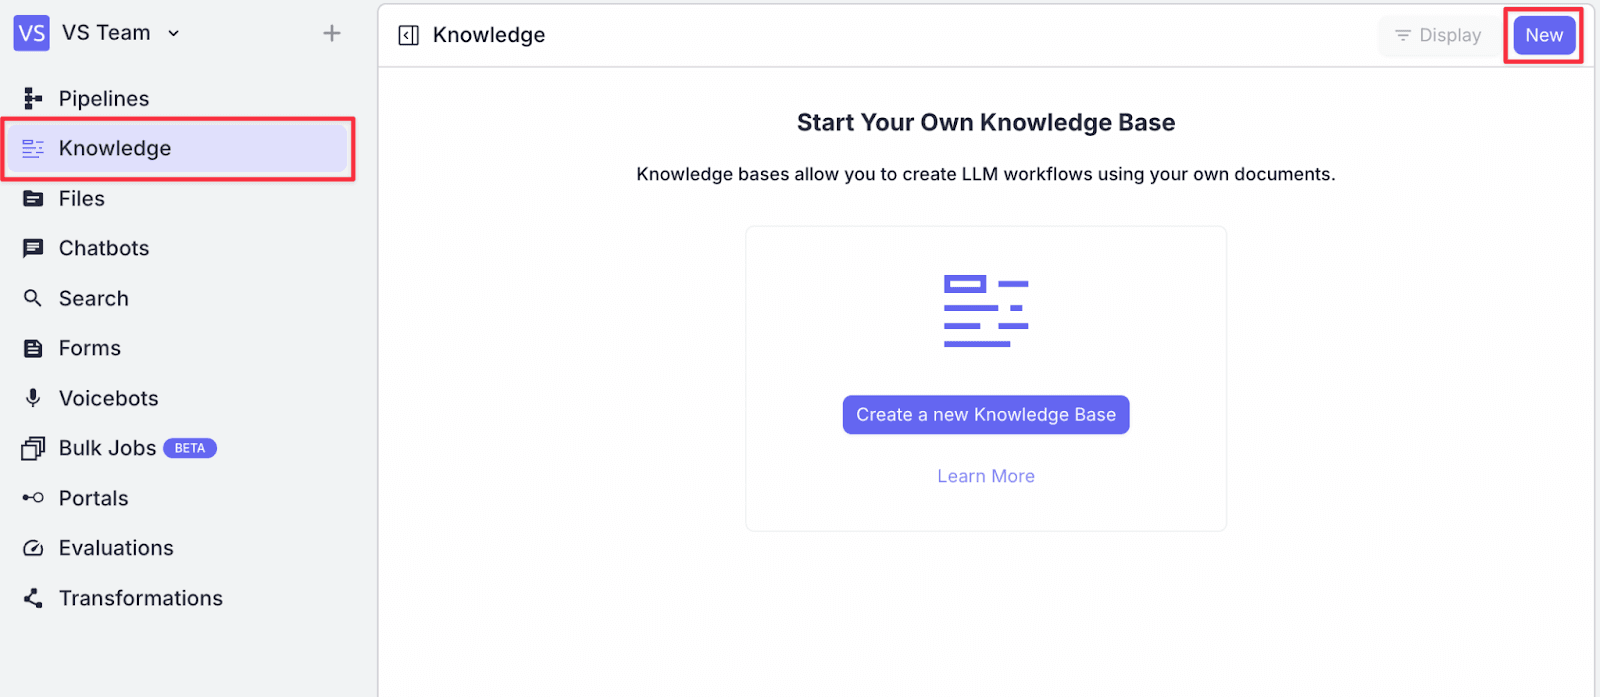
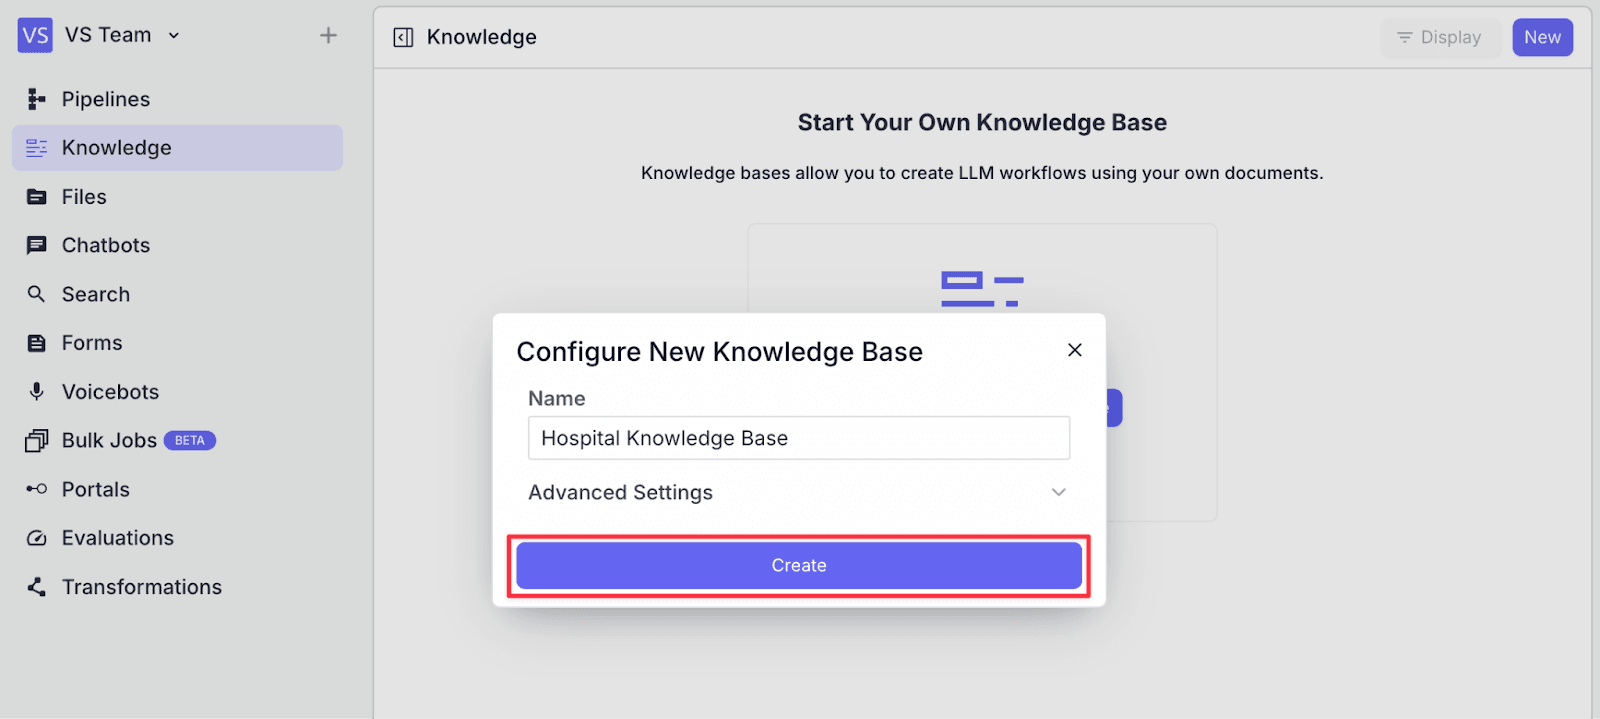
Click on the “Knowledge” tab on the left-hand side. Create a new knowledge base by clicking “New” on the top right and giving it a name.
There are 3 types of data that will be added to the knowledge base:
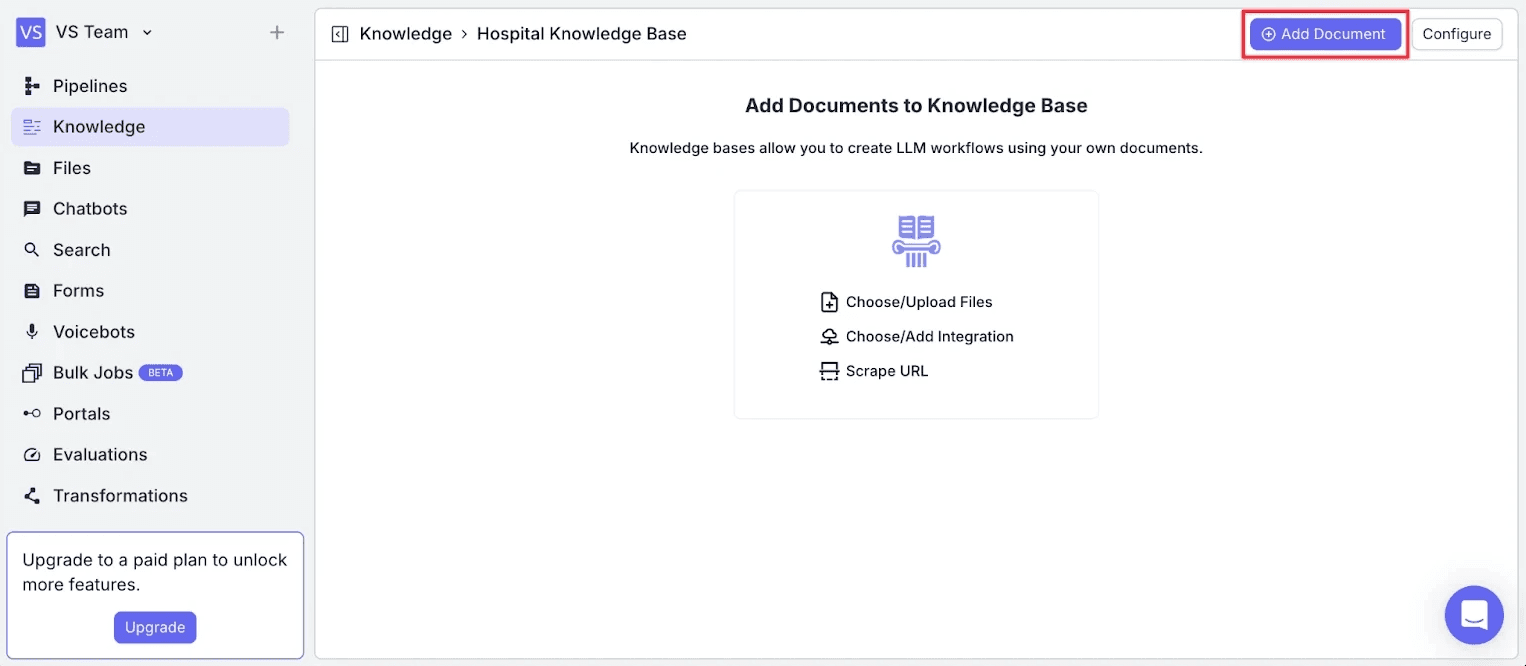
Documents (e.g., SOP and clinical operating documents). To add, click “Add documents” >> “Choose / Upload File”. Then, either select the document(s) or drag them onto the page.
Notion (e.g., medical imaging reports): To add, click “Add documents” >> “Choose / Add Integration” >> “Connect New App” >> “Notion”.
Airtable (e.g., medicine inventory): same as Notion except selecting “Airtable” at the final step.
We will walk through the above step by step.
Add Documents to a Knowledge Base
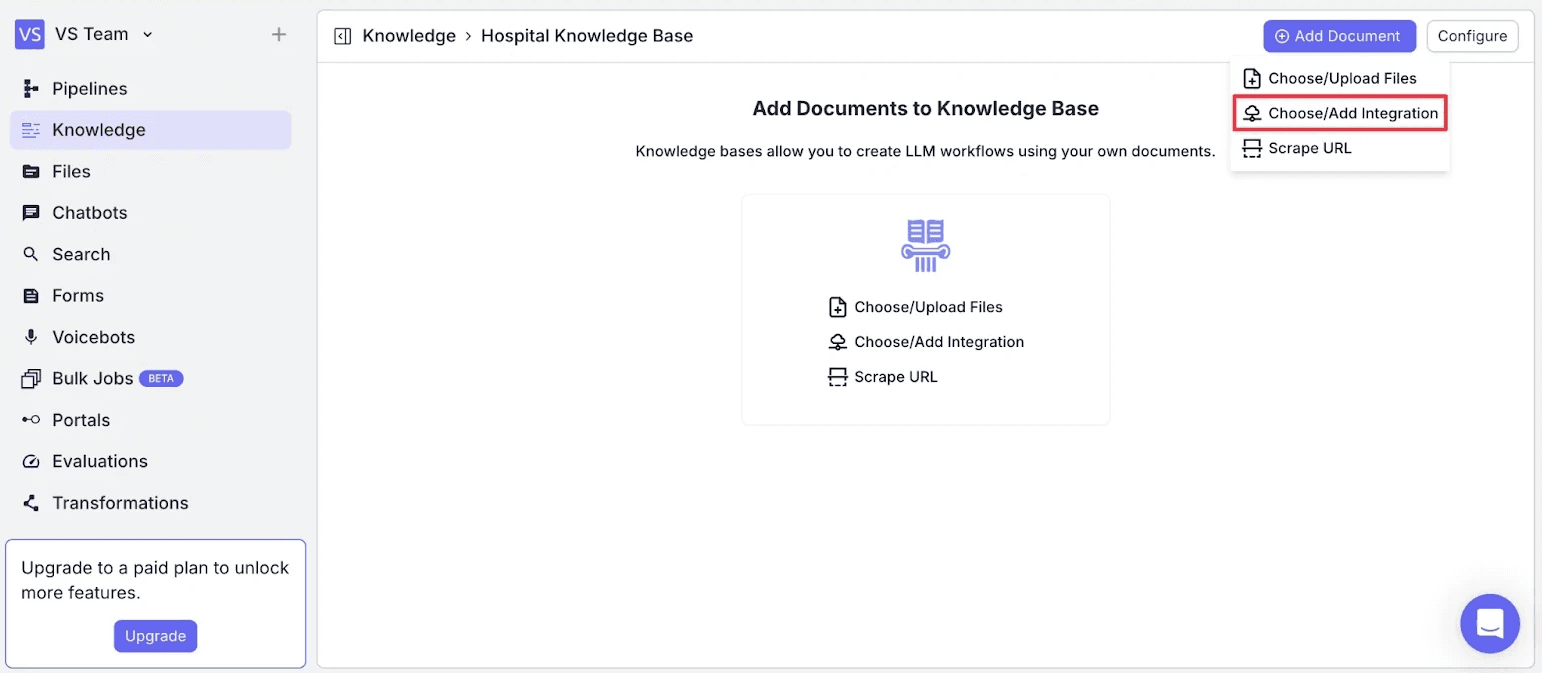
Step 1: Click “Add Document” >> “Choose/Upload Files”
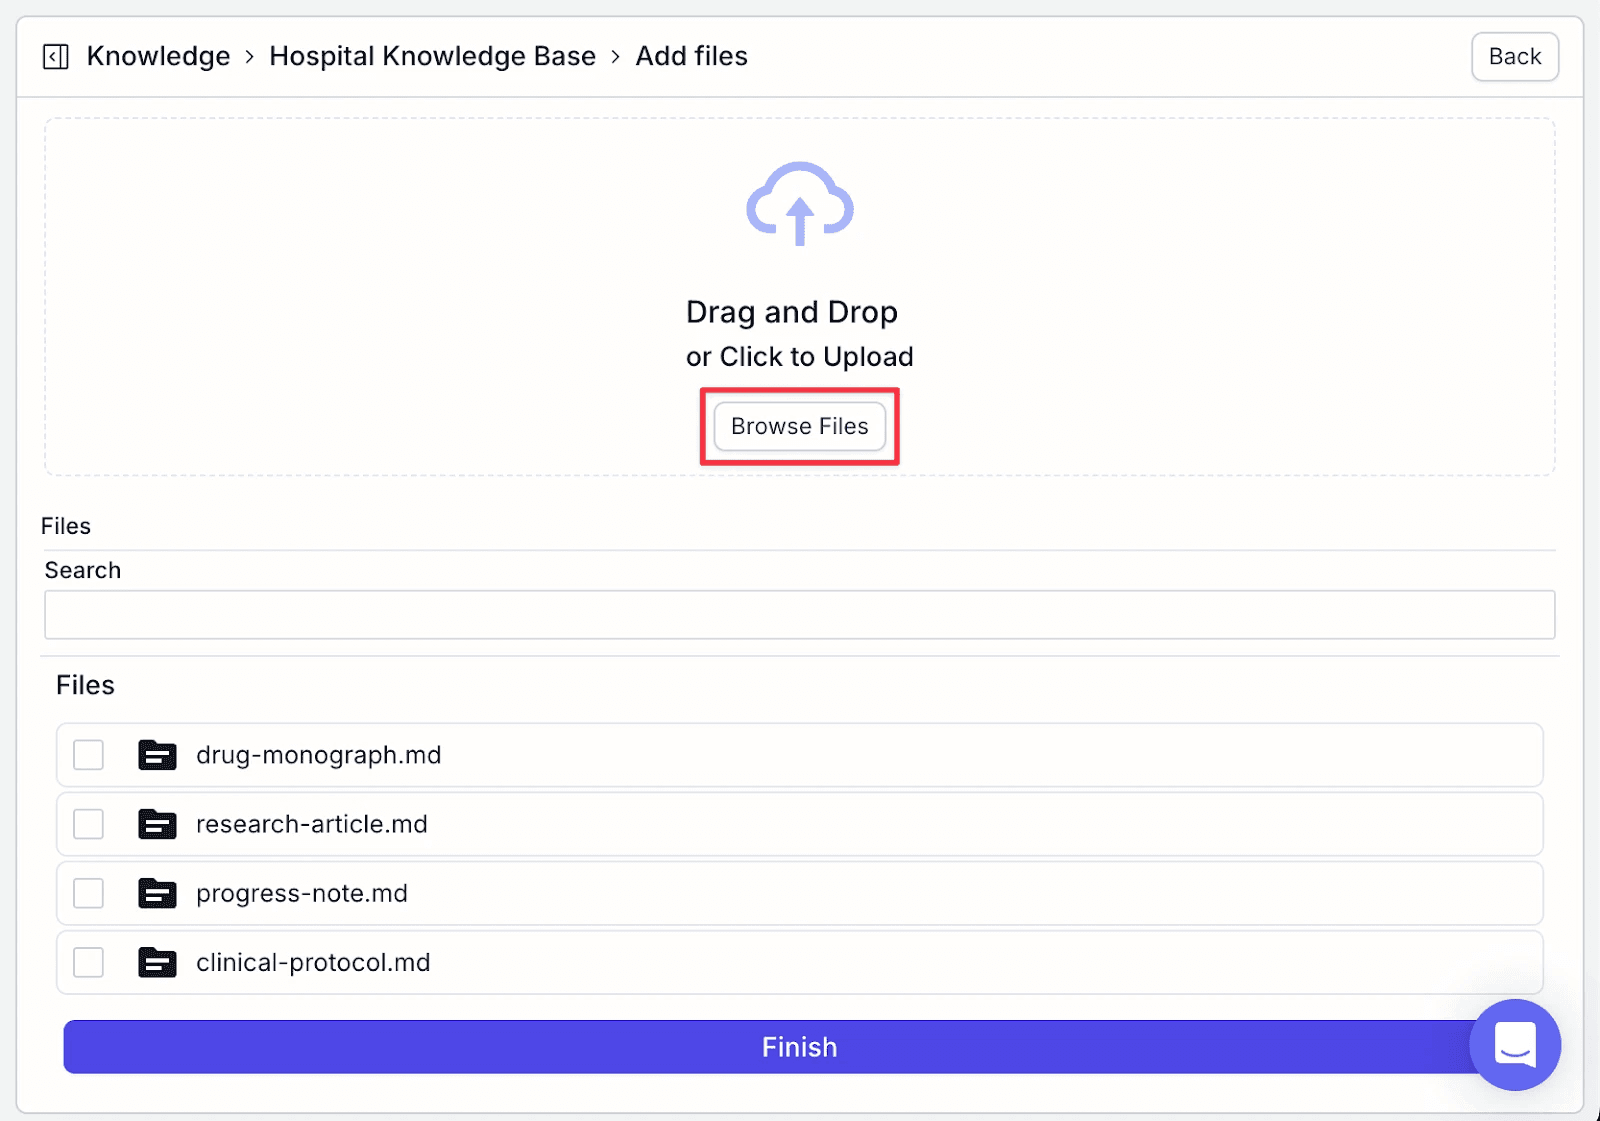
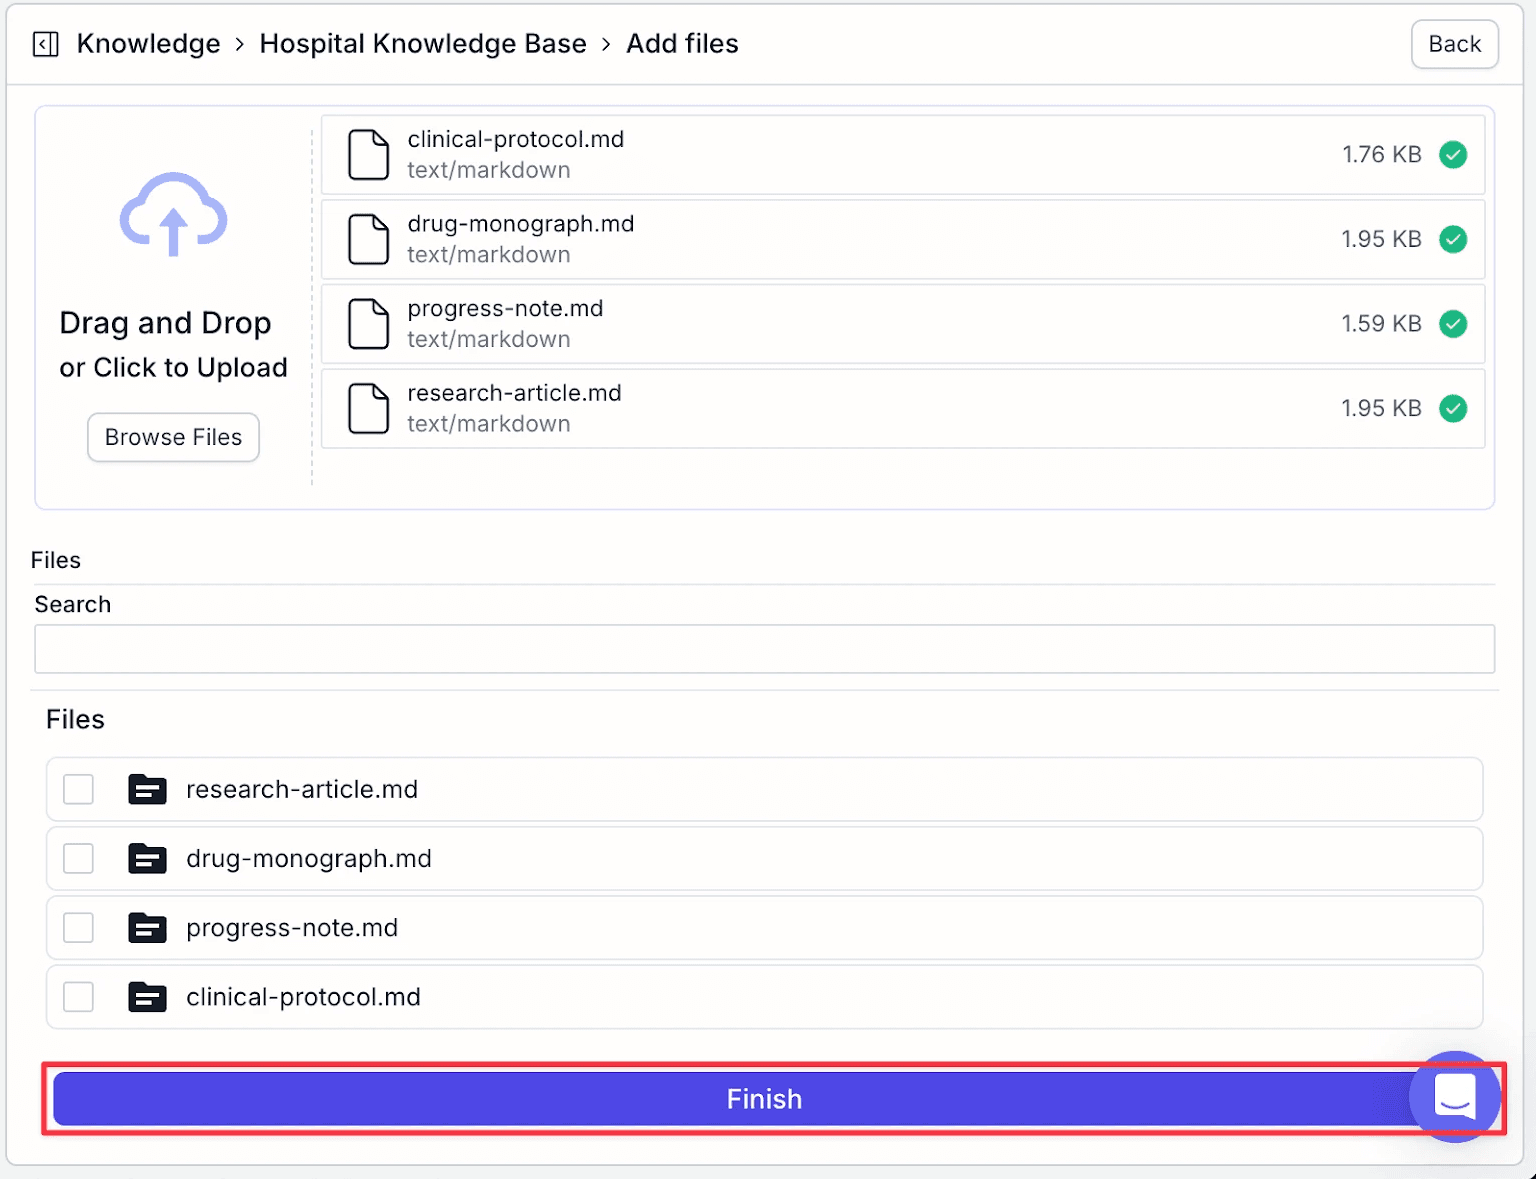
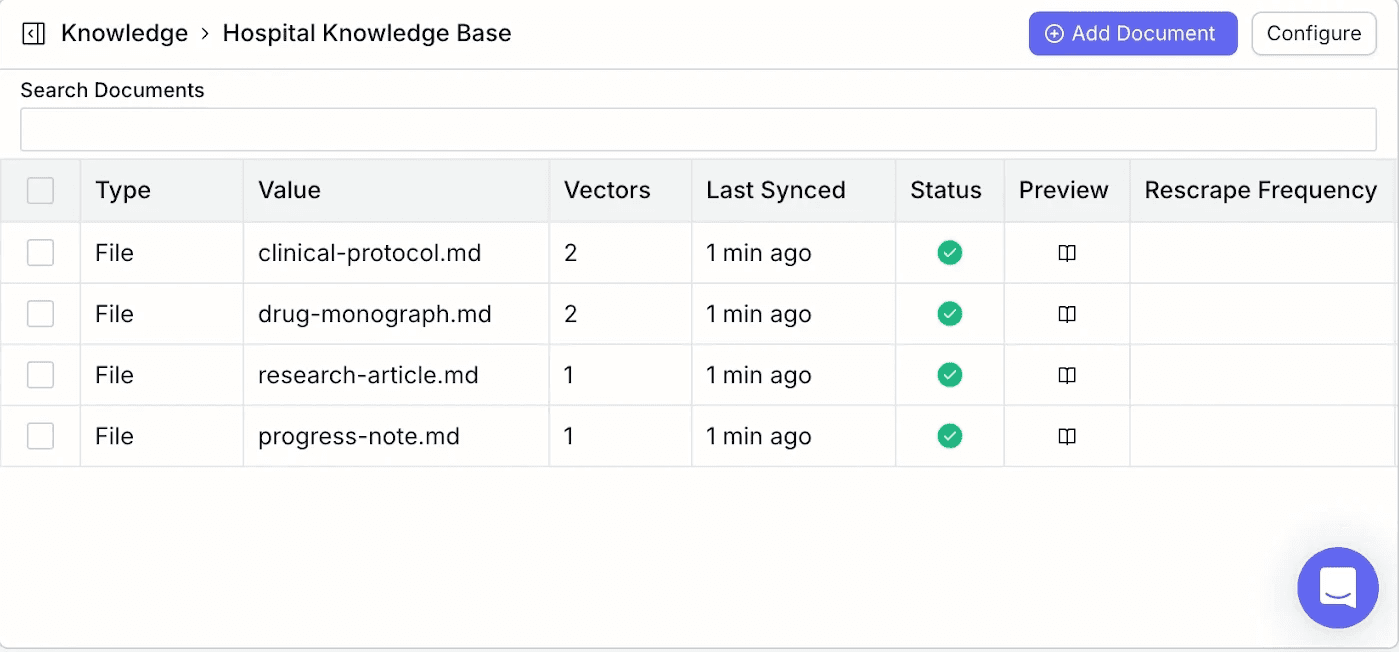
Step 2: Click “Browse Files” >> select files you want to upload >> click on “Confirm Selection”. You will see the files added to the knowledge base.
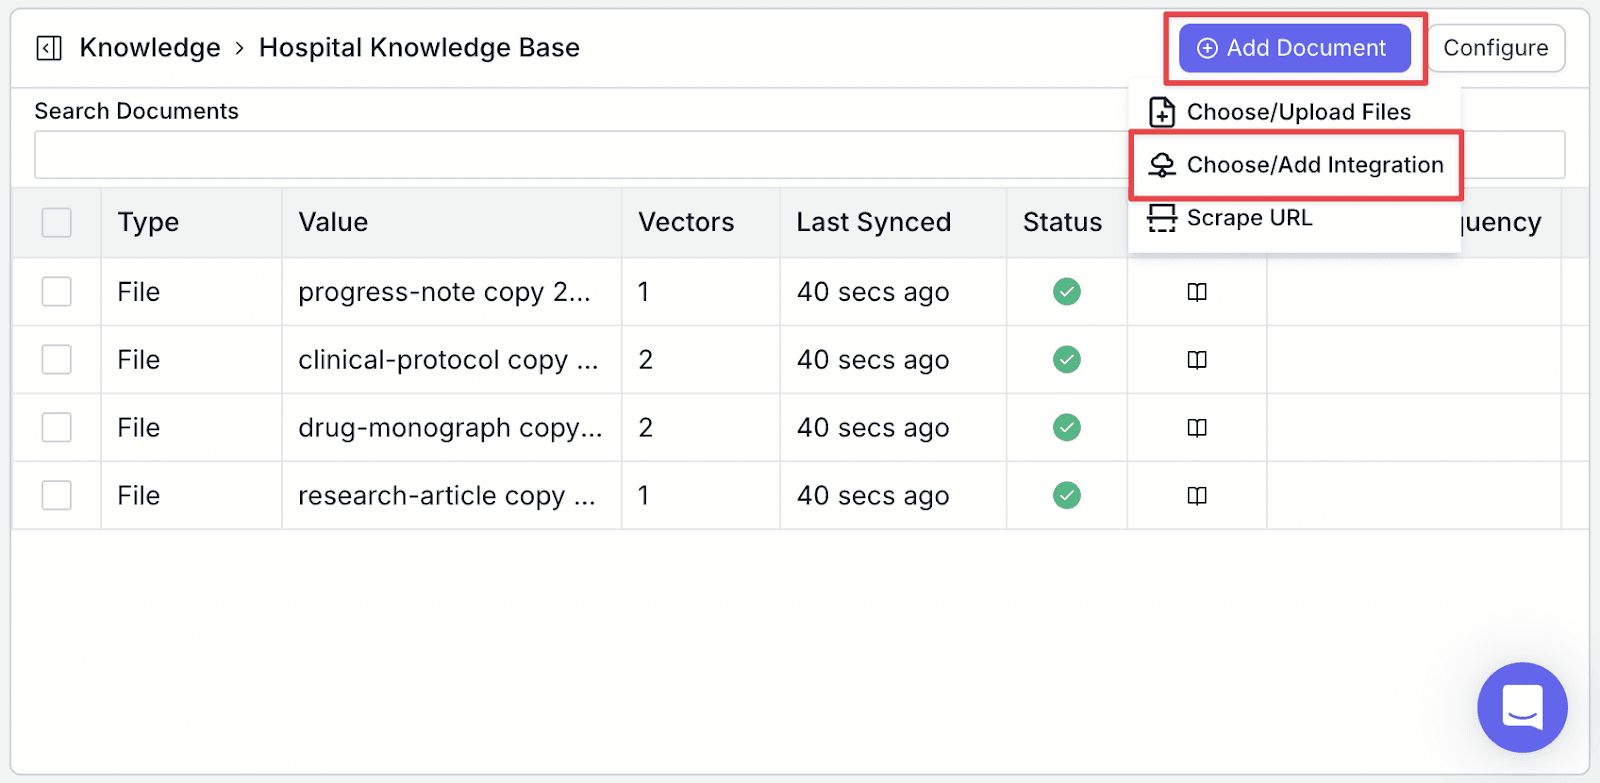
Add Data from Integrations: Airtable
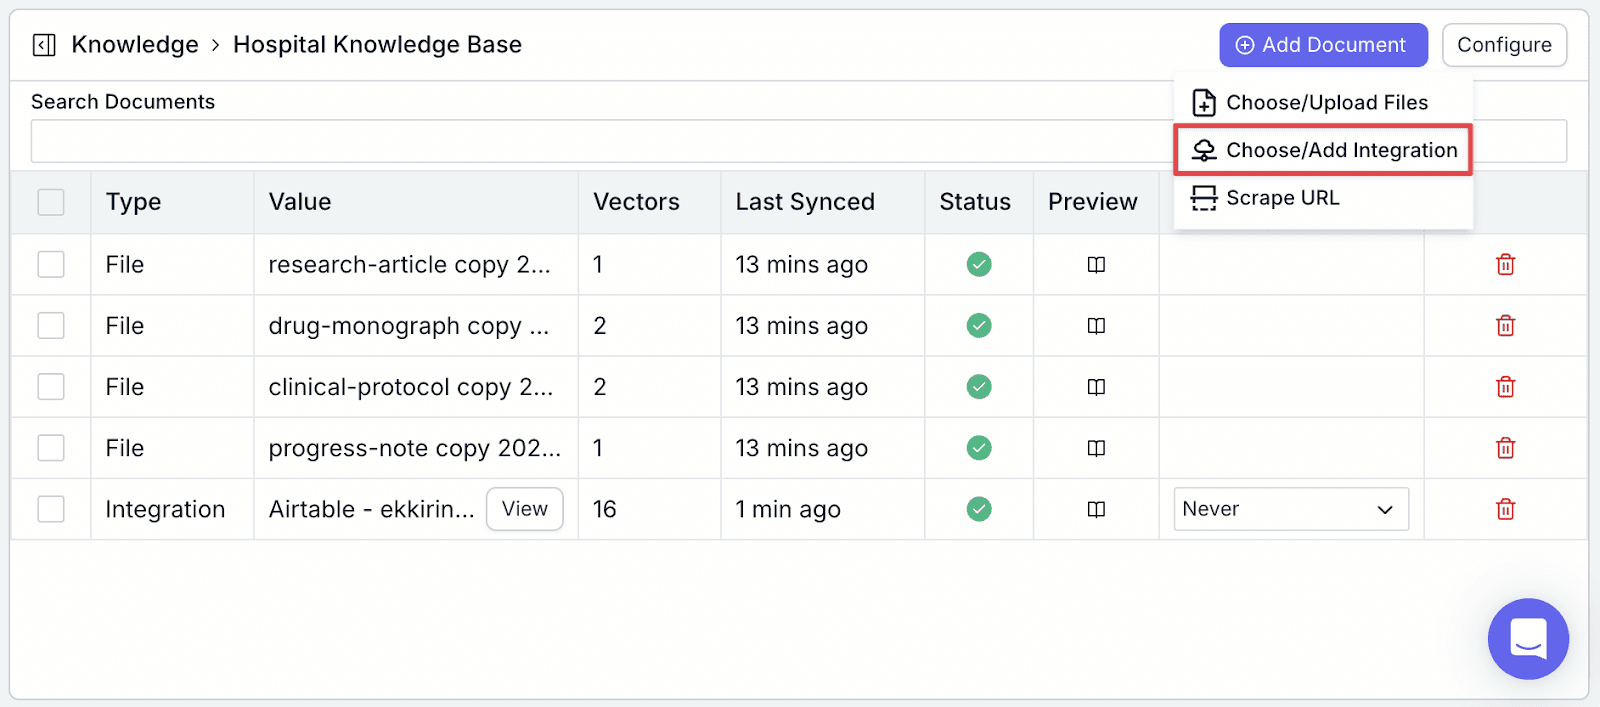
Step 1: Go back to the Knowledge base. Click on “Add Document” then “Choose/Add Integration”.
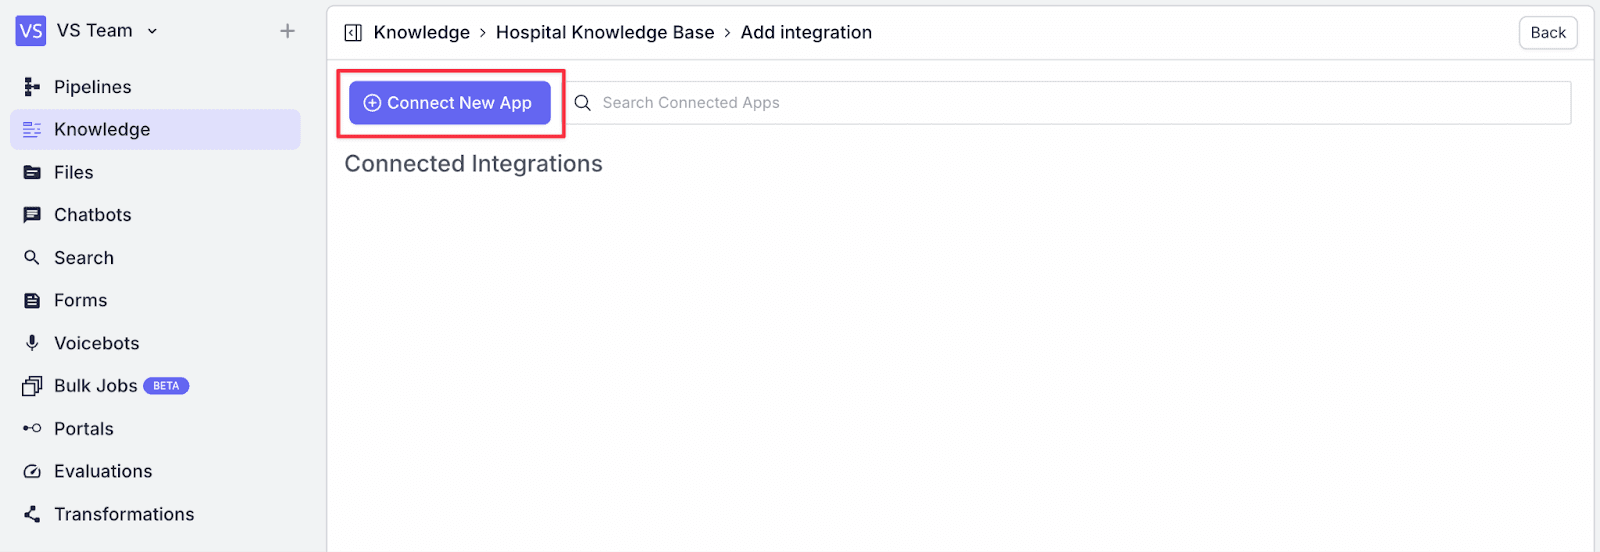
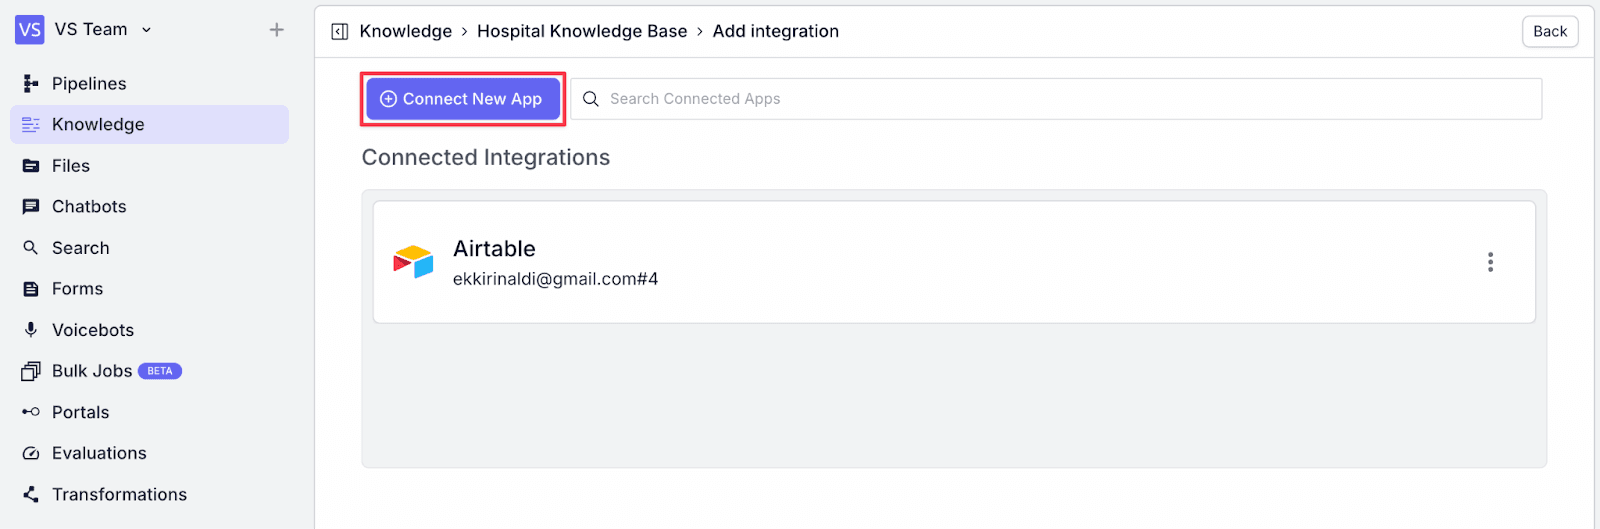
Step 2: Click on “Connect New App”
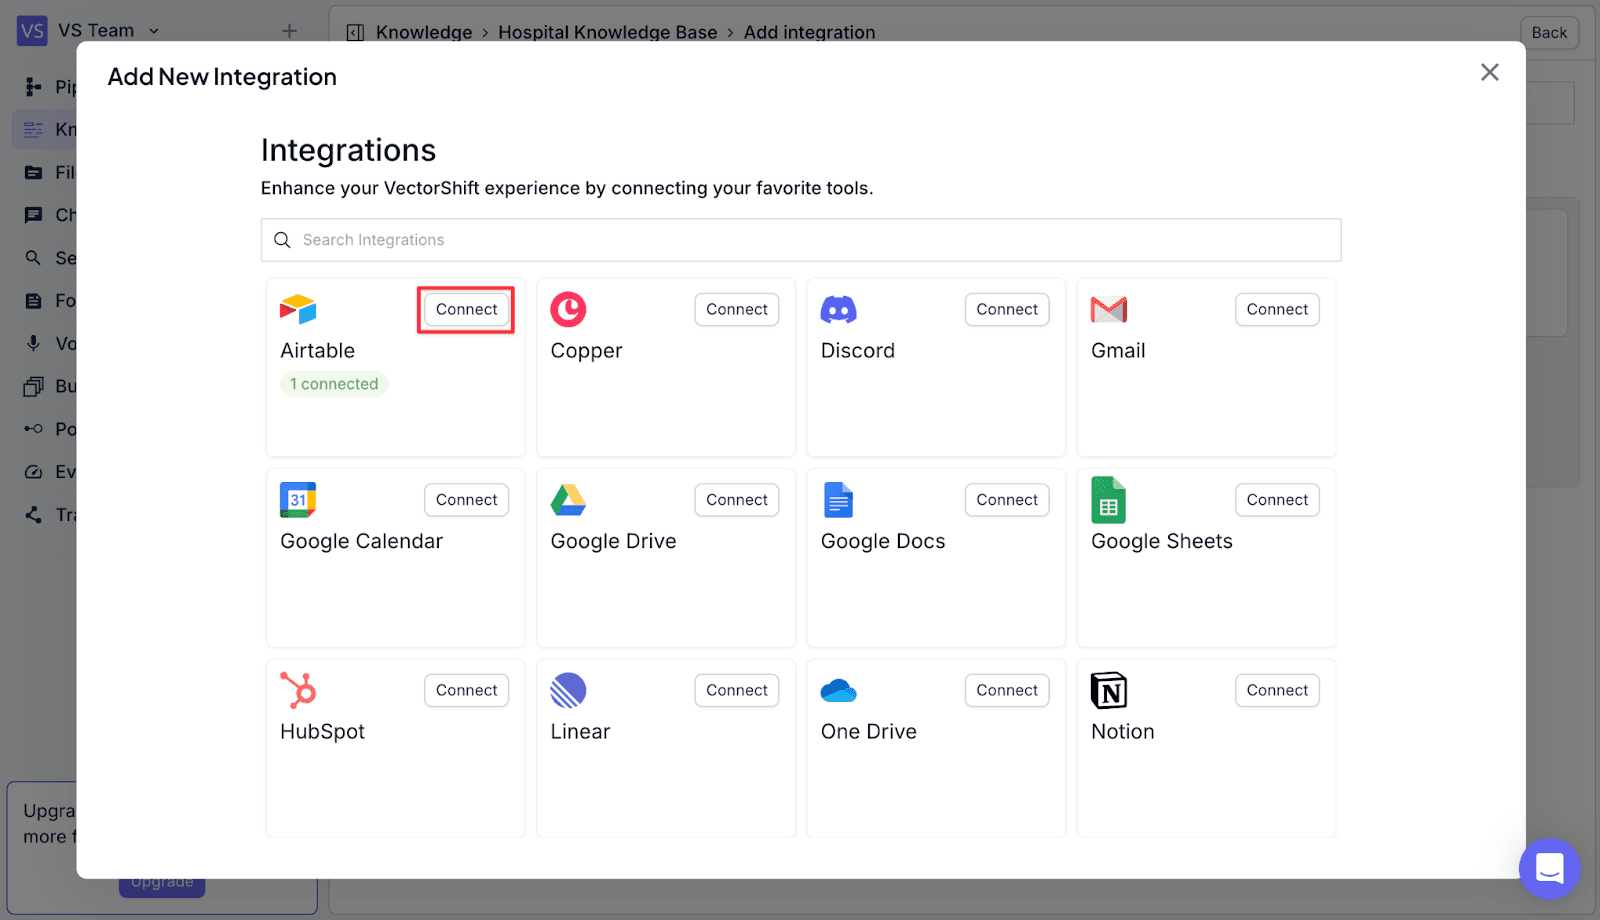
Step 3: Find the Airtable integration, and click “Connect”
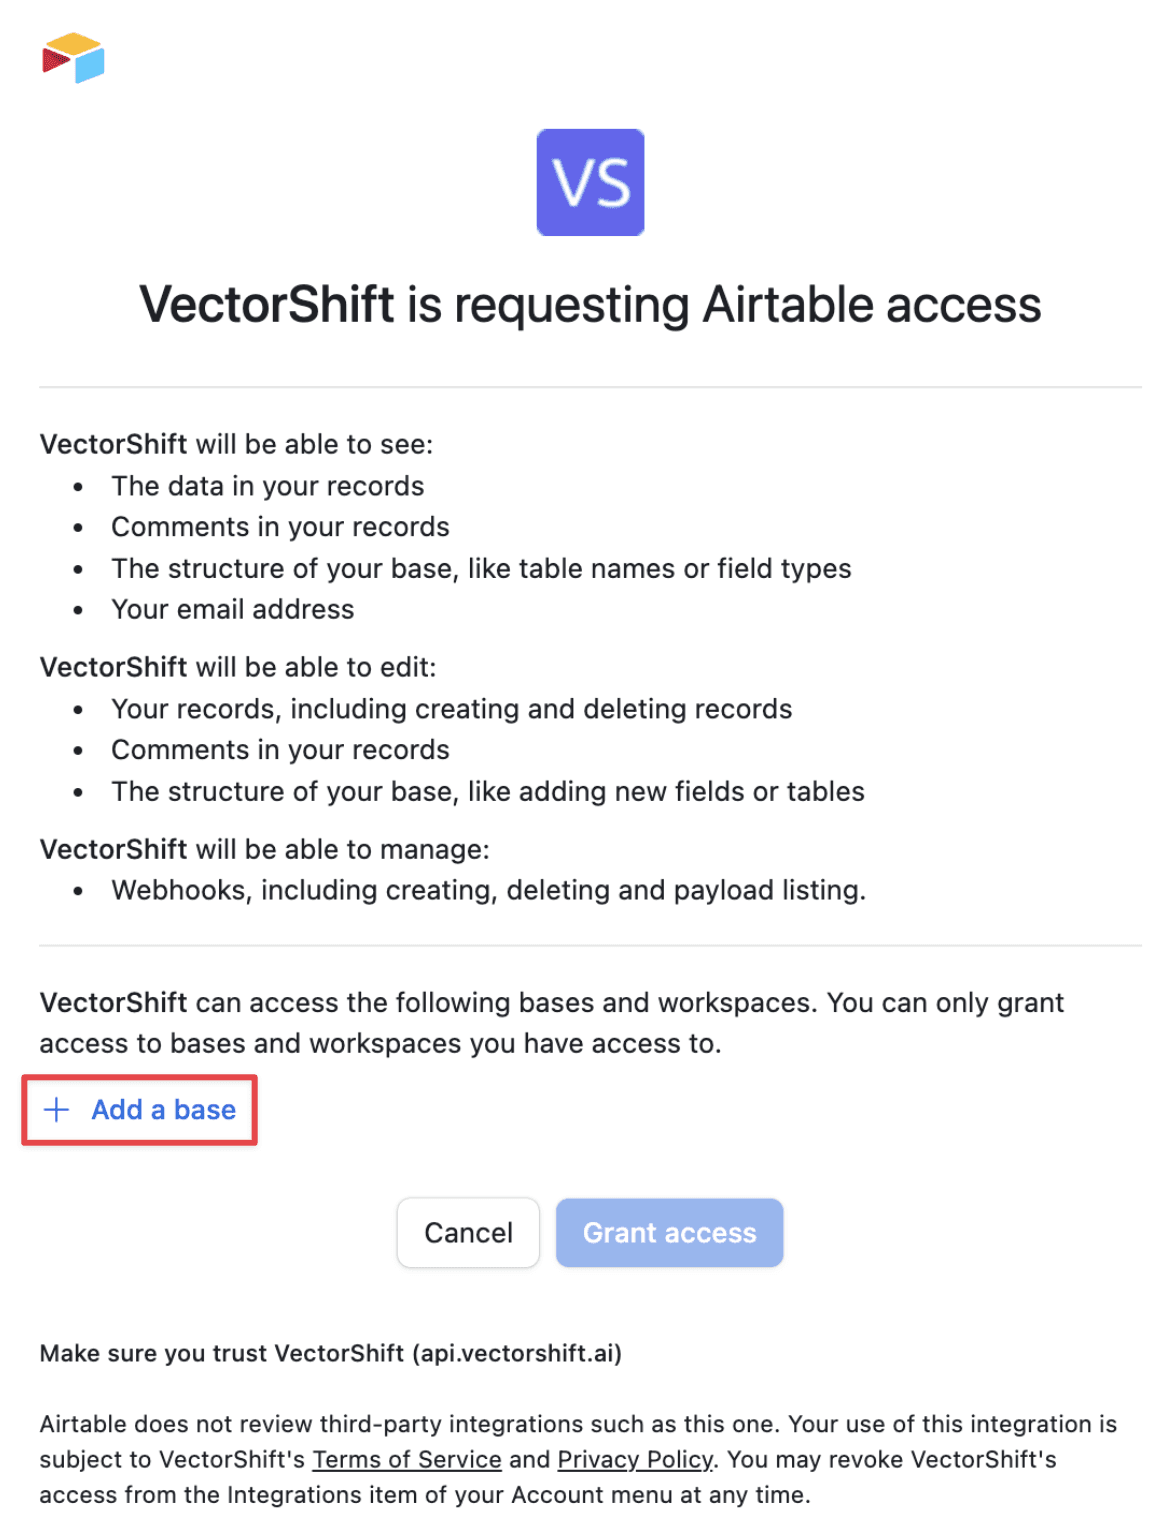
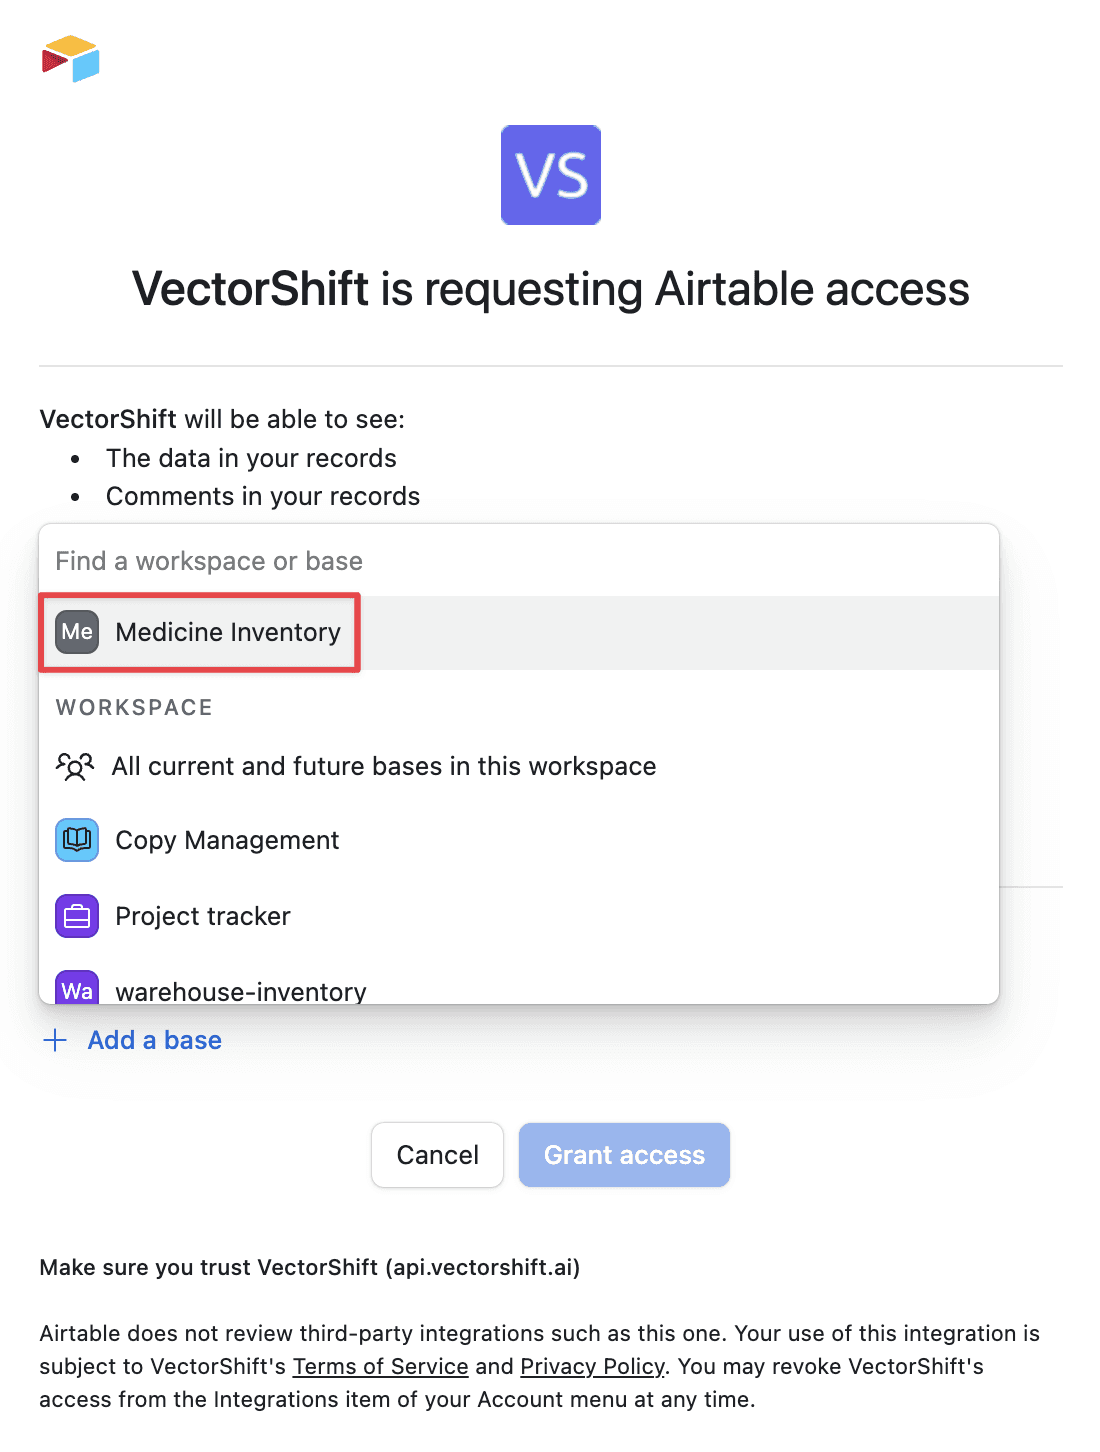
Step 4: A pop-up will open asking you to grant access to an Airtable base and table. Select the relevant data you want VectorShift to integrate with. Finally, click “Grant Access”.

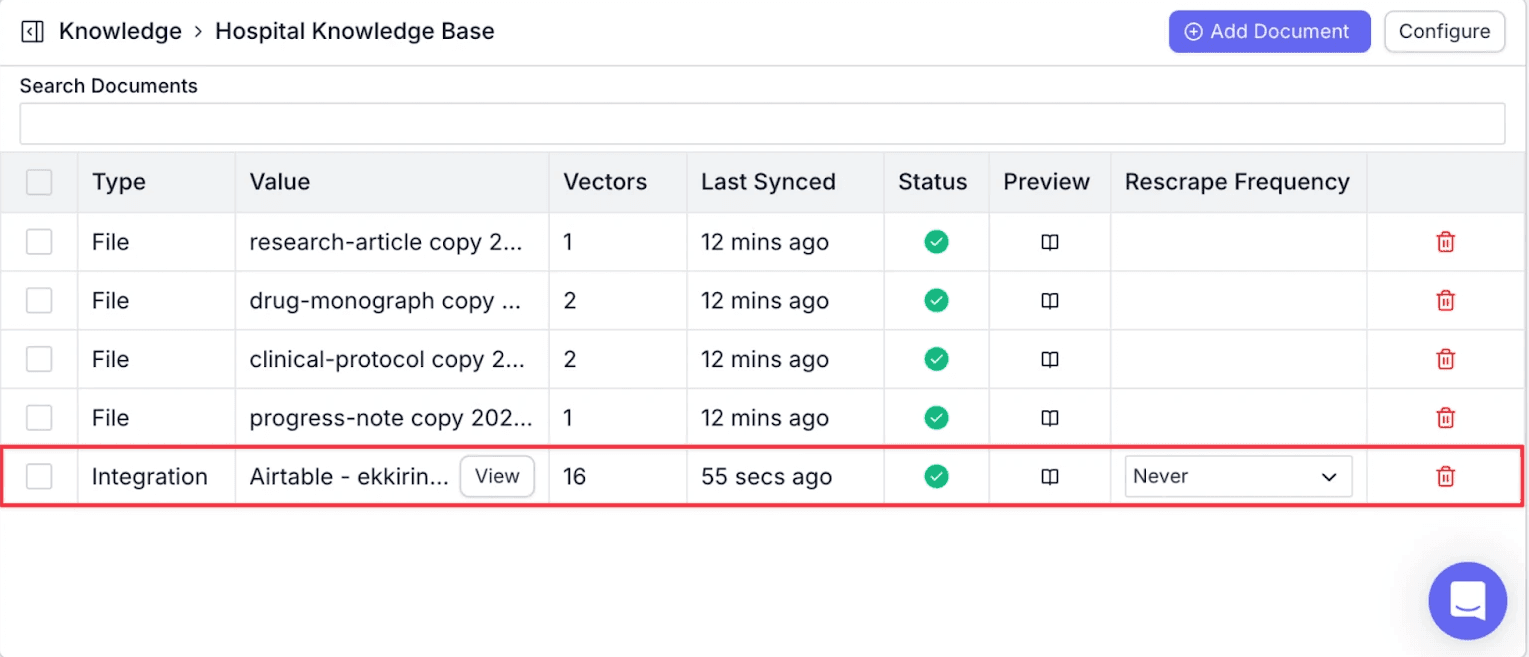
Step 5: Select the relevant file you want to embed in the knowledge base and click on “Confirm Selection”. You will see the selected table added to the knowledge base.

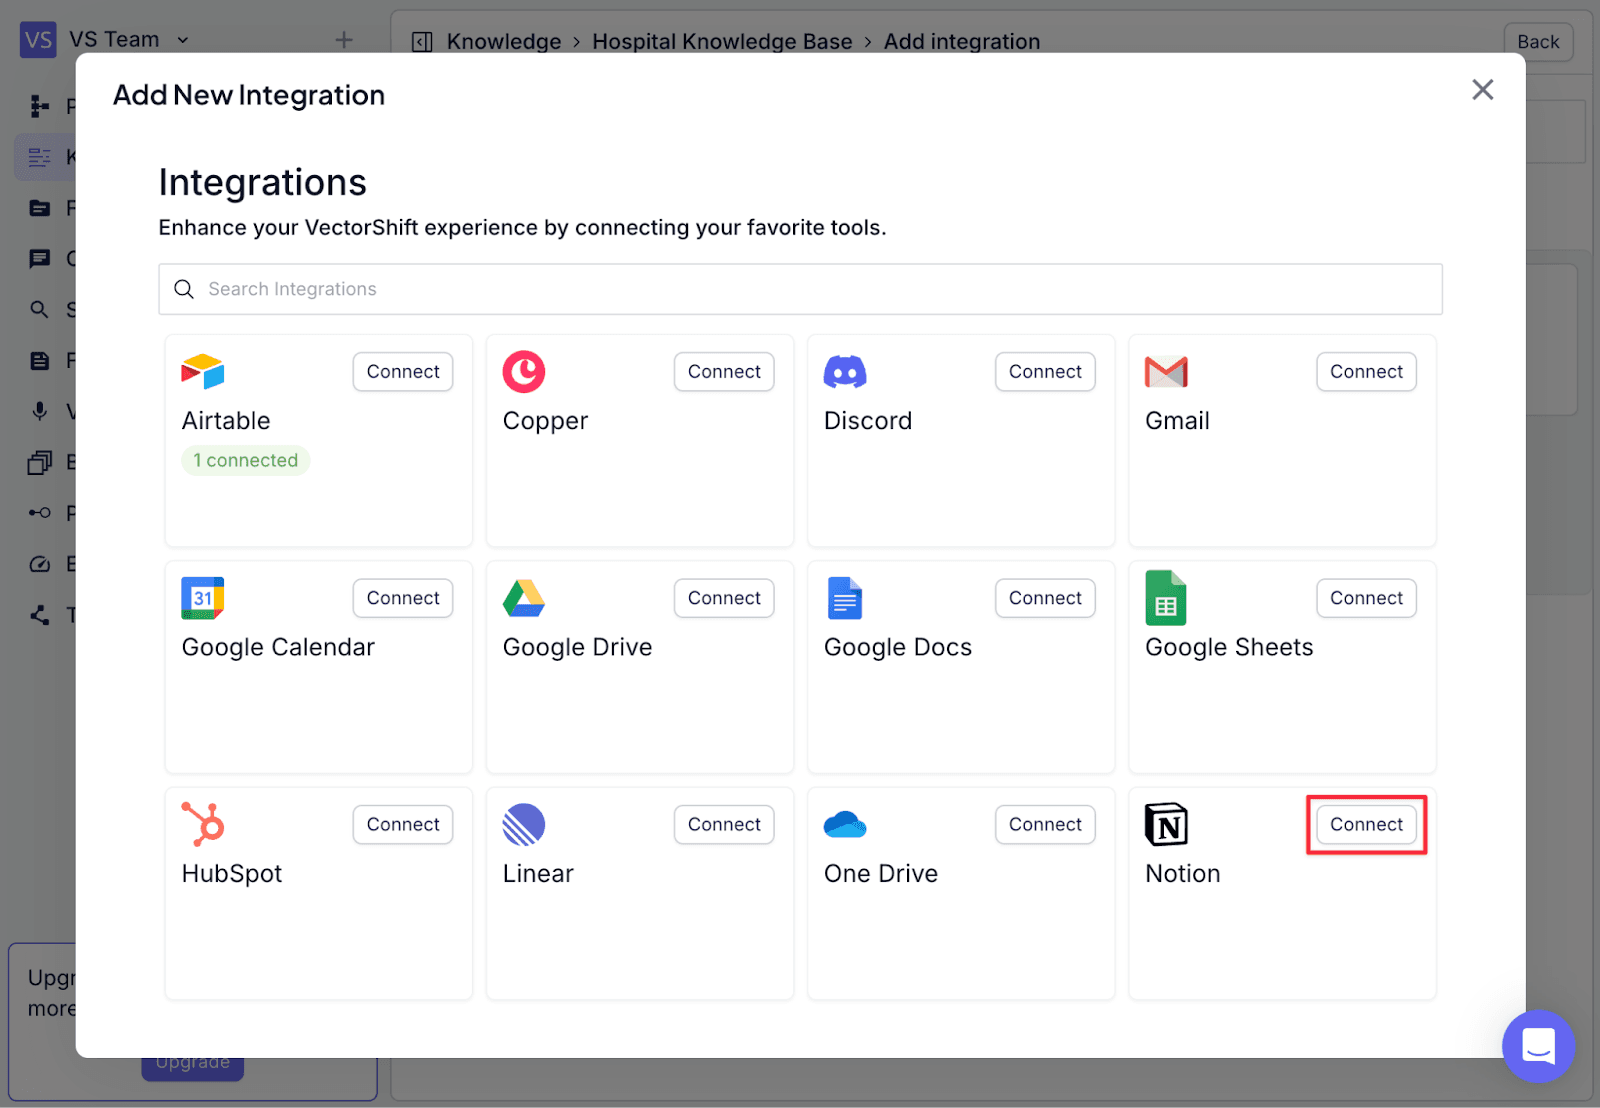
Add Data from Integrations: Notion
Step 1: Click “Add Document” >> “Choose / Add Integration”
Step 2: Click on “Connect New App”
Step 3: Find the Notion integration, and click “Connect”
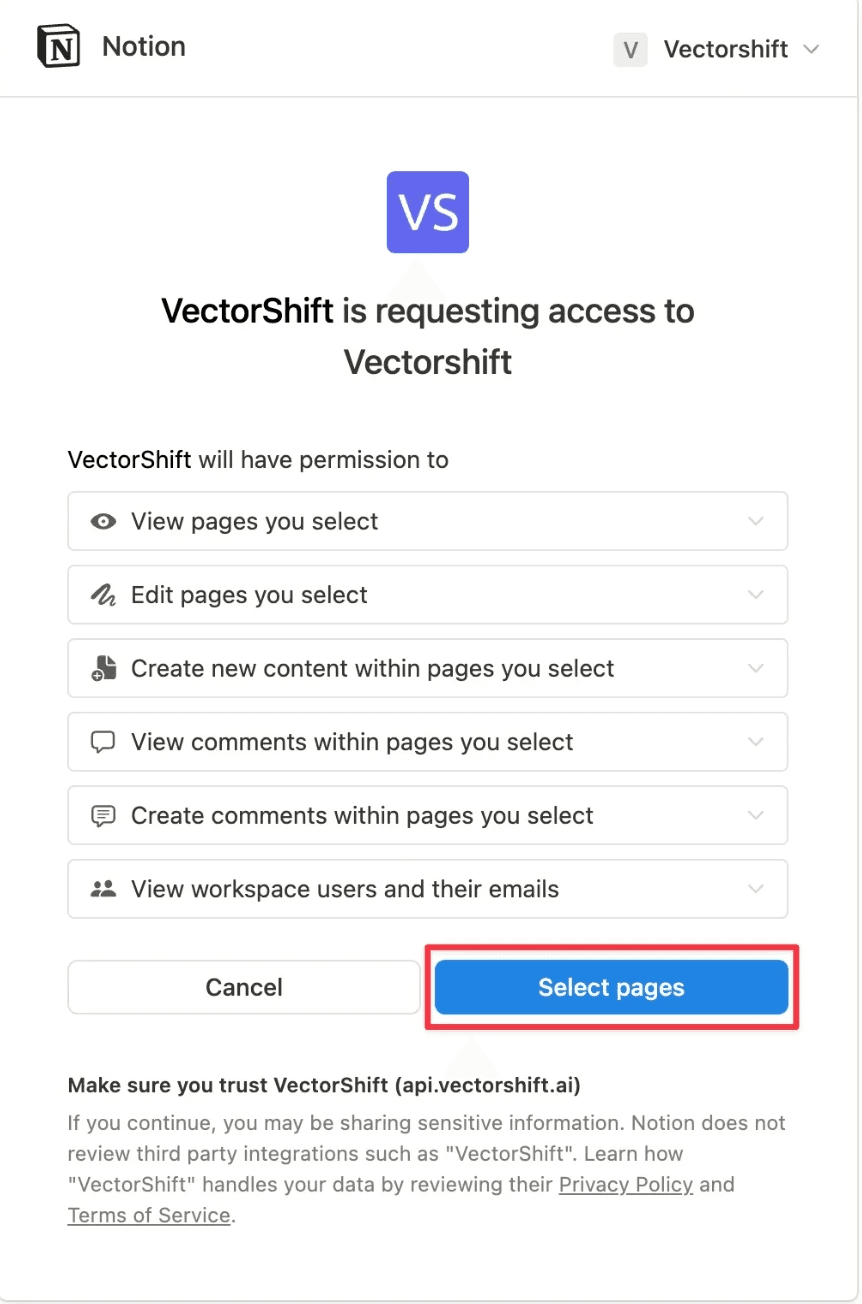
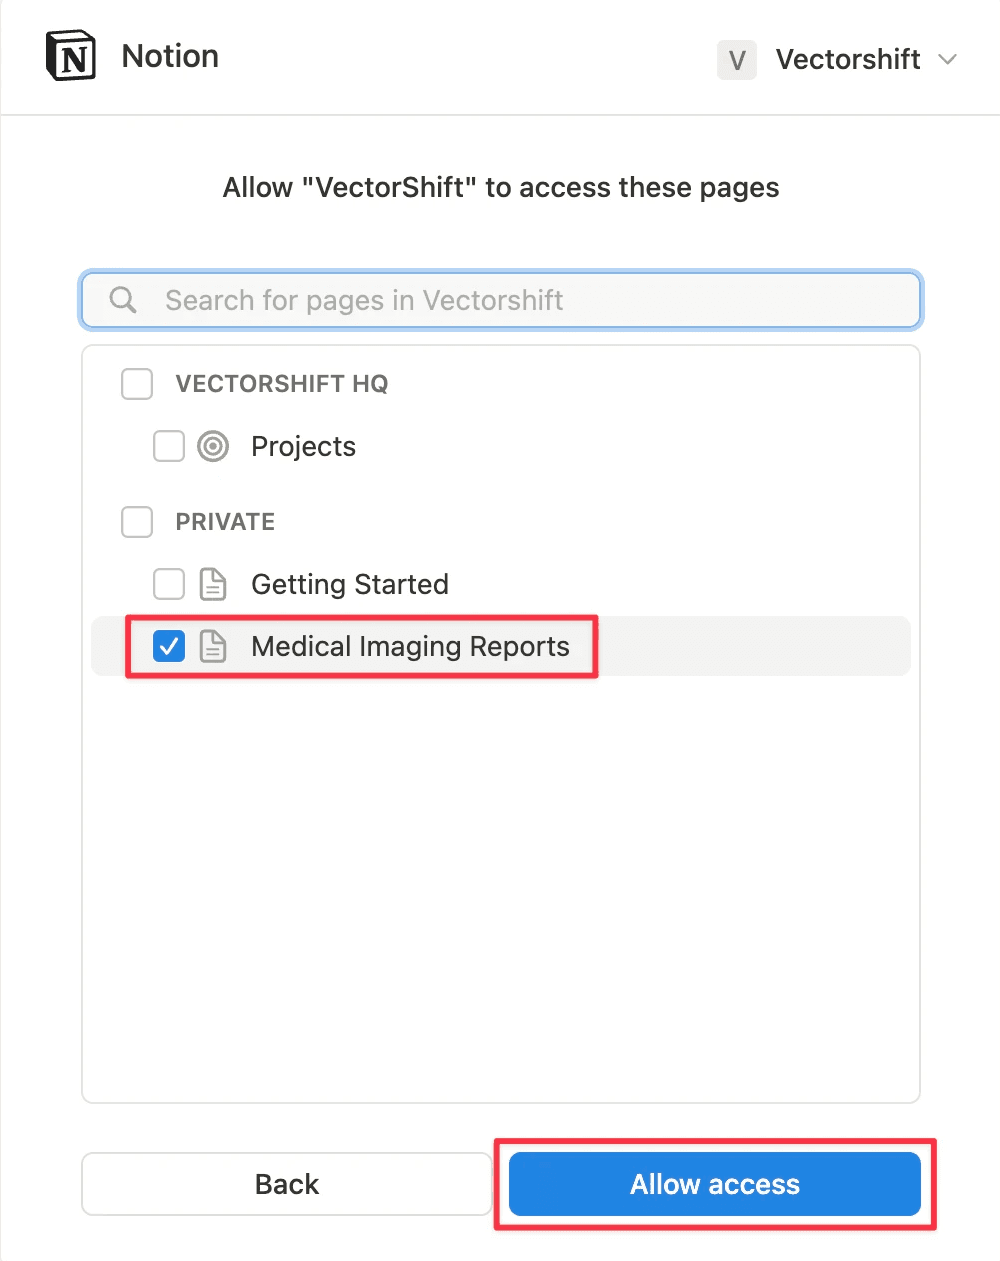
Step 4: You will be asked to select specific pages you want to give VectorShift access to. Click “Select pages” and then select the relevant pages.
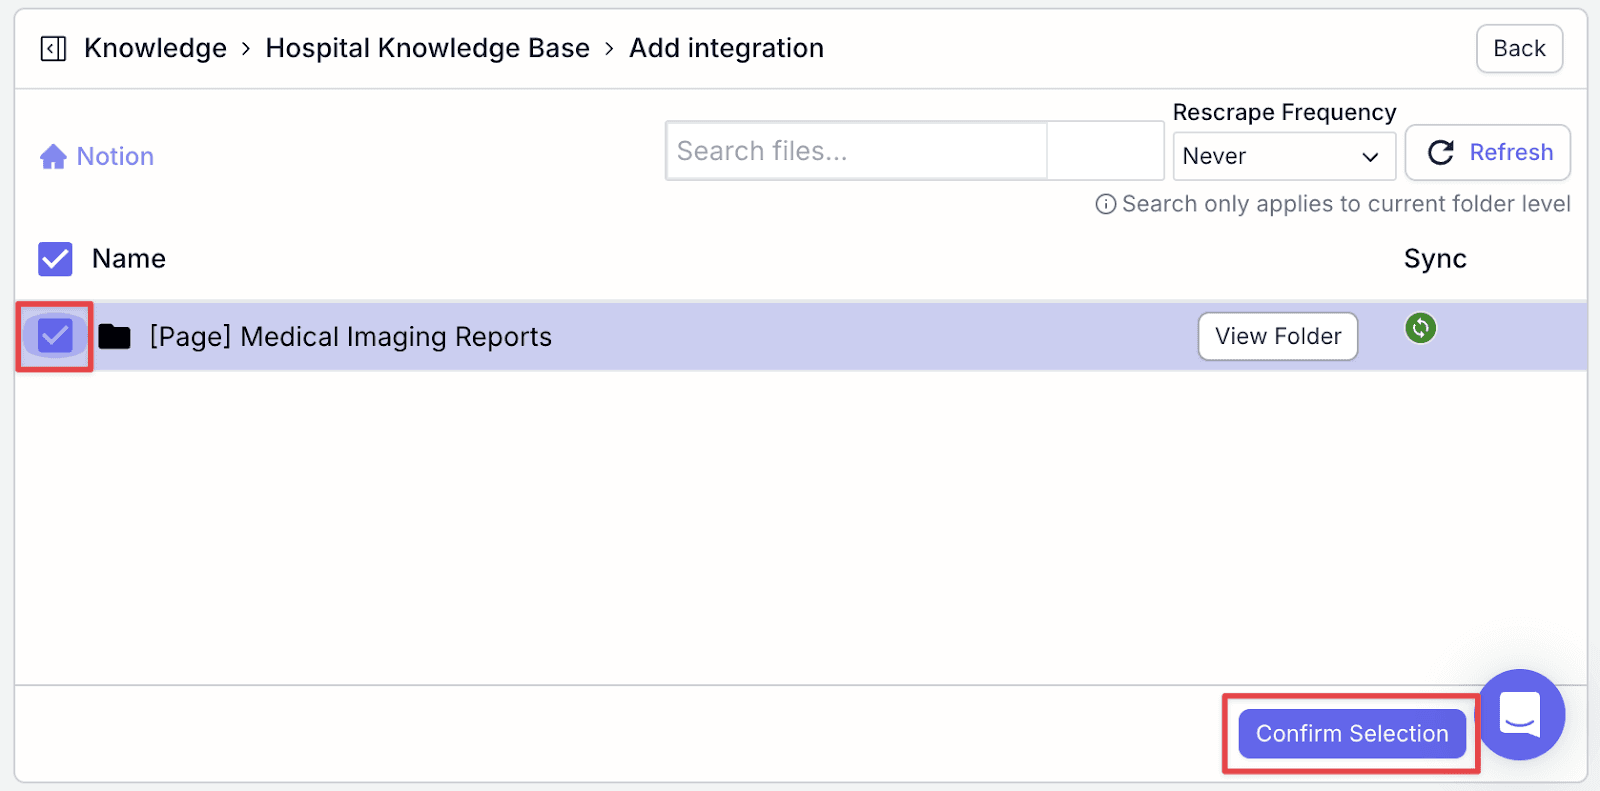
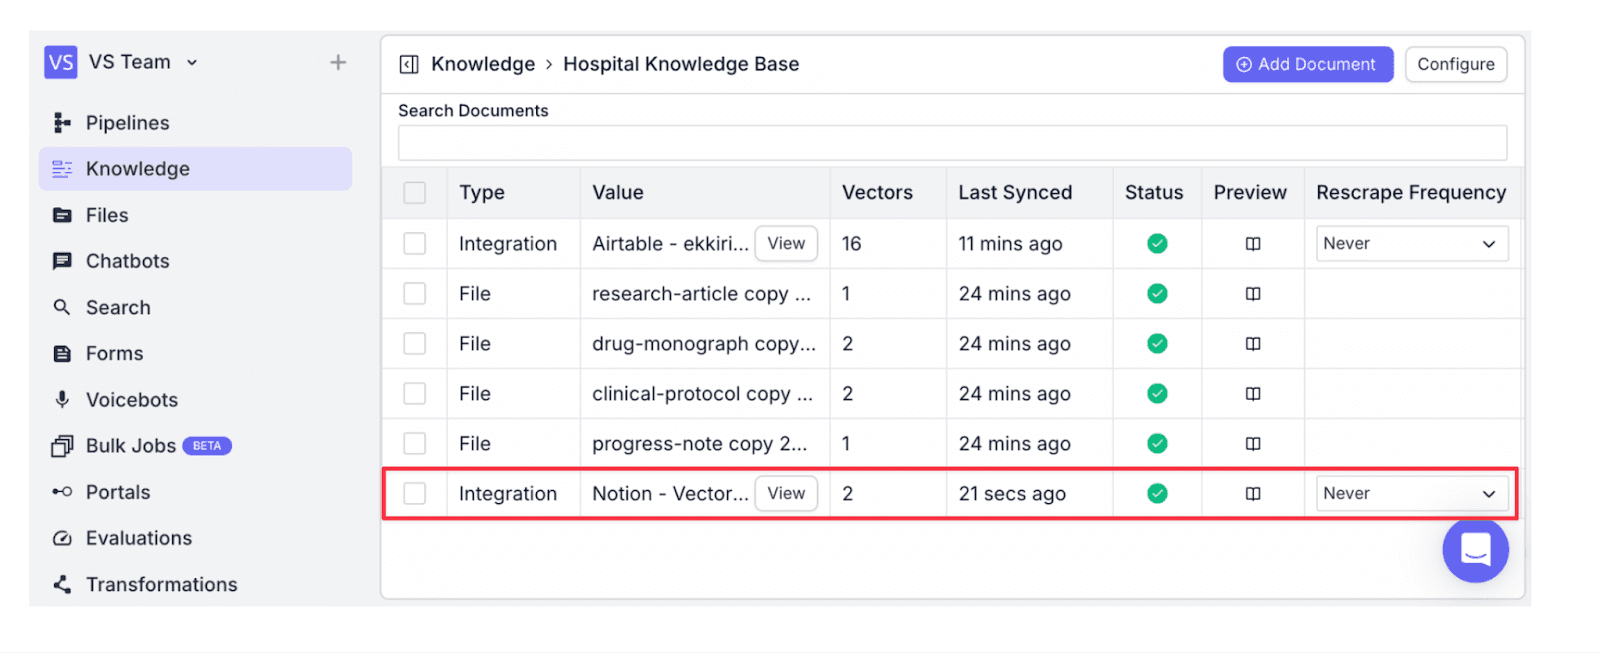
Step 5: Back in VectorShift, check off the relevant page, and click “Confirm Selection”. You will see the Notion page added to the knowledge.
Designing the Pipeline
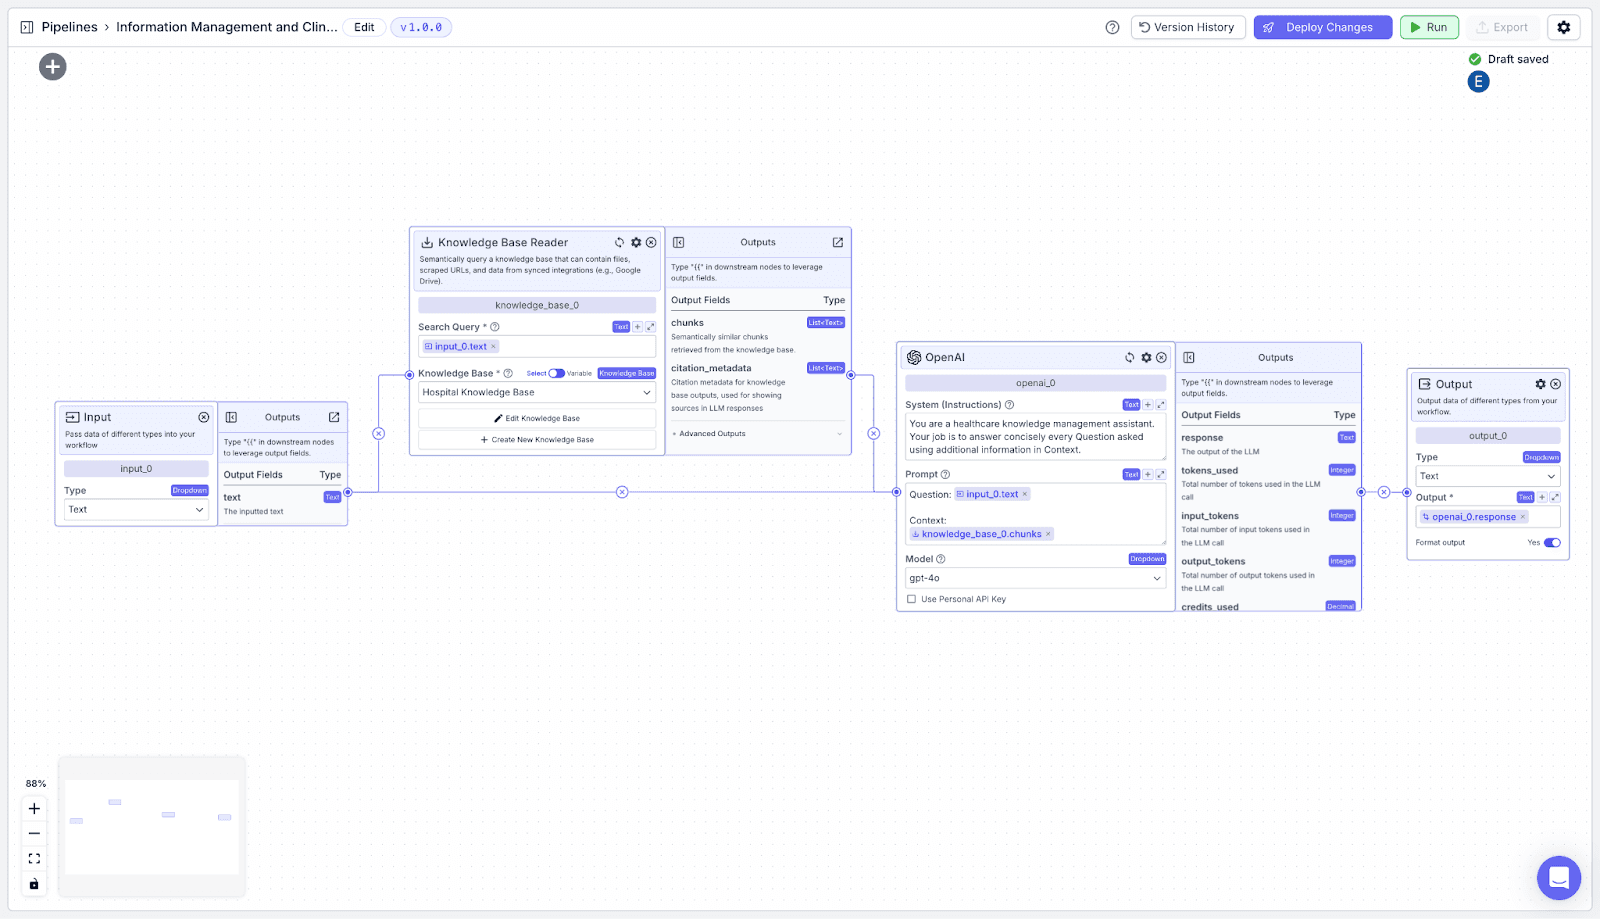
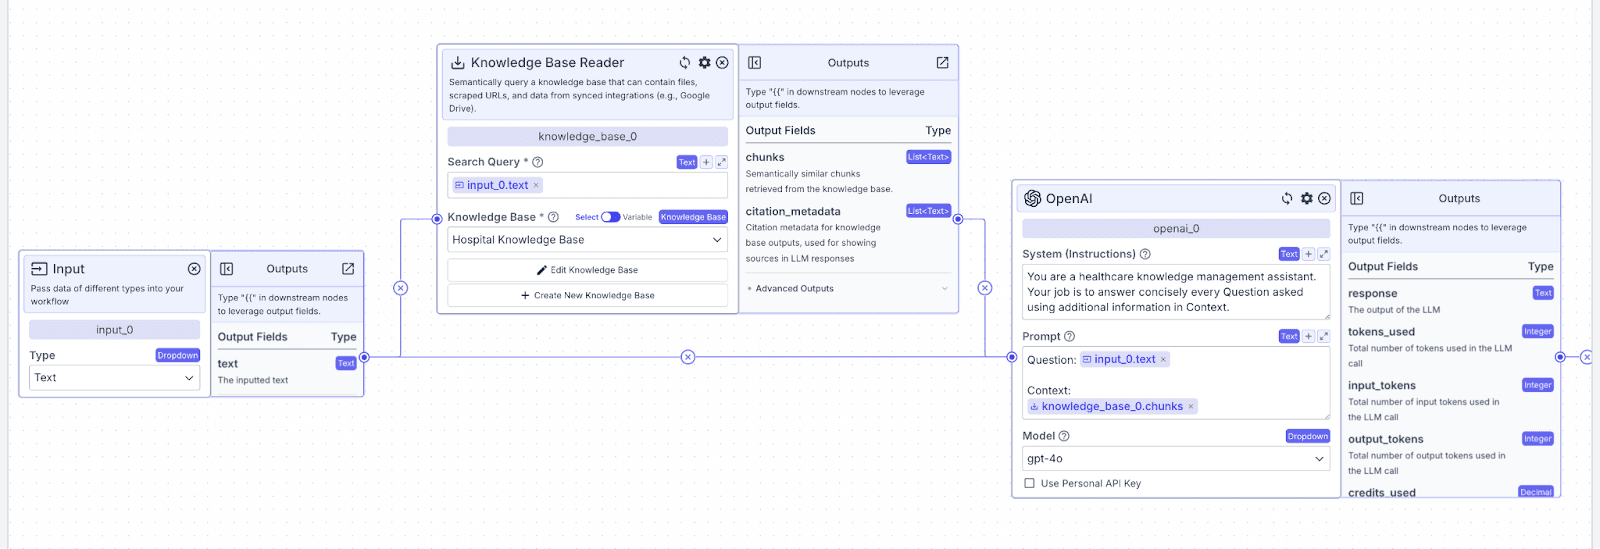
The pipeline has 4 nodes: input, knowledge base reader, LLM, and output.
Input Node: the inputted data into the pipeline; represents the physician question.
Knowledge Base Reader Node: the knowledge base that we created above. The physician question will query the knowledge base to return relevant information to the LLM.
LLM Node: The LLM generates the answer to the physician's question based on the context it receives from the knowledge base.
Output Node: the data (here, the response from the LLM) that will be displayed to the physician.
Overall Pipeline:
Input Node
Each node in VectorShift has a name at the top of each node (e.g., input_0) and output field(s), which are found in the right-hand pane of each node (e.g., the input node only has one output field: text). Here, the output field of the input node is whatever data the user asks (e.g., the user question).
To reference specific data fields from other nodes, you have to do two things:
Connect the two nodes together
Reference the desired data using a variable
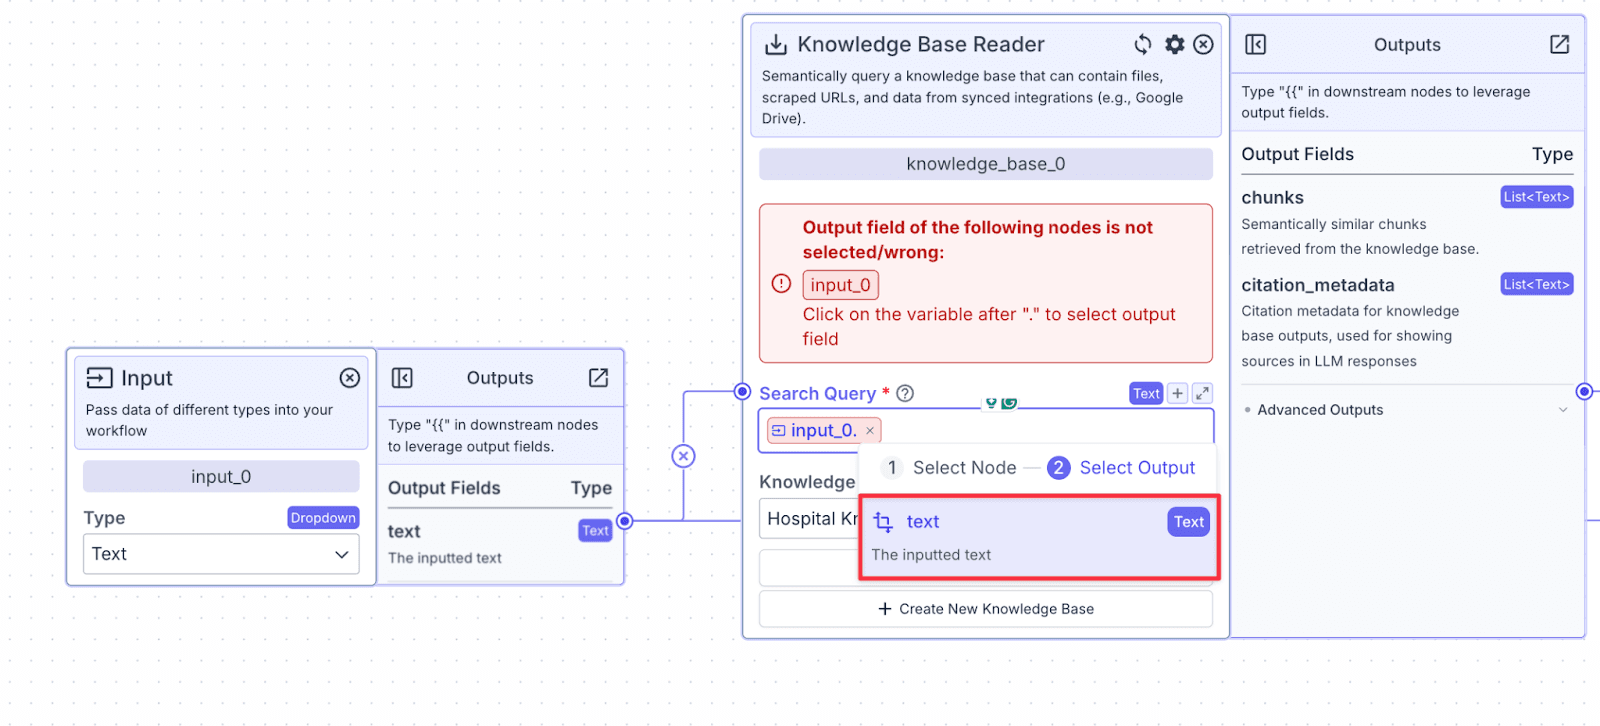
Variables in VectorShift all have the same structure: {{[Node name].[OutputField]}}. You can also create variables by typing “{{“ in any text field, which opens the variable builder.
To reference the text from the input node, you call the variable: {{input_0.text}}.
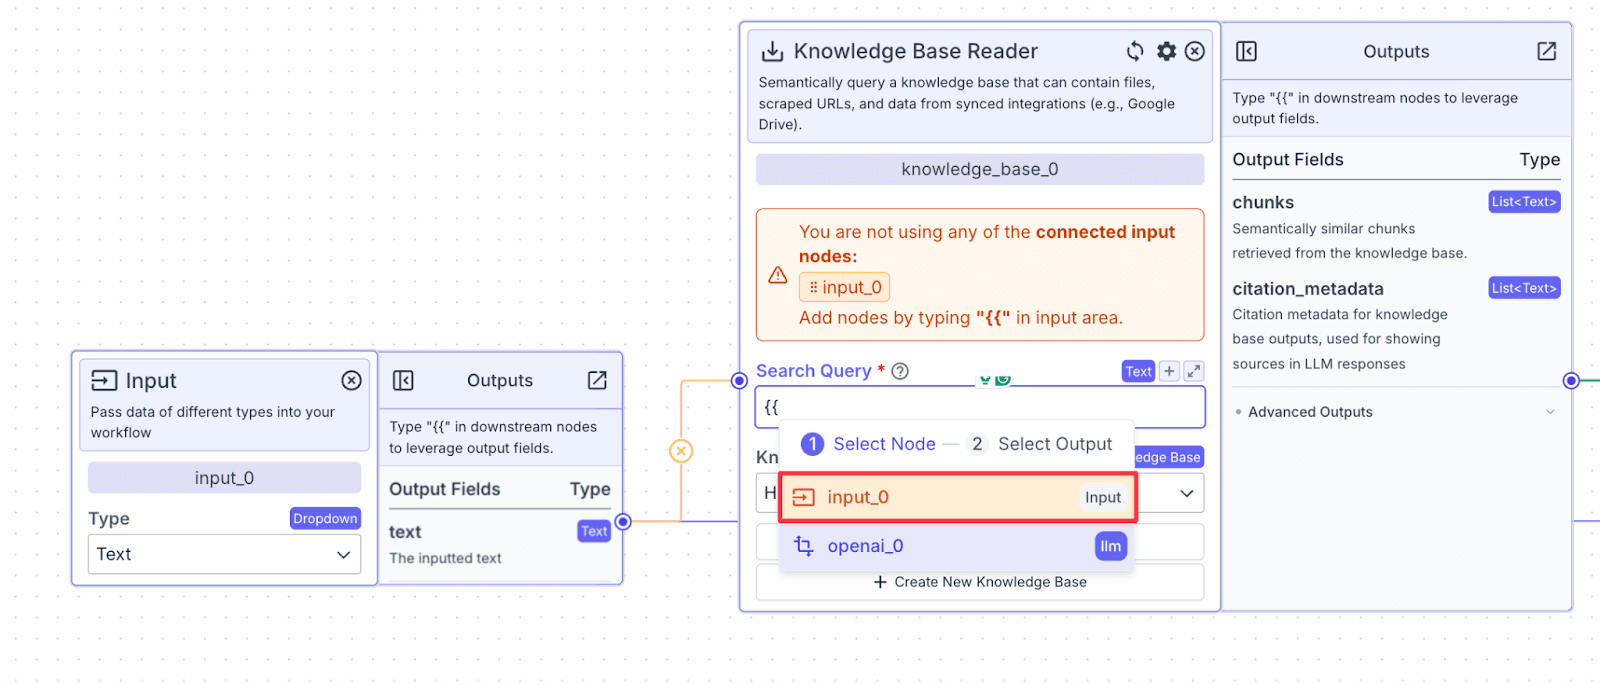
When the pipeline runs, the data from the referenced output field is passed to the connected nodes.
For example, for “Search Query” on the knowledge base reader (the query that will be used to search the knowledge base at run time), we reference the input node:{{input_0.text}}. When the pipeline runs, the user query (the input node) will be used to search the knowledge base.
Additionally, for the “Prompt” on the LLM node, we also reference the input node. This allows the LLM to know what question it has to answer (discussed further below).
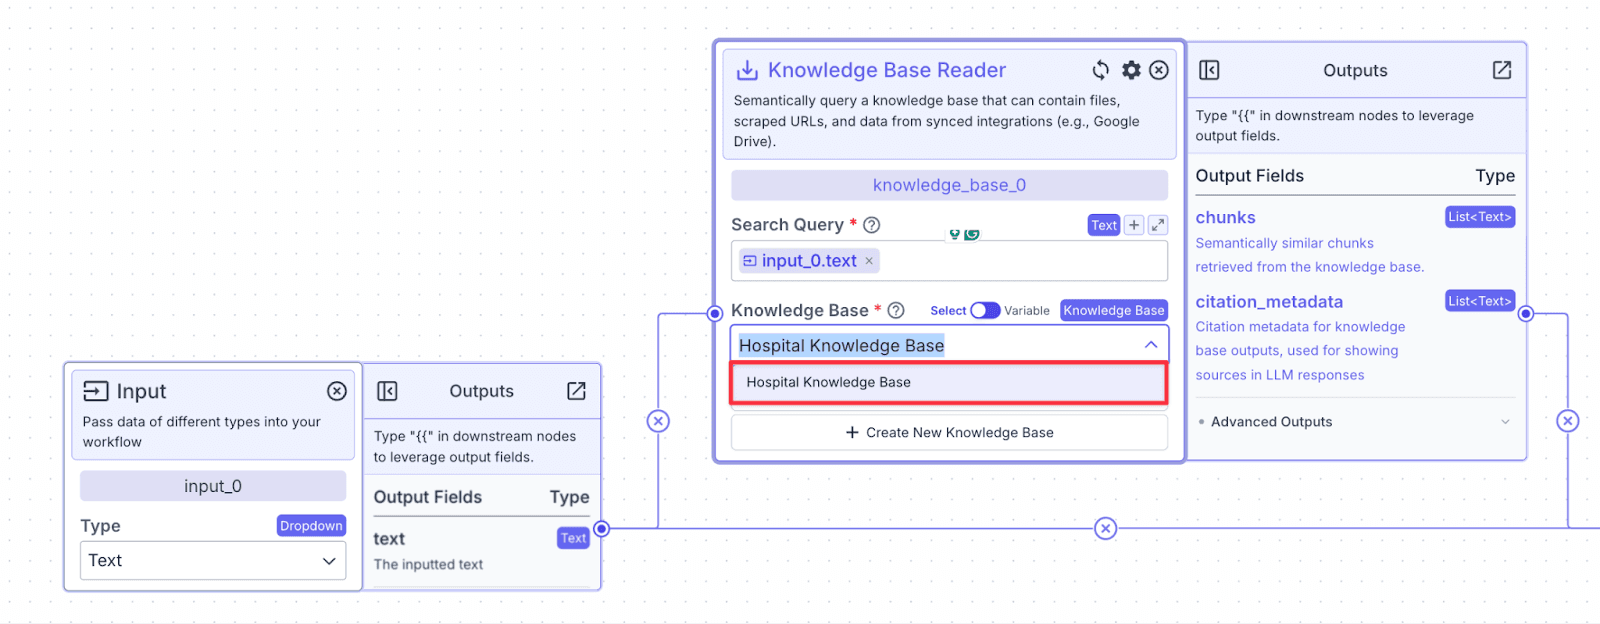
Knowledge Base
Additionally, in the knowledge base, we need to select the knowledge base we created previously. In the pull-down for “Knowledge Base”, select “Hospital Knowledge Base”.
LLM Node
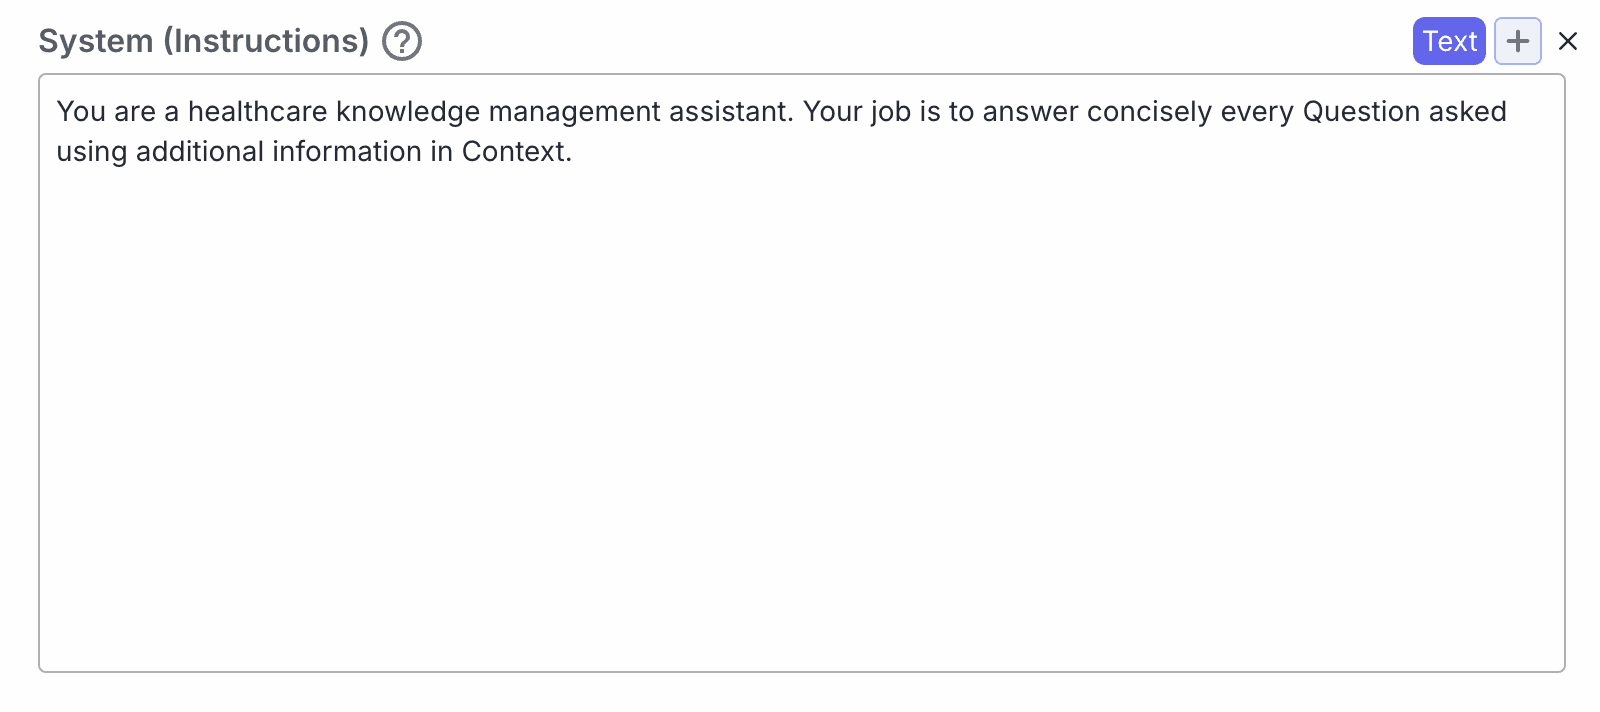
The LLM node has two fields: “System (Instructions)” and “Prompt”. In the “System (Instructions)”, we provide instructions to the LLM on how it should behave.
System Prompt:
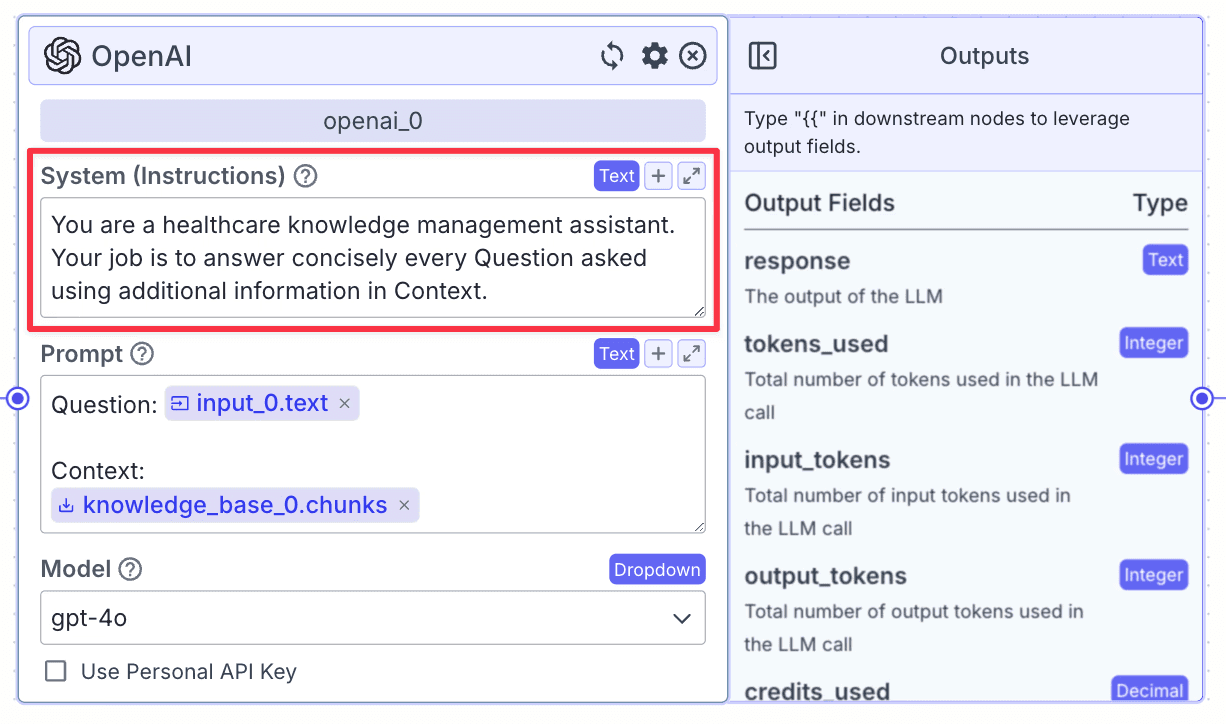
Within the Prompt, you can pass data from other nodes. Use the prompt below to pass both the user question and the context from the knowledge base:
Output Node
Finally, we connect the LLM node to the output node, while referencing the response output field of the LLM node: {{openai_0.response}}.
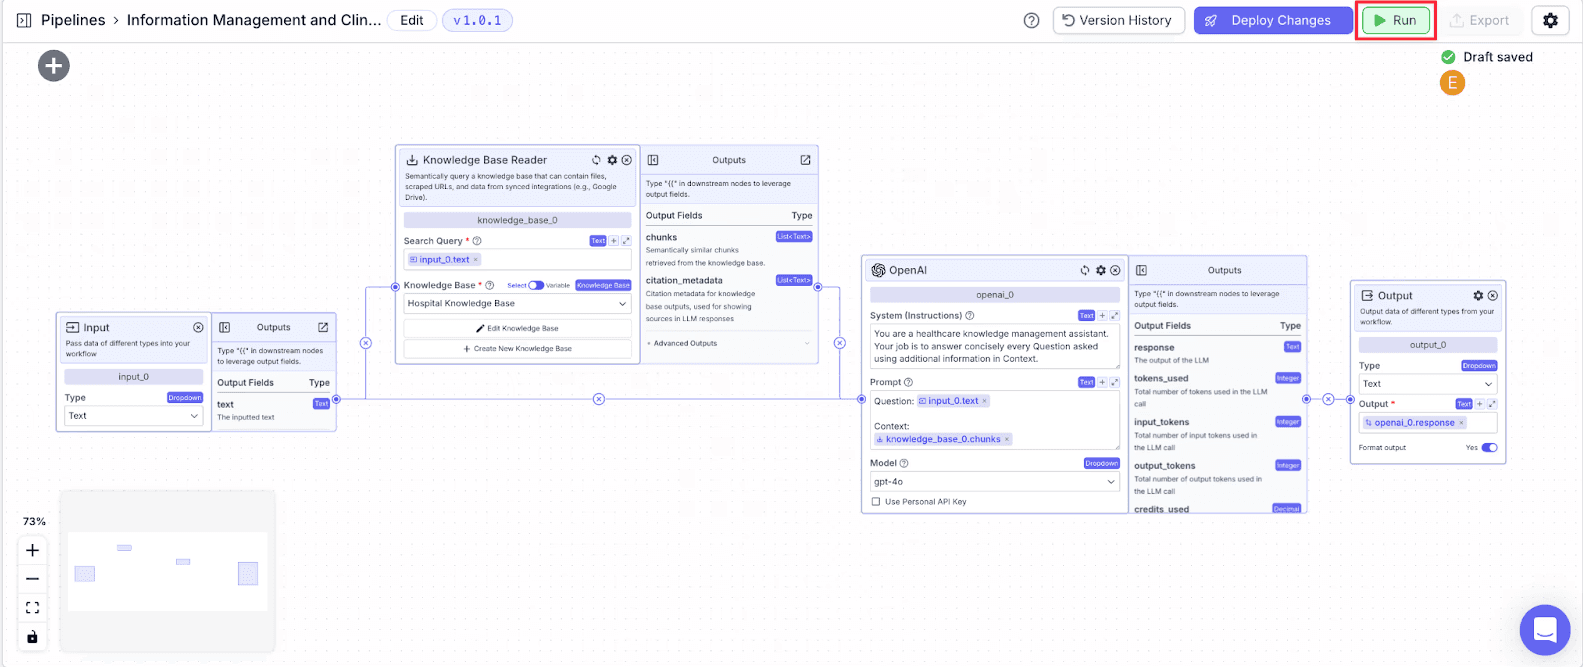
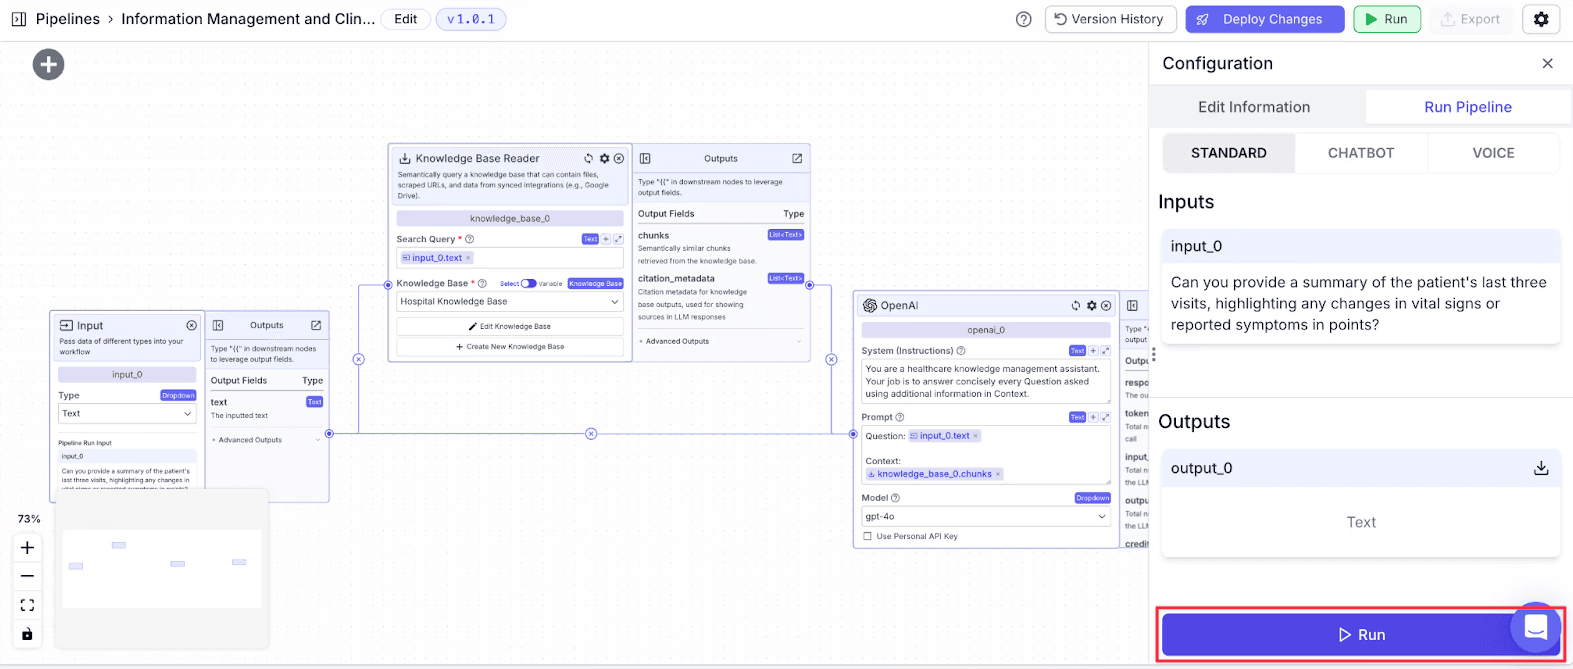
You can run your pipeline by clicking “Run” in the top right to open up the “Run Pipeline” pane, and then clicking “Run” in the bottom right.
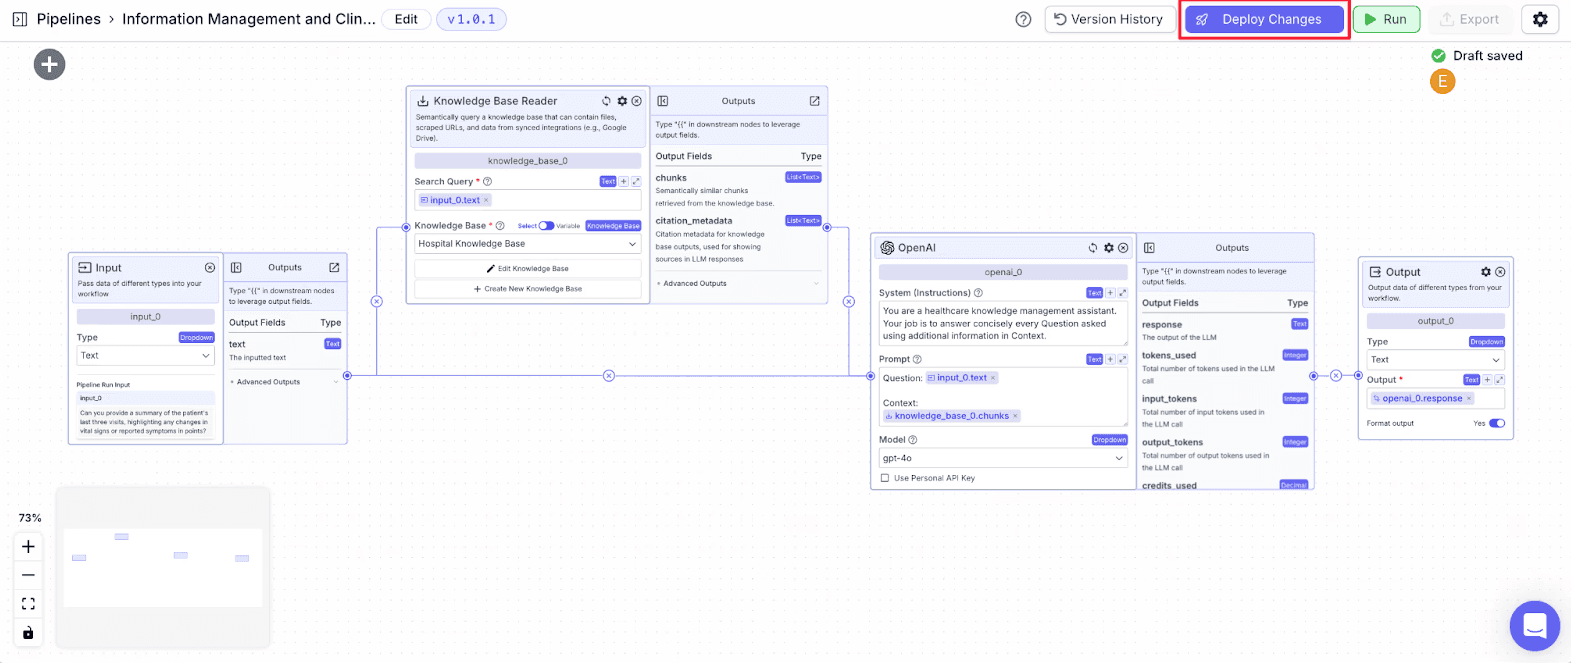
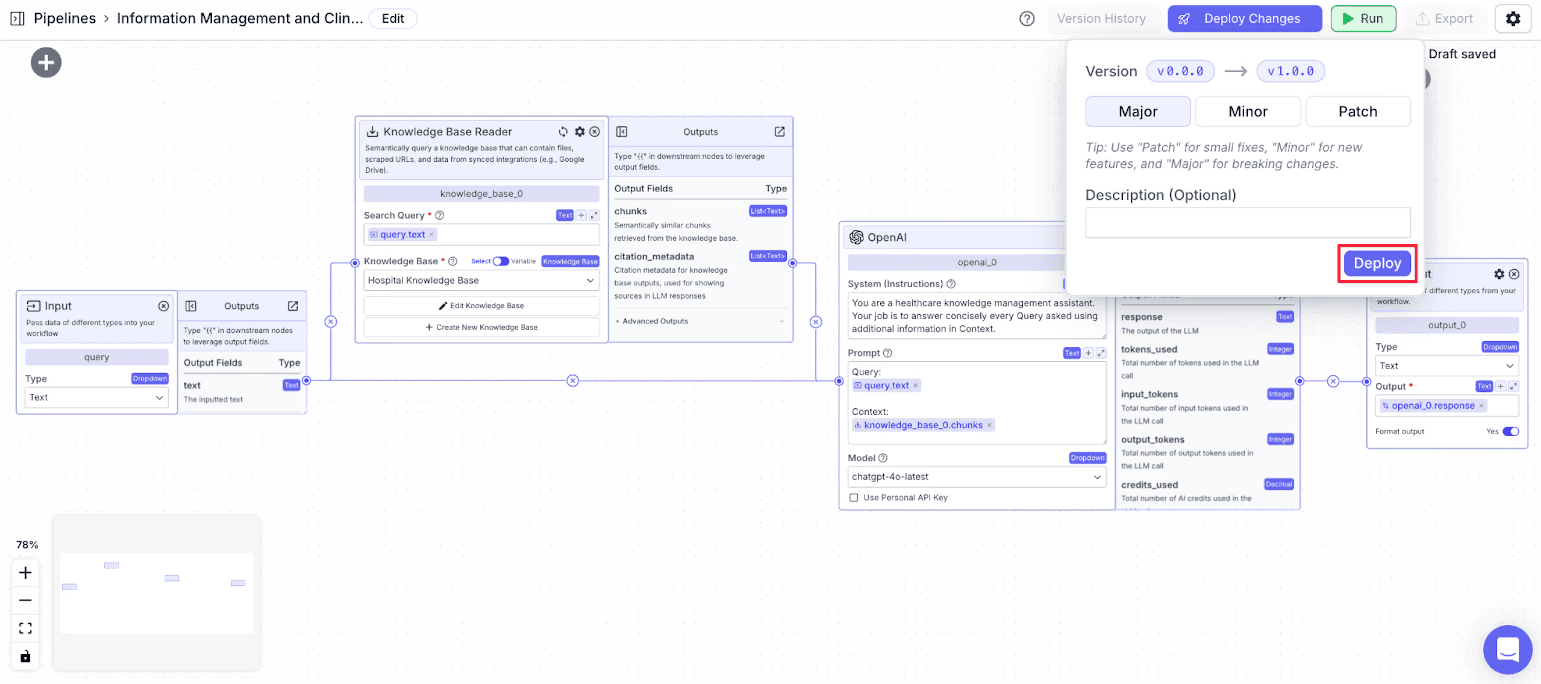
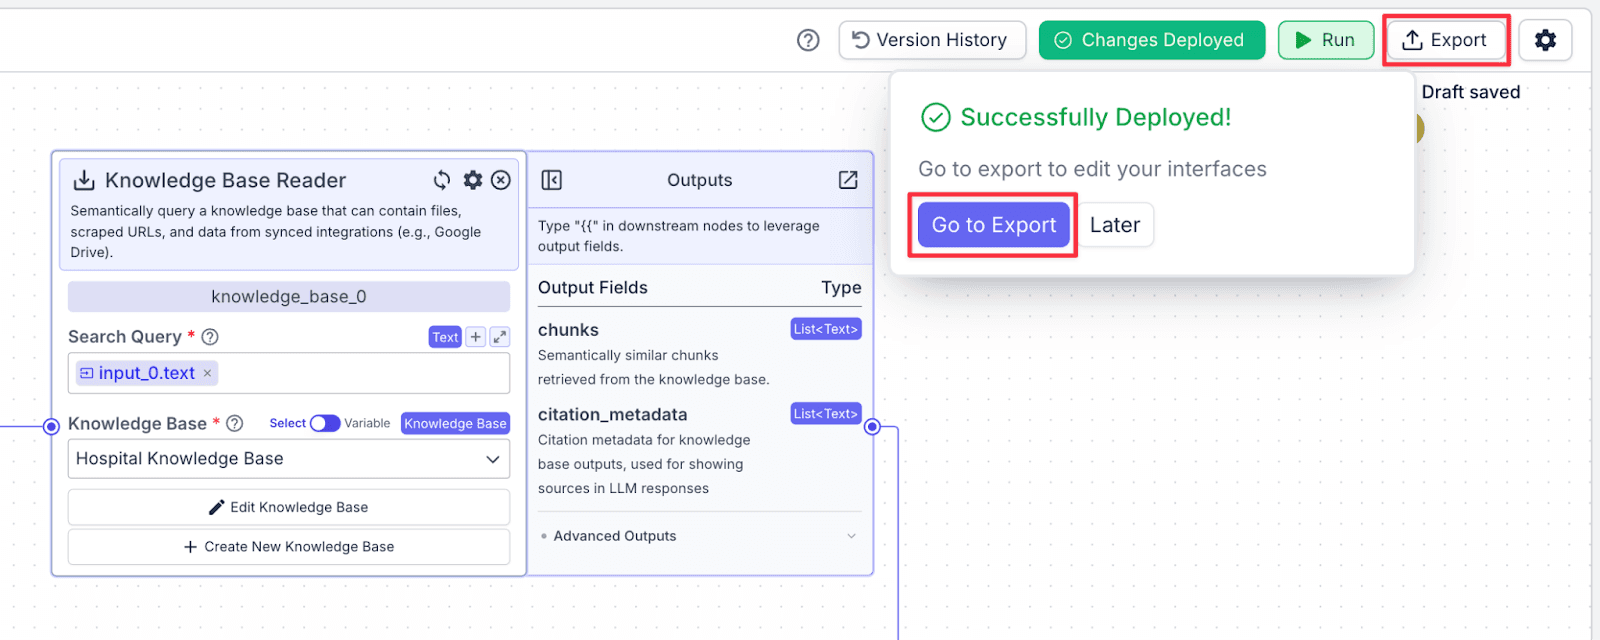
The last thing you need to do is to deploy the pipeline. This publishes your pipeline. Click “Deploy Changes” on the top right and click “Deploy”.
Export Pipeline as a Chat Assistant
Exporting your pipeline as a chatbot allows end users (in this case physicians) to use the chat assistant.
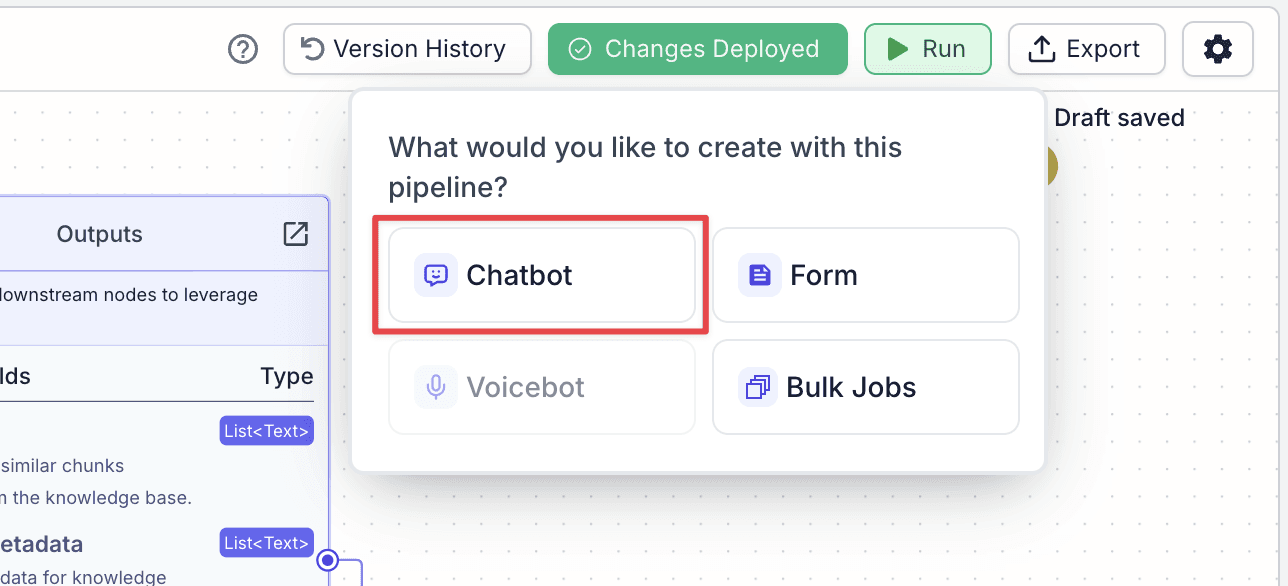
Step 1: After finishing with deployment, click “Go to Export” and select “Chatbot”.
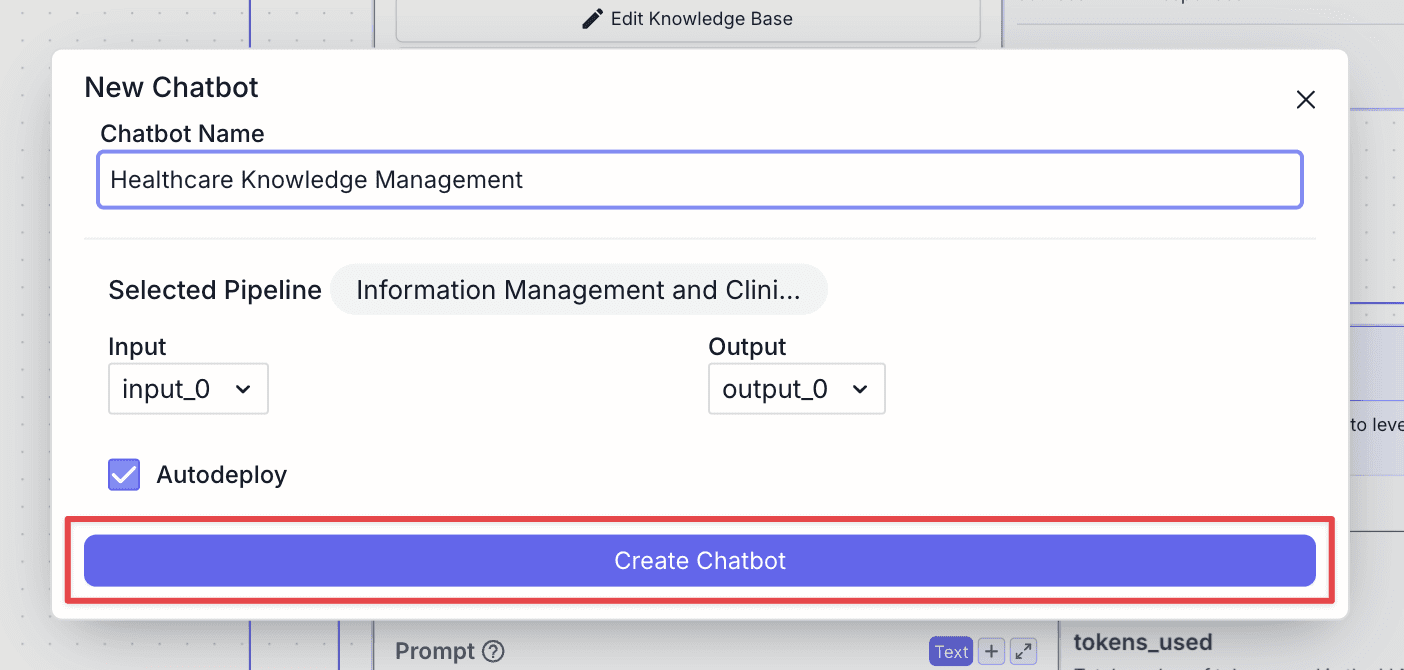
Step 2: Give your chat assistant a name and click “Create Chatbot”
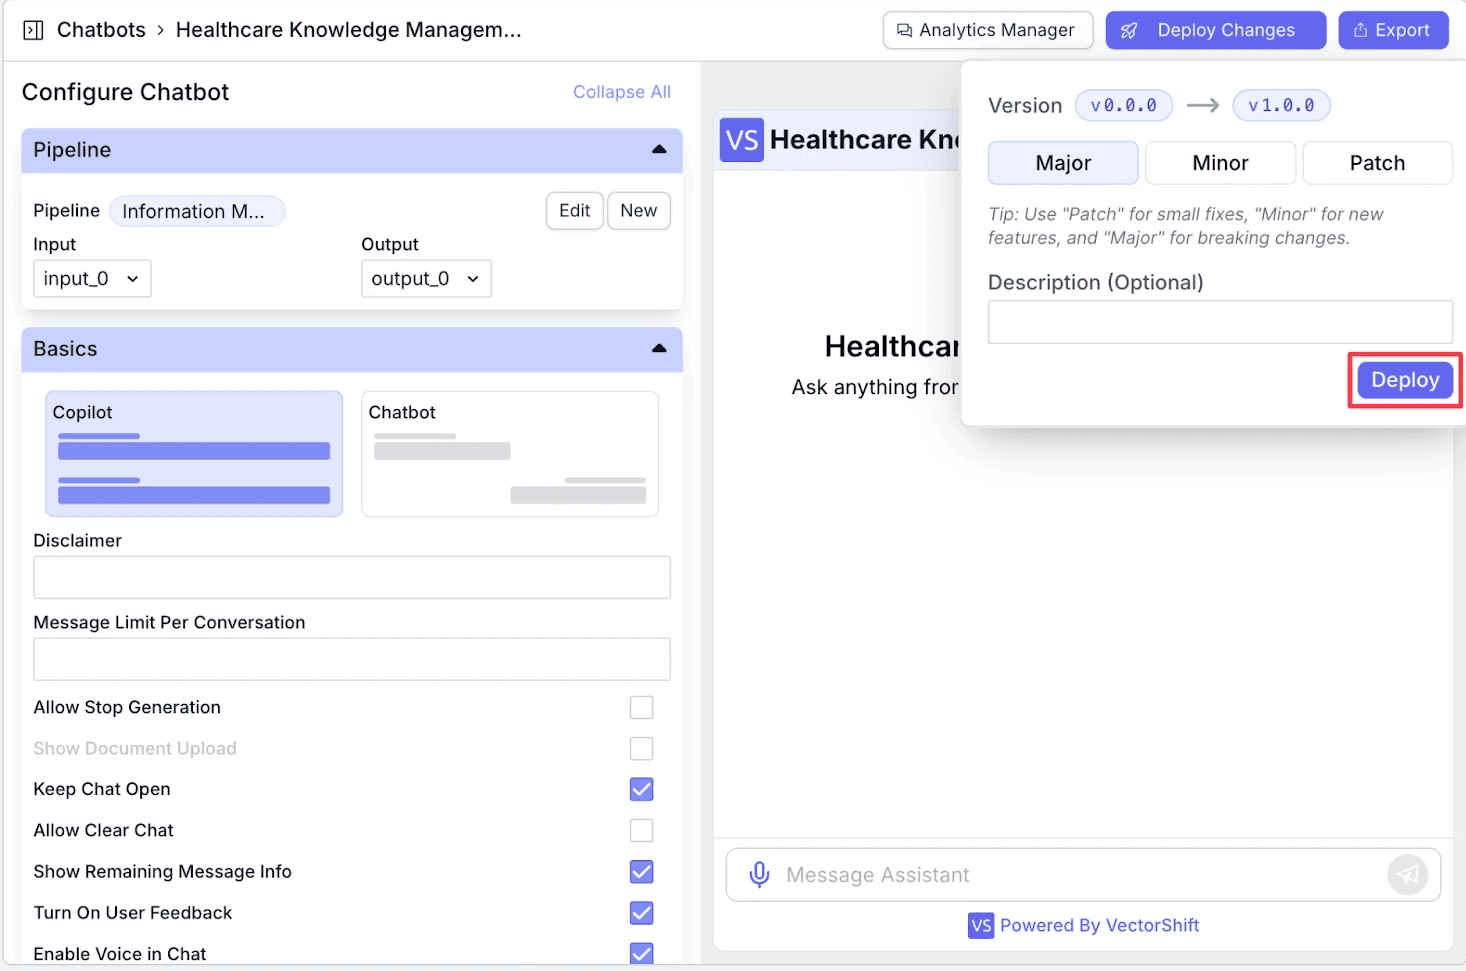
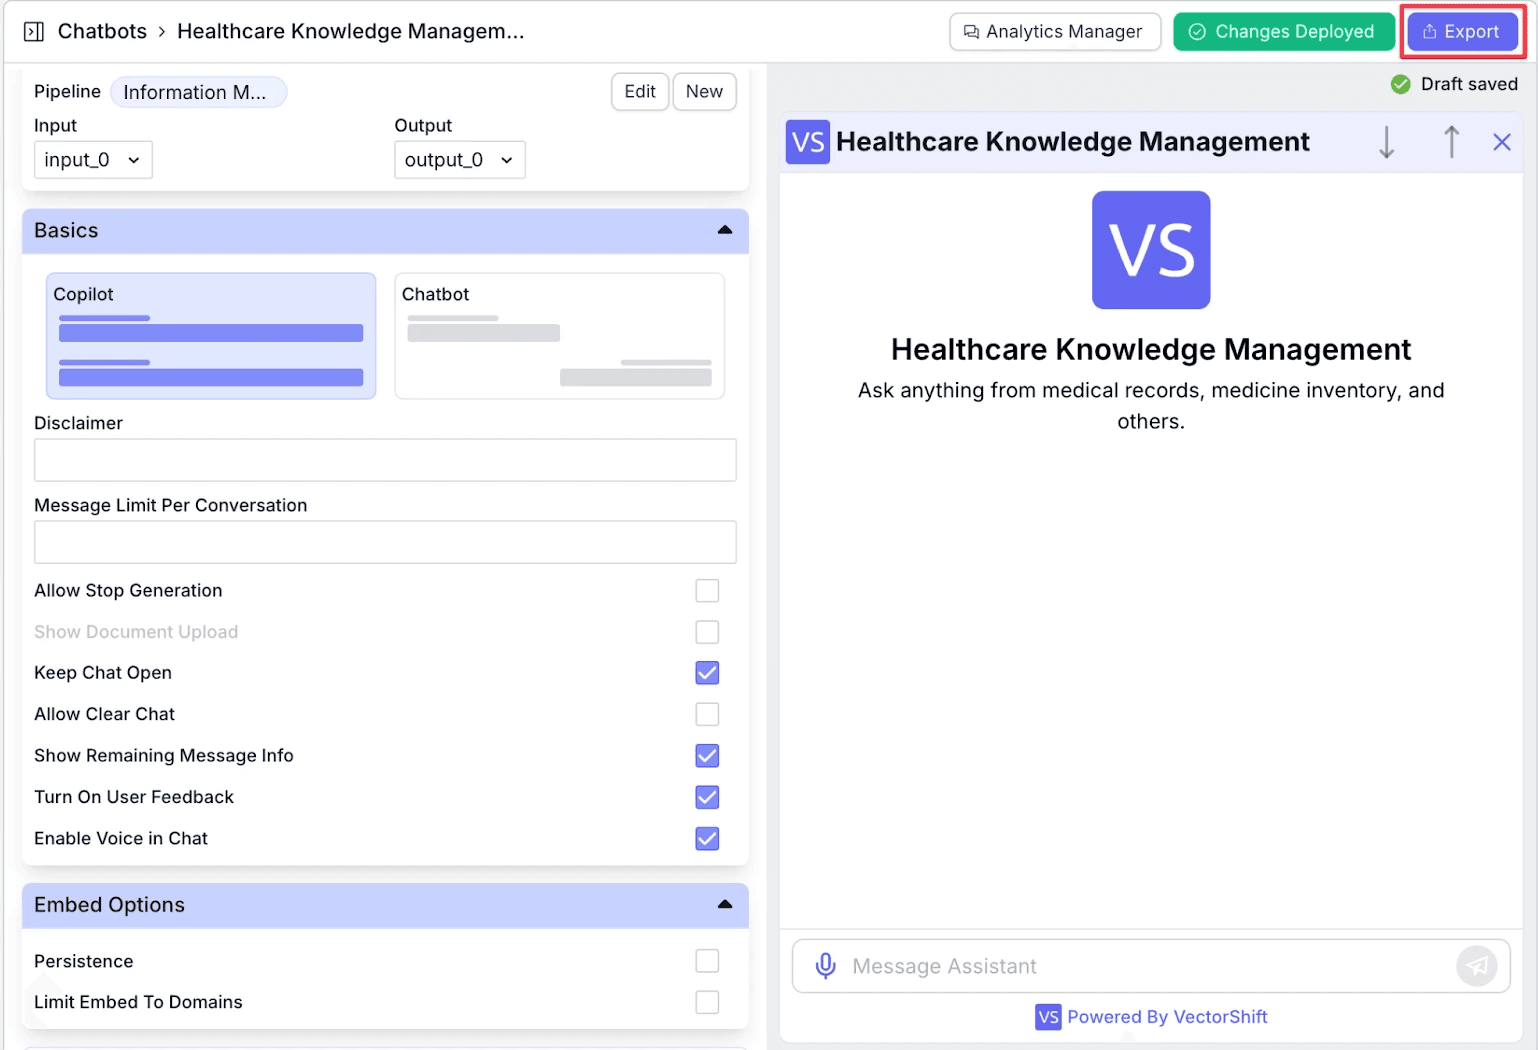
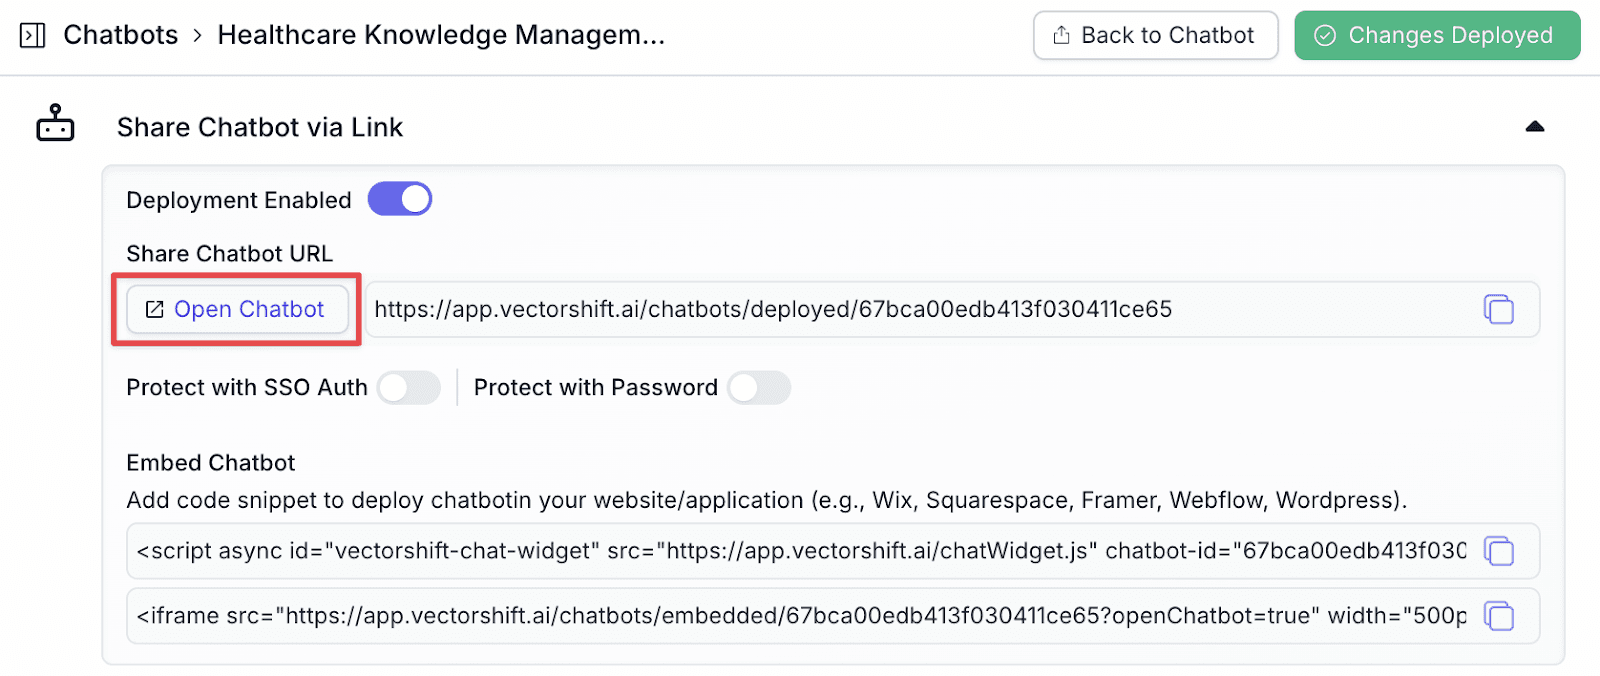
Step 3: Make necessary changes to the UI, then click, “Deploy Changes” >> “Deploy” >> “Export” >> “Open Chatbot”.

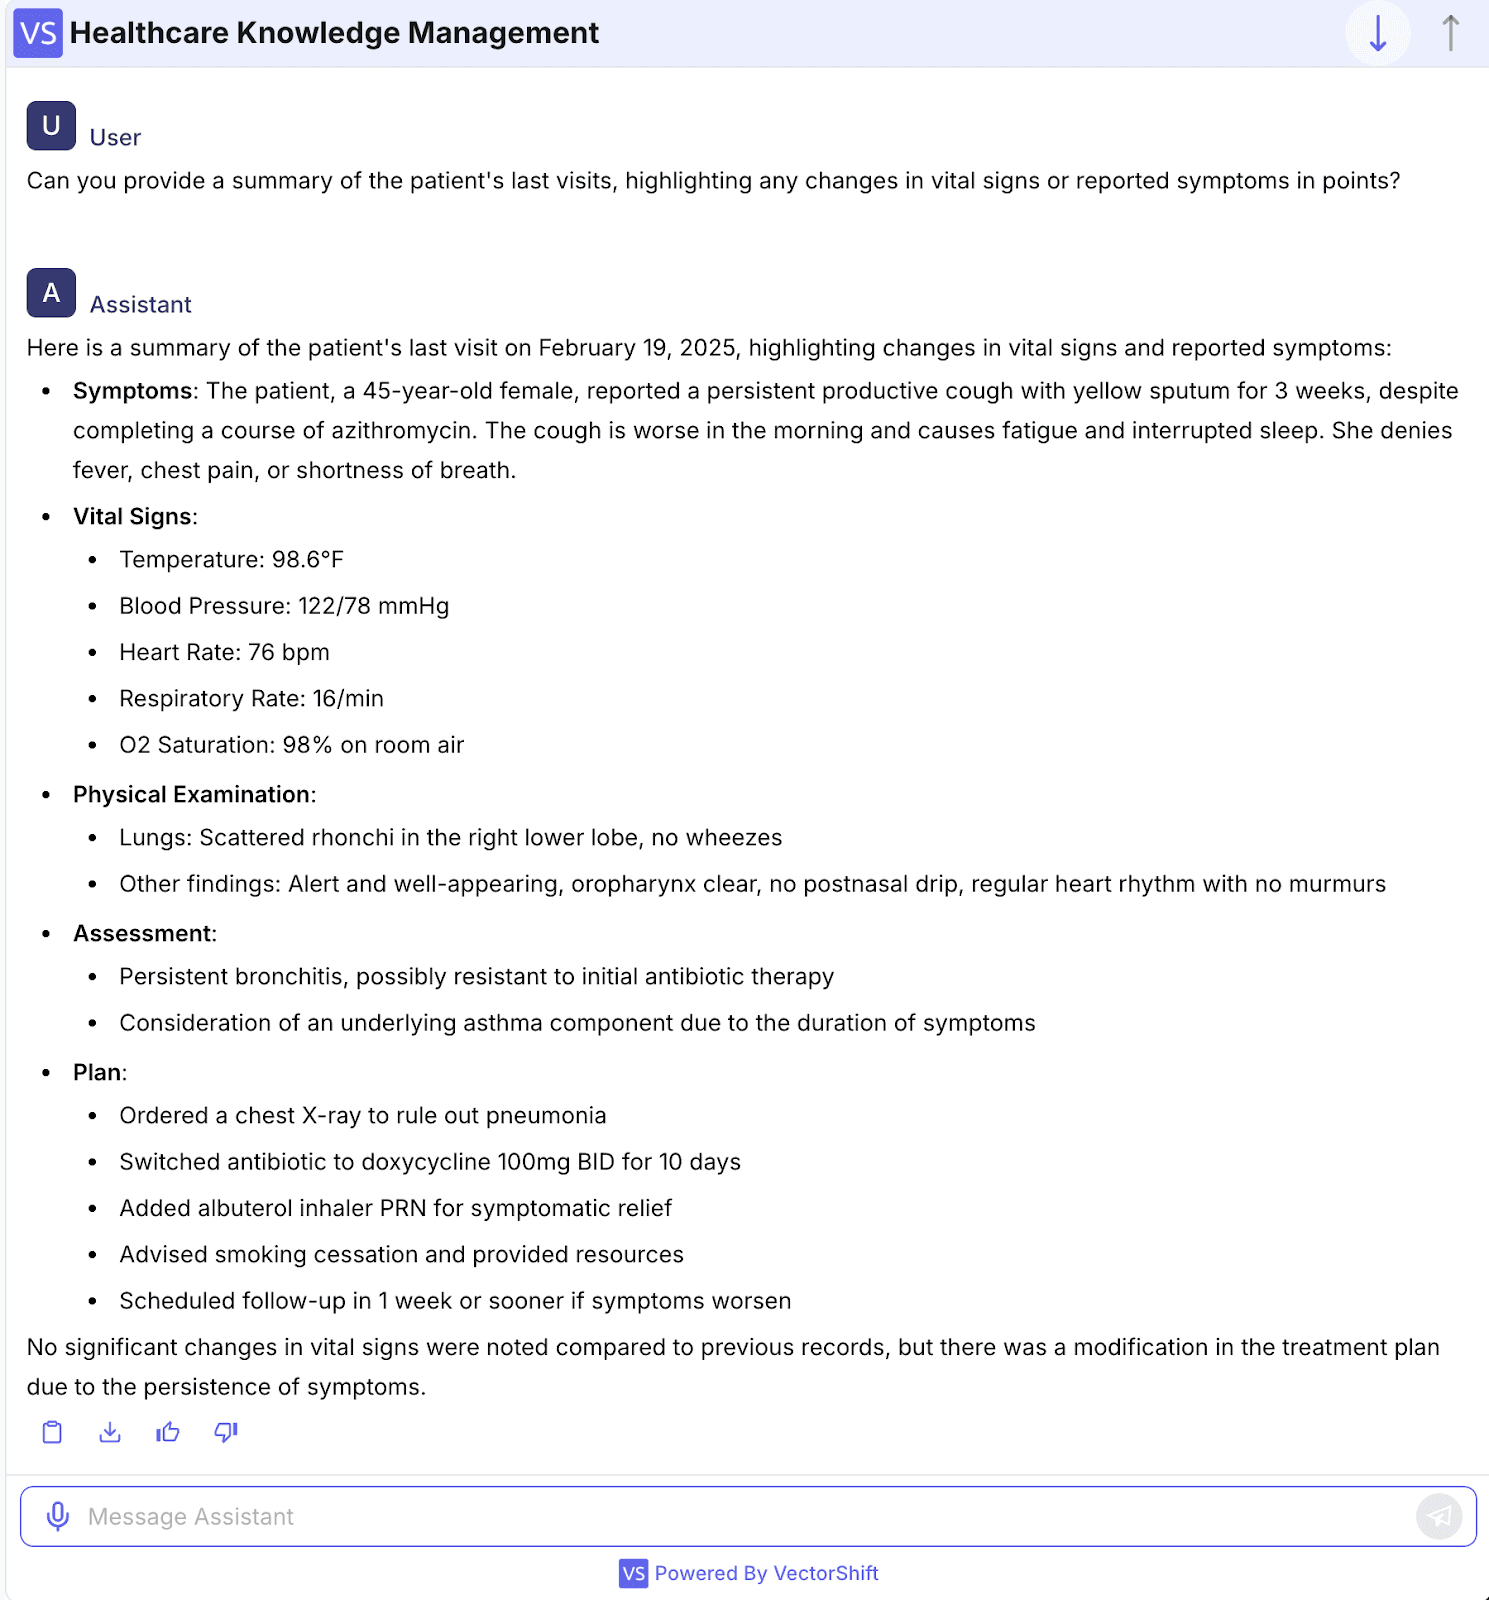
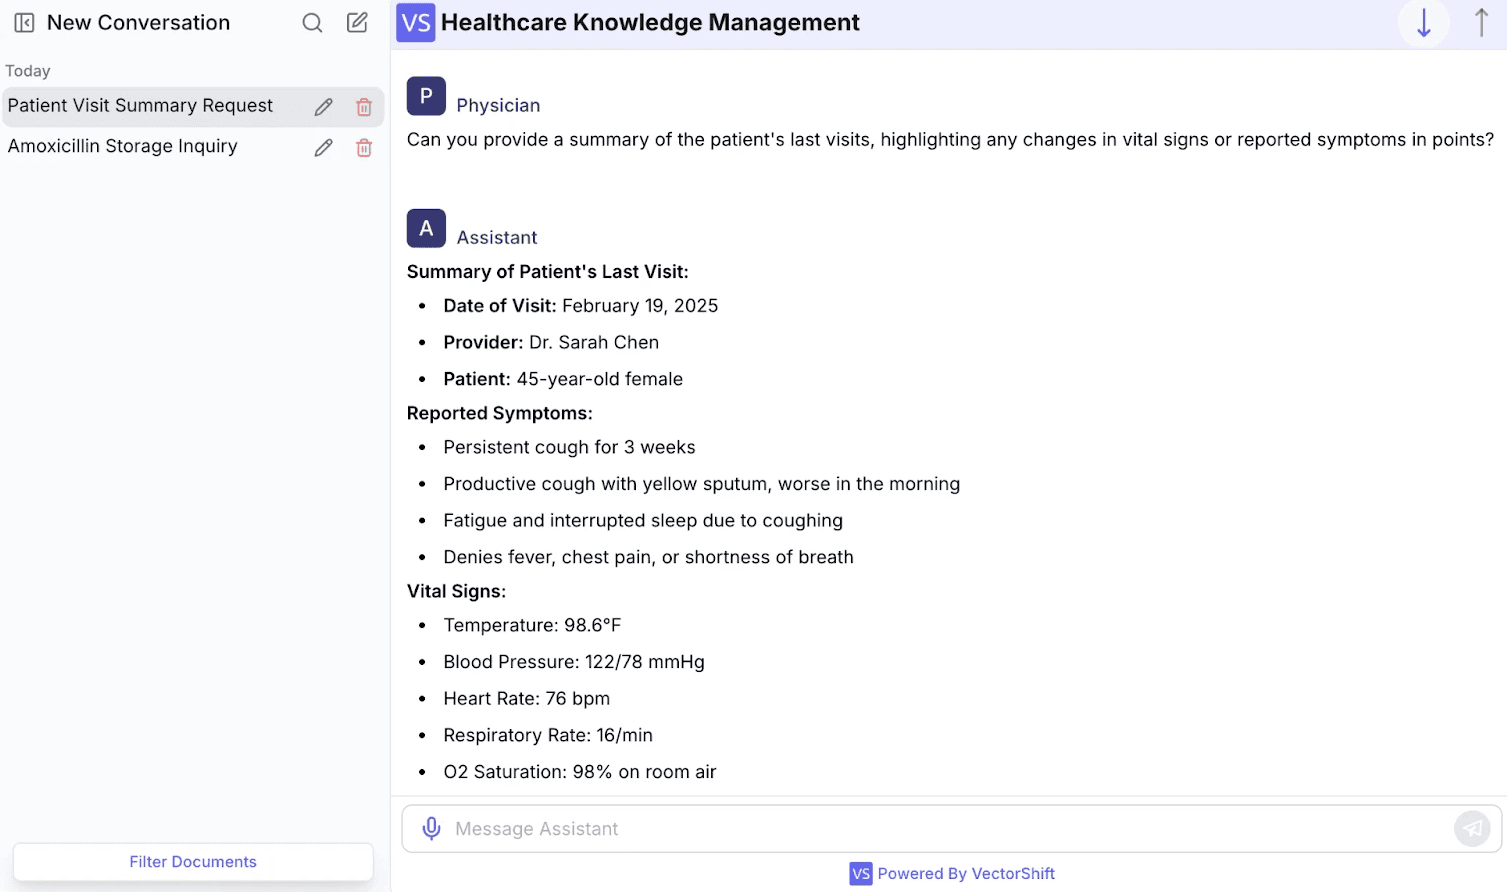
Step 4: Final chat assistant
Conclusion
With a physician co-pilot, doctors can focus more on their patients and deliver high-quality care, while maintaining the highest data security and privacy standards.
Looking to integrate AI into your organization and automate back-office operations? Create a free account or feel free to reach out.

Albert Mao
Co-Founder
Albert Mao is a co-founder of VectorShift, a no-code AI automation platform and holds a BA in Statistics from Harvard. Previously, he worked at McKinsey & Company, helping Fortune 500 firms with digital transformation and go-to-market strategies.