
Guides
Mar 31, 2025

Albert Mao
Co-Founder
Transform your organization with AI
Discover how VectorShift can automate workflows with our Secure AI plarform.
KYC is a critical process for financial institutions, enabling fraud protection and ensuring compliance.
The traditional approach—characterized by manual document verification, multiple customer touchpoints, and siloed teams—not only drives up costs but also results in delays, errors, and customer frustration.
In this article, we walkthrough a redacted workflow automation a financial institution uses to automate a KYC process. In this case, the financial institution has an email where customers send their required documents. The workflow will run whenever a new email is received, AI is used to extract information from the documents, the extracted data is used to update a database, and the results of the KYC diligence is sent to the customer via email.
Designing the Workflow
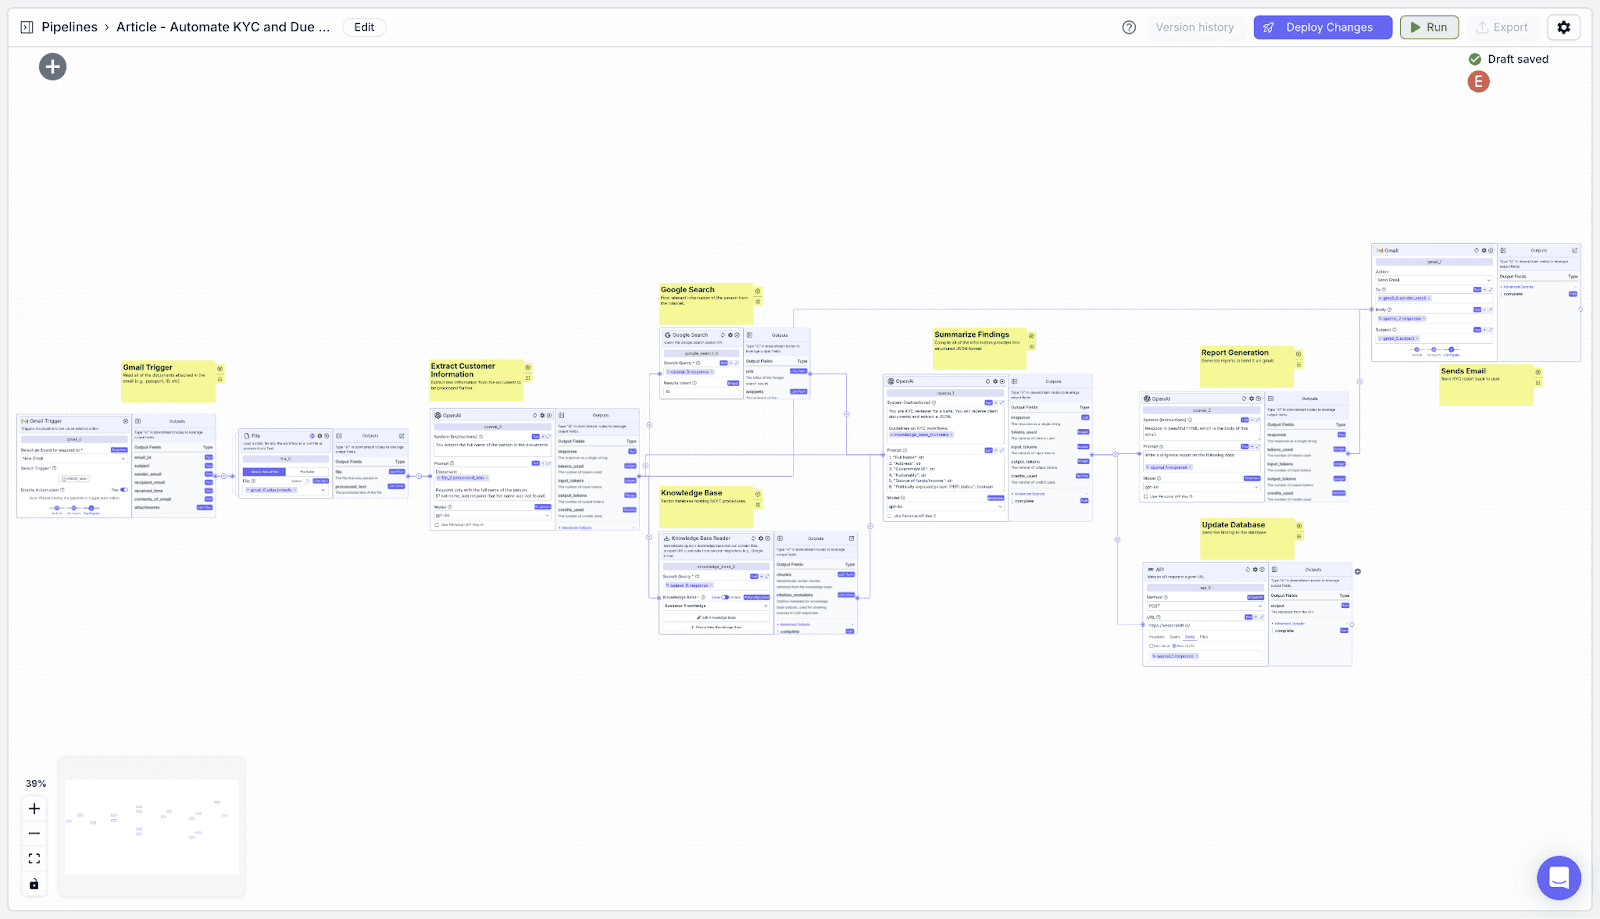
Here’s how the overall architecture of the workflow:
Create a knowledge base containing documentation and procedures on how KYC is conducted, relevant legal documents, and data about existing customers.
Build a workflow to read attached customer documents from an incoming email, find relevant information from the internet about the customer, and write a KYC diligence report. Then, update the customer’s information in a database and send an email to the customer containing the results of the KYC process.
1. Building Knowledge Base
We will build a knowledge base containing information about documentation and procedures on how KYC is conducted. We will then use this knowledge base in the pipeline to guide the writing of the KYC report.
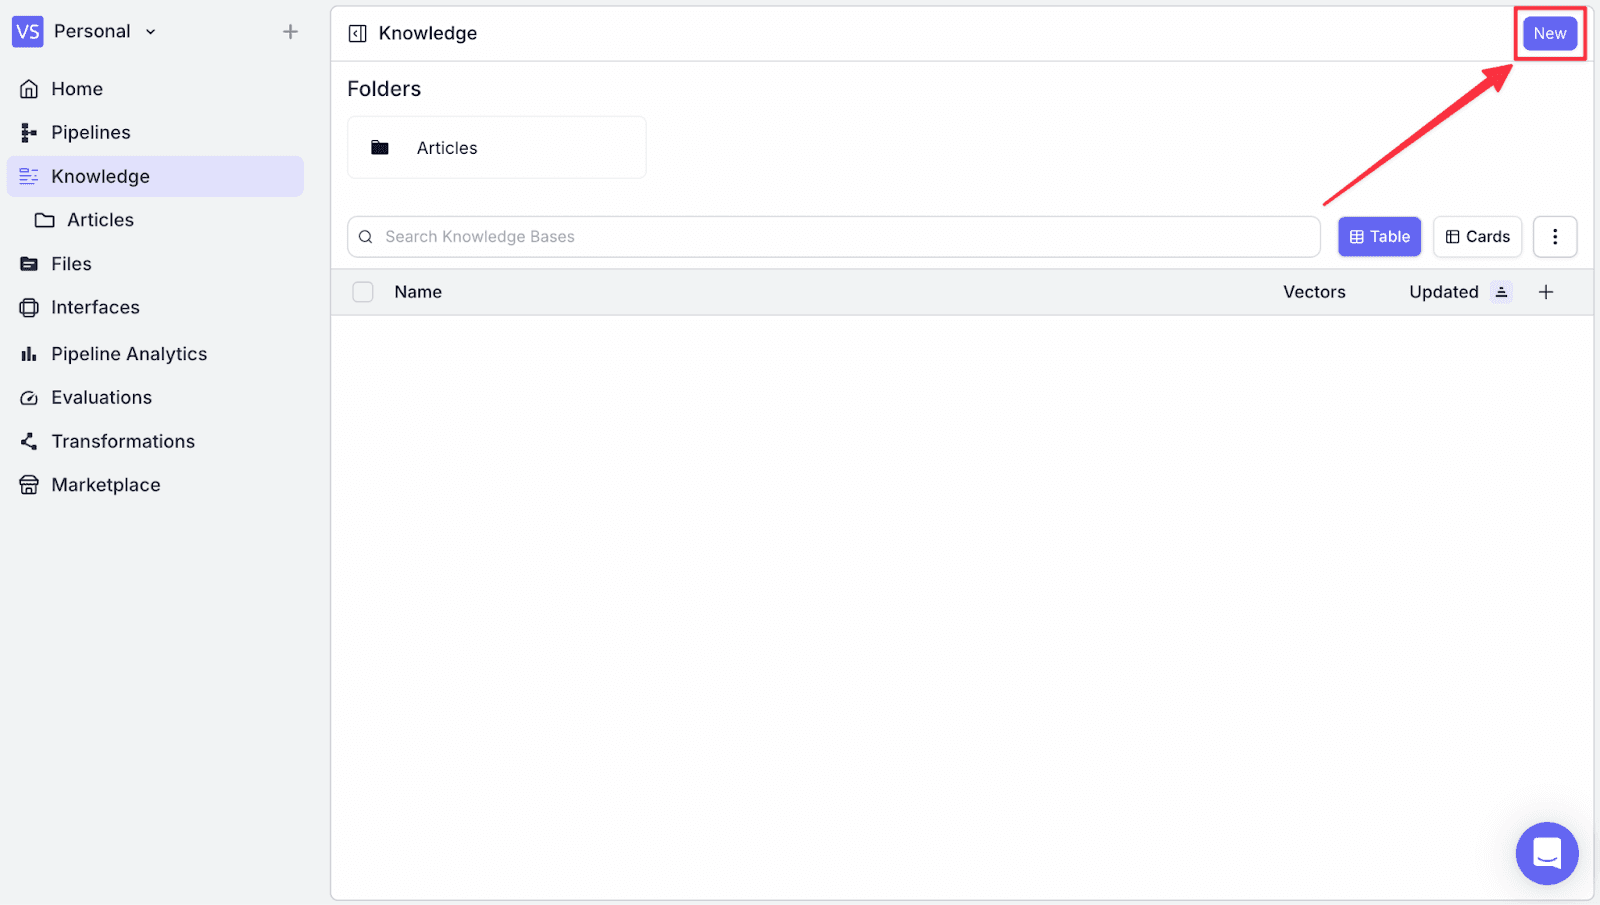
Step 1: Go to the “Knowledge” menu on the left, and click “New” on the top right.
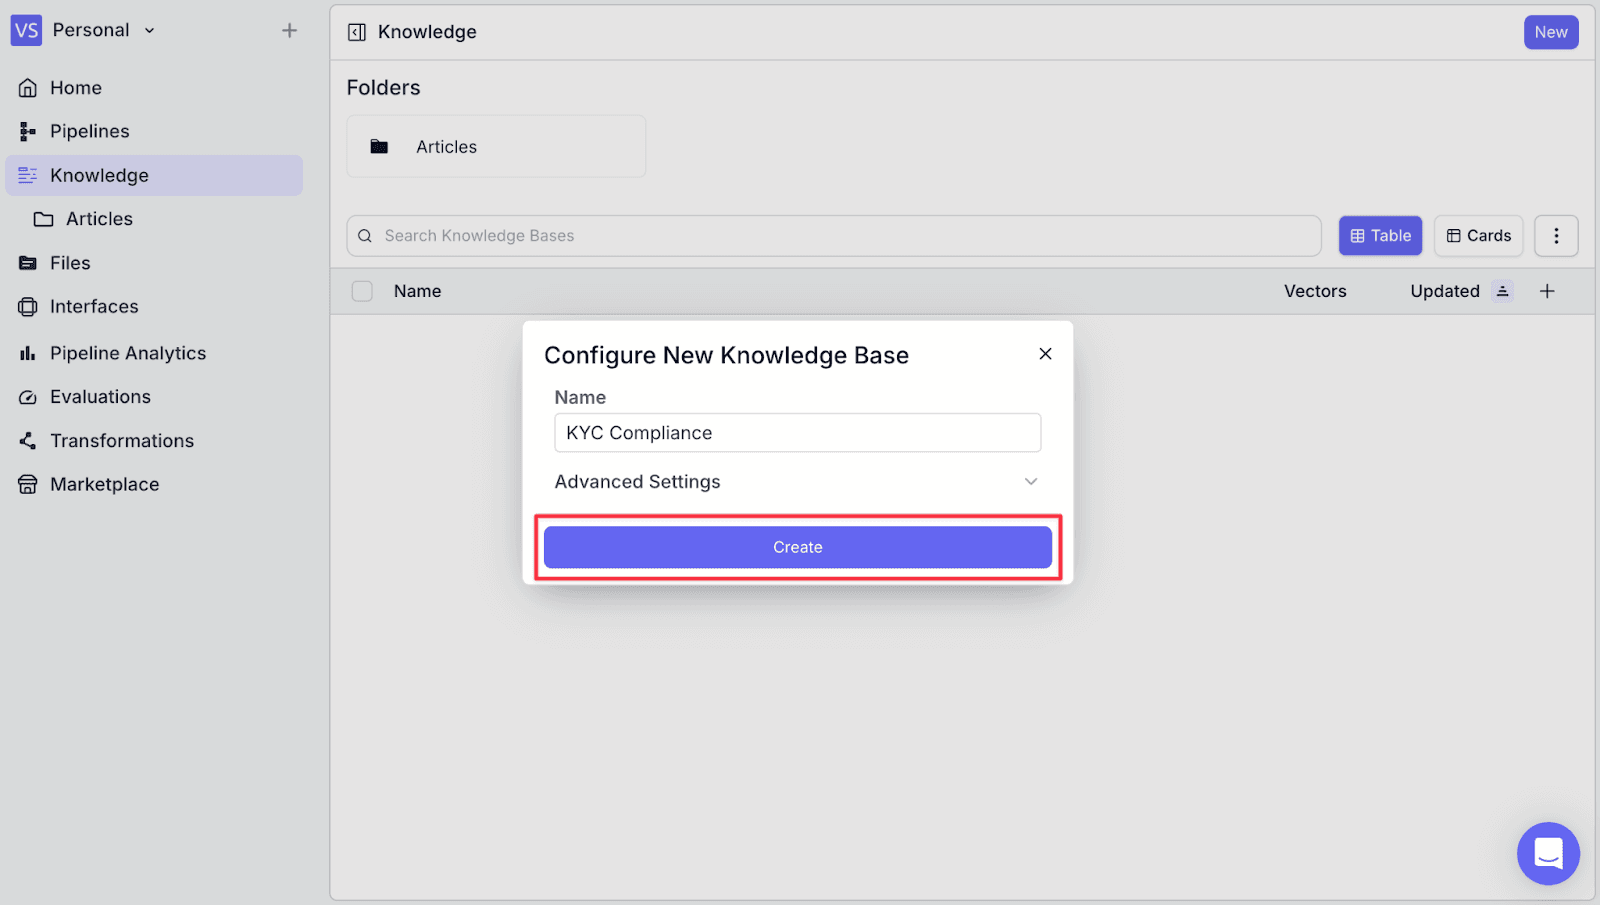
Step 2: Name the knowledge base, then click “Create”.
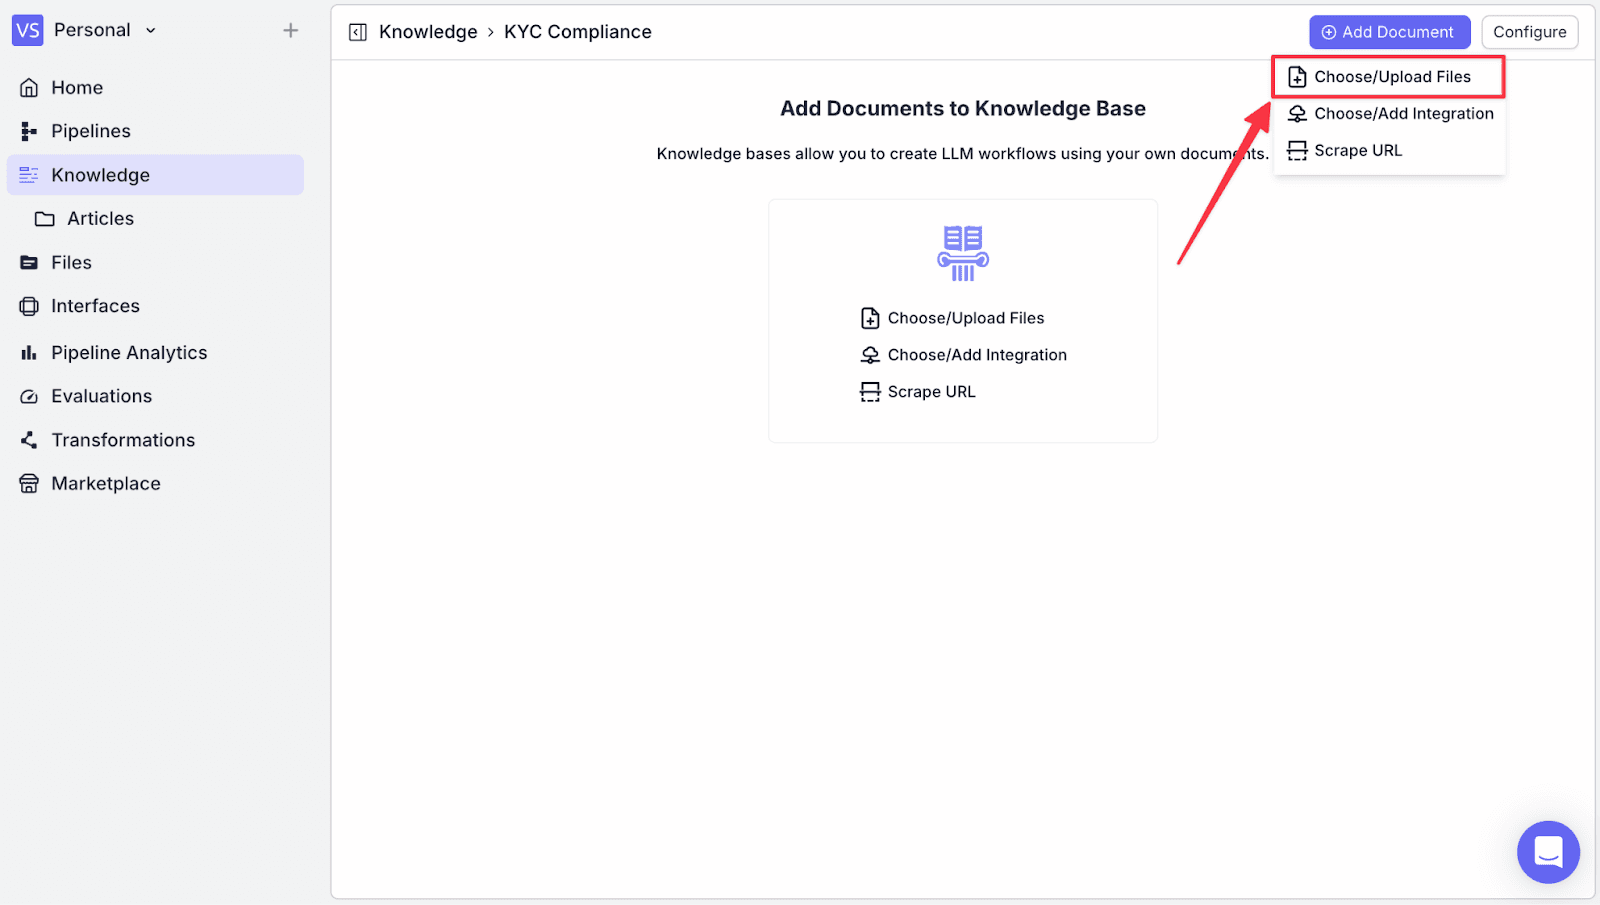
Step 3: You can add relevant documents in multiple ways:
Import documents directly from your computer
Connect to cloud storage services like Google Drive or Dropbox
Scrape from existing URL
As you import your data, VectorShift will automatically categorize and index the information, making it easily retrievable.
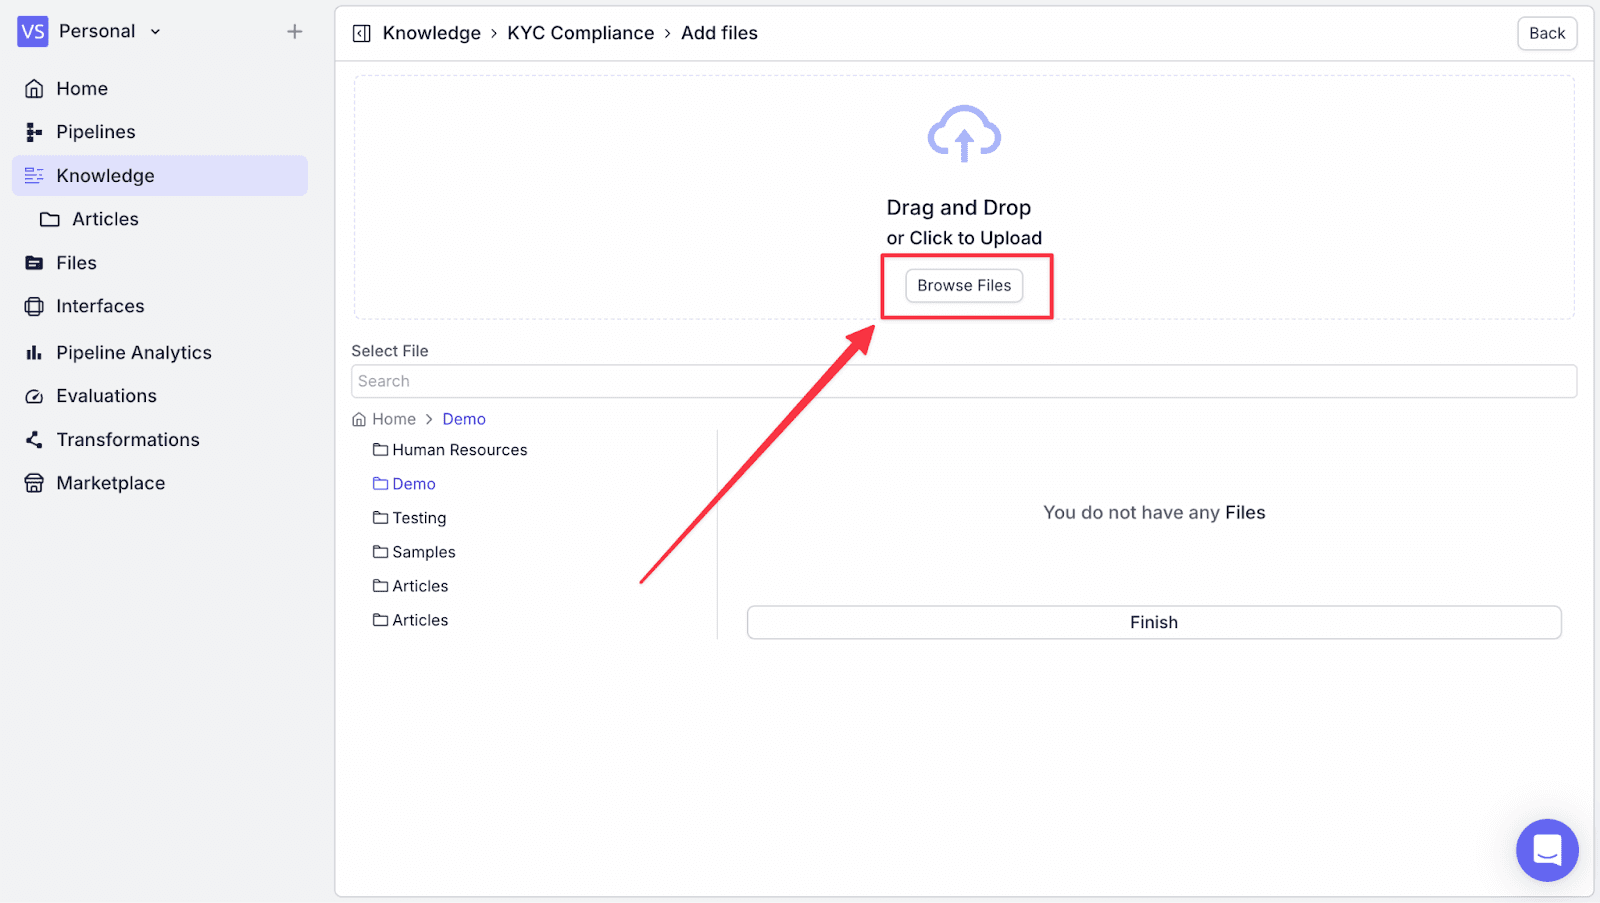
Now click “Add Document” on the top right, then click “Choose/Upload Files”.
Step 4: Click on “Browse Files” and then upload files from your local computer.
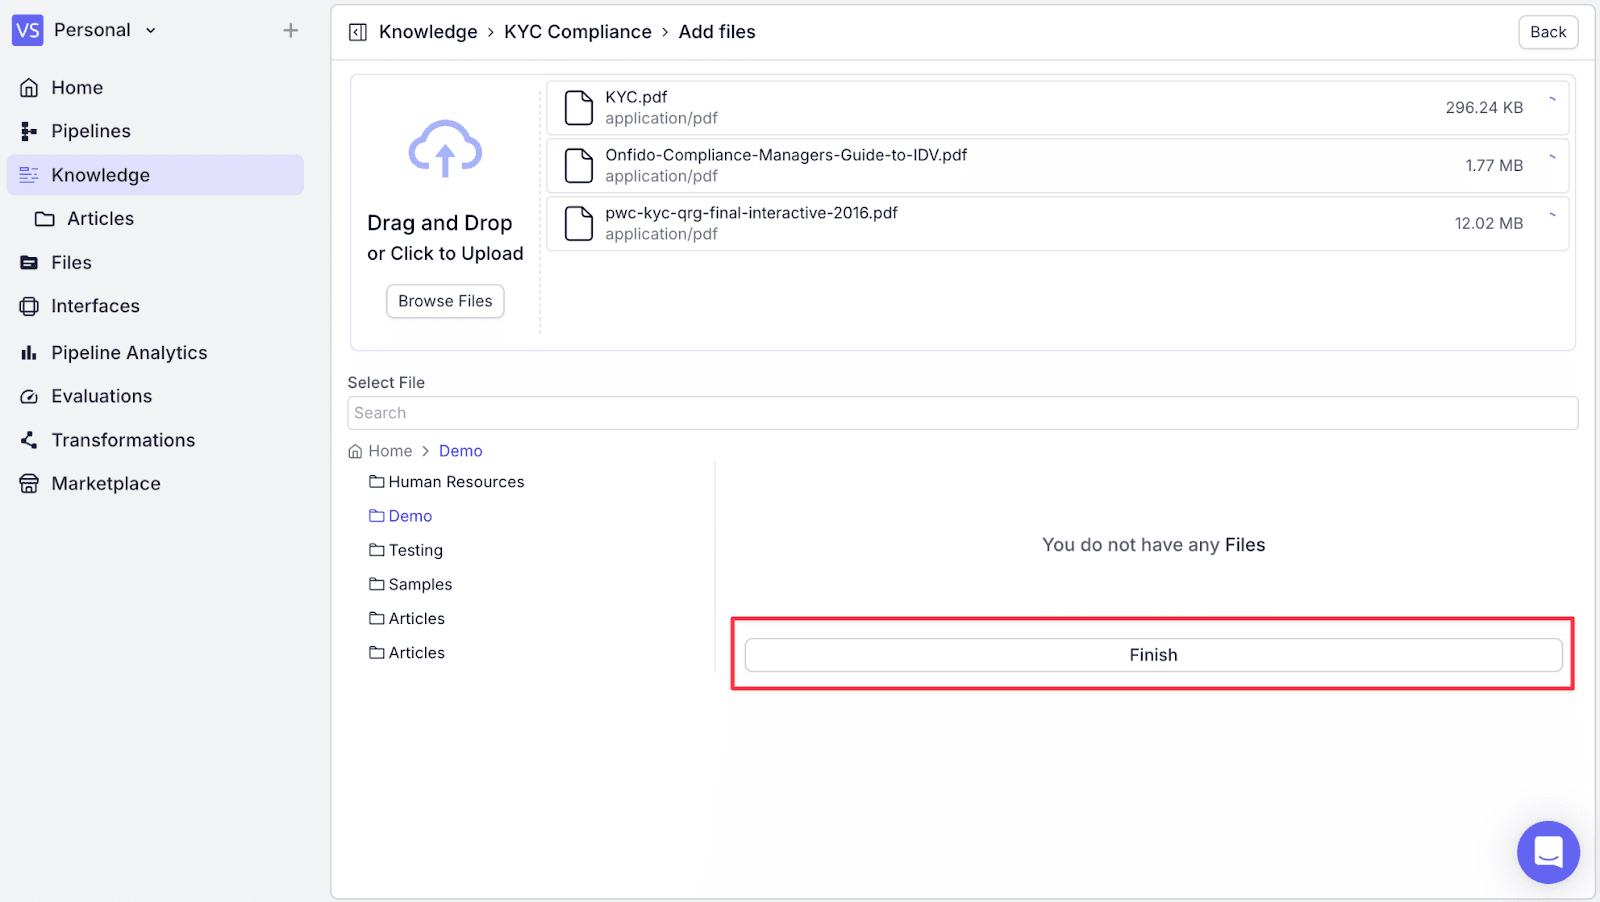
Step 5: After finishing uploading the files, click on the “Finish” button at the bottom.
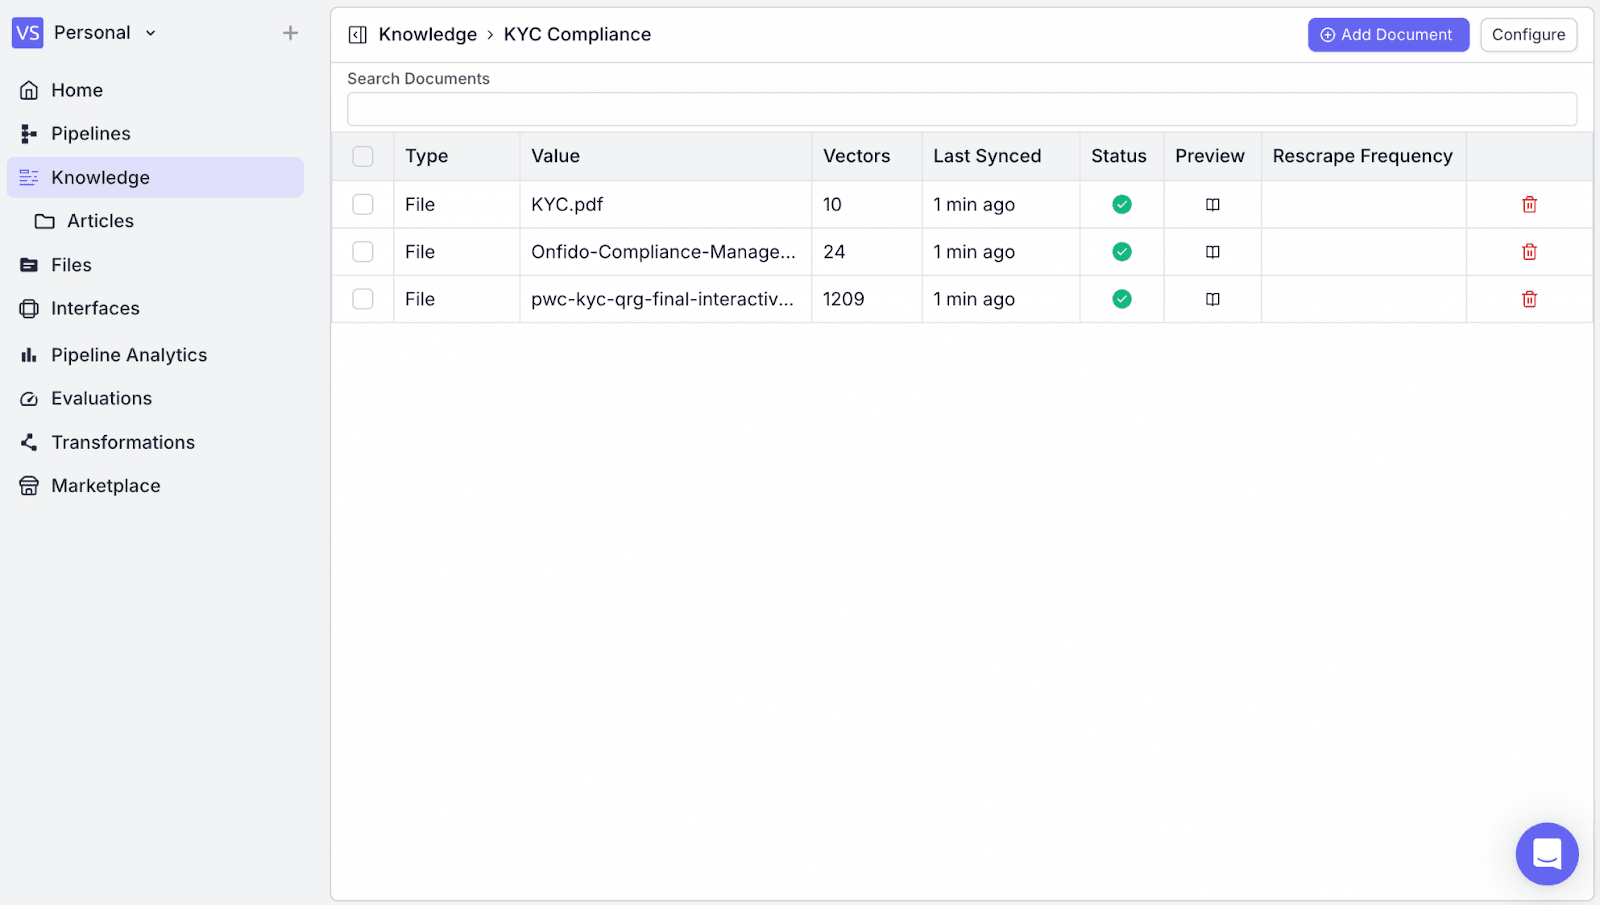
You can see the uploaded document has been added to the knowledge base.
2. Designing the Pipeline
Given we need to run this pipeline whenever a new email is received, we will utilize a “Trigger” to start the pipeline. A trigger will “trigger” the pipeline to run whenever “something” happens (in this case, a new email).
The pipeline consists of several parts:
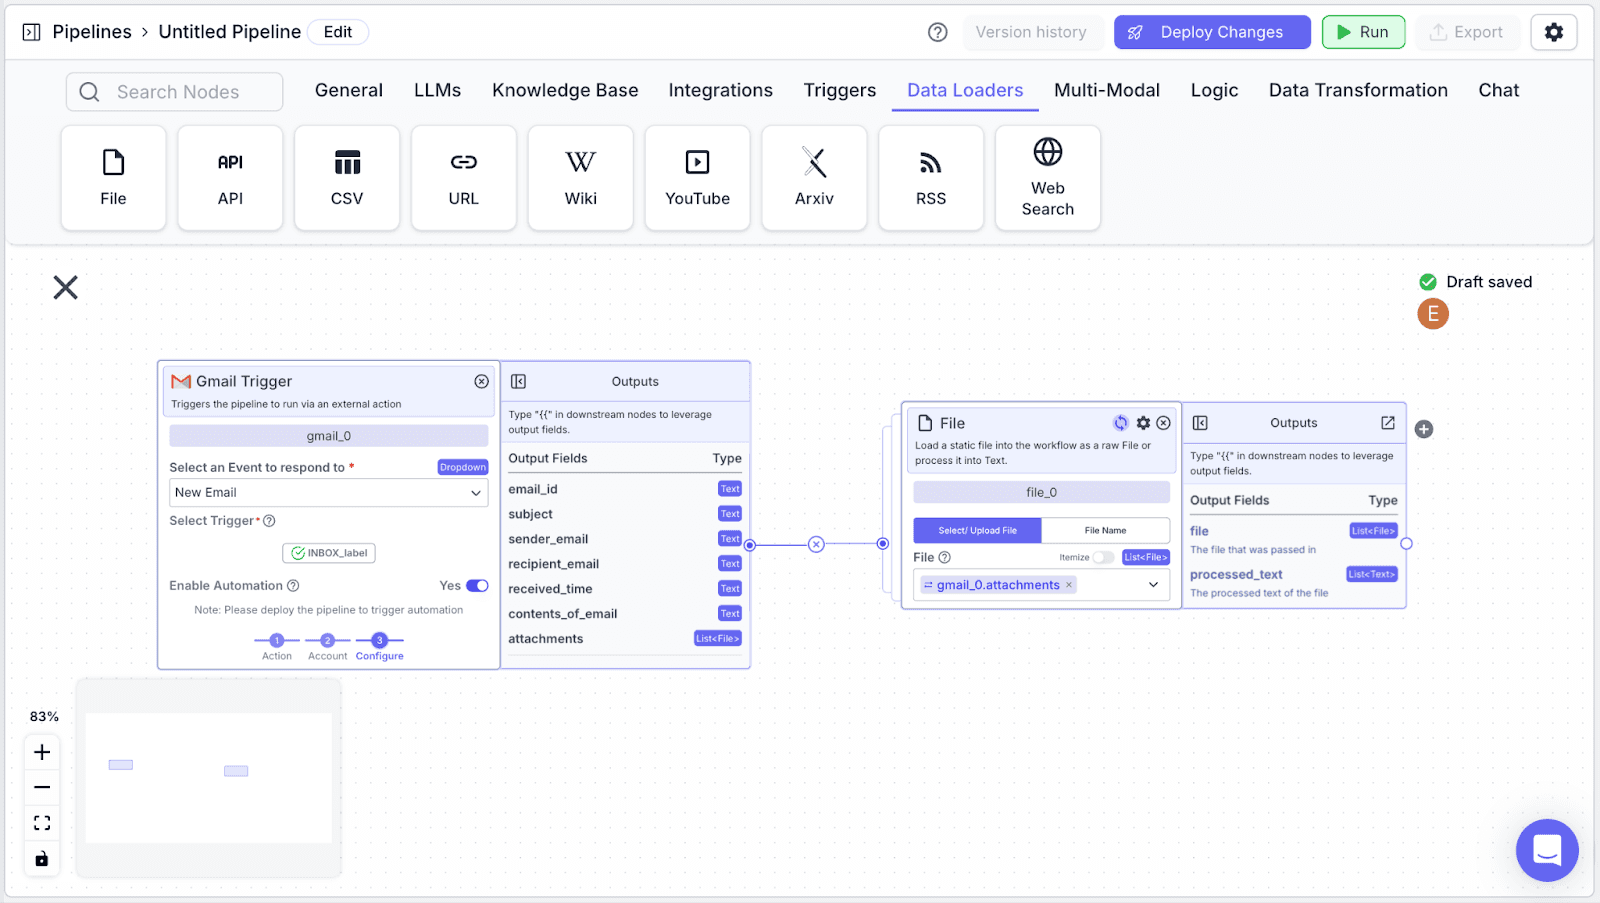
Gmail Trigger Node: To trigger the pipeline whenever a new email is received.
File Reader Node: To read the file(s) attached to the email.
Knowledge Base Node: Read relevant information from the knowledge base.
LLM Nodes: We will use three LLM nodes to: 1) extract data from the attachments, 2) utilize data from the attachments and websearch to write a JSON (for updating user info in the database), and 3) write the due diligence report.
API Node: To update the user info.
Gmail Node: To send the customer the final due diligence report.
Working with Nodes in VectorShift
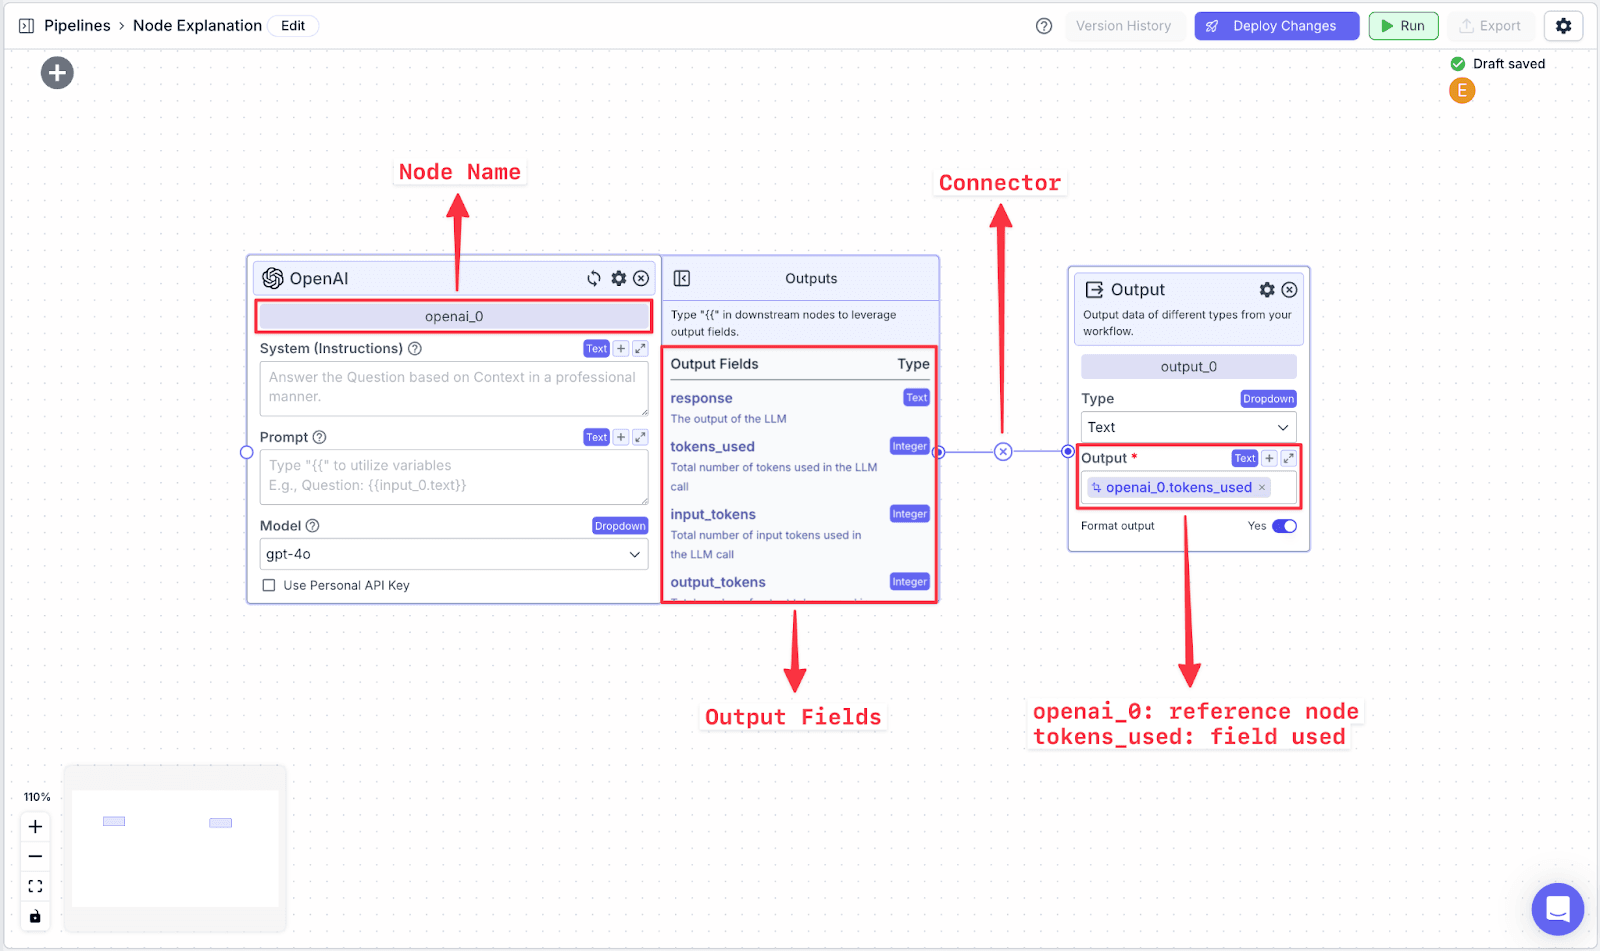
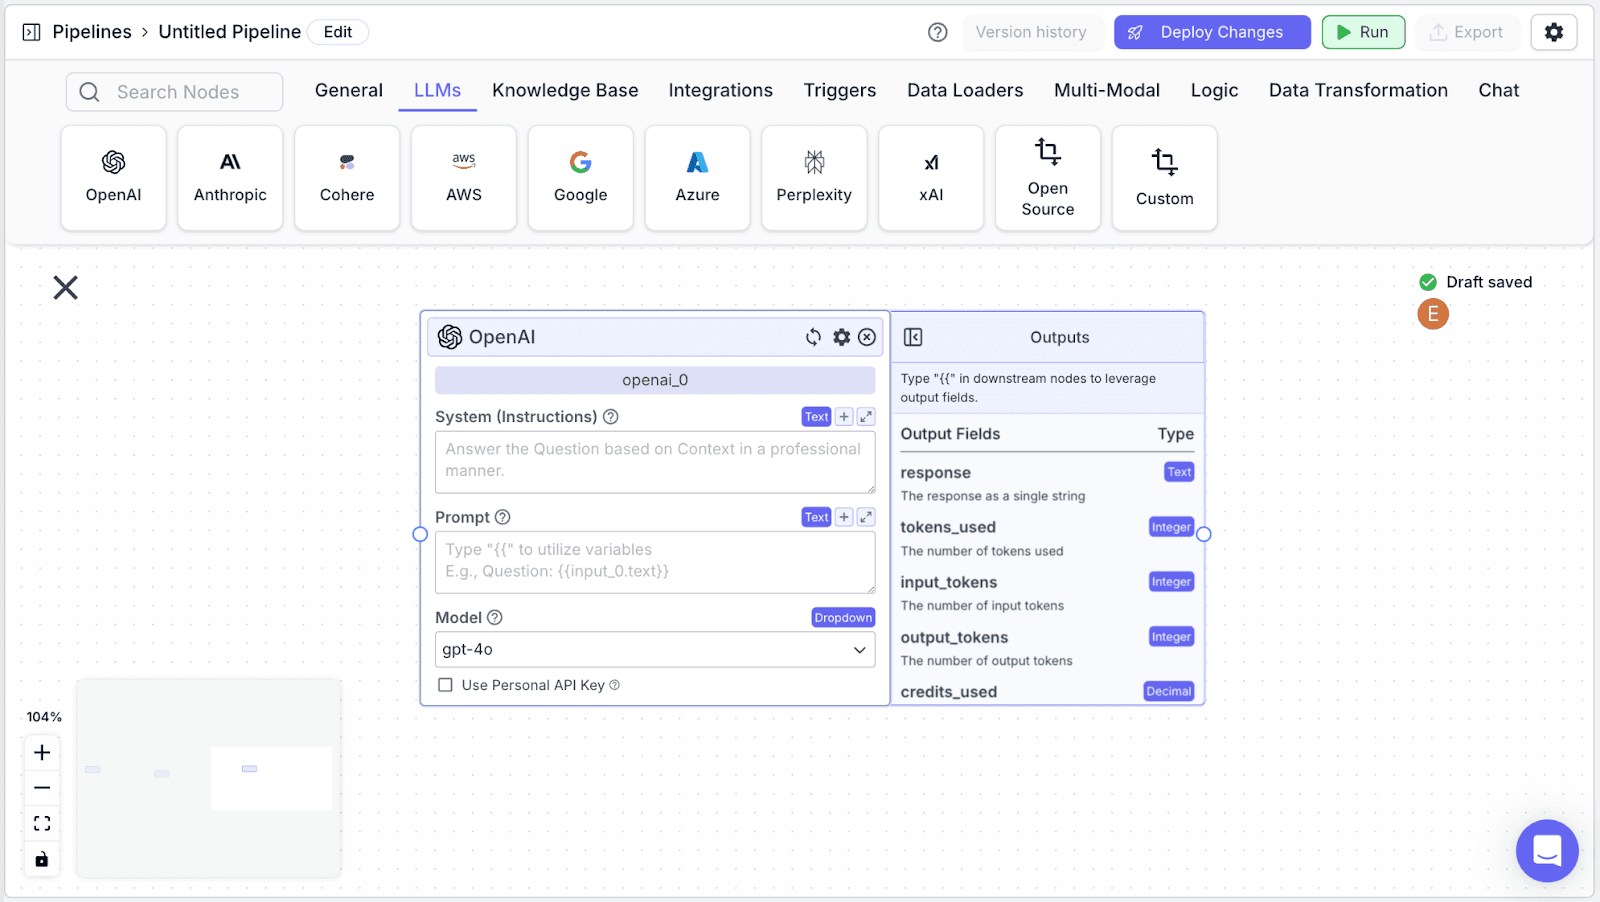
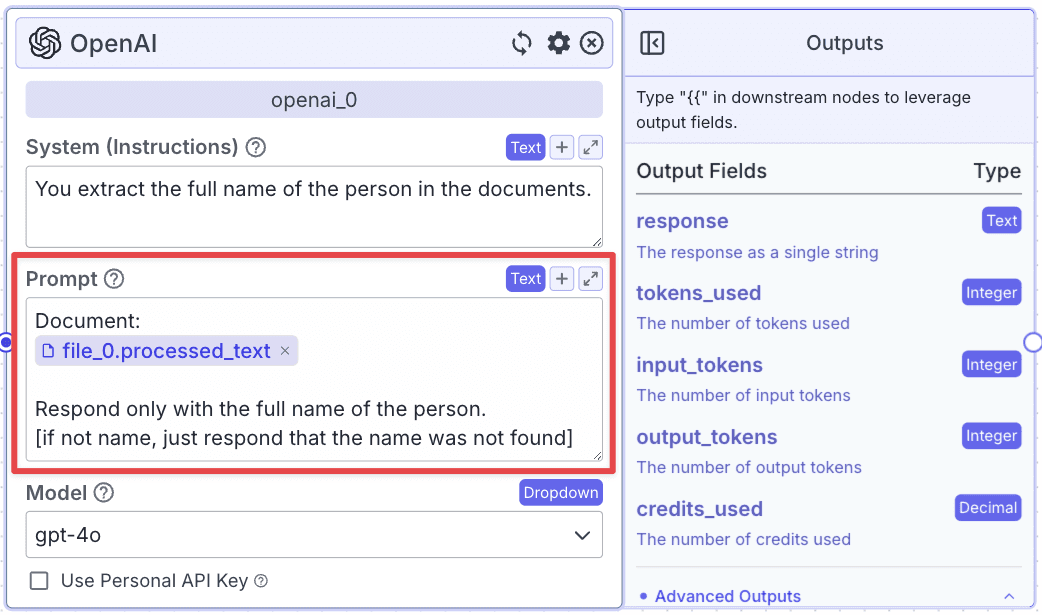
Each node in VectorShift has a name at the top of each node (e.g., openai_0) and output field(s), which are found in the right-hand pane of each node (e.g., the OpenAI LLM node has various output fields: response, tokens.used, input_tokens, output_tokens).
To reference specific data fields from other nodes, you have to do two things:
Connect the two nodes.
Reference the data from the previous field using a variable.
Variables in VectorShift all have the same structure:
You can also create variables by typing “{{“ in any text field, which opens the variable builder. To reference the text from the OpenAI node, you call the variable on the Output node:
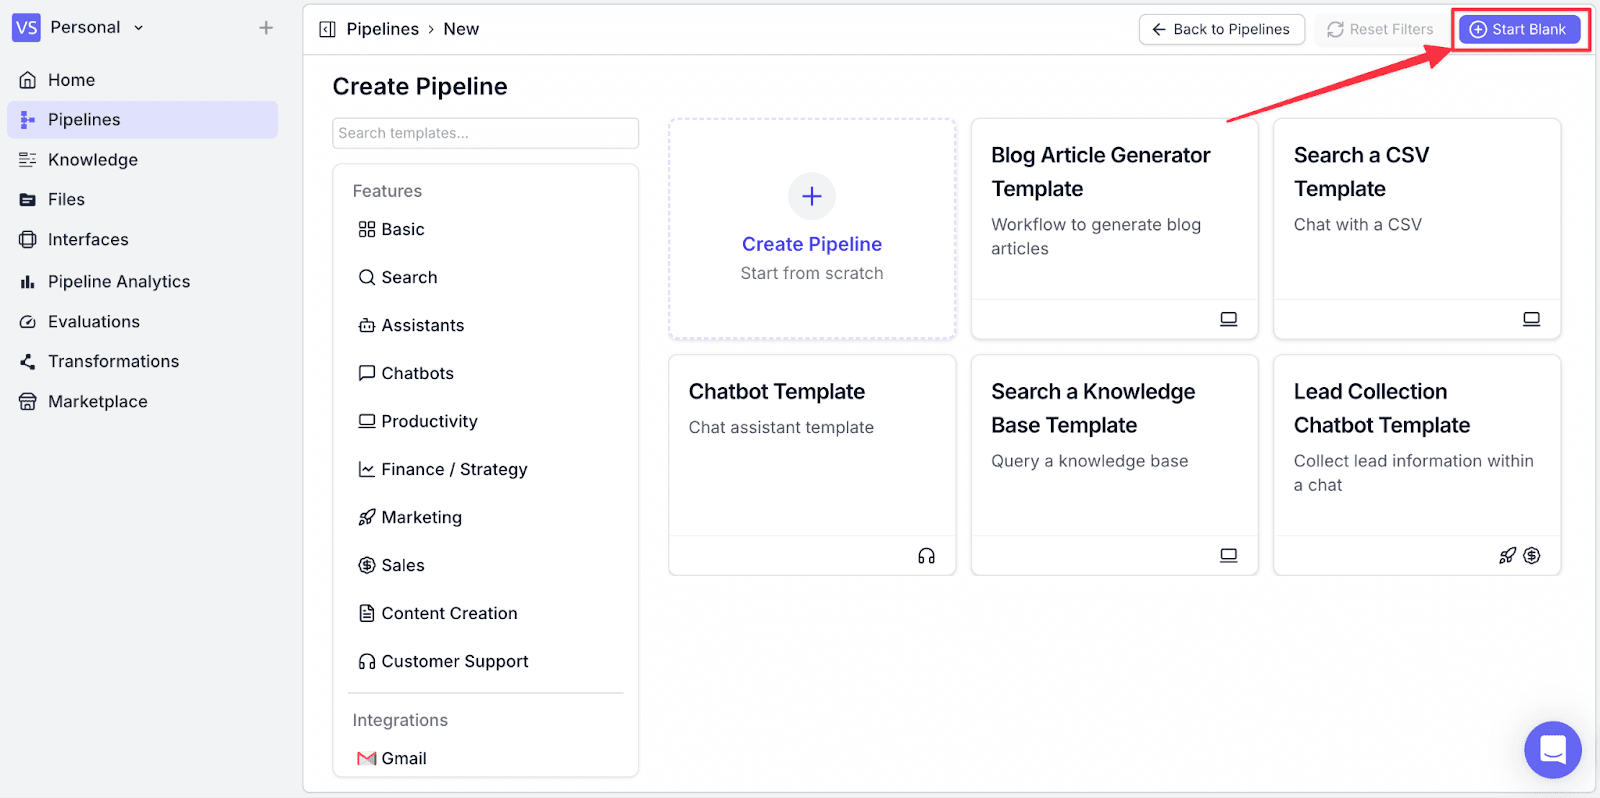
To start creating a new pipeline, go to the “Pipeline” menu, and click “New” on the top-right
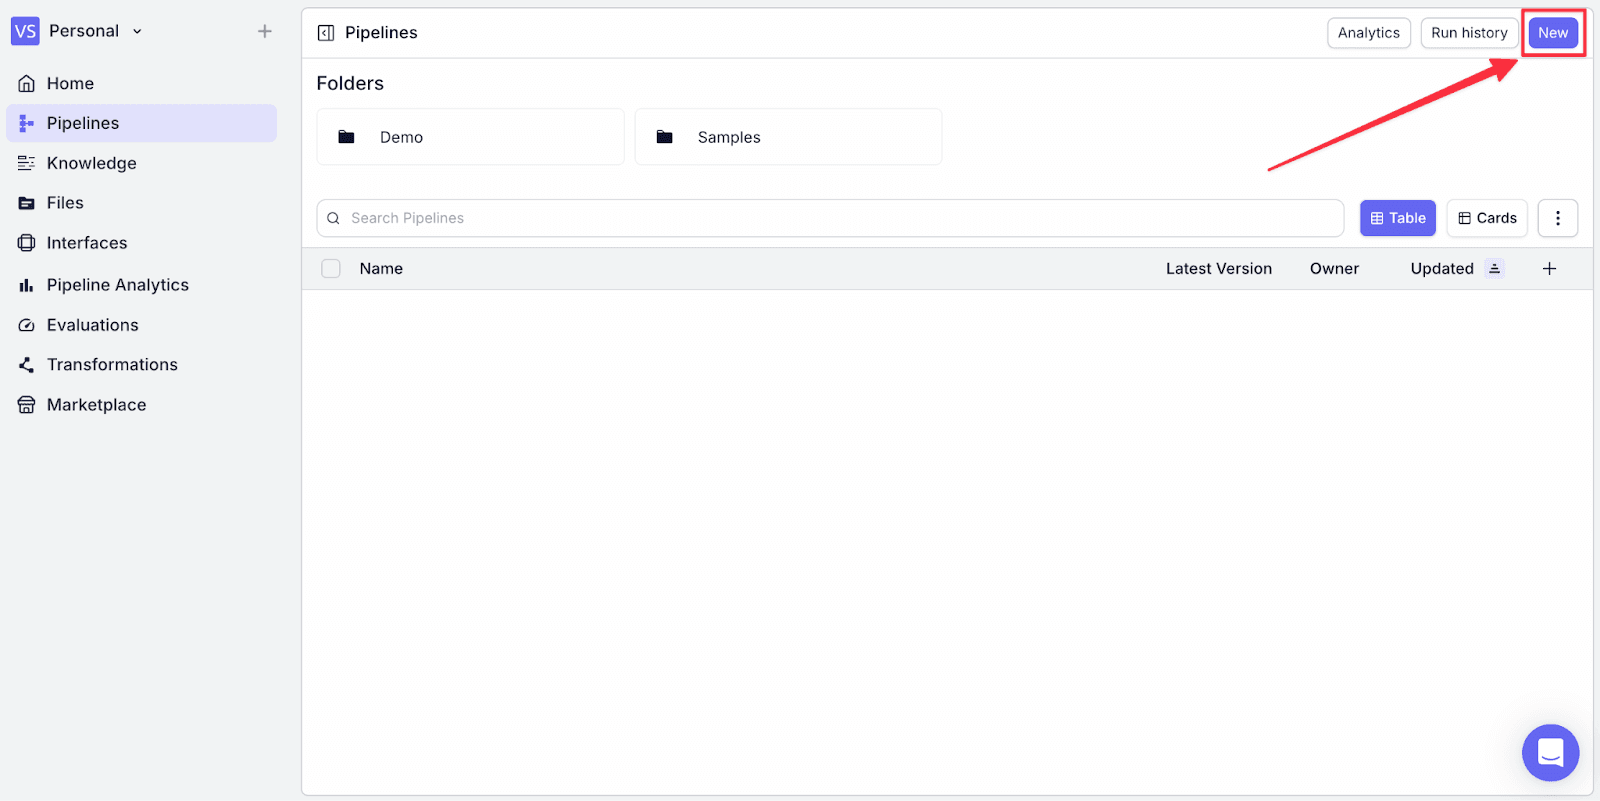
You will see some options, so go with “Start Blank” on the top right.
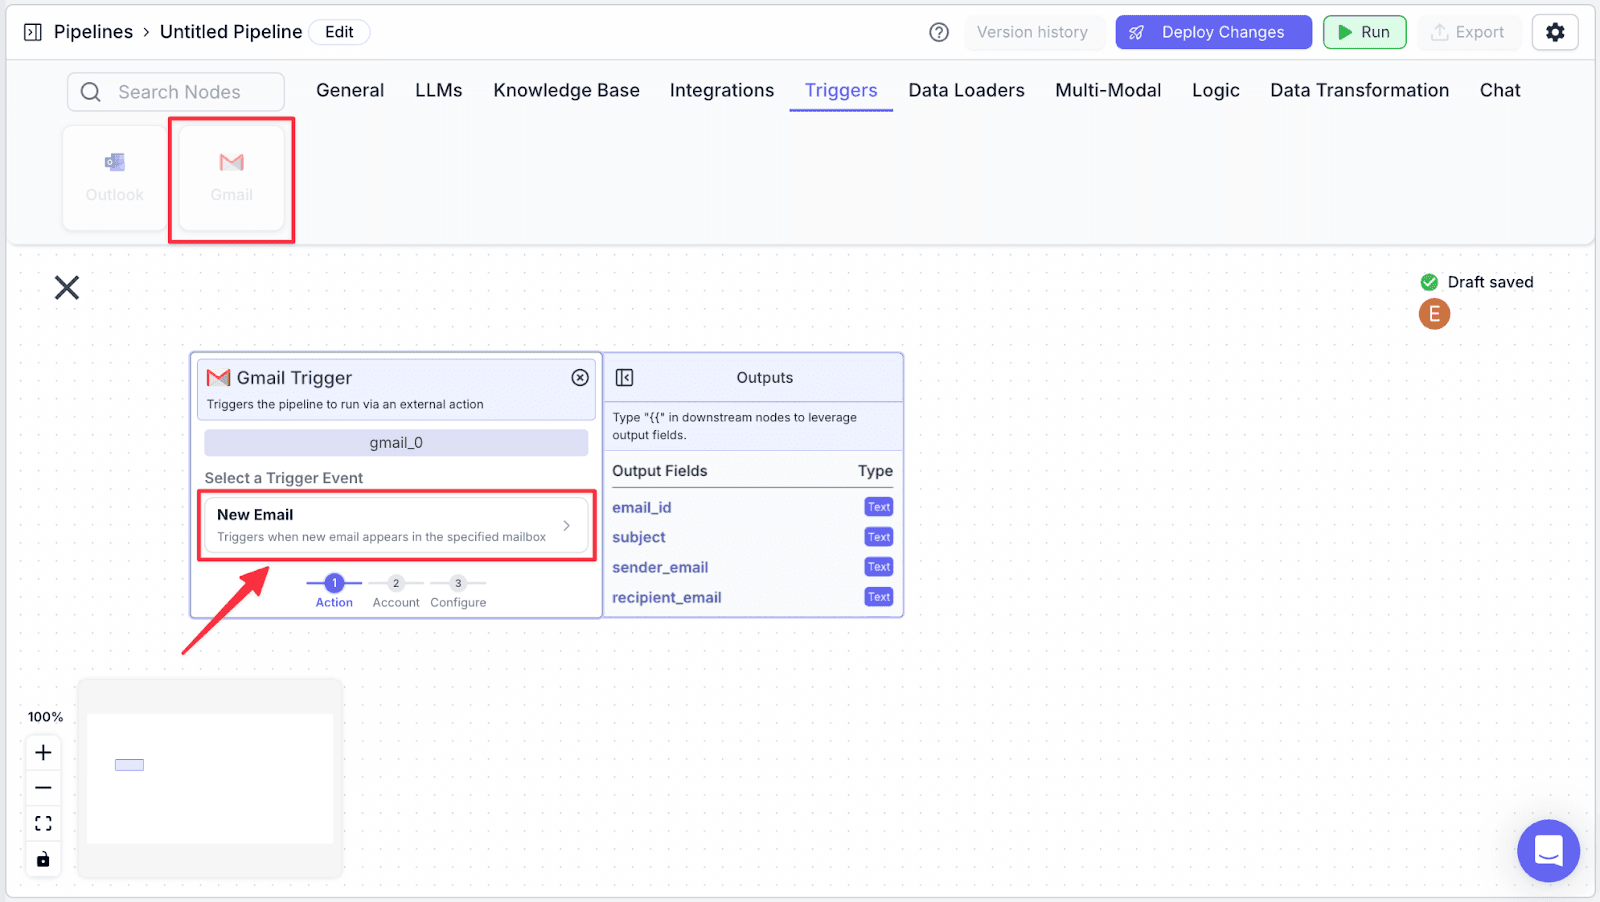
Gmail Triggers
Step 1: Take a “Gmail Trigger” node under the “Triggers” section, then click on “New Email”.
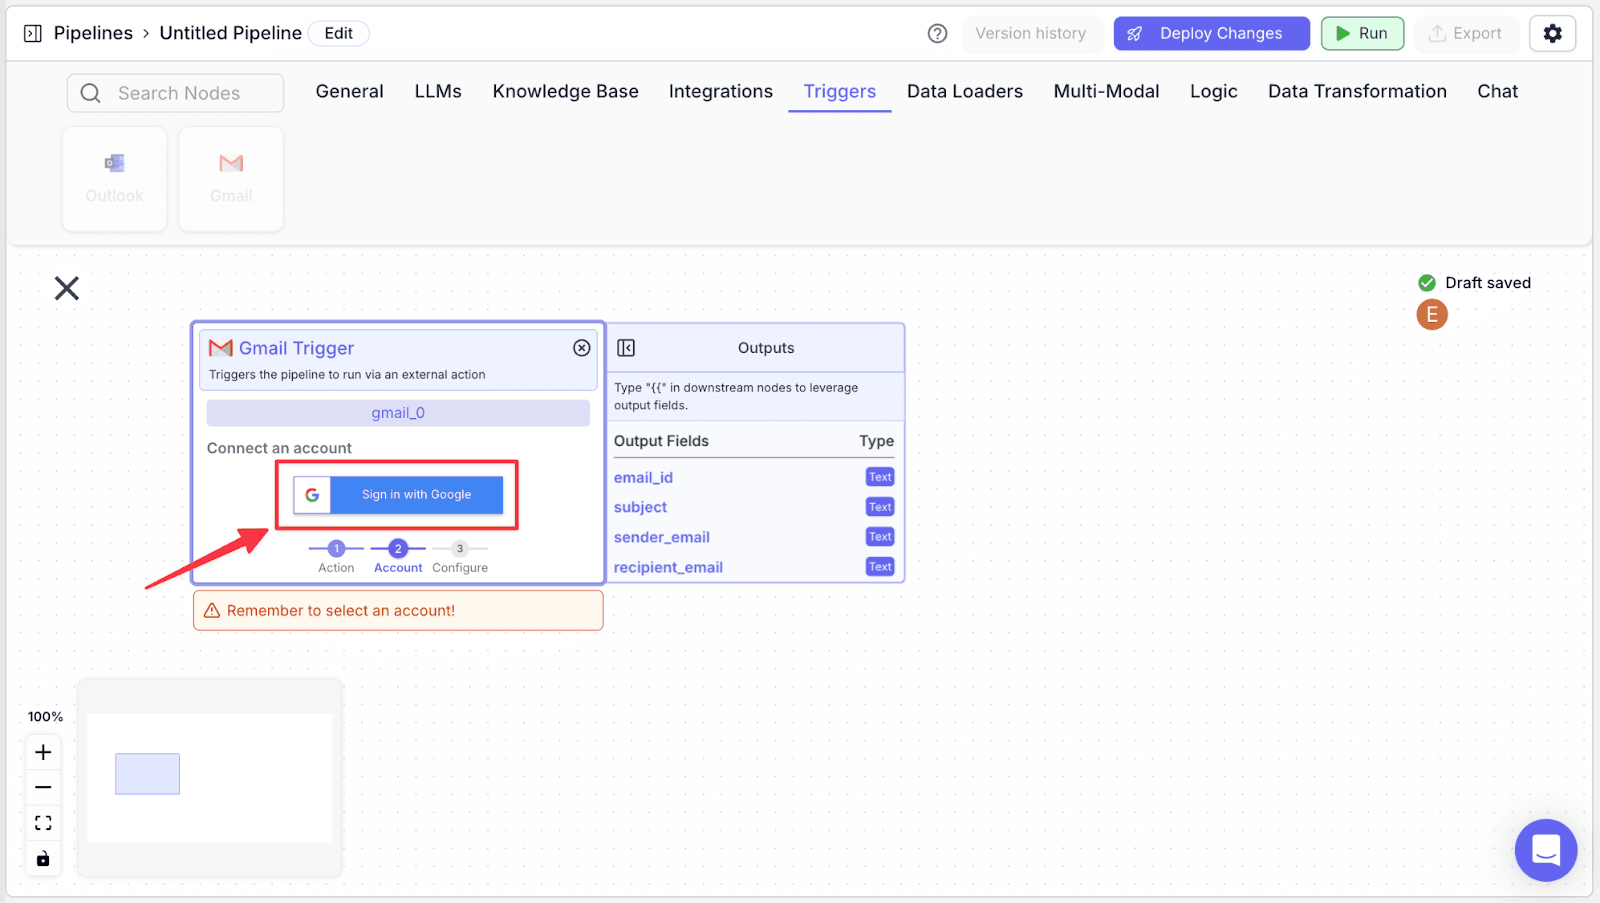
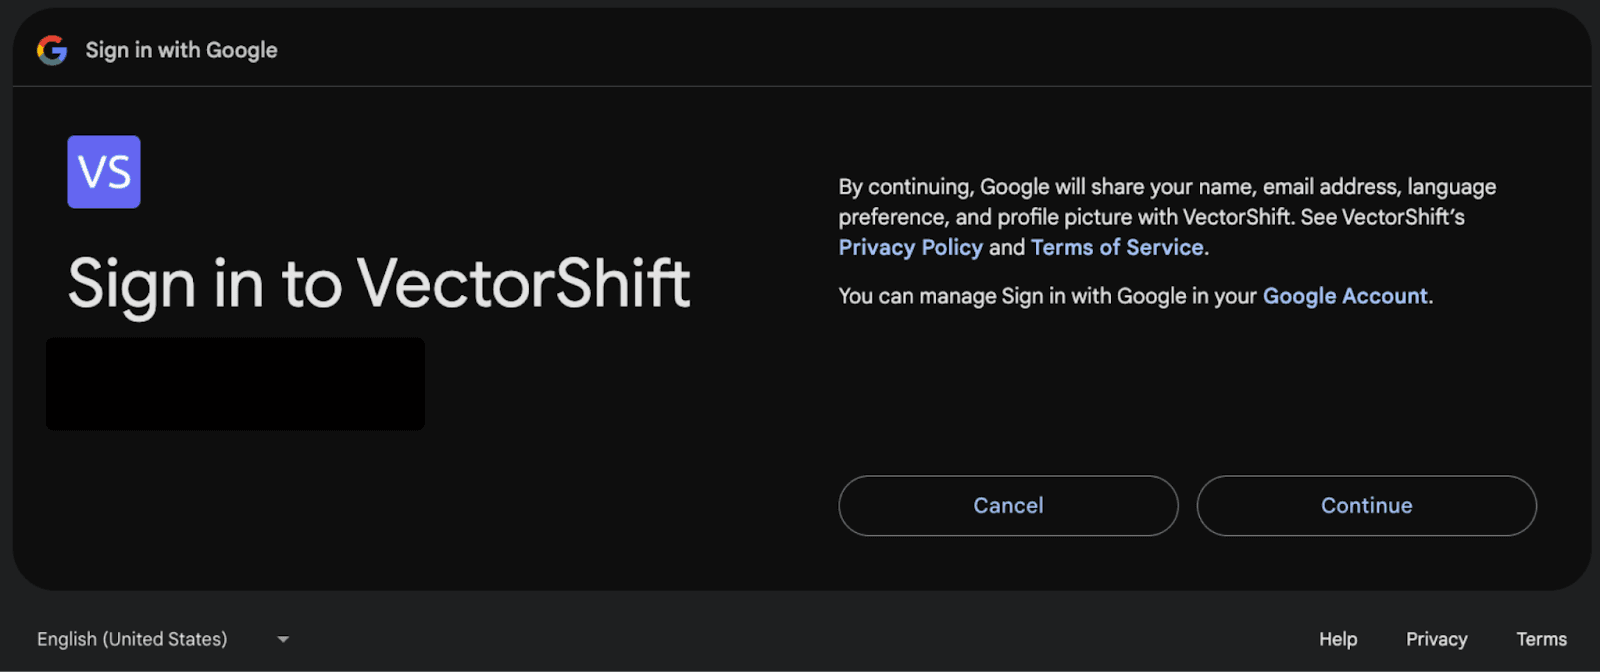
Step 2: Click on “Sign in with Google”
Step 3: Select the Google account and click on “Continue”.
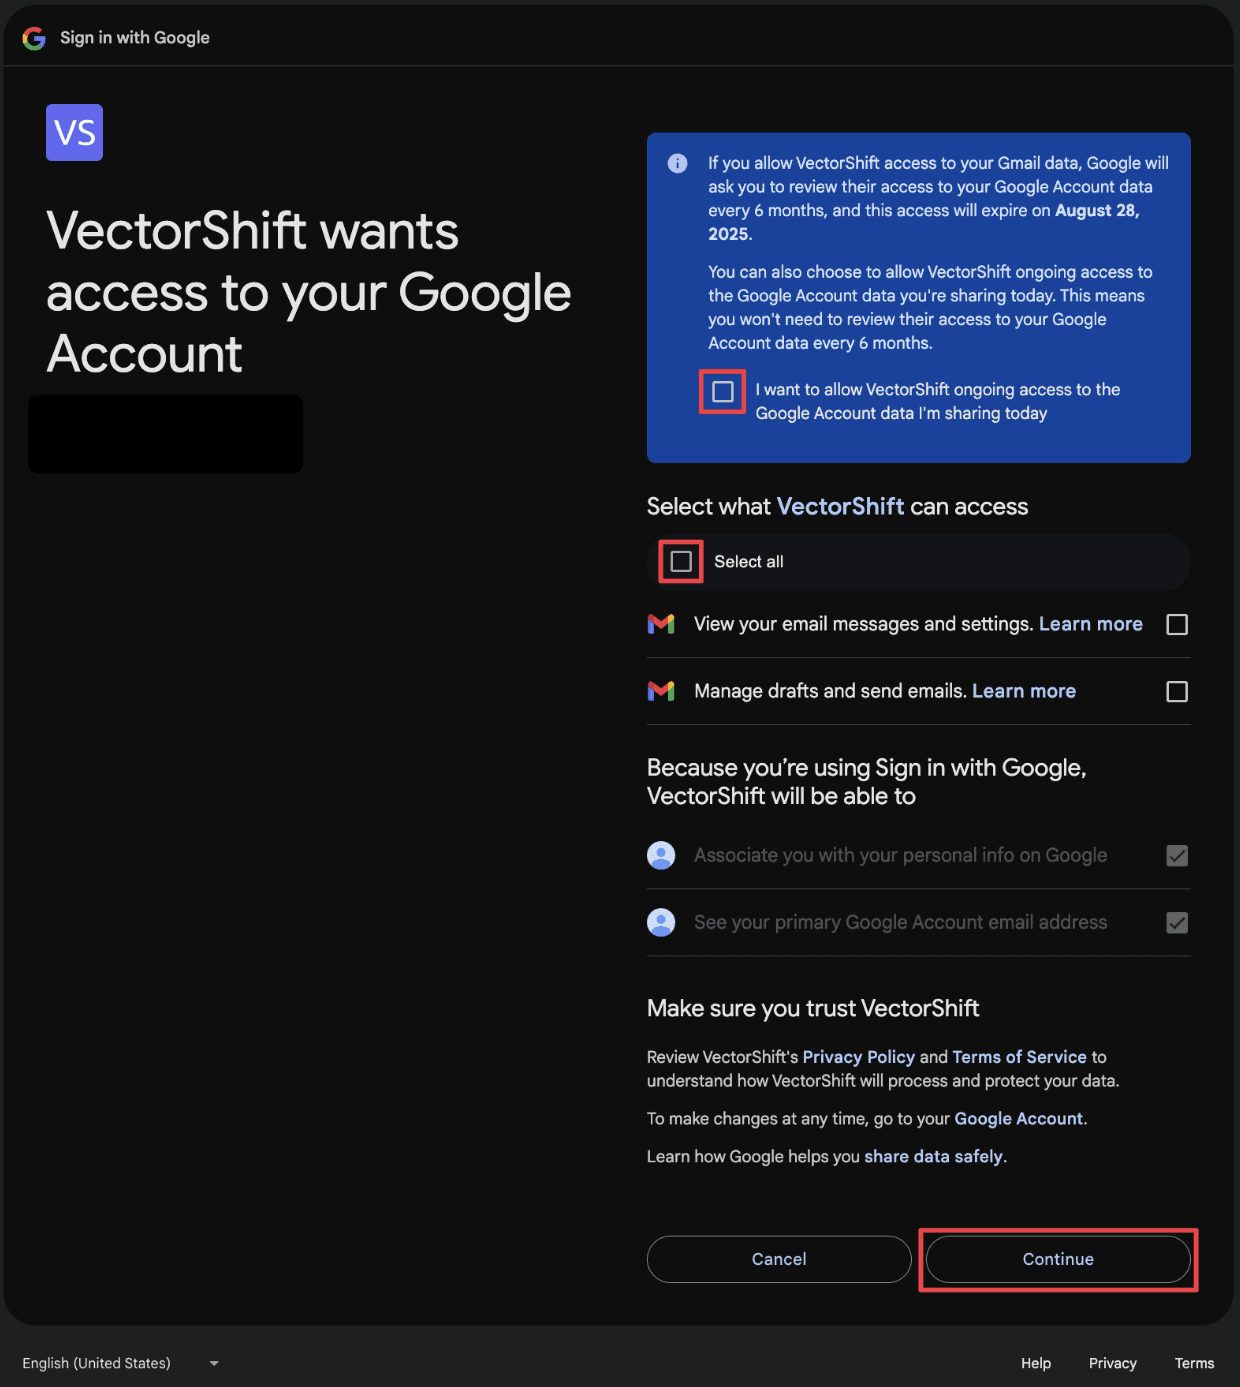
Step 4: Check all of the permissions, then click “Continue” again.
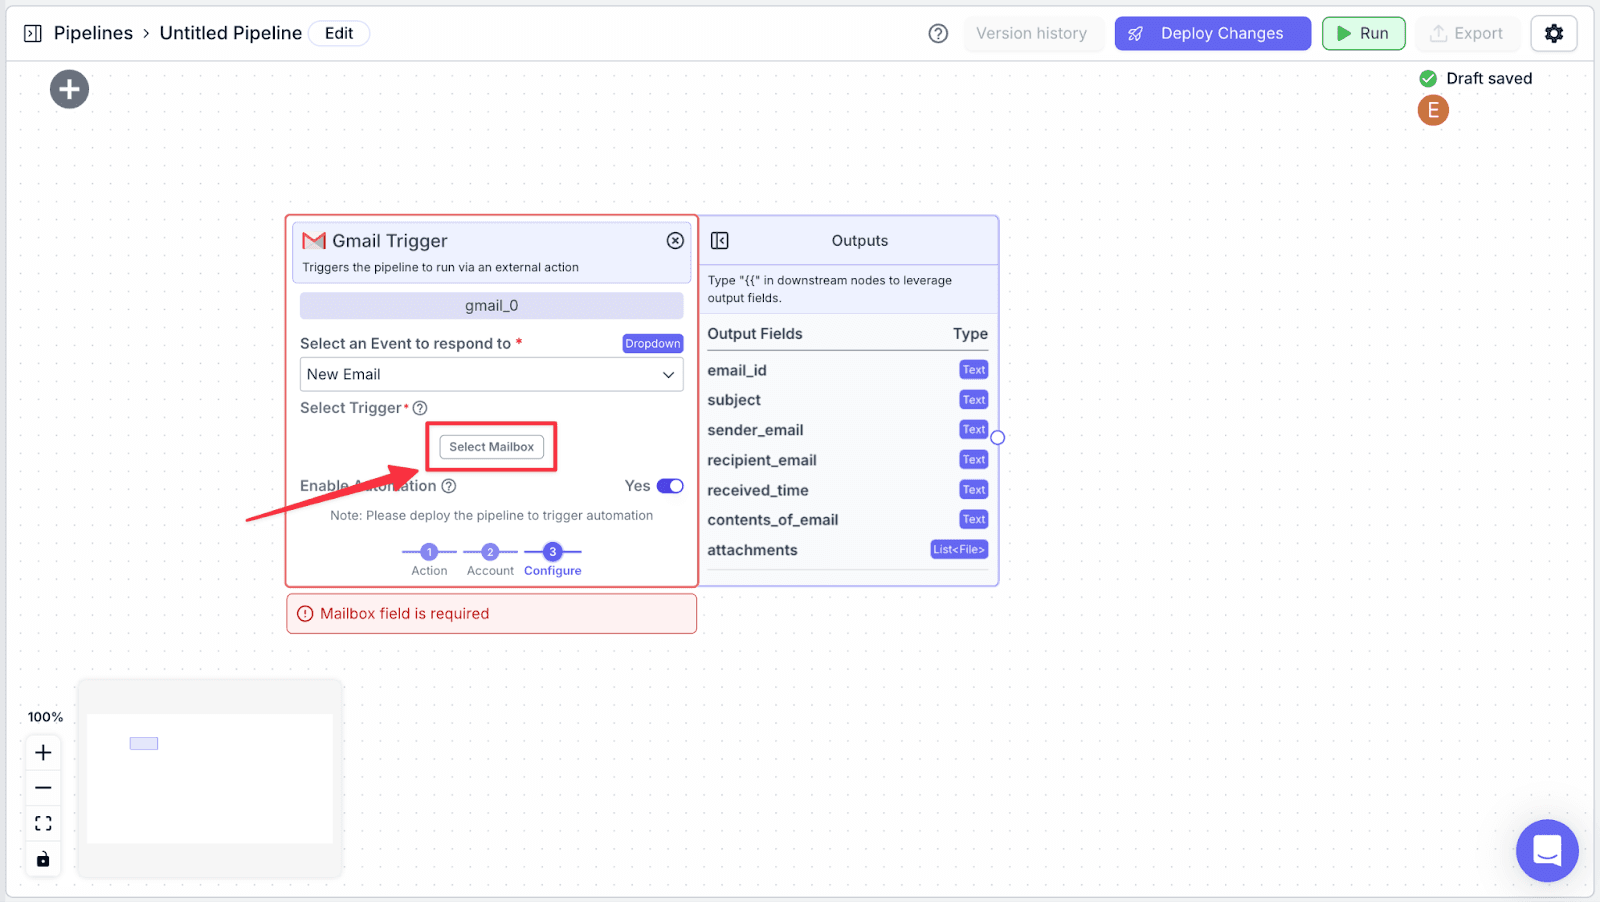
Step 5: Click on “Select Mailbox”. You will be shown which mailbox you’re going to monitor in this pipeline.
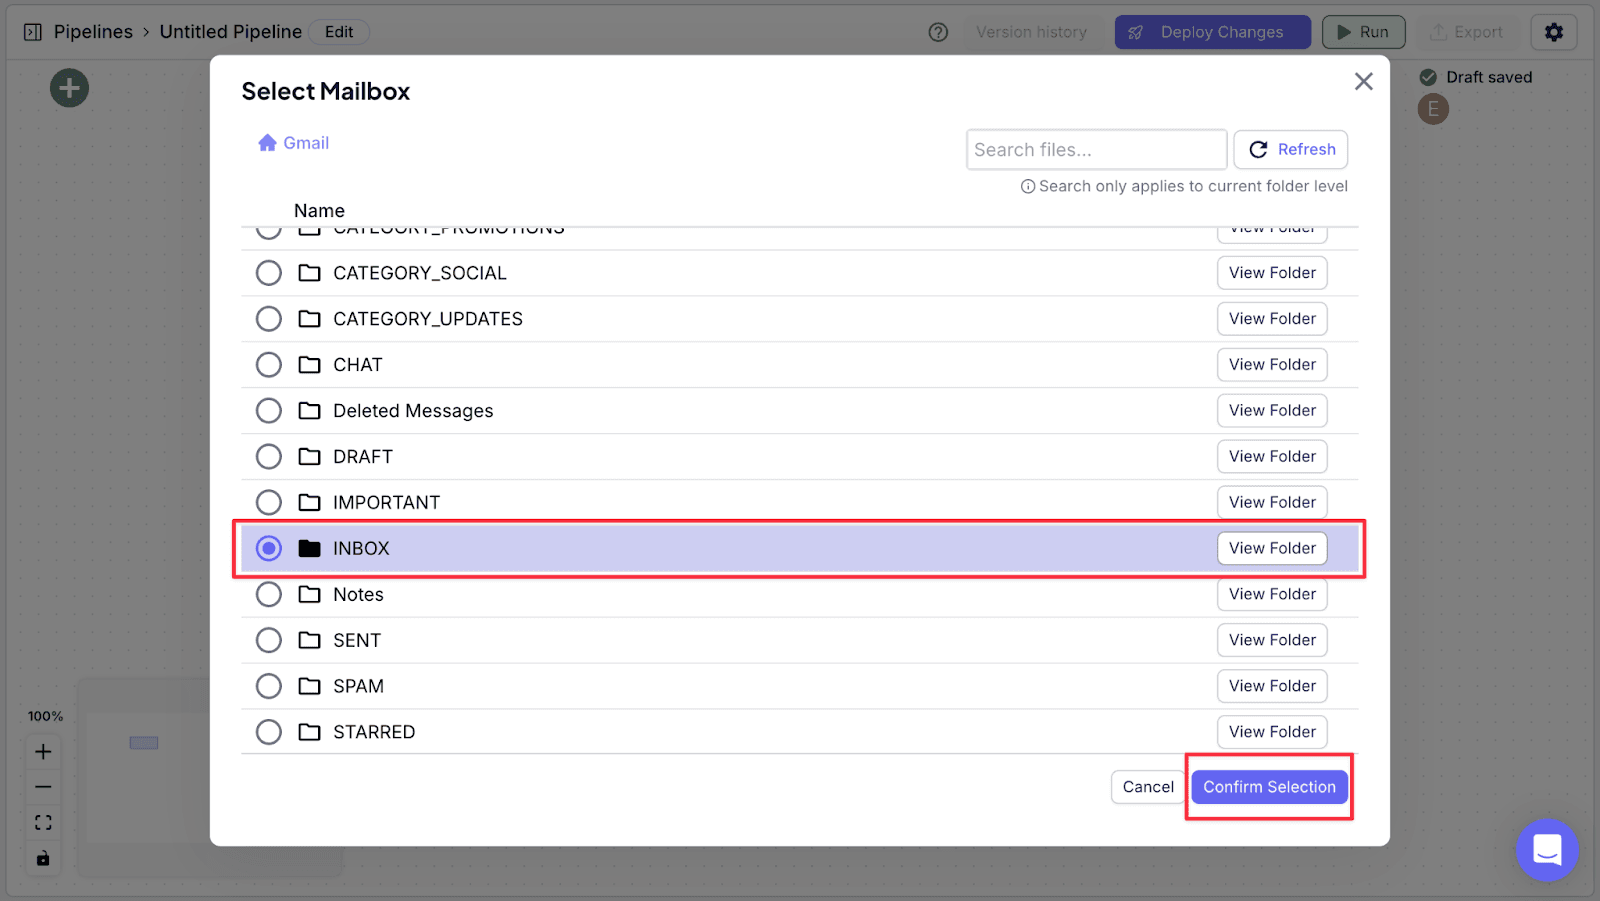
Step 6: Choose “INBOX” then click “Confirm Selection”. Here, this means that the pipeline will run whenever a new email enters the inbox.
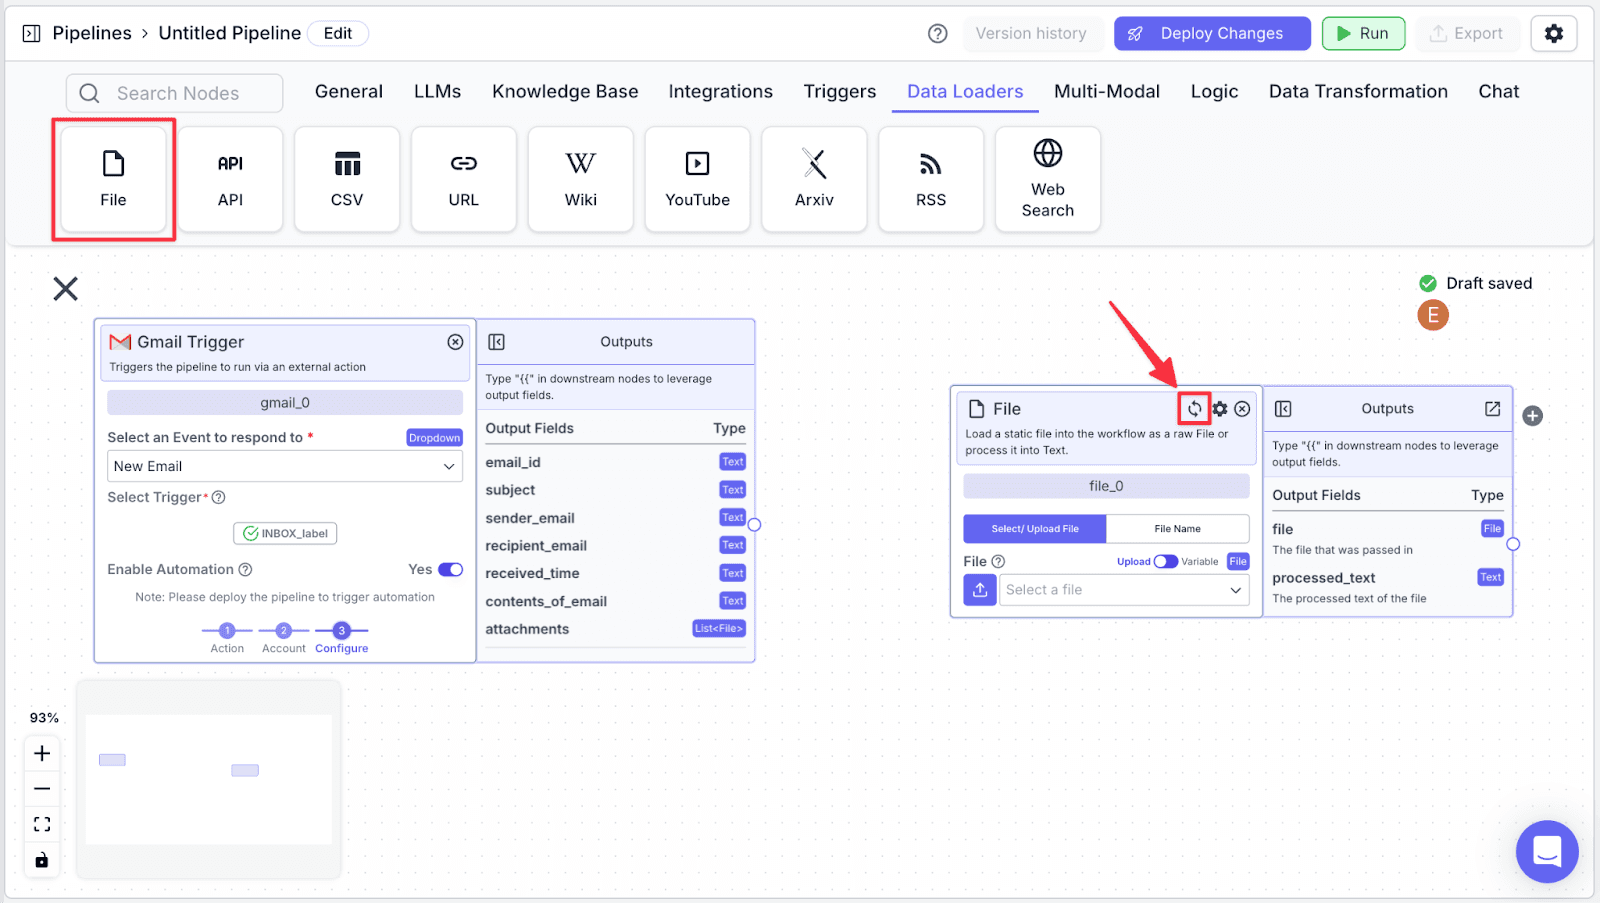
File Node
A file node allows the pipeline to read the file attachments (specifically, extract the raw text from the files).
Step 1: Take the “File” node under the “Data Loaders” section, then click on the “Enable List Mode” icon (top right of the node). This allows the File node to accept data type list of File, instead of File.
We need this given the attachment field in the gmail node is of type list of File and not file (given an email can have more than one attachment).
Step 2: Connect the “Gmail Trigger” node with the “File” node.
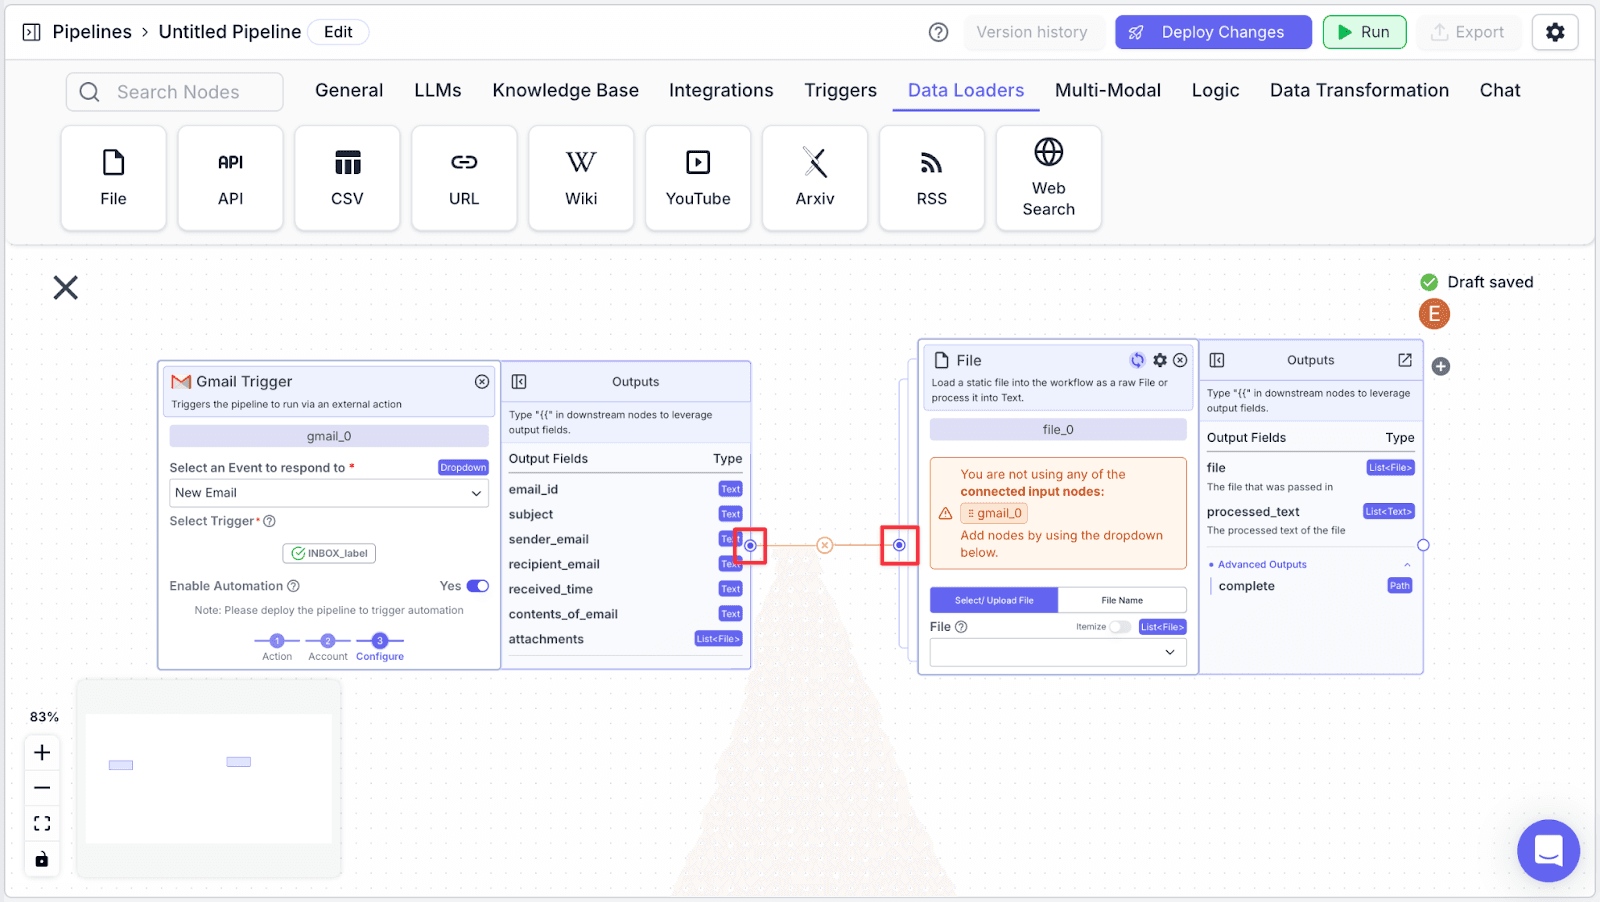
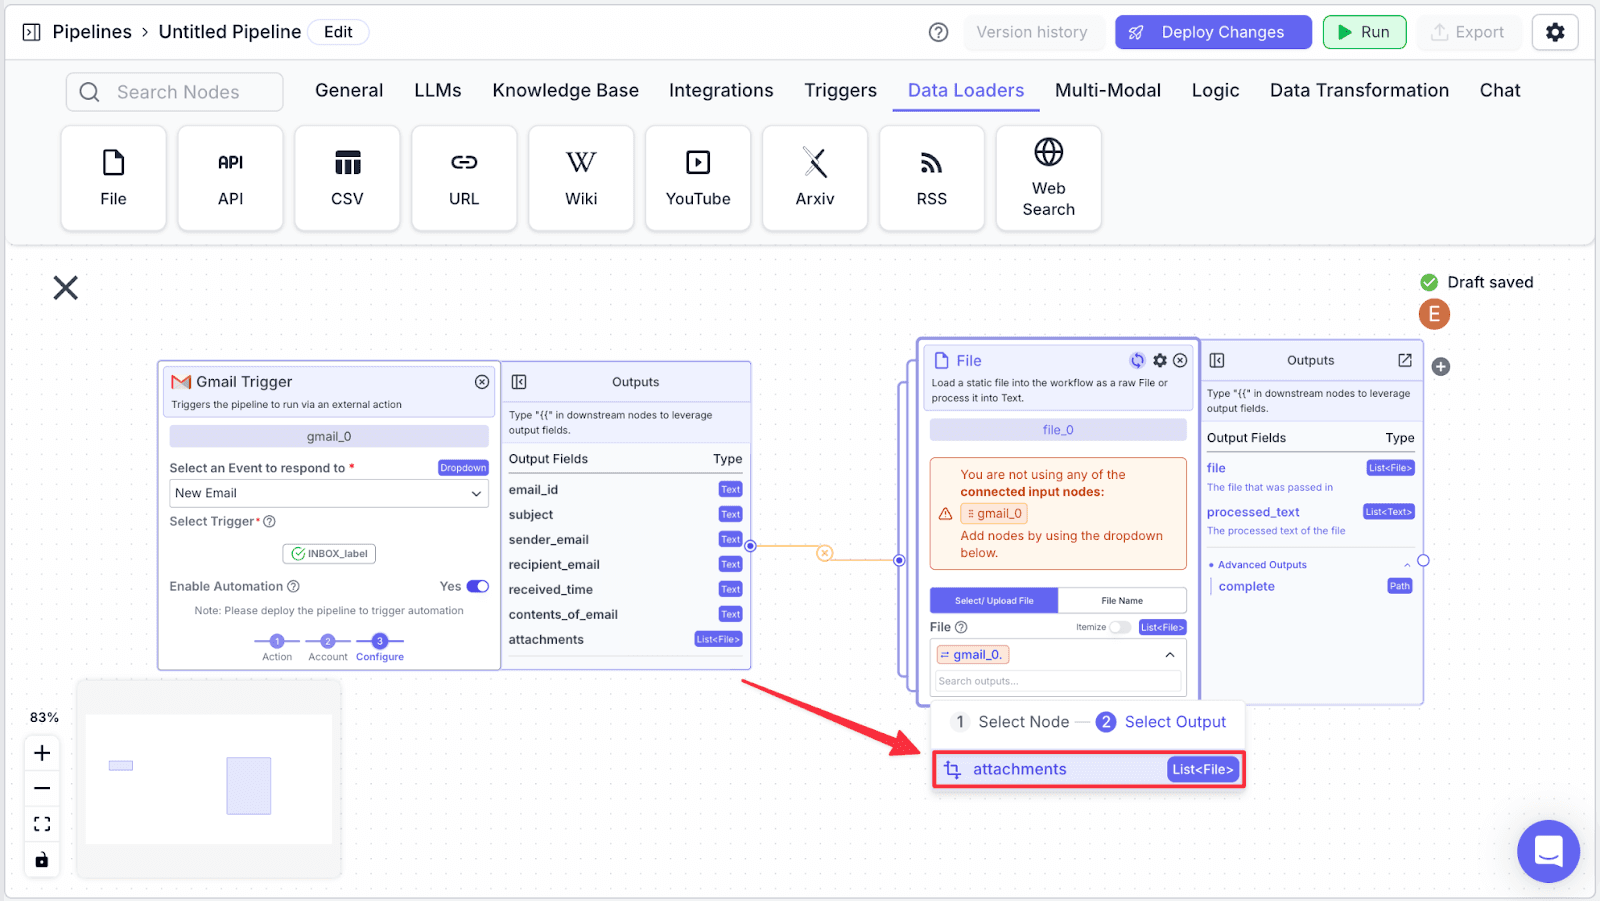
Step 3: Under the “File” field, select the “gmail_0” node.
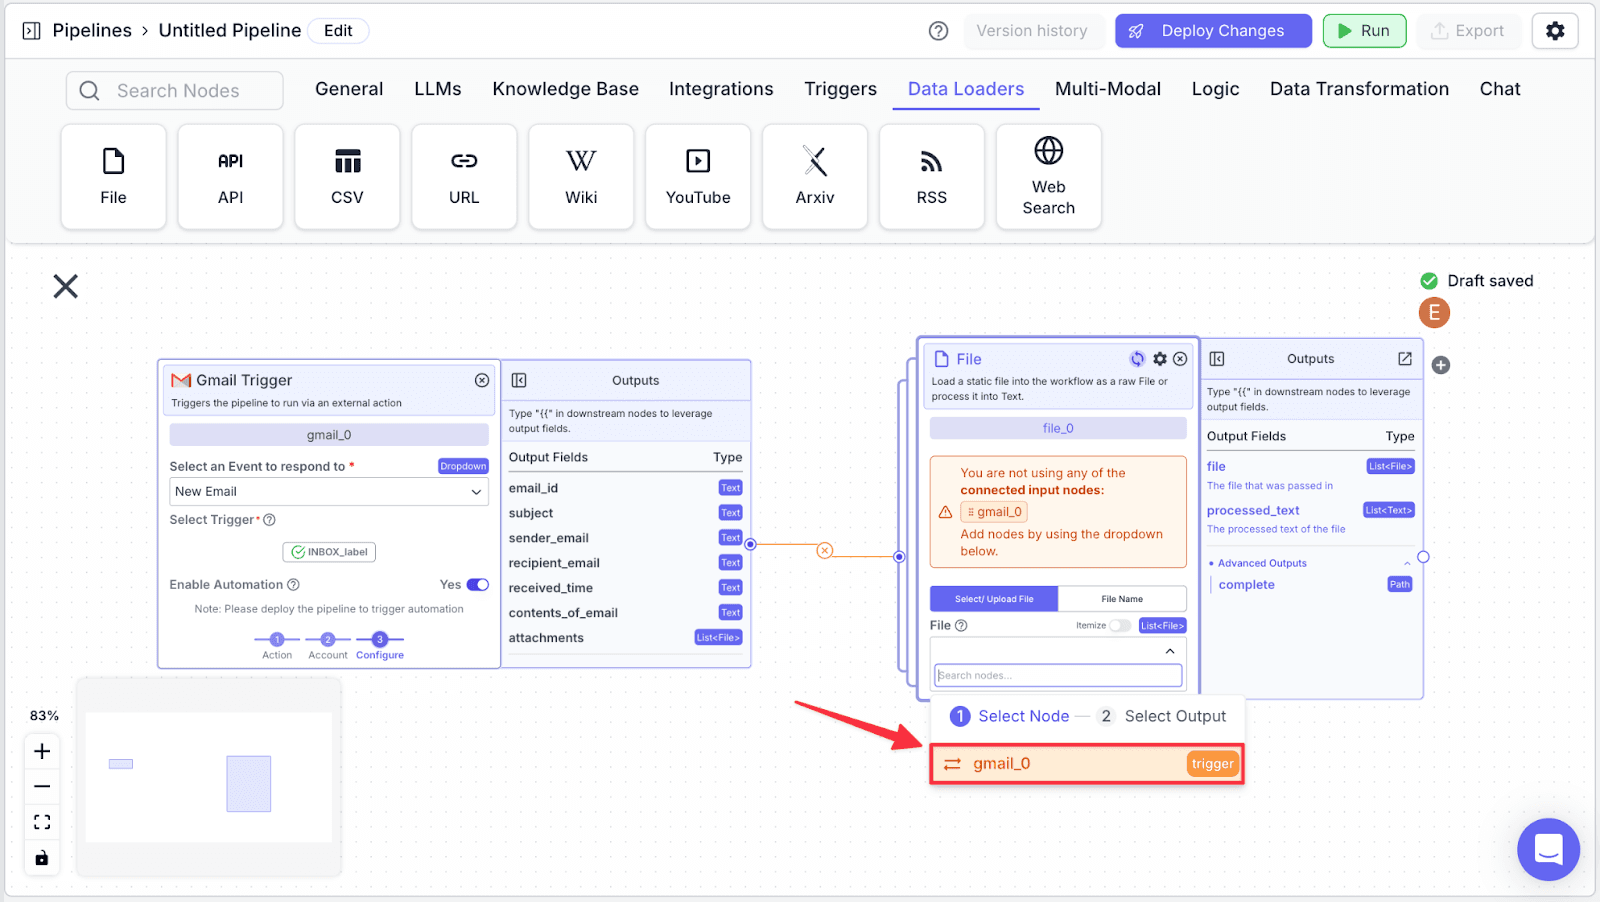
Step 4: After choosing the “gmail_0” node, click on “attachment”.
LLM Node (Extract Customer Information)
For the next step, we’re going to use a LLM to extract the customer information.
Step 1: Take an “OpenAI” node under the “LLMs” section.
Step 2: Connect the “File” node with the “OpenAI” node.
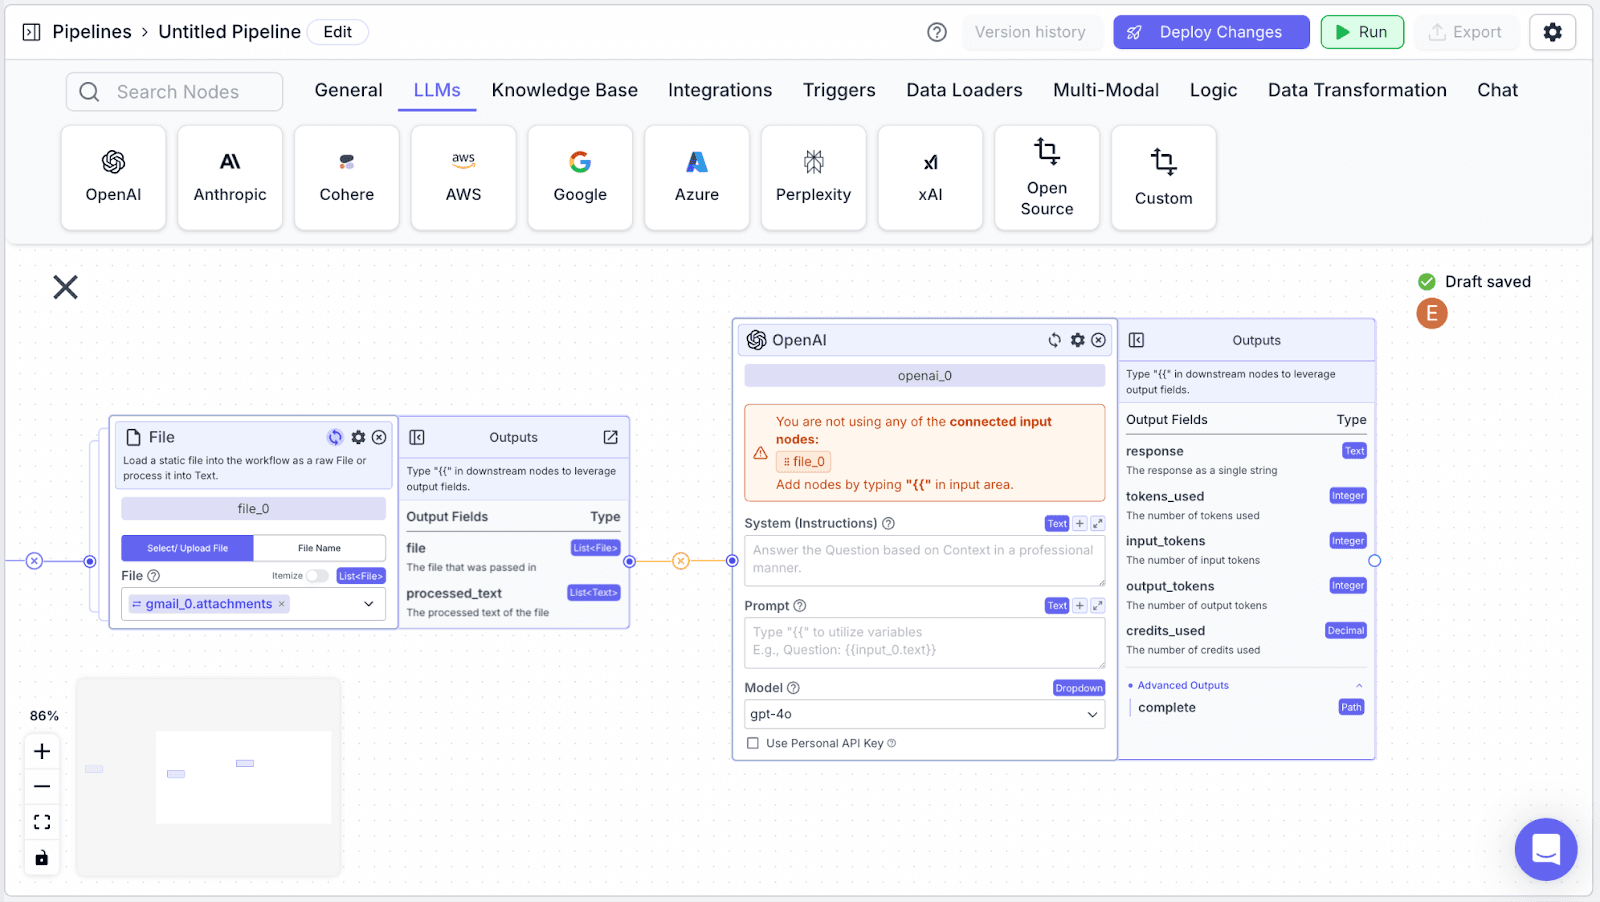
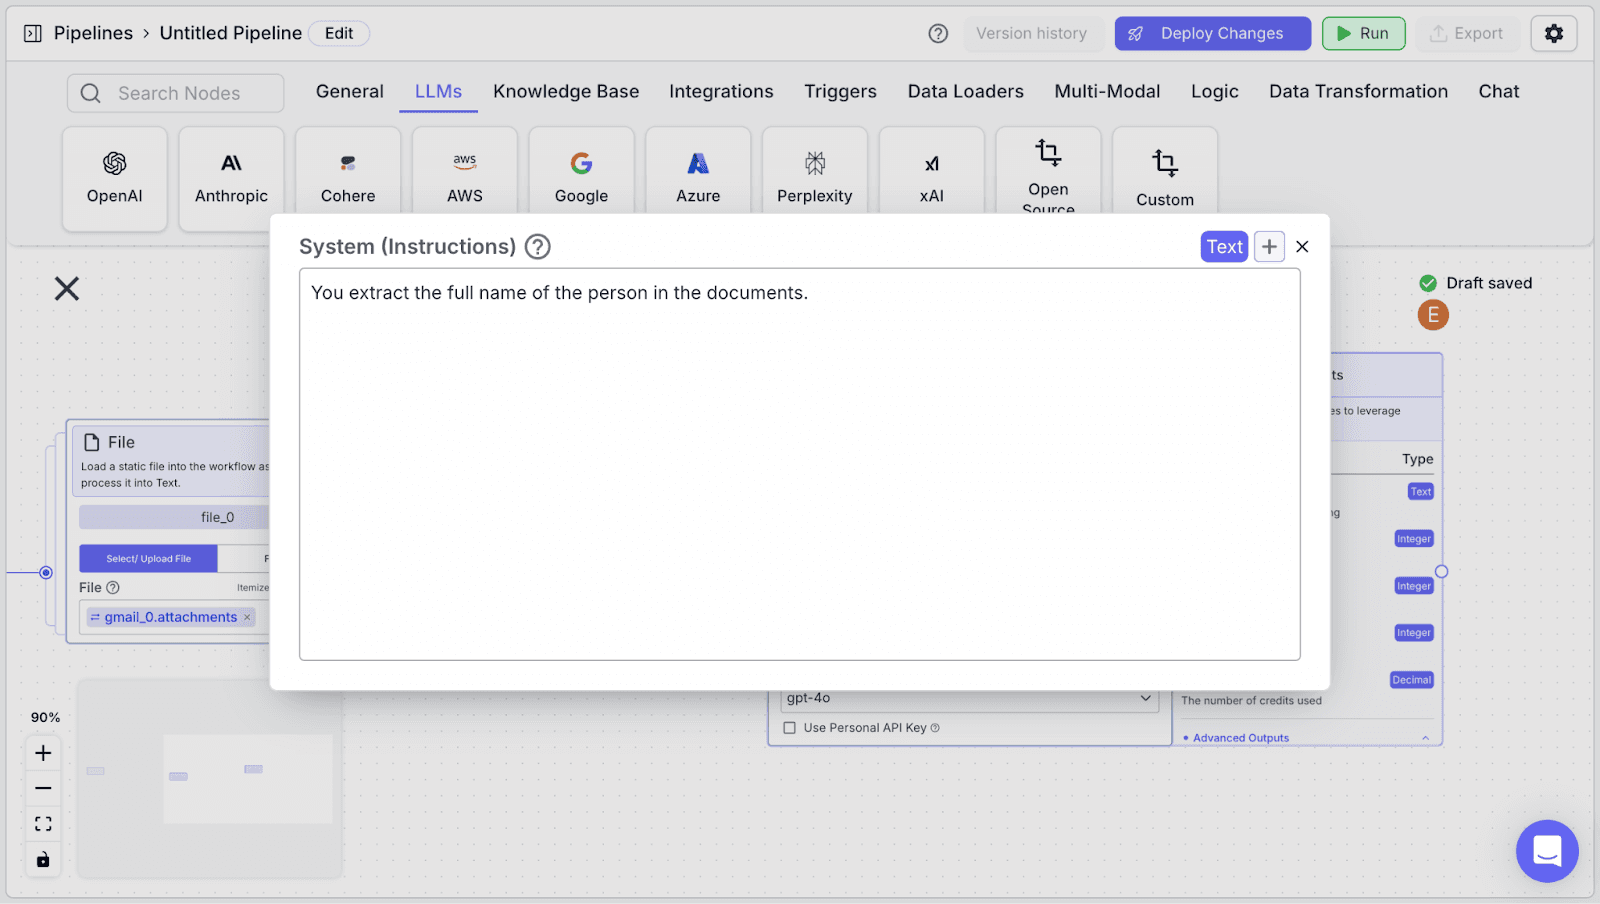
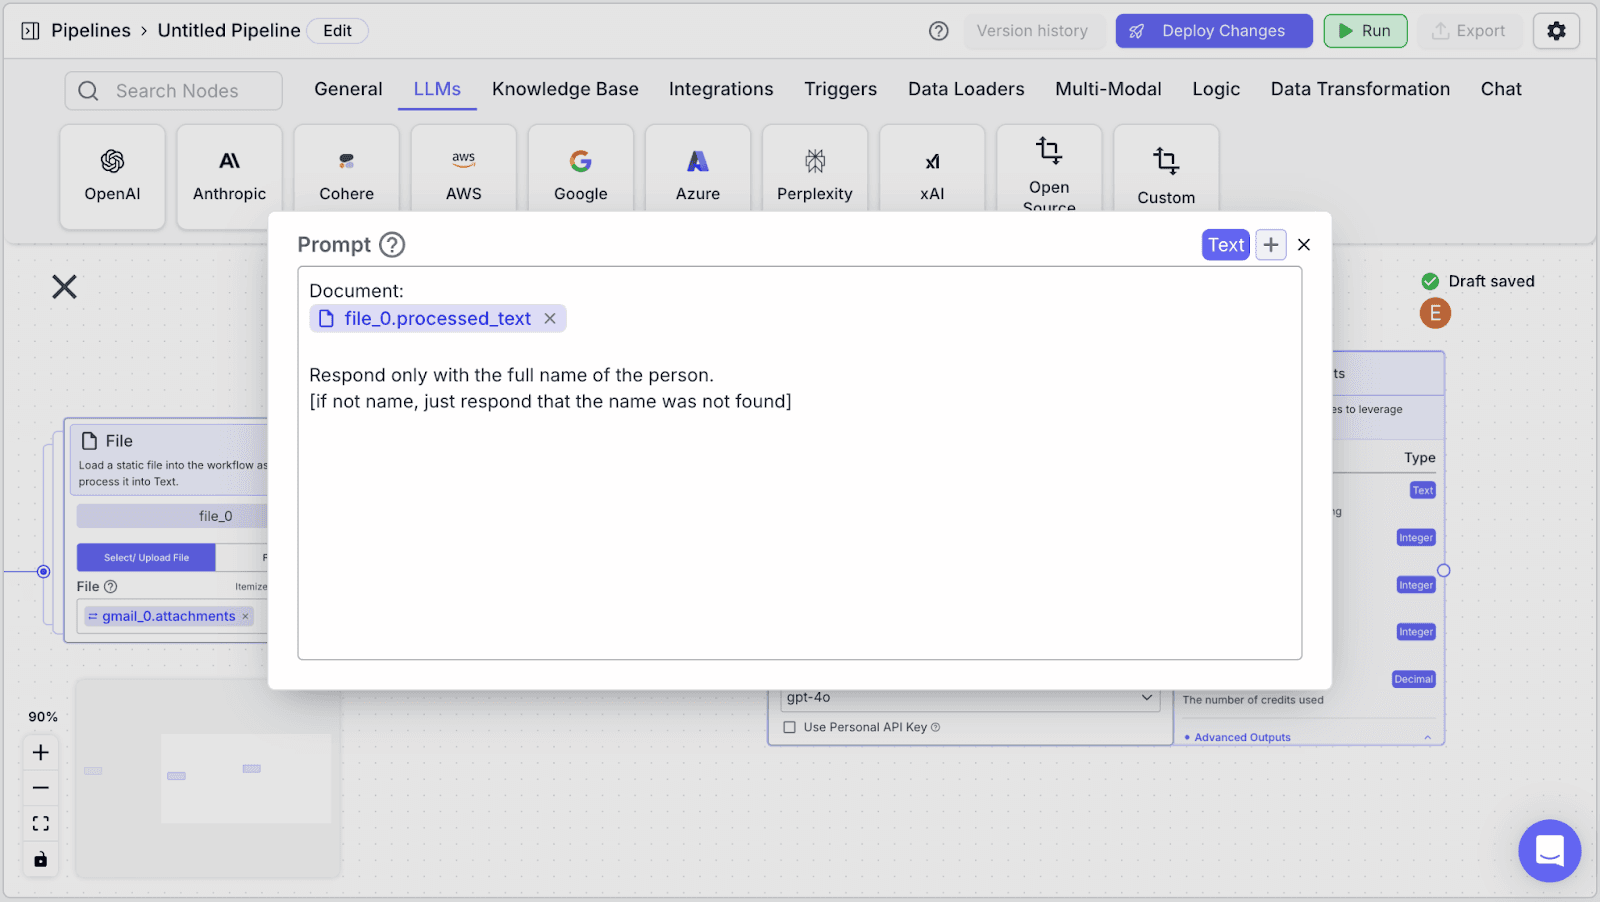
Step 3: The LLM node has two fields: “System (Instructions)” and “Prompt”.
“System (Instructions)” defines how you want the LLM to behave. You can use the instructions below:

Within the “Prompt”, you can pass data from other nodes:
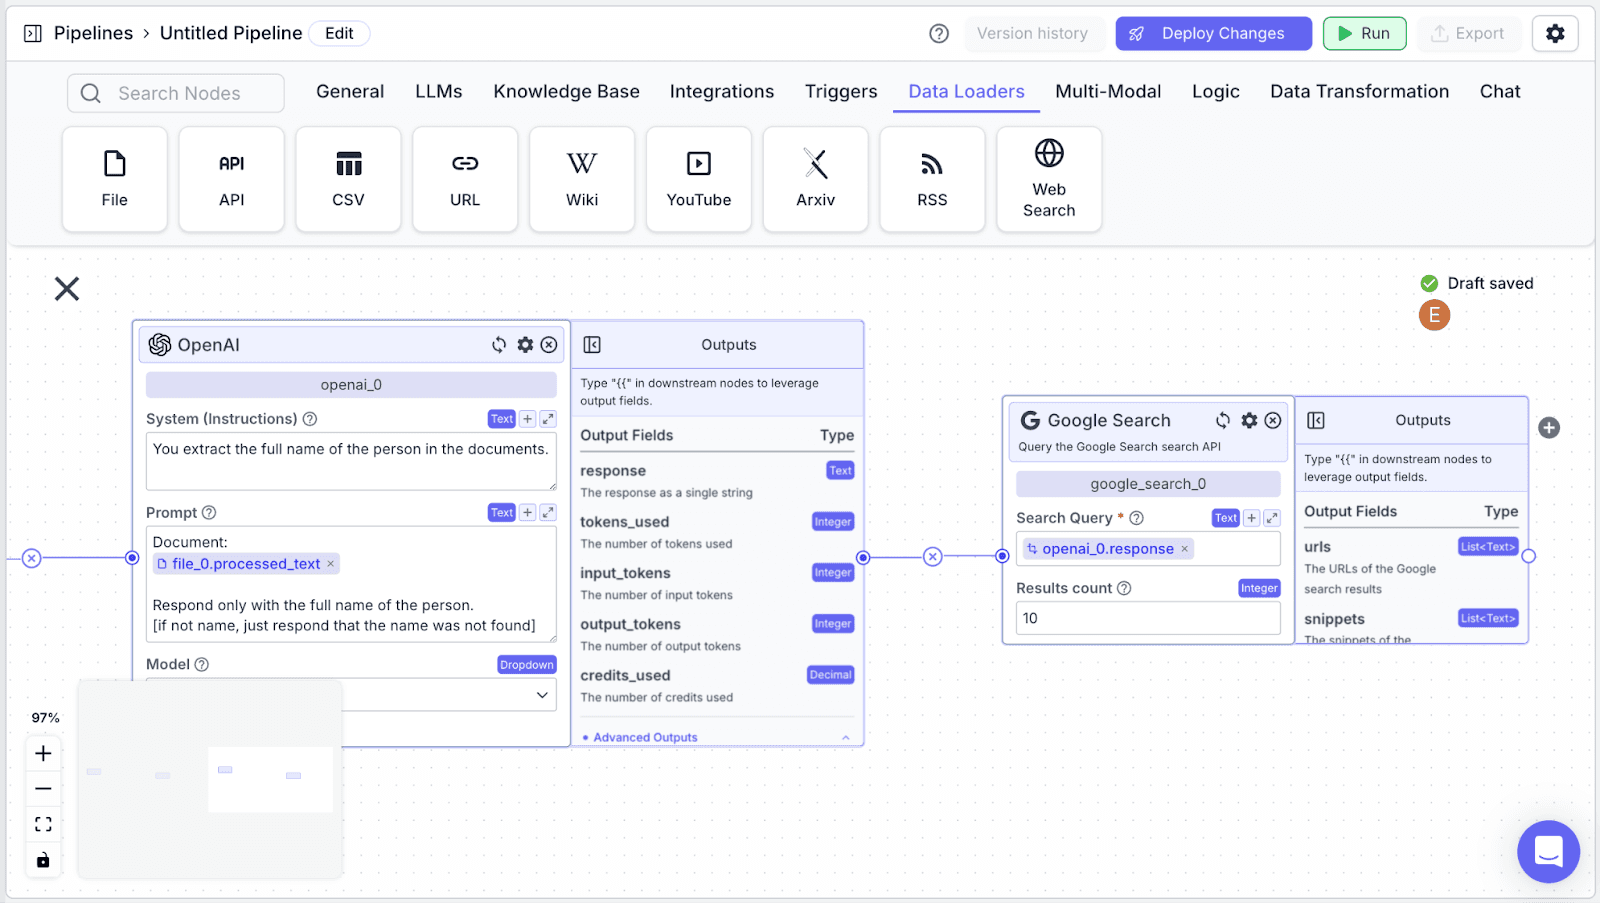
Web Search Node
Web Search Node allows us to find any relevant information about the person on the internet.
Step 1: Take a “Web Search” node under the “Data Loaders” section, then click on “Google Search”.
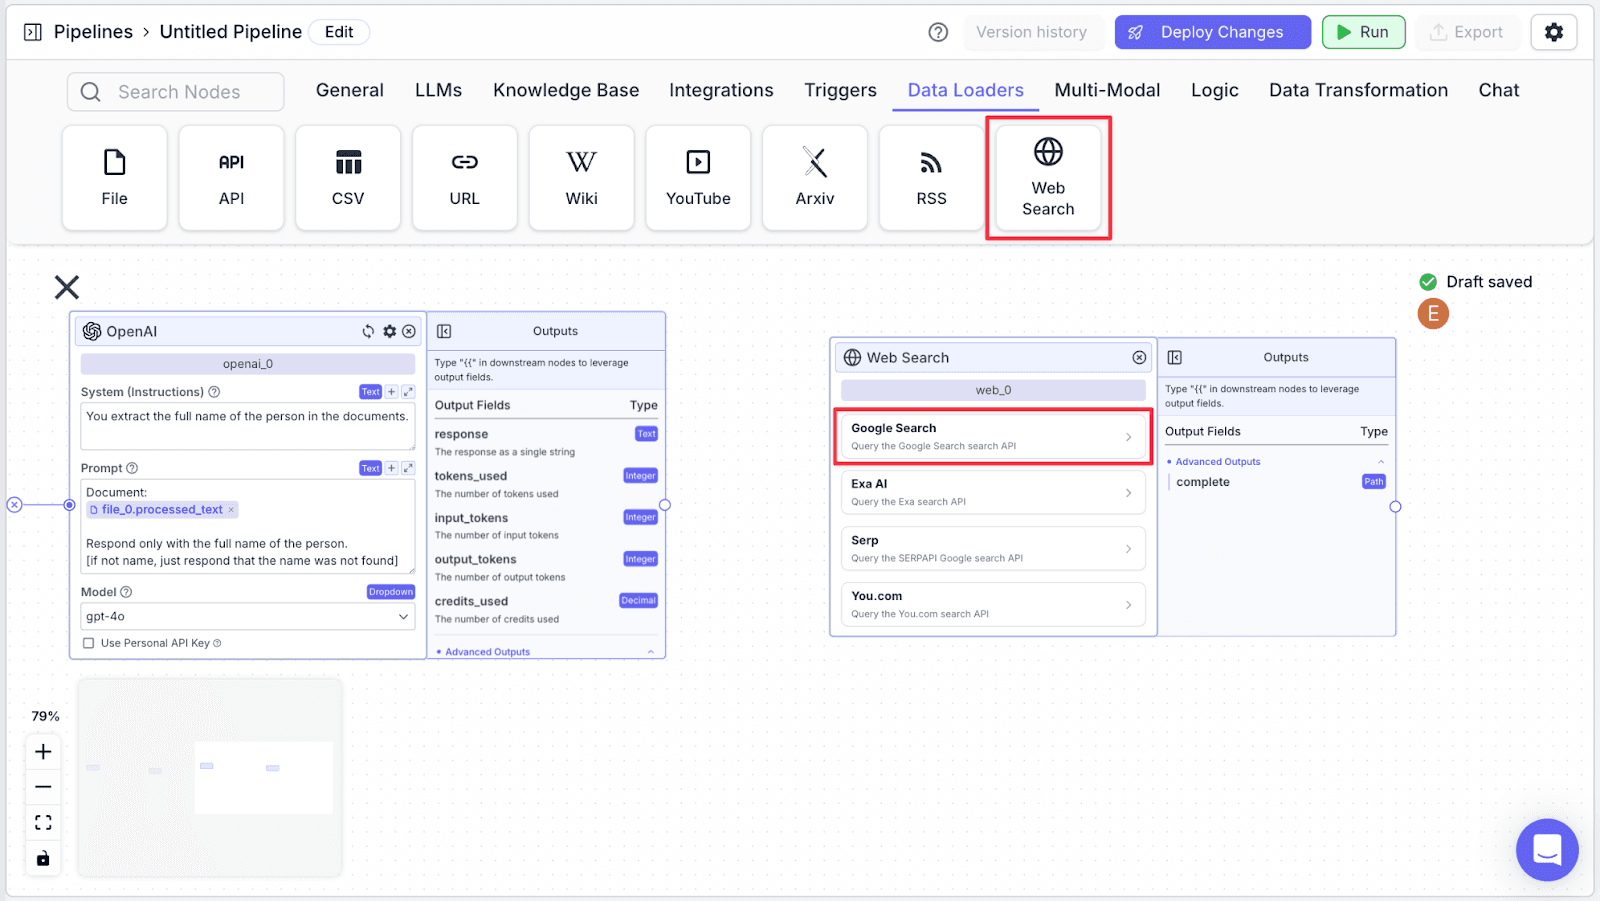
Step 2: Connect the “openai_0” node with the “google_search_0” node. The “Search Query” field will be automatically filled with “openai_0.response”.
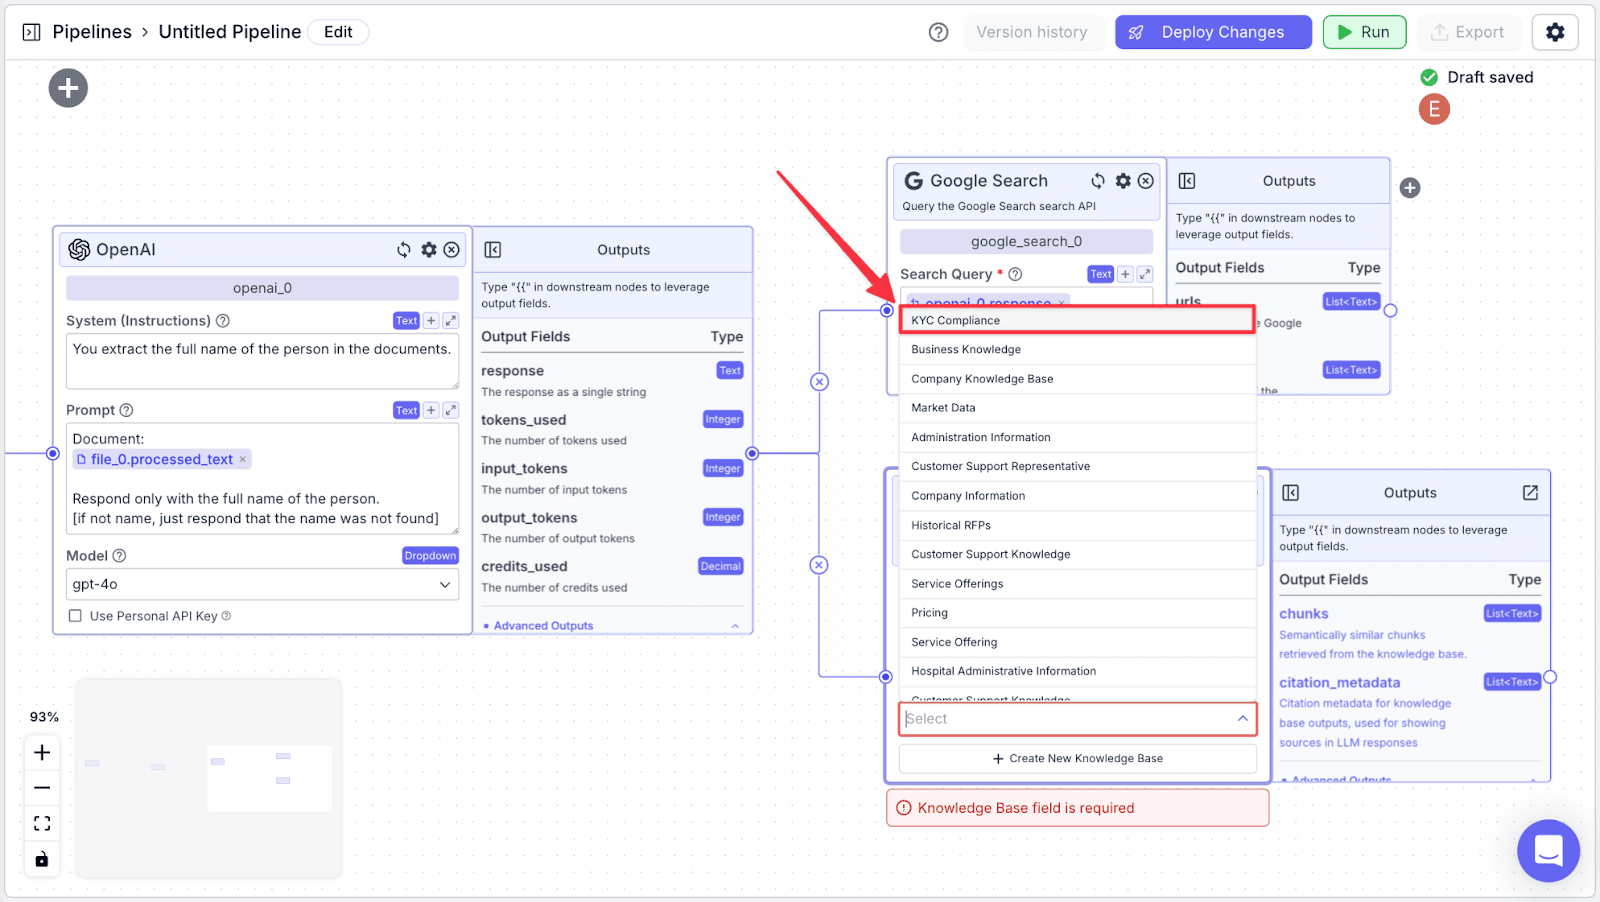
Knowledge Base
Knowledge Base node allows the pipeline to access our compliance knowledge base.
Step 1: Take the “Knowledge” node under the “Knowledge Base” section. The new node will be under the name of “knowledge_base_0”.
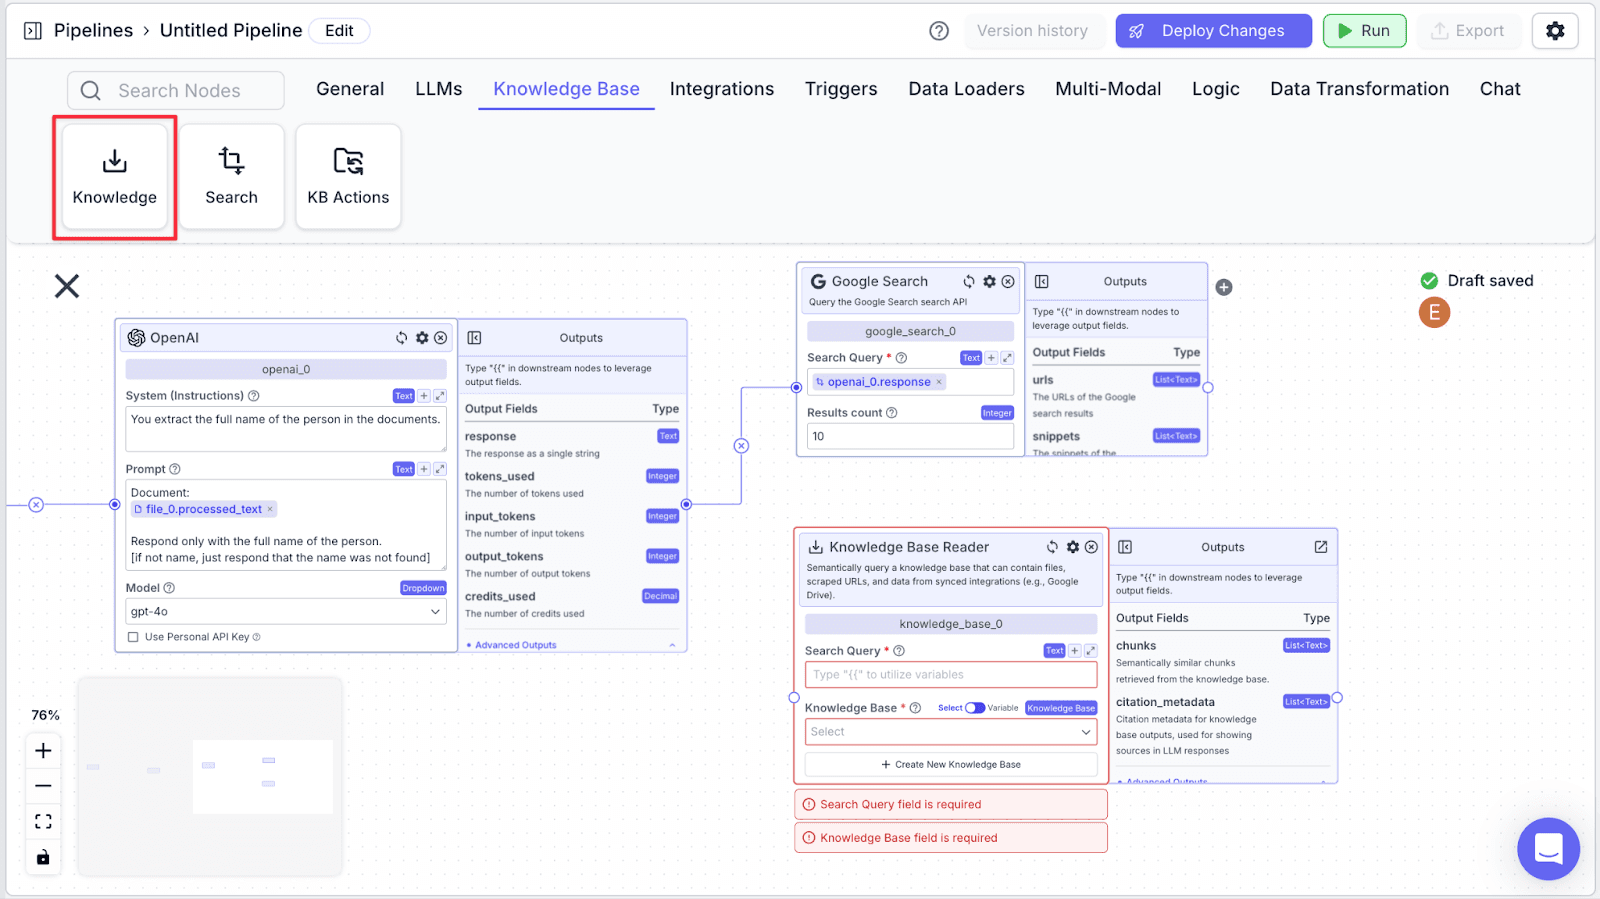
Step 2: Connect the “openai_0” node with the “knowledge_base_0”. Then, under the “Knowledge Base” field, click the drop-down.
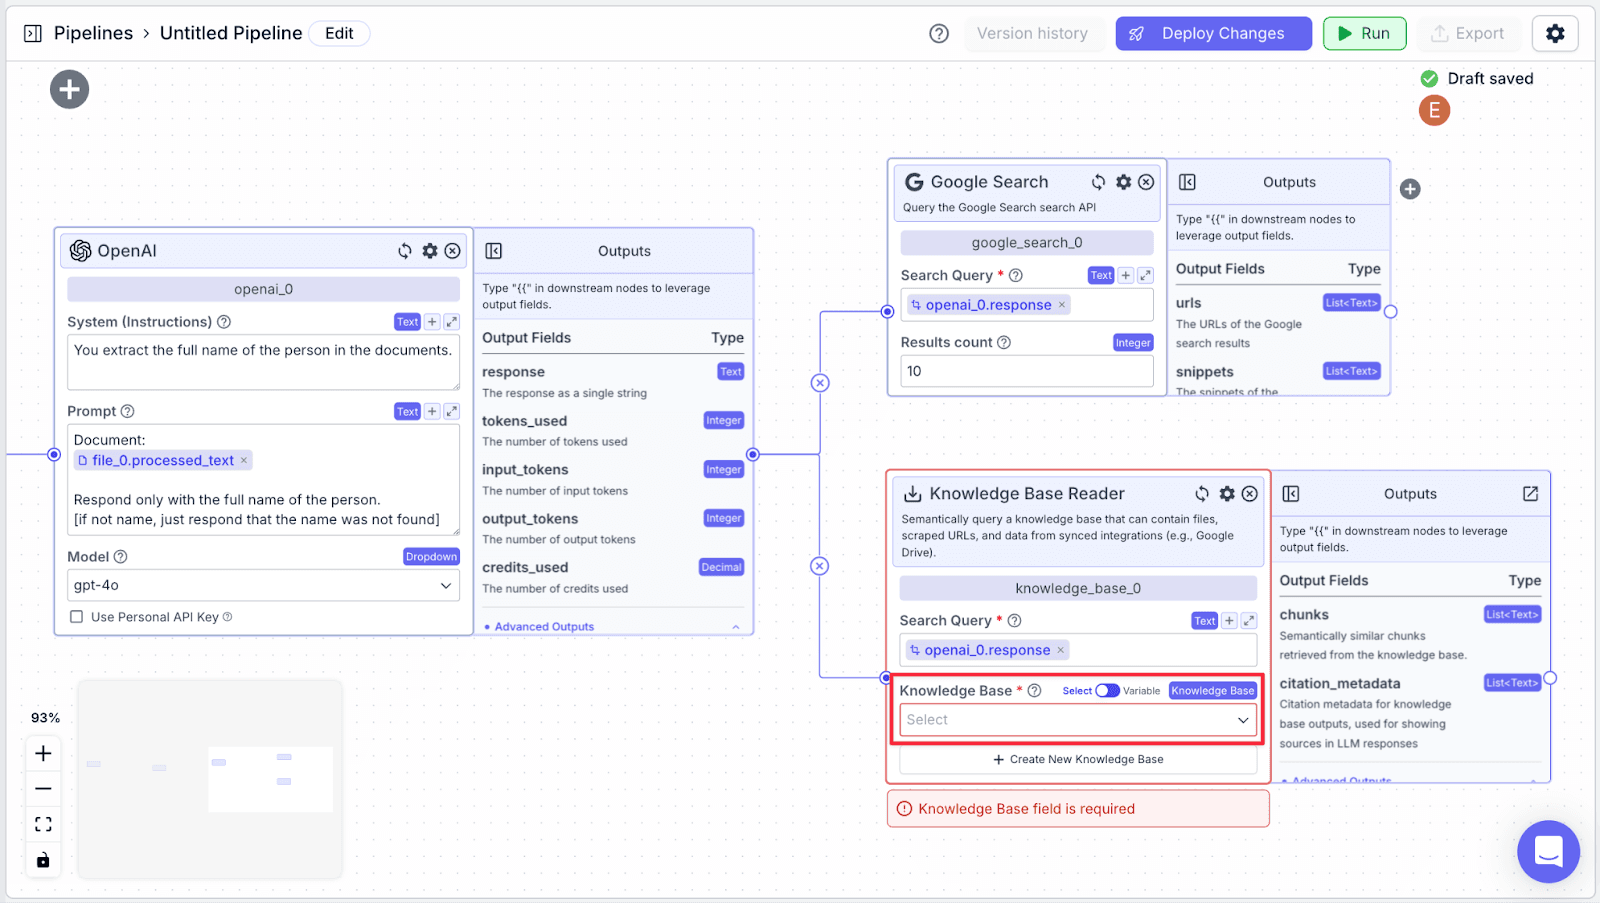
Step 3: Select the knowledge base we’ve just created previously.
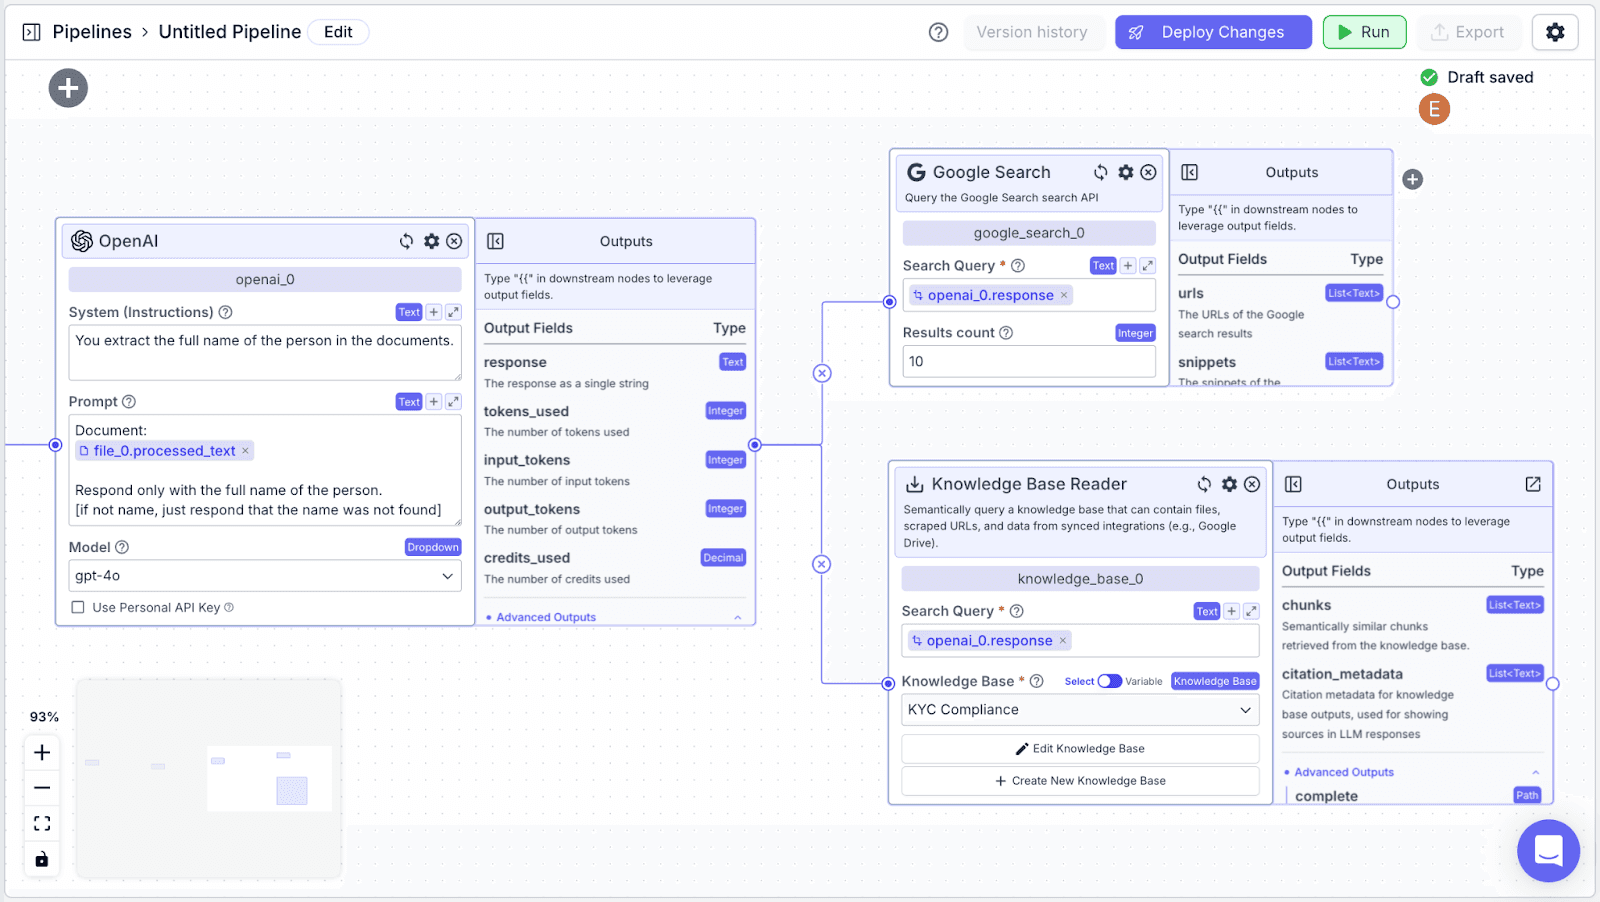
Your pipeline should look like the image below.
LLM Node (Summarize Findings)
We’re going to add another LLM to summarize findings from “google_search_0” and “knowledge_base_0” by outputting a JSON of relevant due diligence fields.
Step 1: Take another “OpenAI” node, it will be under the name of “openai_1” and connect it with “google_search_0” and “knowledge_base_0”.
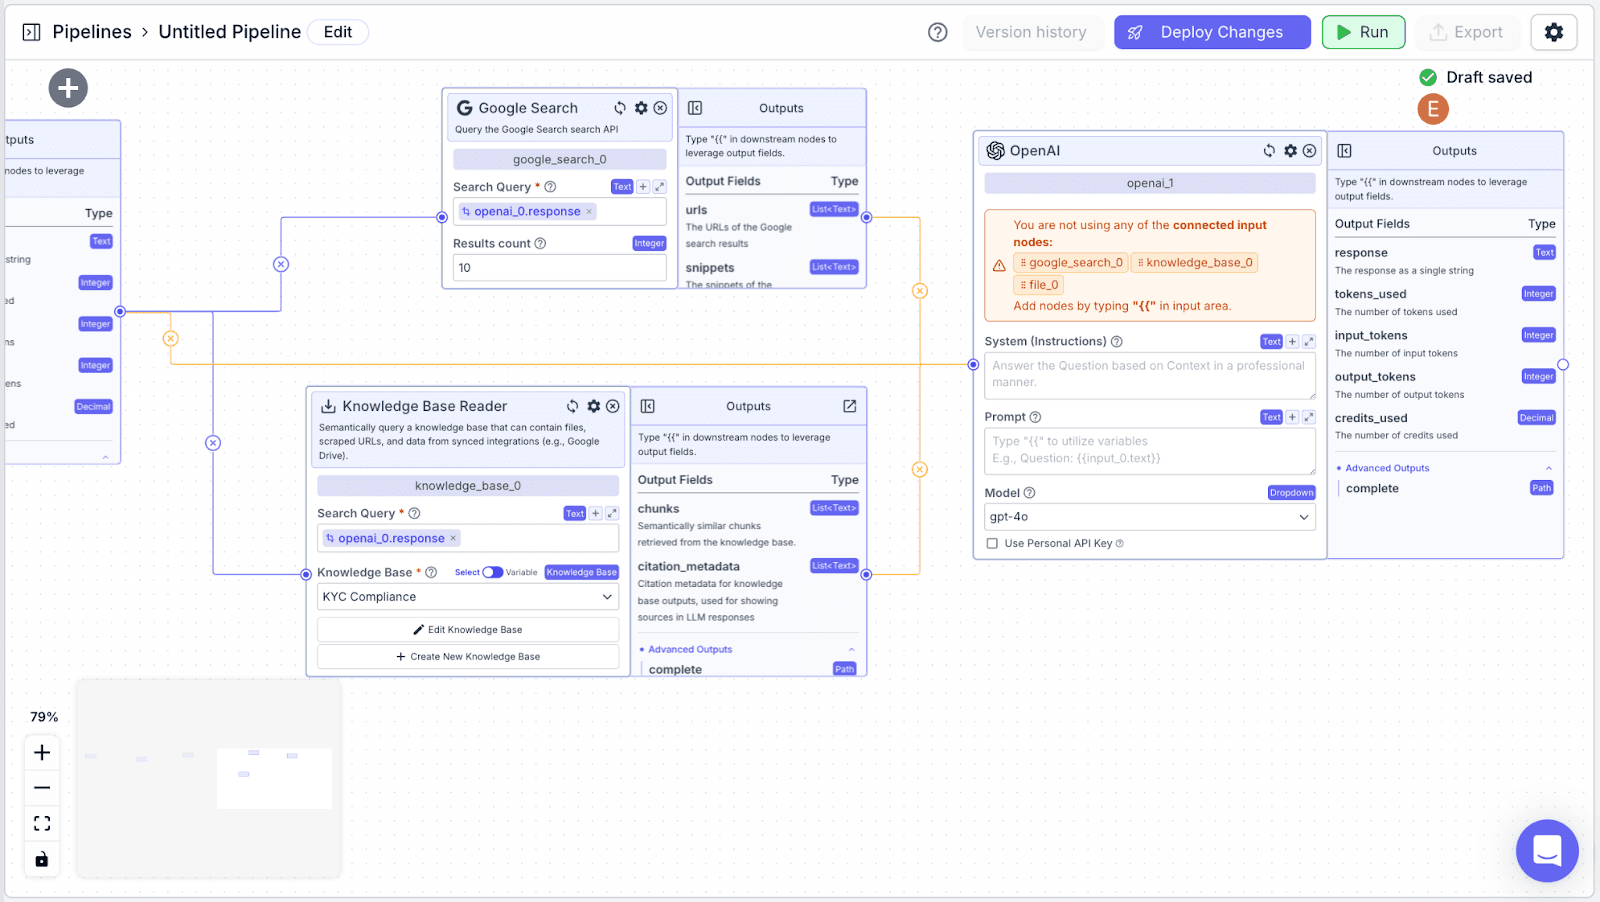
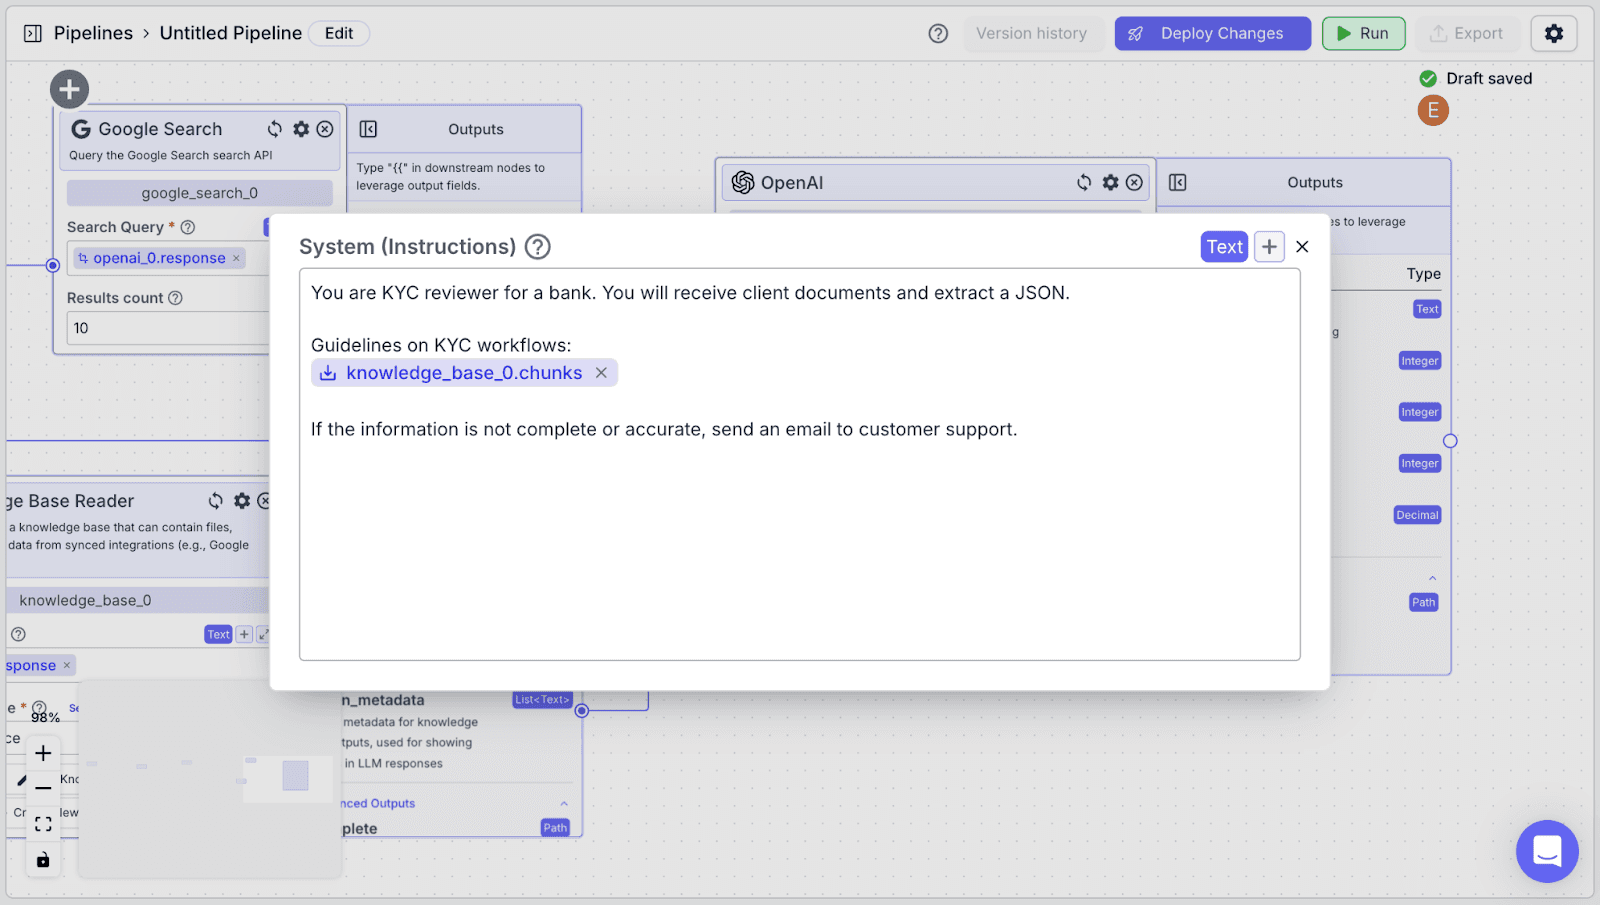
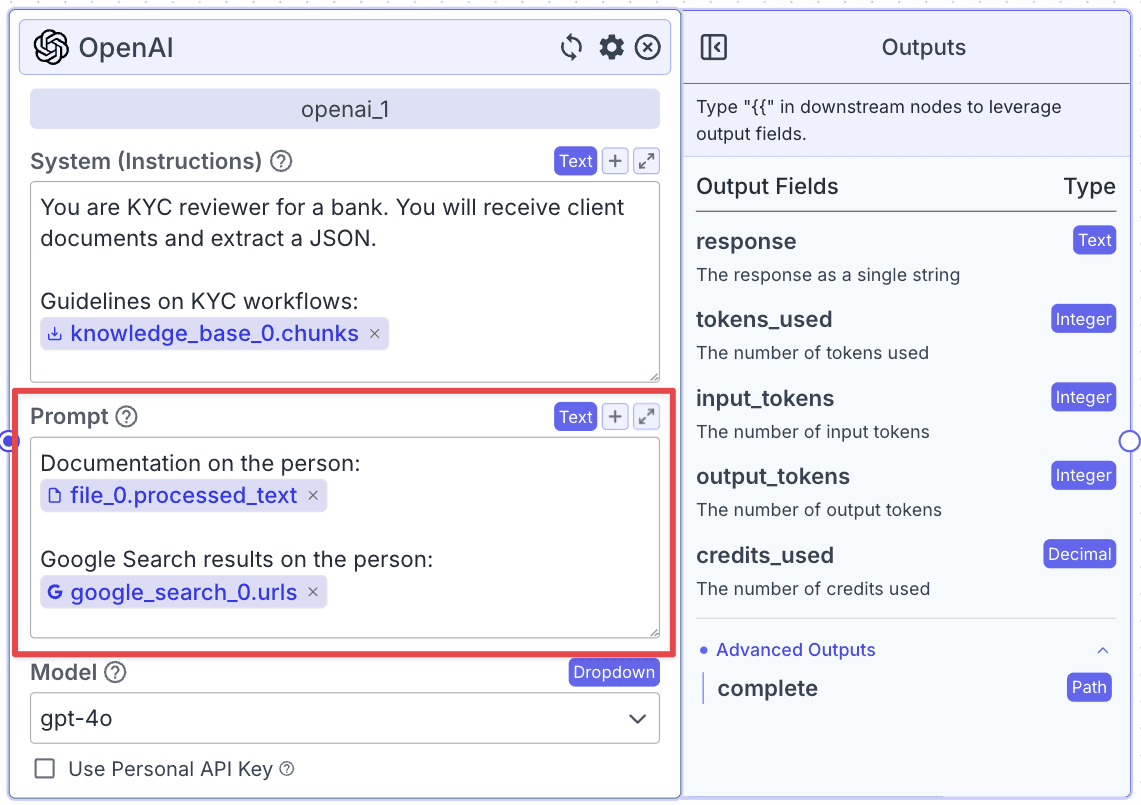
Step 2: Now, let's configure the “System (Instruction)” and the “Prompt” of the “openai_1” node.
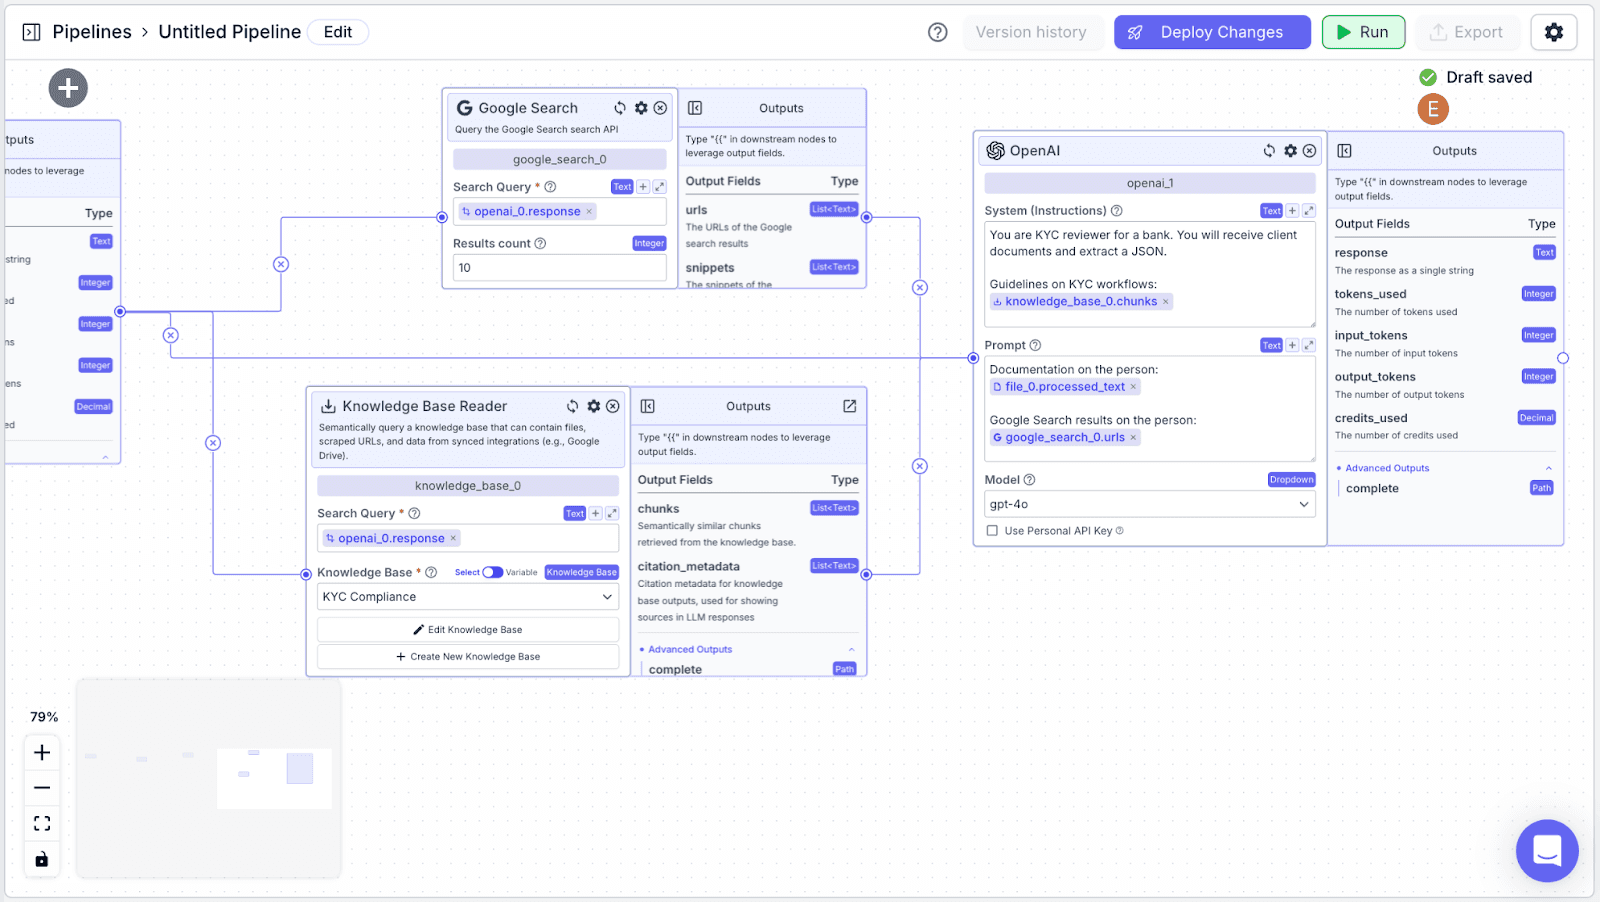
For “System (Instructions)”, you can use the instructions below:
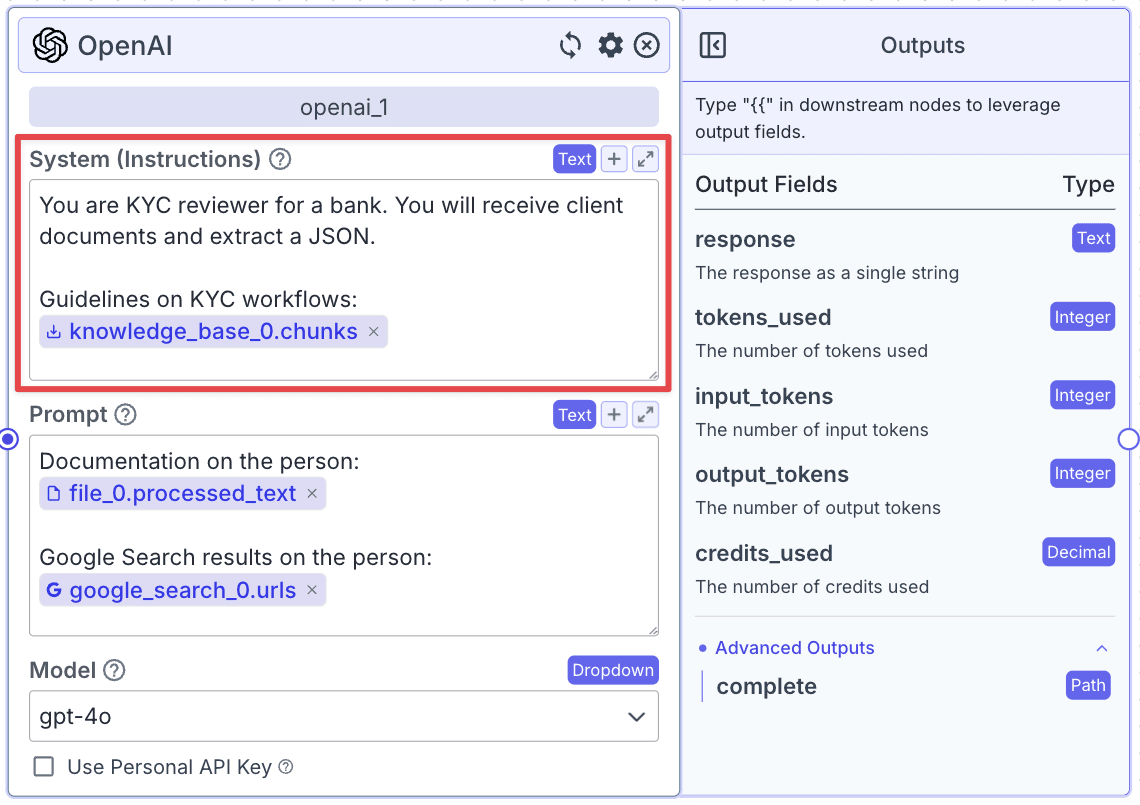
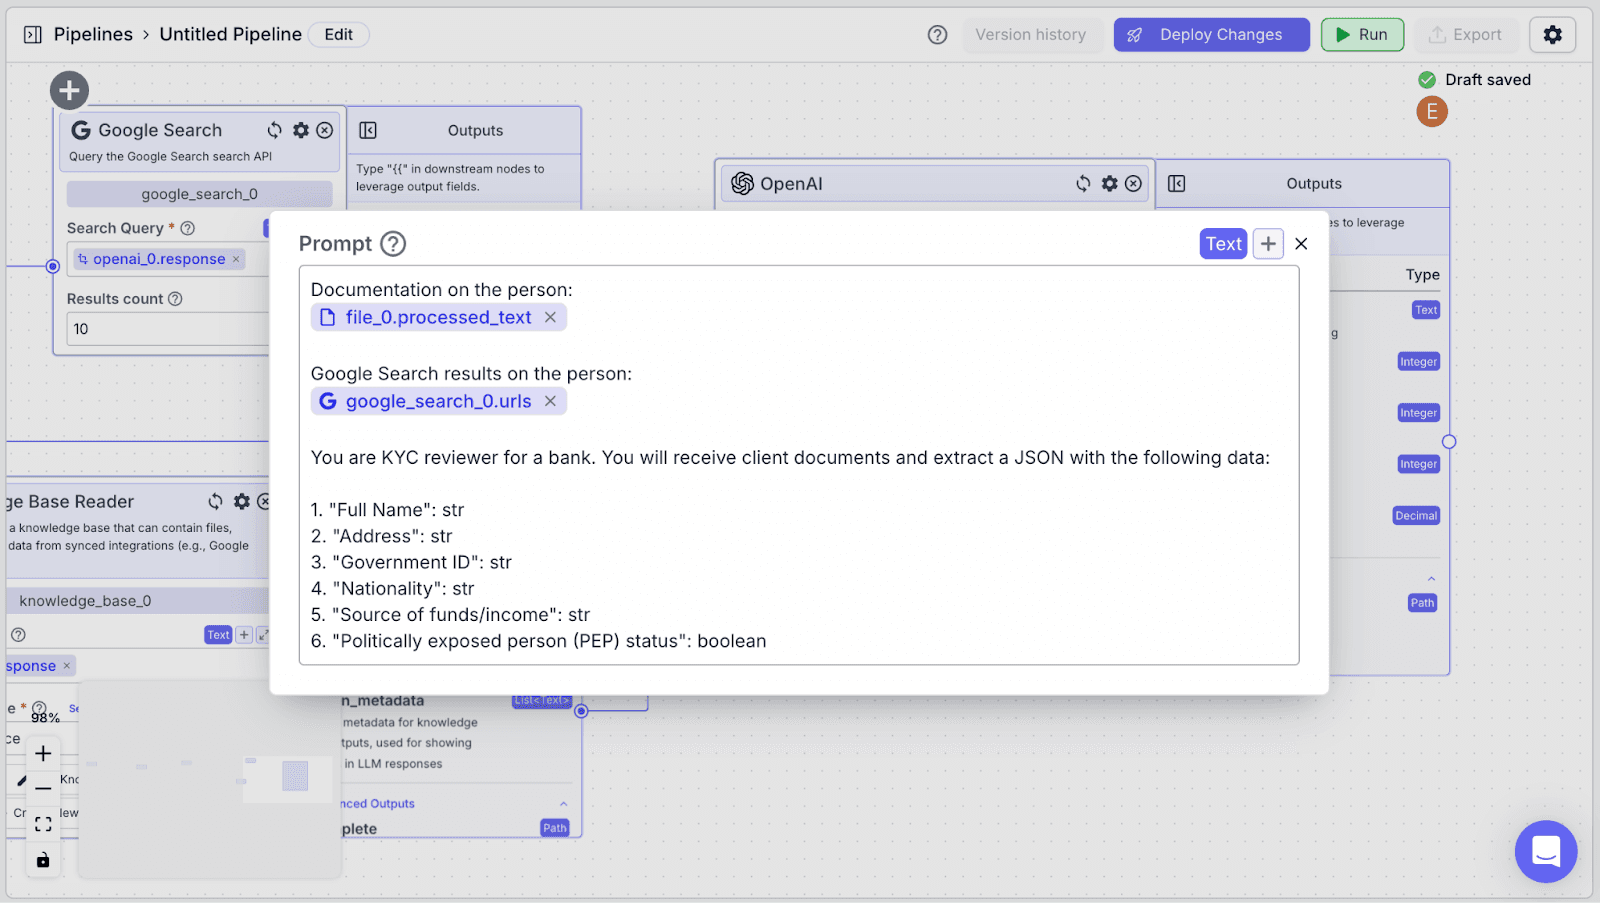
For “Prompt”, you can use the instructions below:
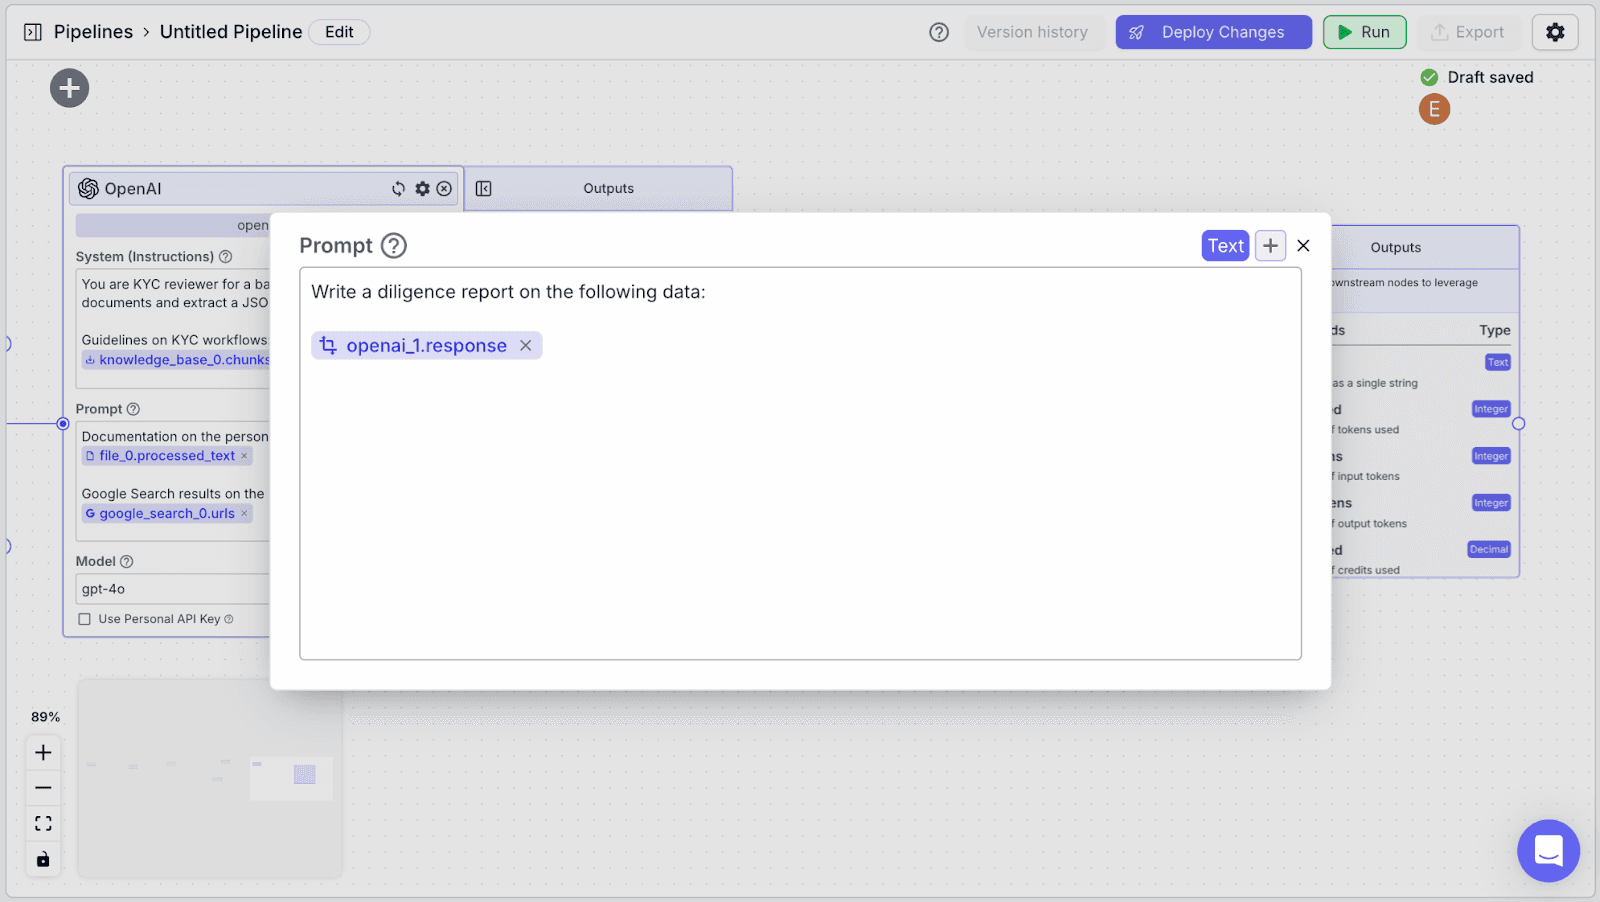
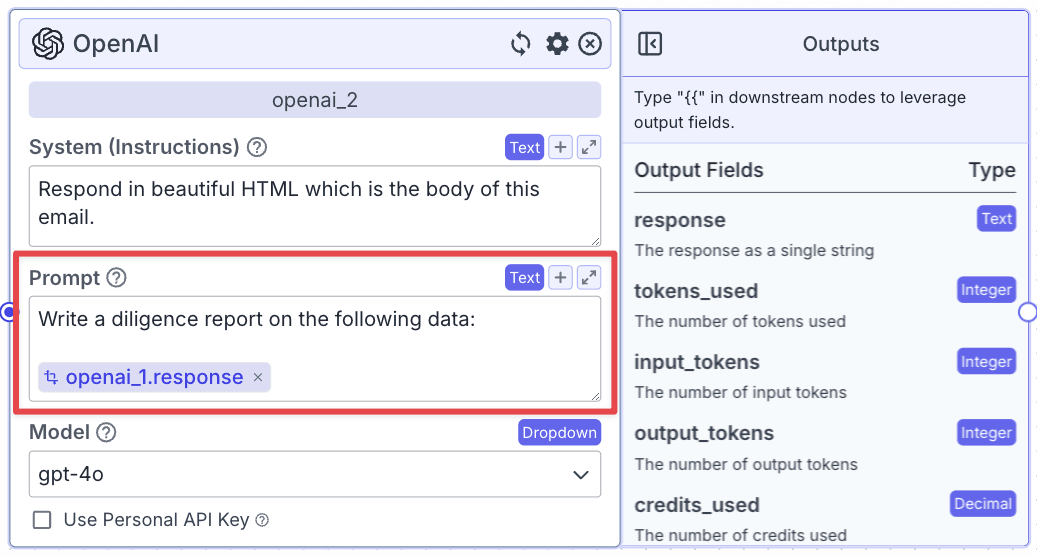
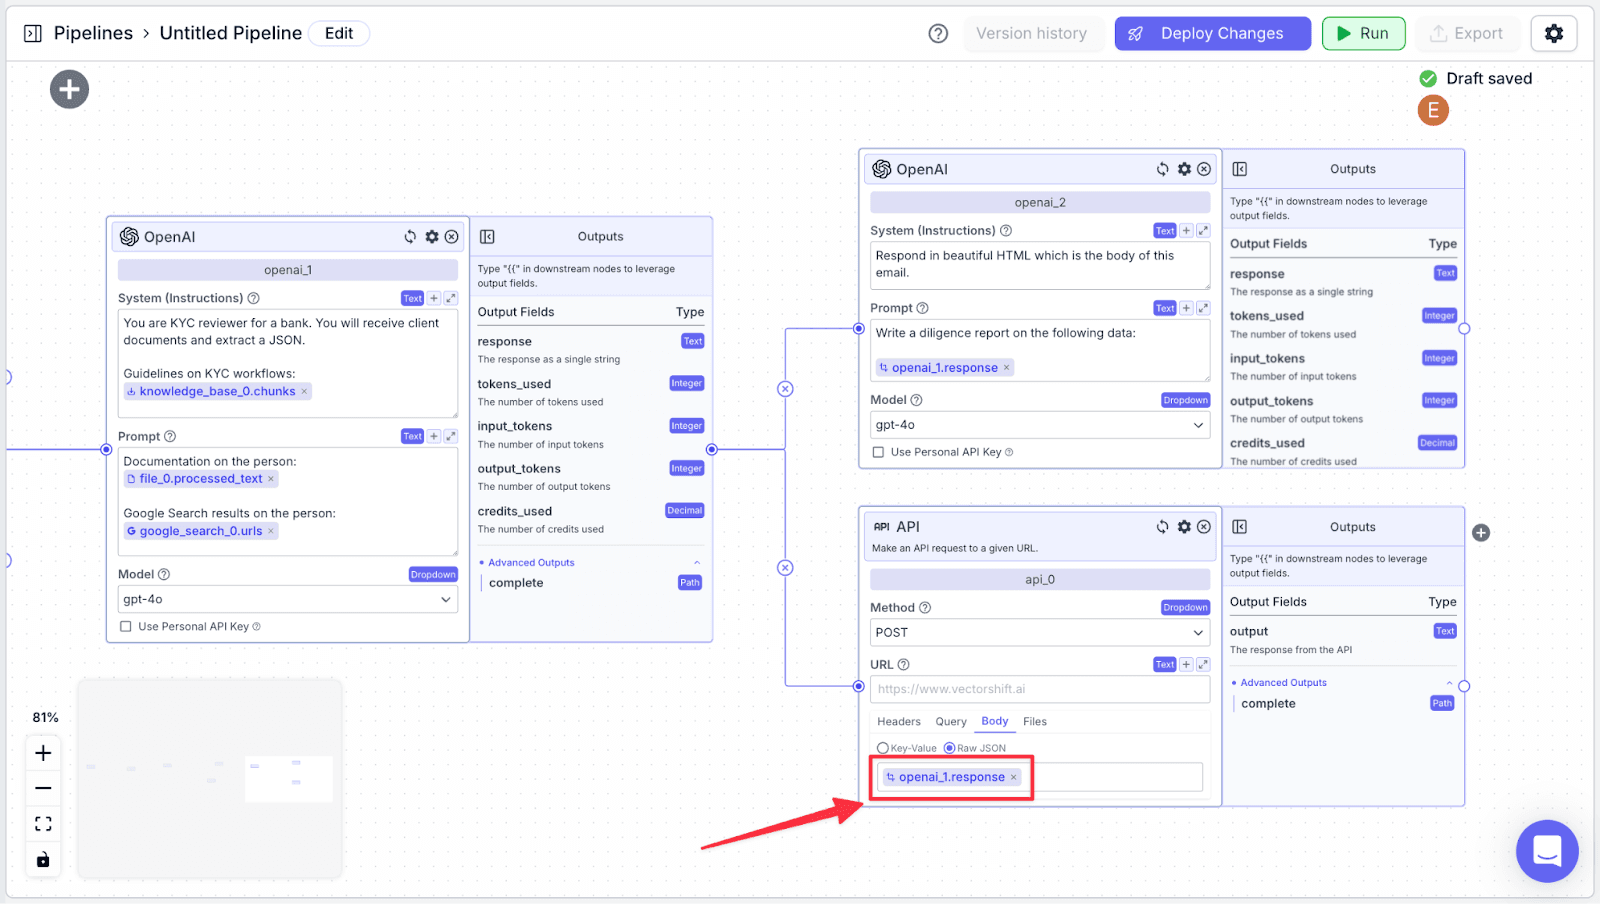
LLM Node (Generate Report)
We need another LLM node to generate a comprehensive report, which will later be sent via email.
Step 1: Take an OpenAI node (“openai_2”) and connect it with “openai_1”.

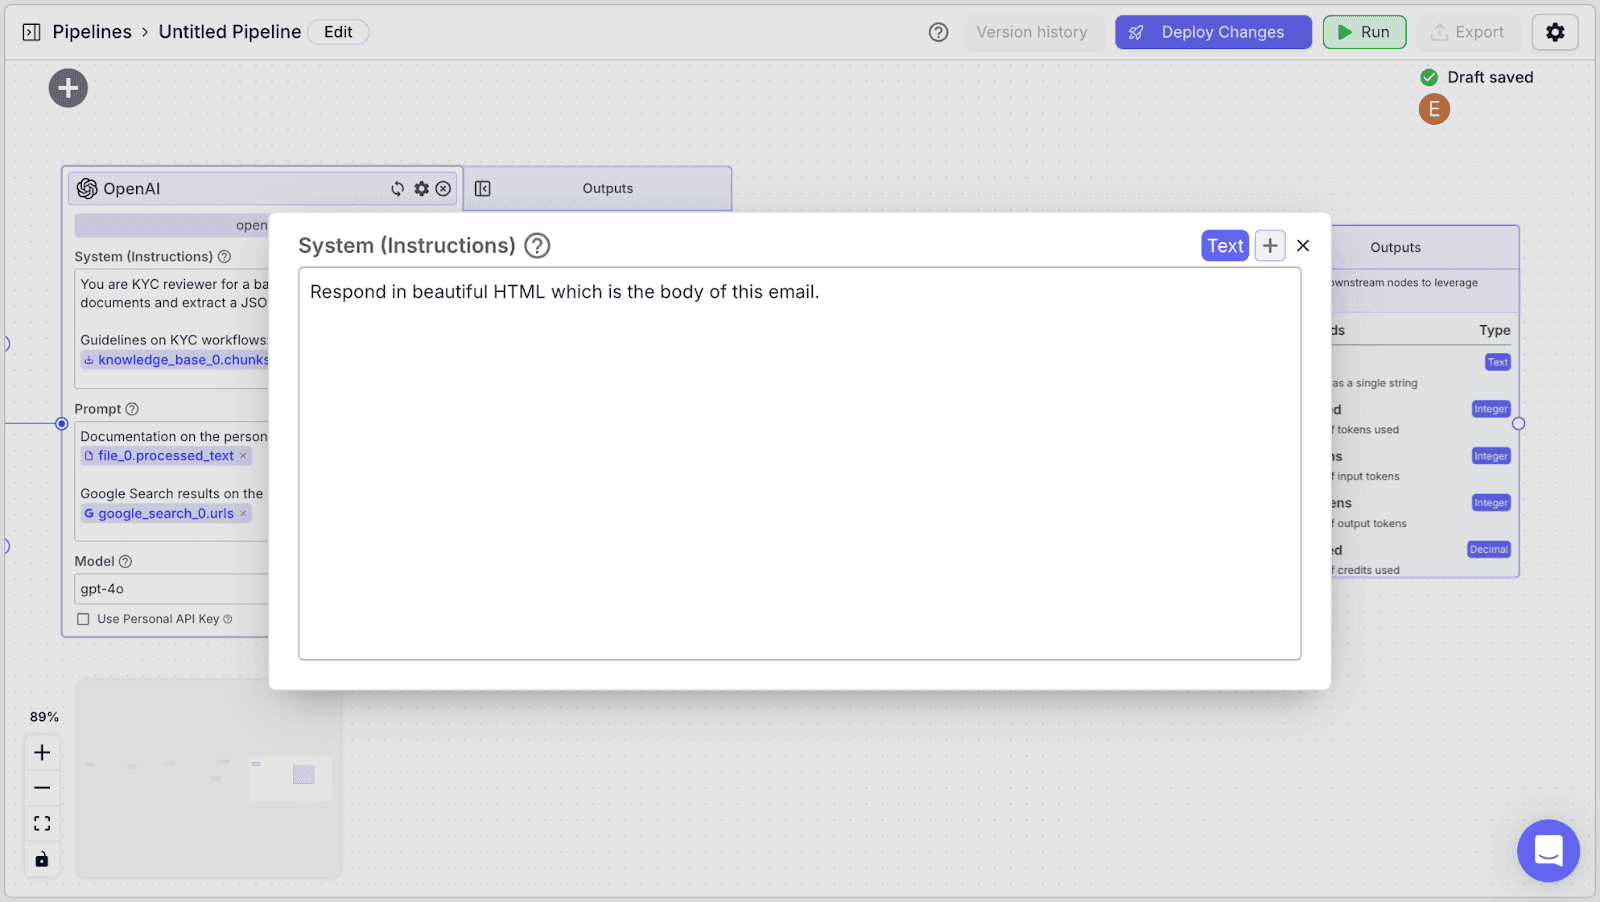
For “System (Instructions)”, you can use the instructions below:
Respond in professional HTML formatting the body of an email for a KYC report. |
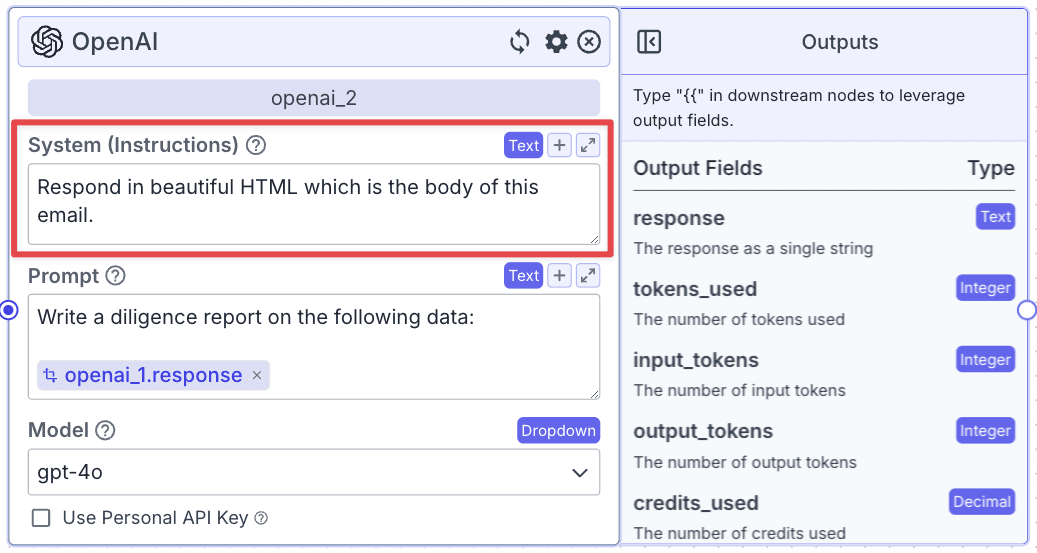
For “Prompt”, you can use the instructions below:
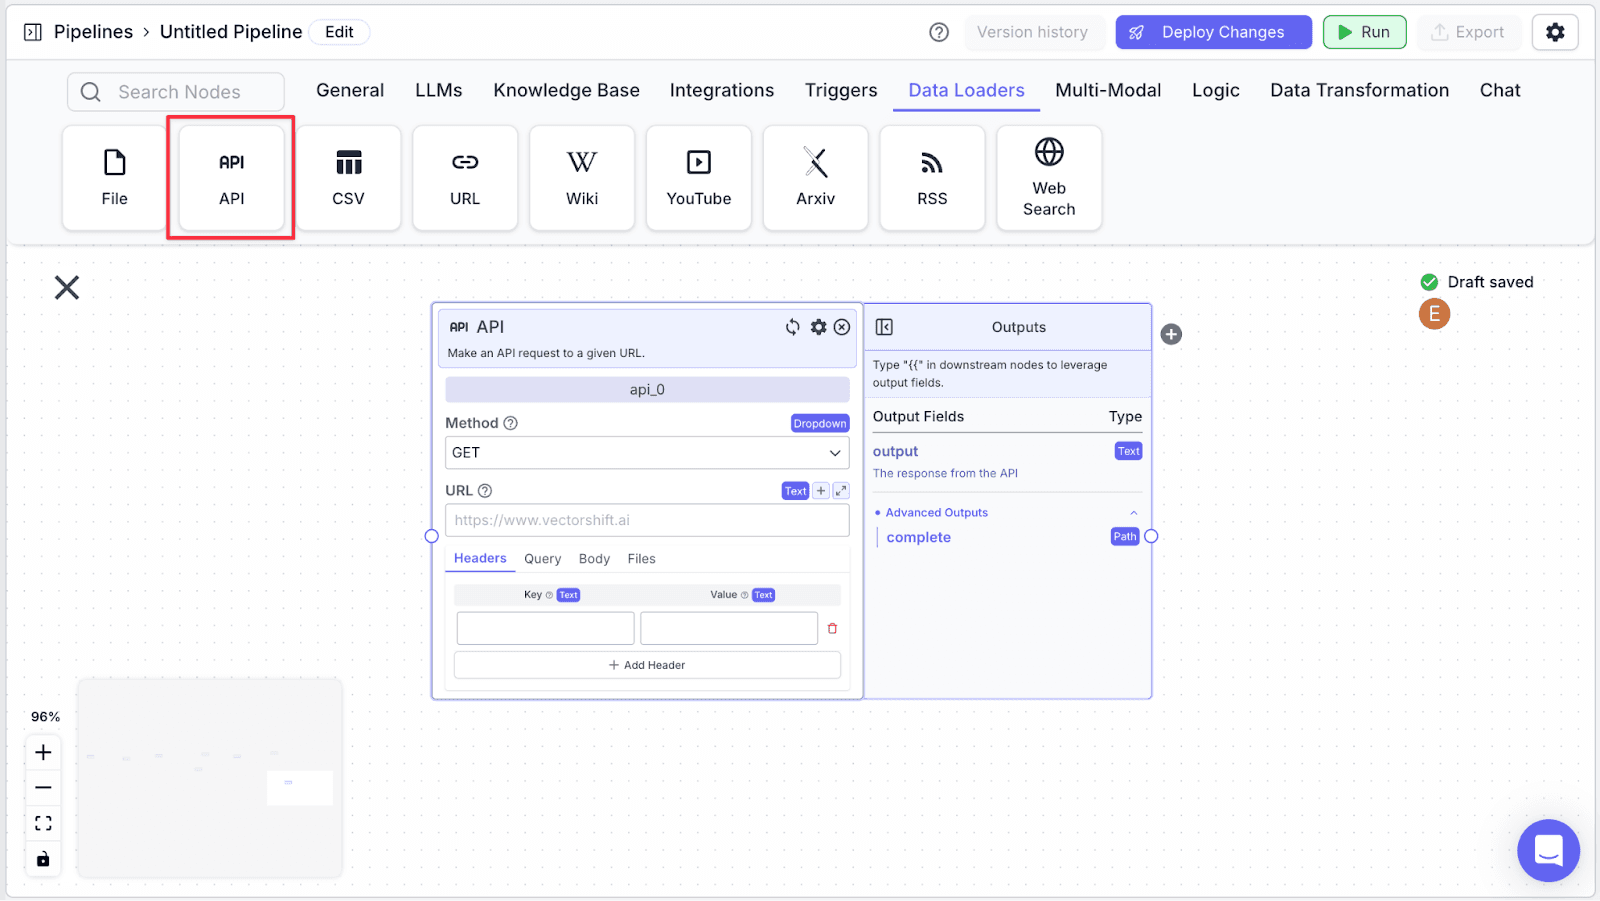
API Node
The API node allows the pipeline to pass the JSON (generated by the 2nd LLM) to an API endpoint.
Step 1: Take an “API” node under the “Data Loaders” section.
Step 2: Change the method to “Post” by clicking the dropdown under “Method”.
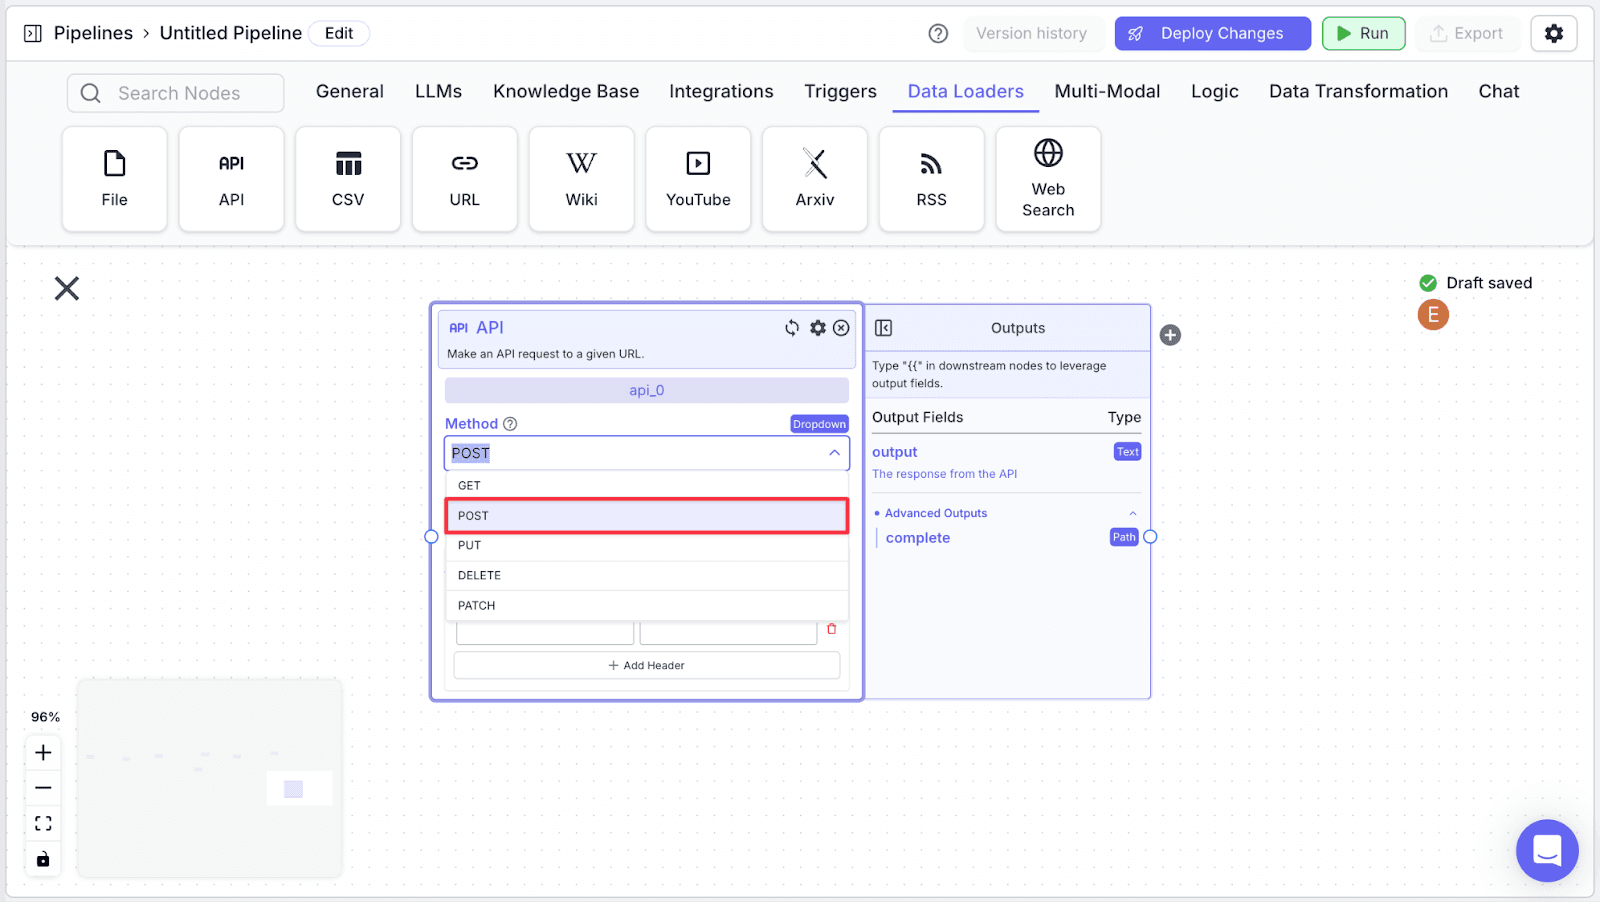
Step 3: Change the Headers to “Body”, and choose “Raw JSON”.
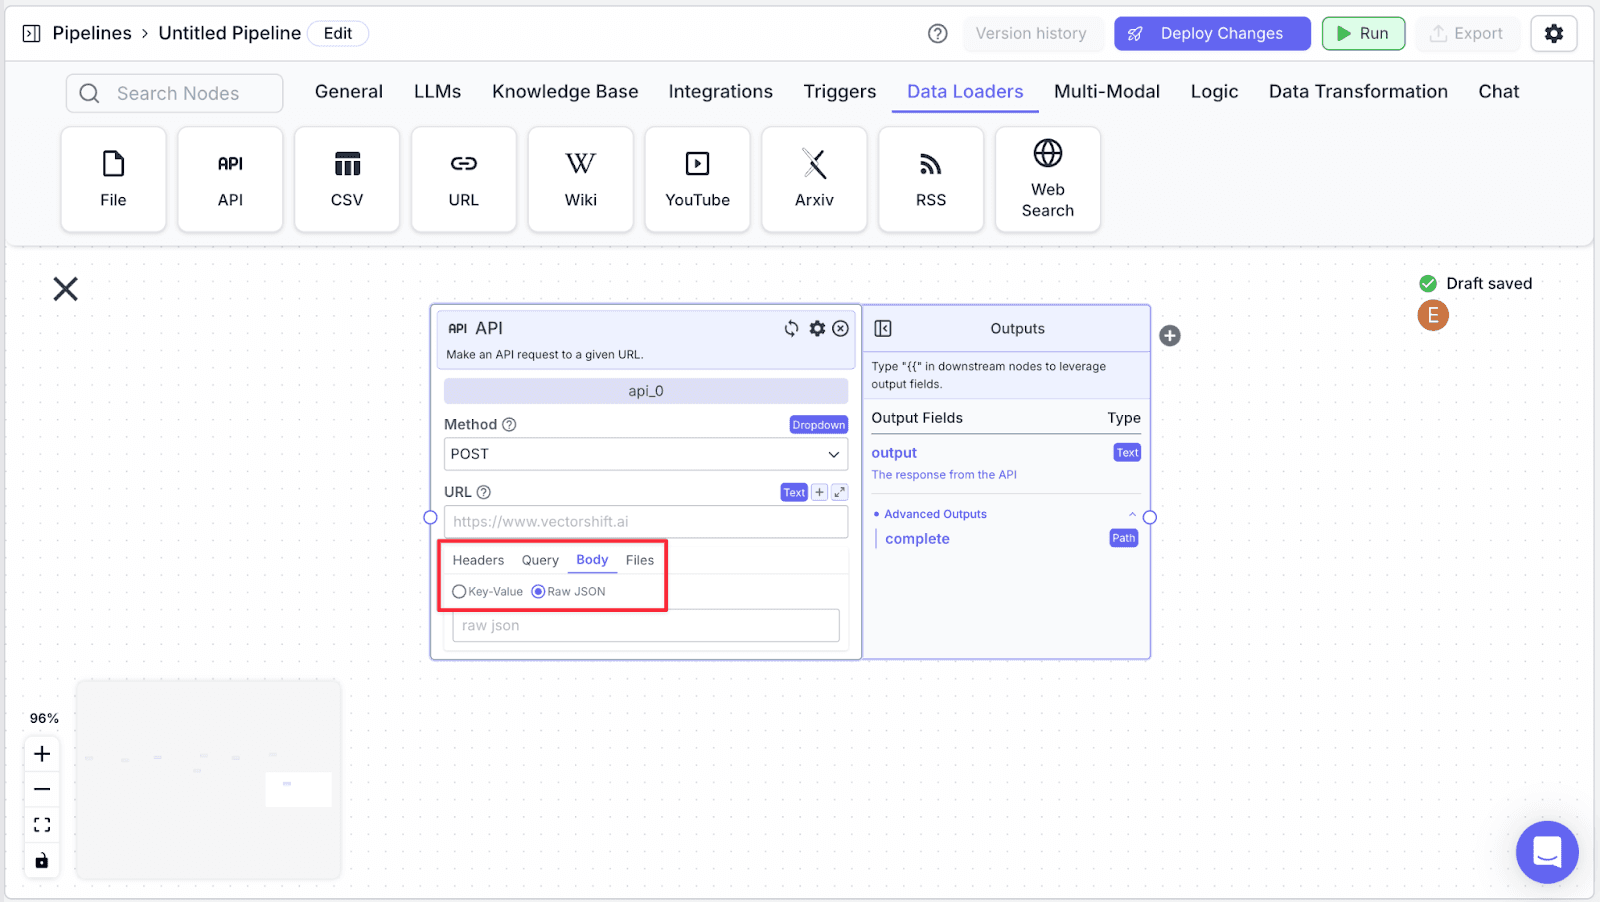
Step 4: Connect “api_0” with “openai_1” node.
Step 5: Set your API endpoint under the “URL” field.

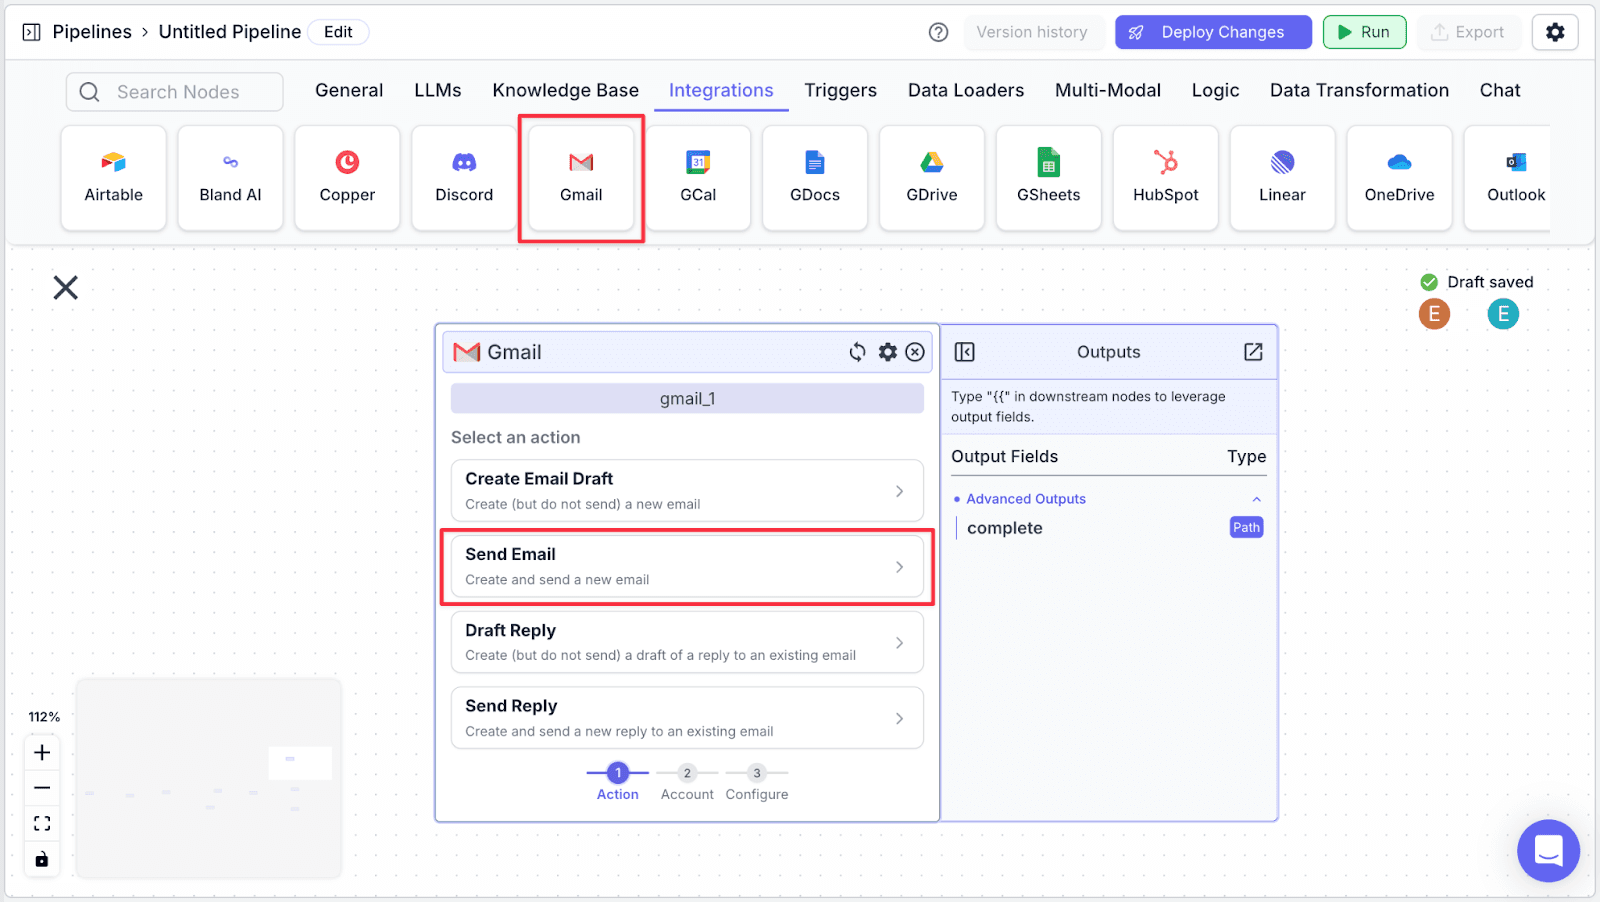
Send Email
We want to send the final diligence result to the customer.
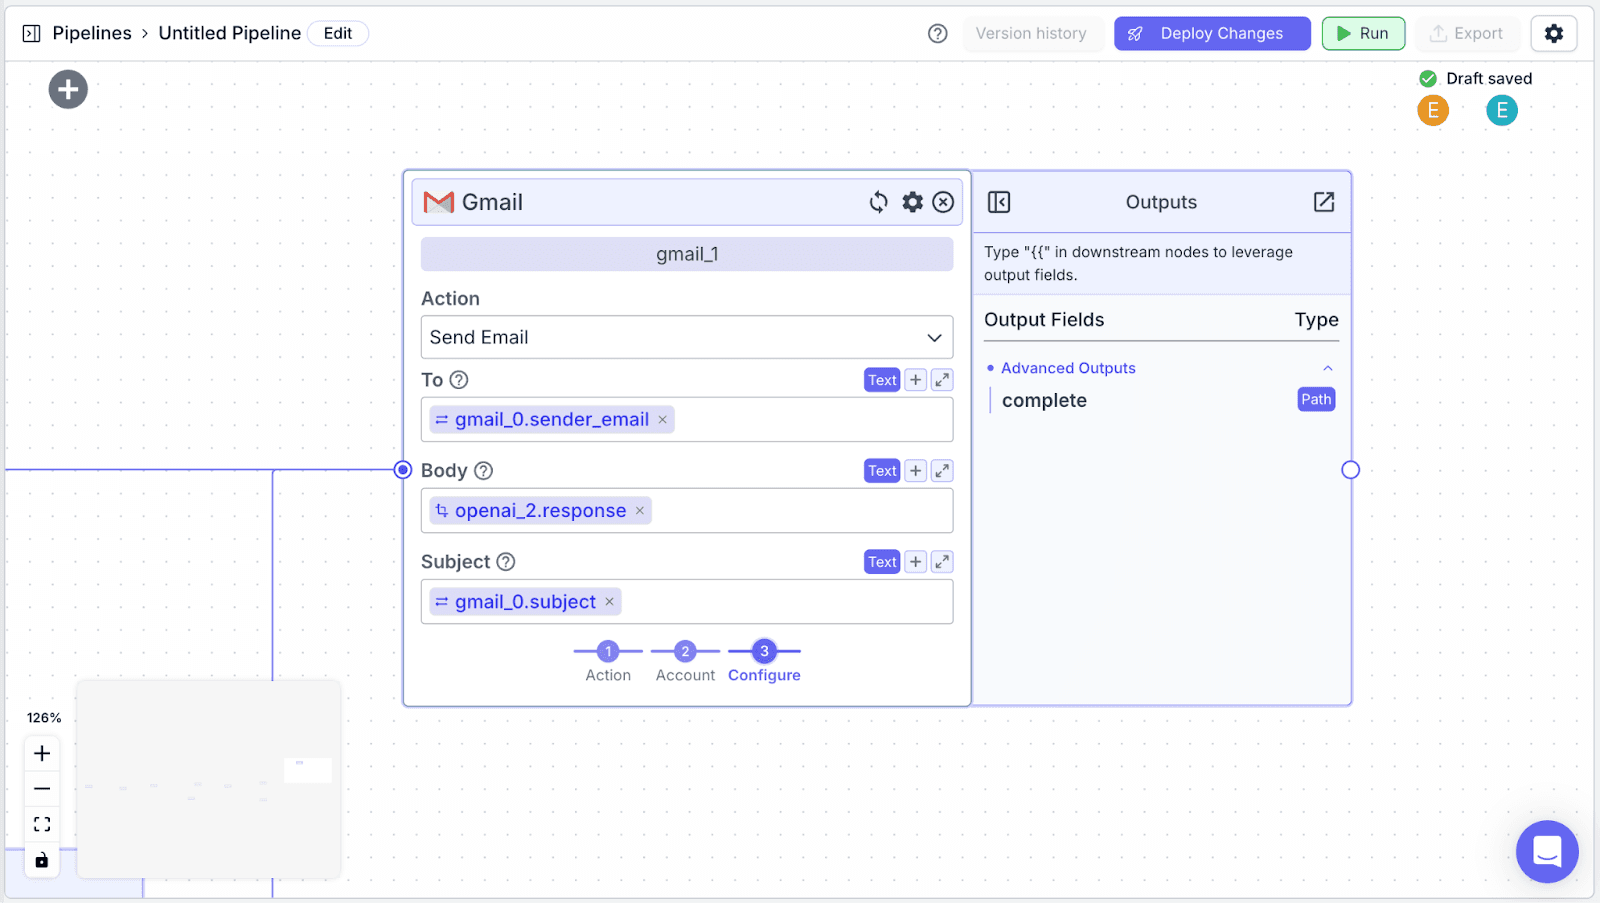
Step 1: Add a “Gmail” node under the “Integrations” node. Then choose “Send Email”.
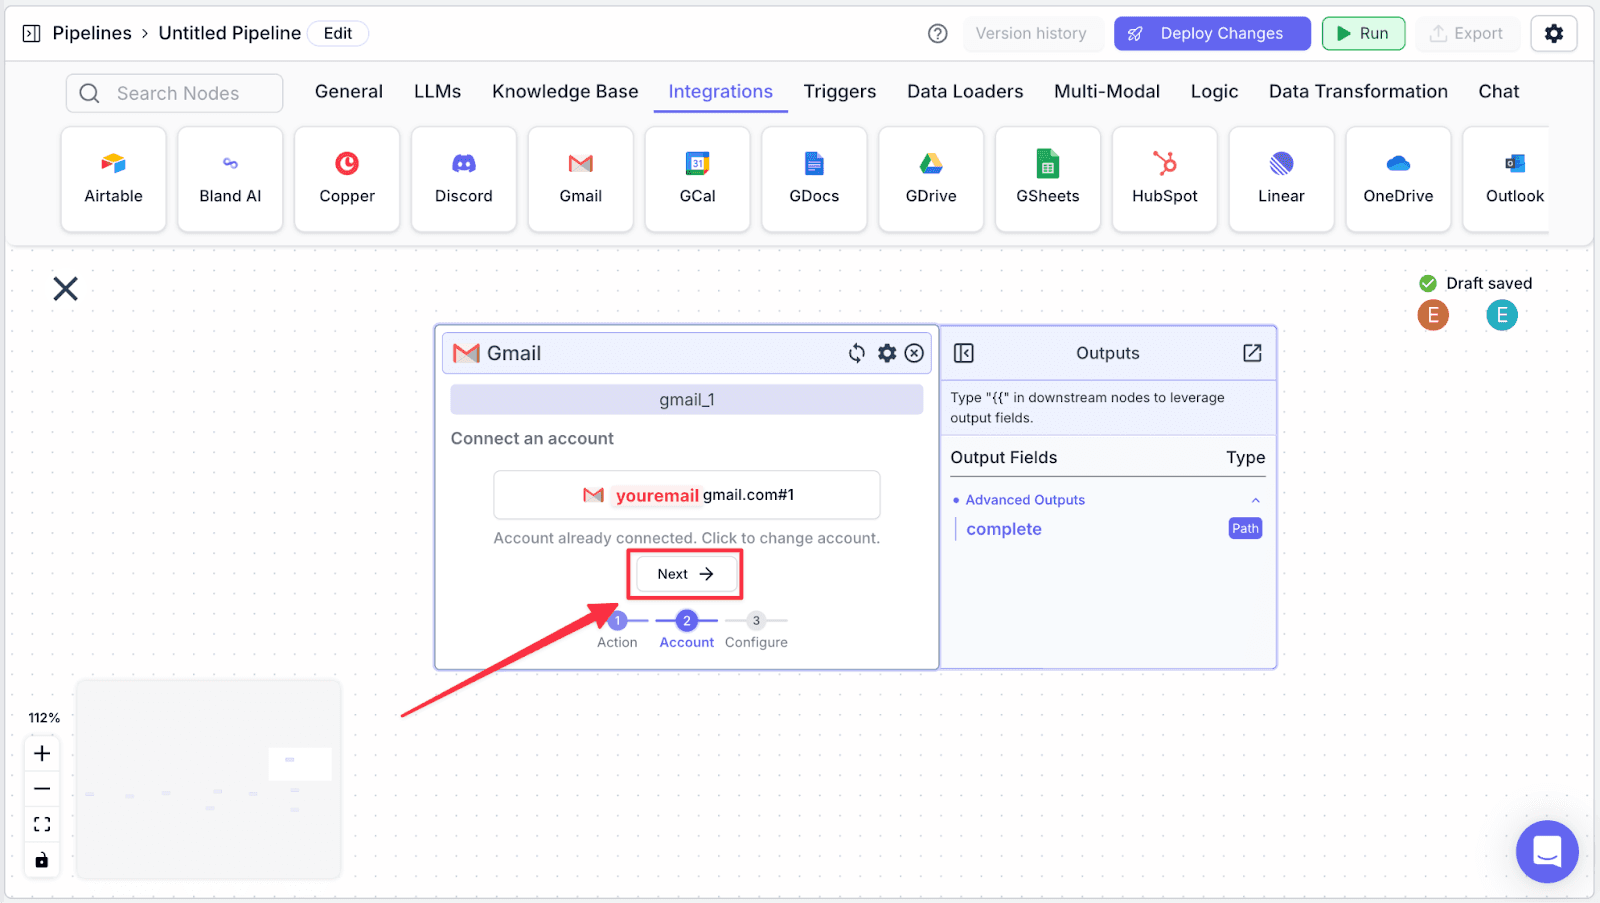
Step 2: Choose your email, then click on “Next”.
Step 3: Connect the “gmail_1” node with “gmail_0” and “openai_2” node.
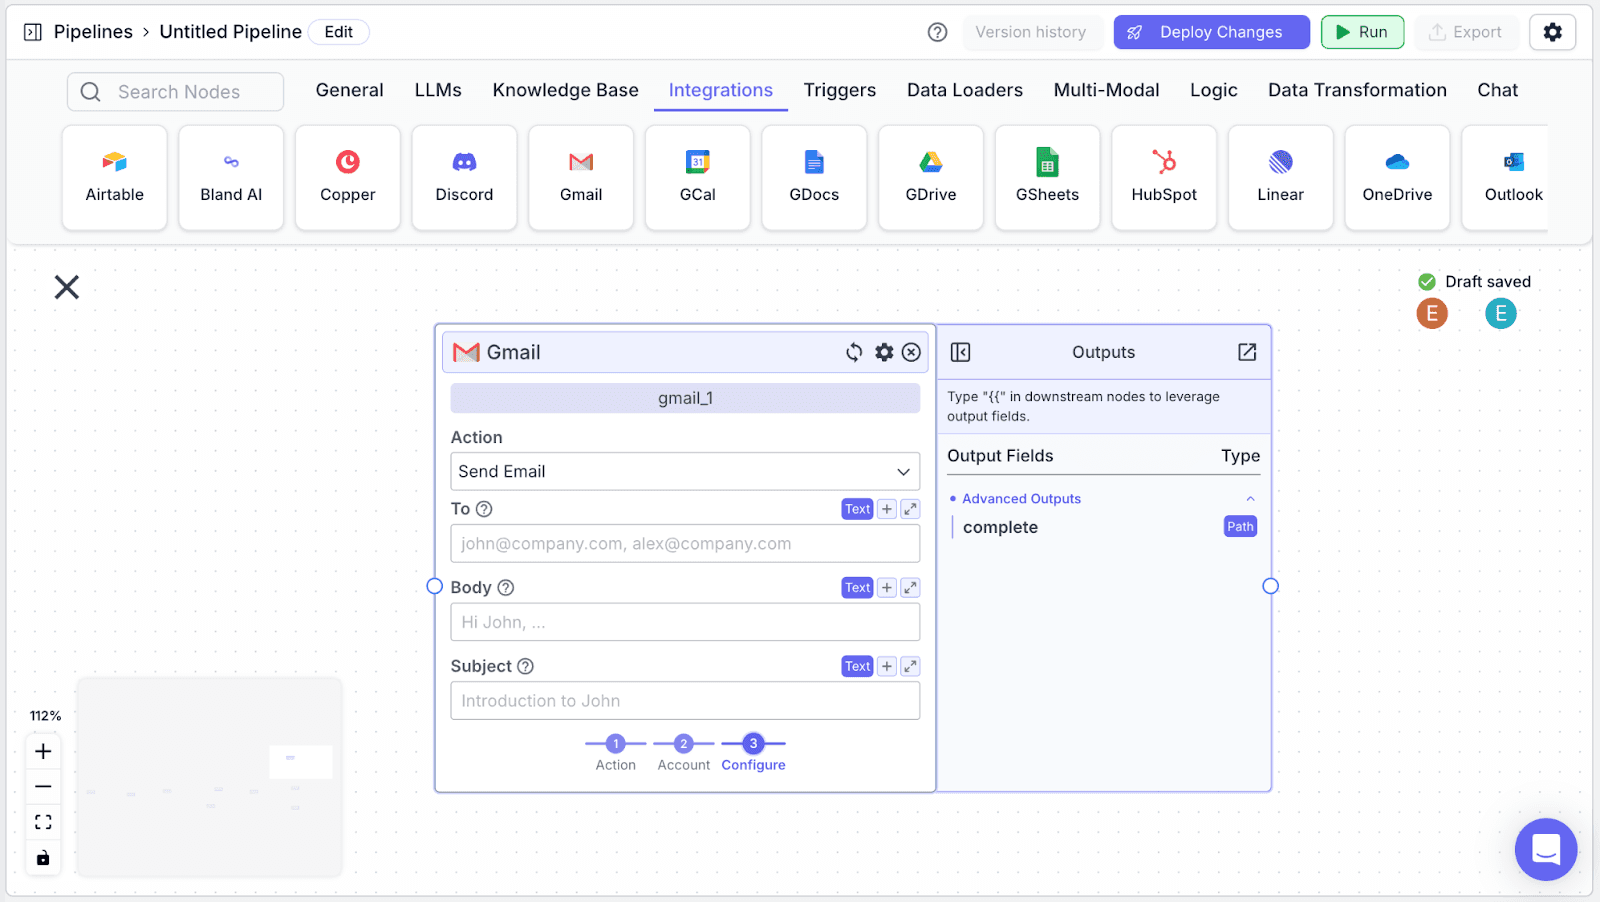
Step 4: Fill each field on the send email Gmail node with the corresponding variables. Fill the “To” field with {{gmail_0.sender_email}}, the “Body” with {{openai_2.response}}, and Subject with {{gmail_0.subject}}.
Deploying the Pipeline
Deploying the pipeline will enable the pipeline to automatically run when a new email is received. Click on “Deploy Changes” on the top-right.

Keep Tracking of the Pipeline Usage
To keep track of any of your pipeline usages, you can go to “Pipeline Analytics”.
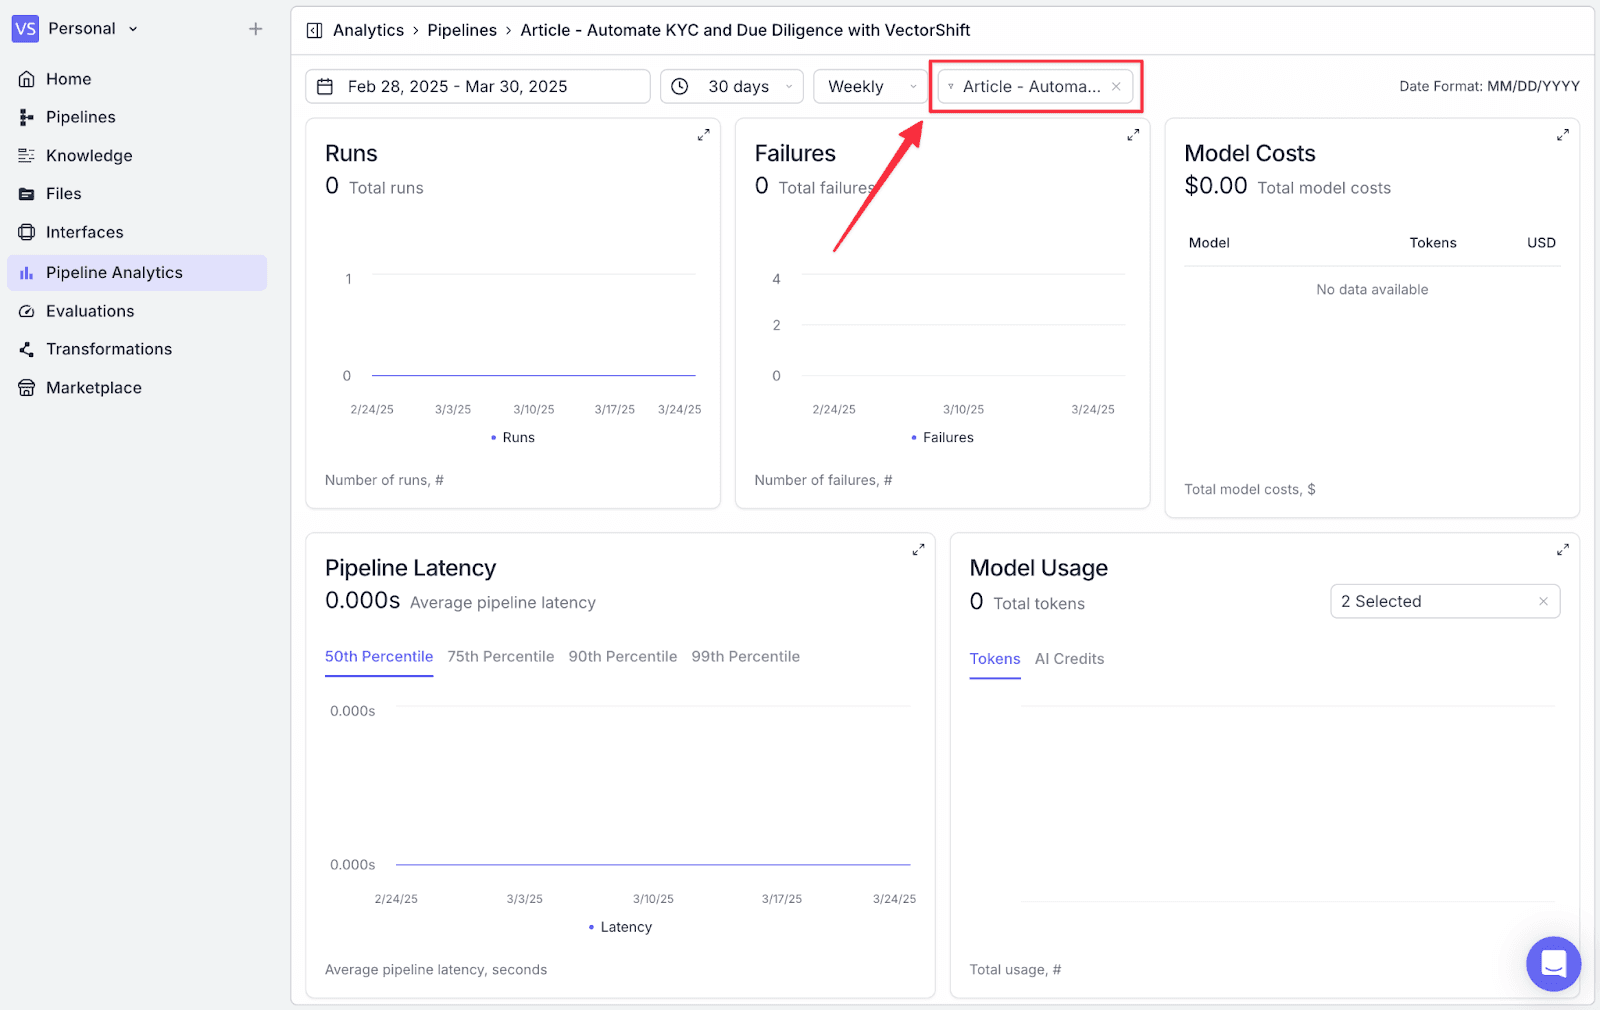
Go to filter, then select the pipeline we’ve just created, the analytics will show the detail of how many times this pipeline has been executed, failures, model costs, latency, and token usage. As you deploy your solution into production, this helps monitor and trace your usage across your organization.
Conclusion: Automate KYC and due diligence processes with AI to scale your business
You can extend the functionality of this pipeline further by integrating it with additional data sources like Google Drive or OneDrive.
Create your free account to start scaling your business or talk with our team

Albert Mao
Co-Founder
Albert Mao is a co-founder of VectorShift, a no-code AI automation platform and holds a BA in Statistics from Harvard. Previously, he worked at McKinsey & Company, helping Fortune 500 firms with digital transformation and go-to-market strategies.