
Guides
Apr 7, 2025

Albert Mao
Co-Founder
Transform your organization with AI
Discover how VectorShift can automate workflows with our Secure AI plarform.
Contract redlining is a process utilized by law firms / legal departments: the marking up of legal documents with suggested changes.
This article explores how a legal firm used VectorShift to accelerate their redlining process.
Designing the Workflow
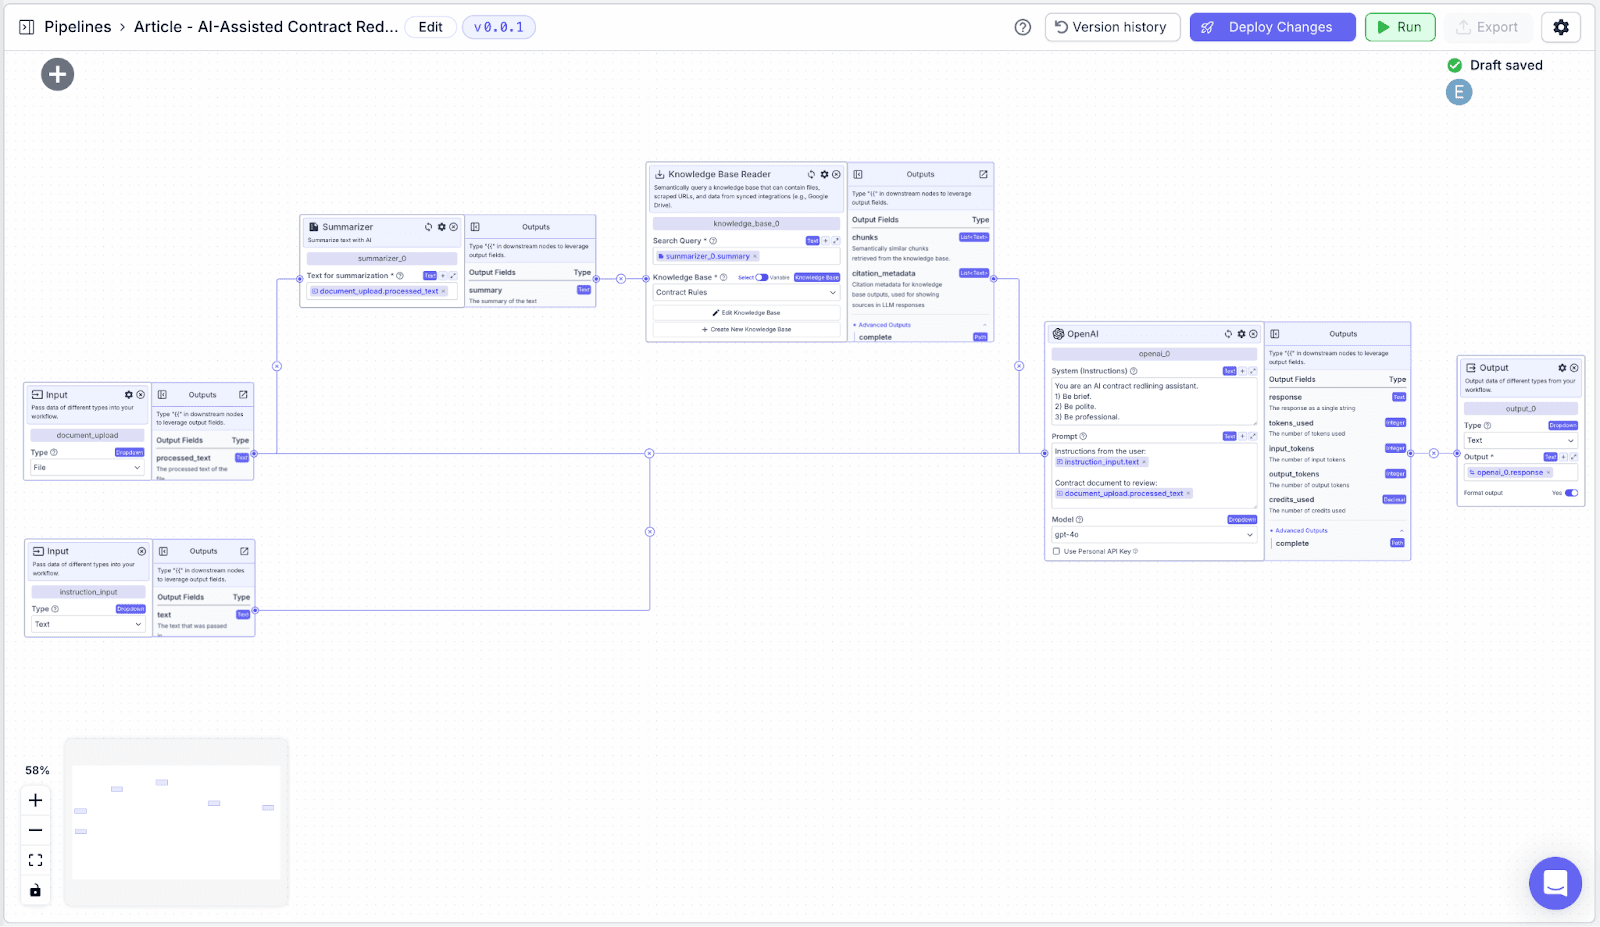
Here’s how the overall design of the workflow looks:
Compile and centralize information regarding redlining (e.g., procedures for redlining, guidelines on specific items to look for, etc.).
Build a workflow to automate the contract review and redlining.
Deploy a bulk job interface on the workflow (which allows for processing of many contracts in bulk).
1. Building a Knowledge Base
We will add relevant guidelines on redlining to a knowledgebase.
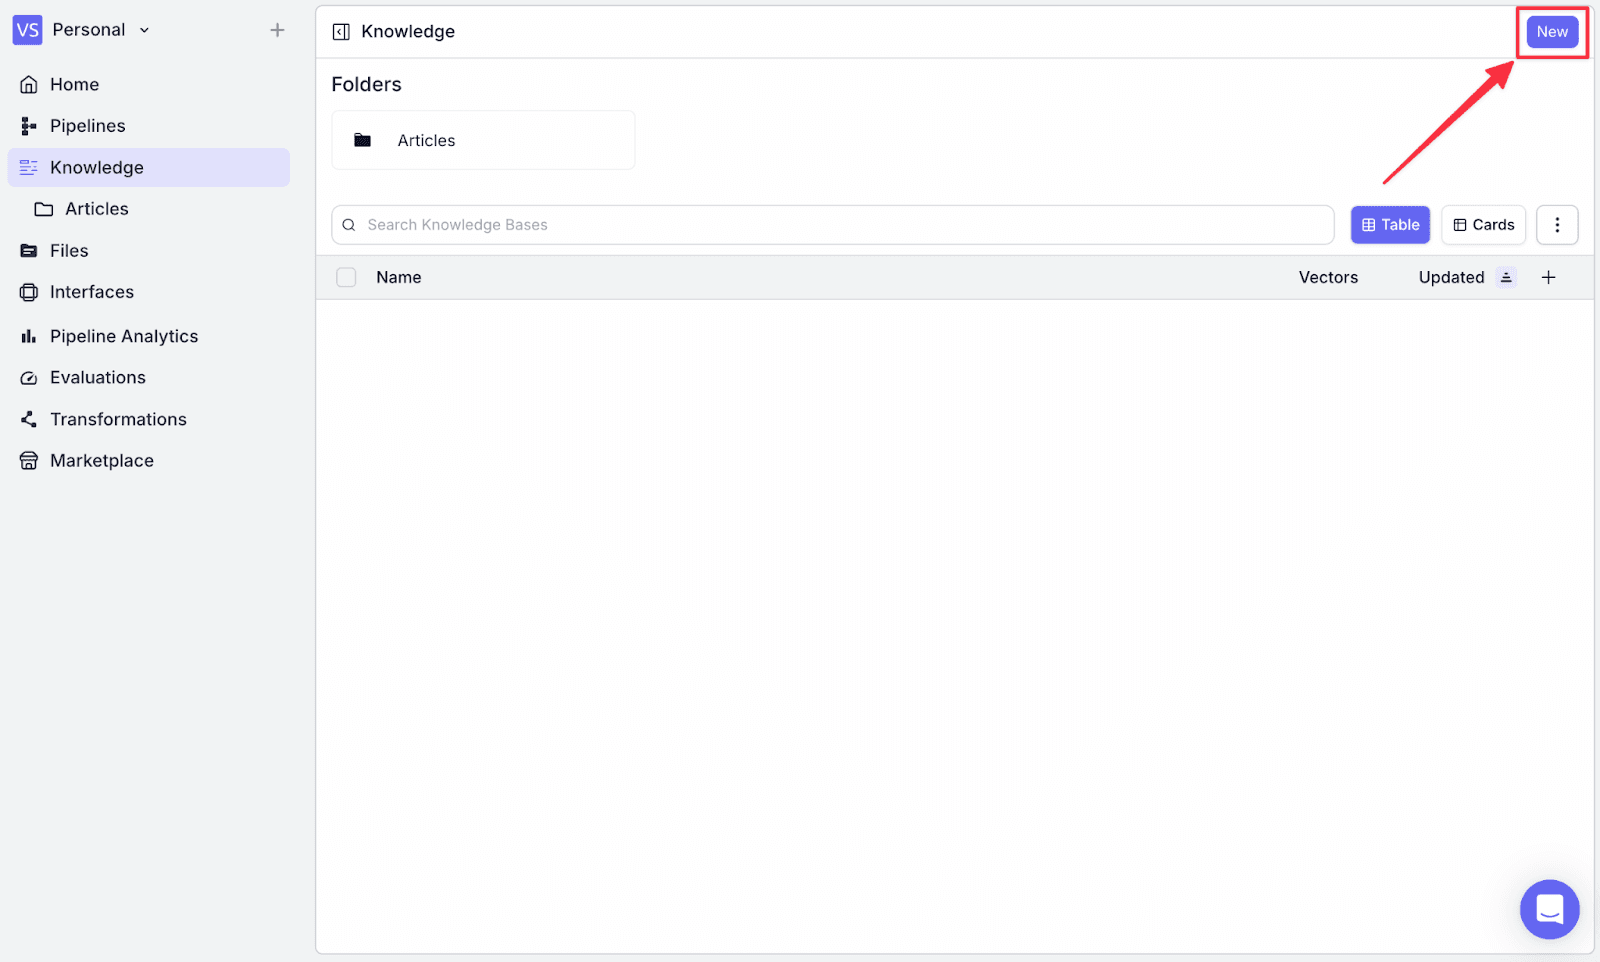
Step 1: Go to the “Knowledge” menu on the left, and click “New” on the top right.
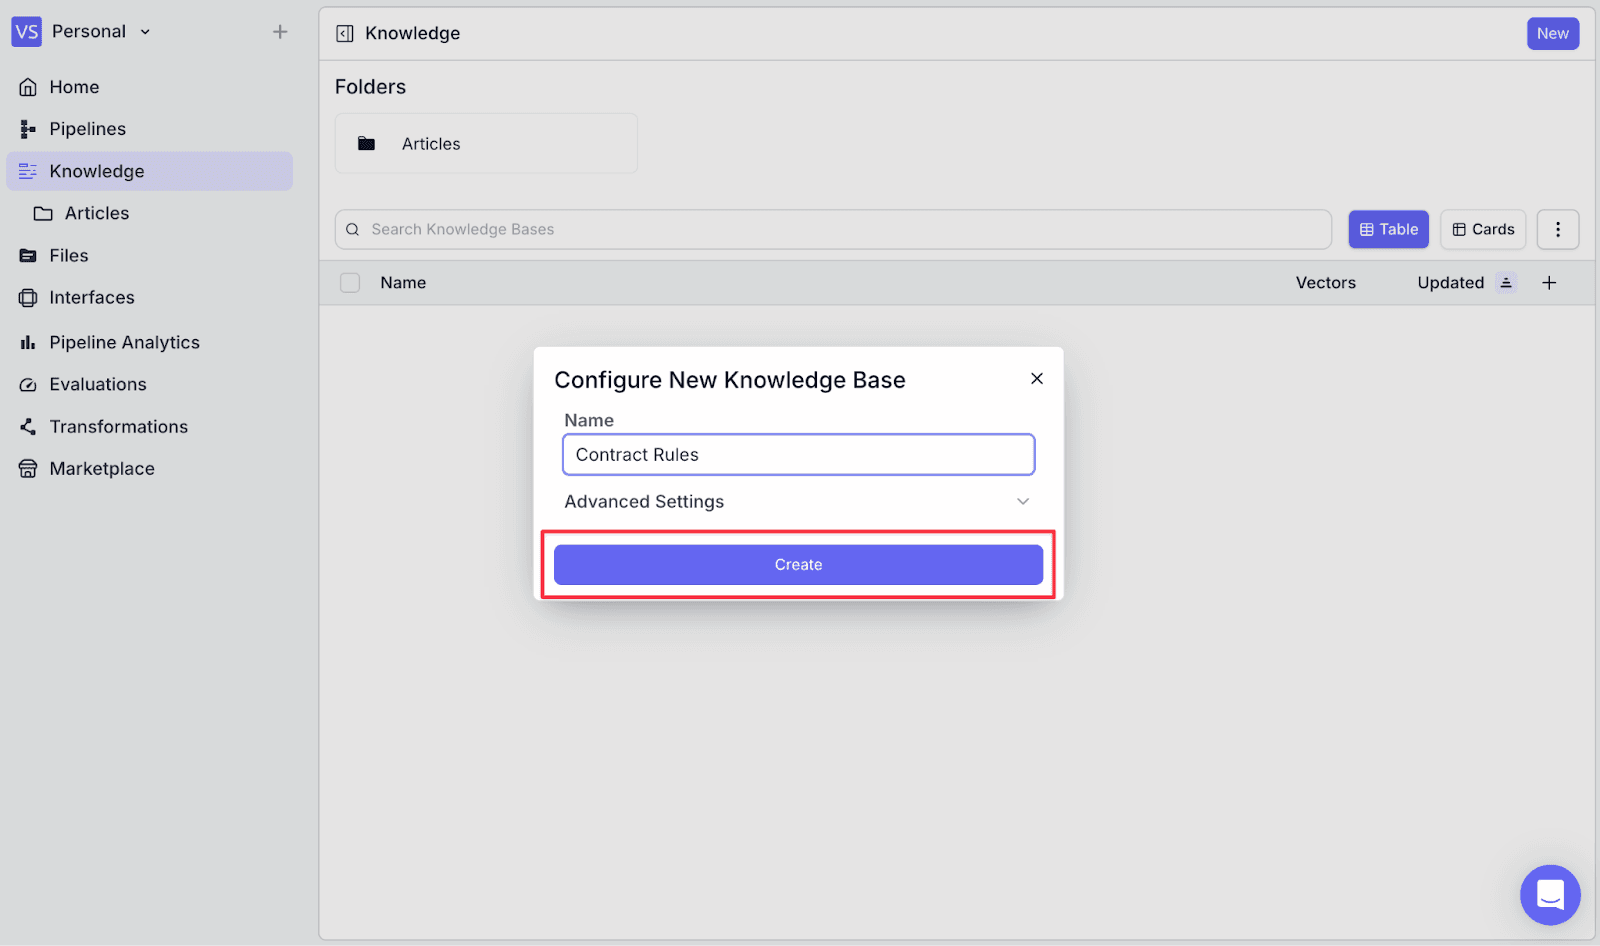
Step 2: Name the knowledge base, then click “Create”.
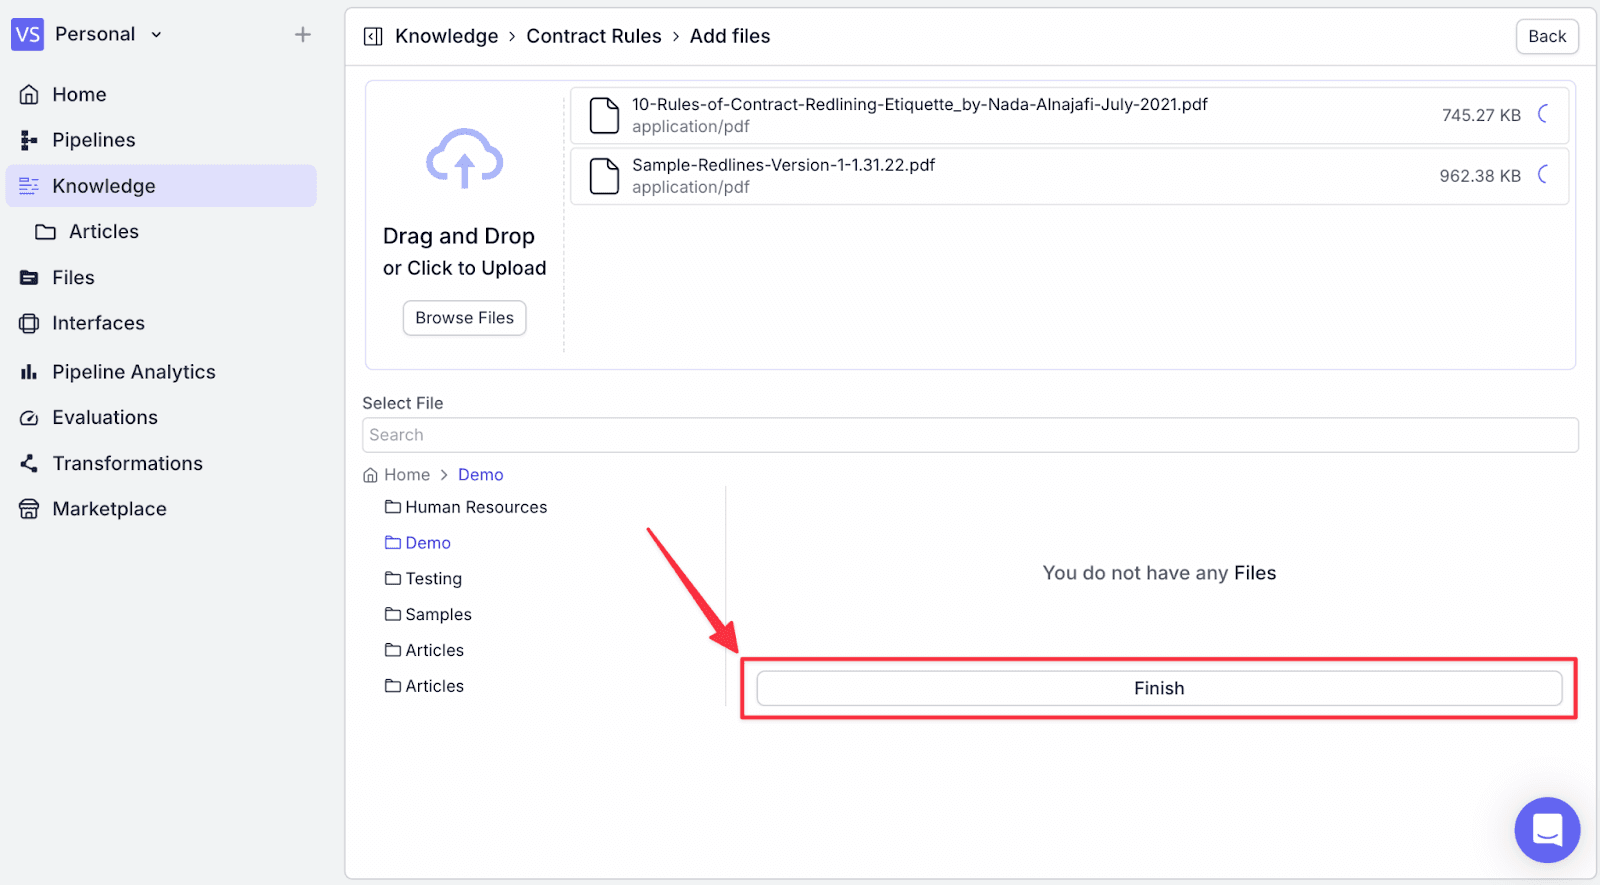
Step 3: Click on “Add Document” on the top-right, then click on “Choose/Upload Files”.

Step 4: Click on “Browse Files” to add your files to the knowledge base.

Step 5: When finished, click on “Finish”.
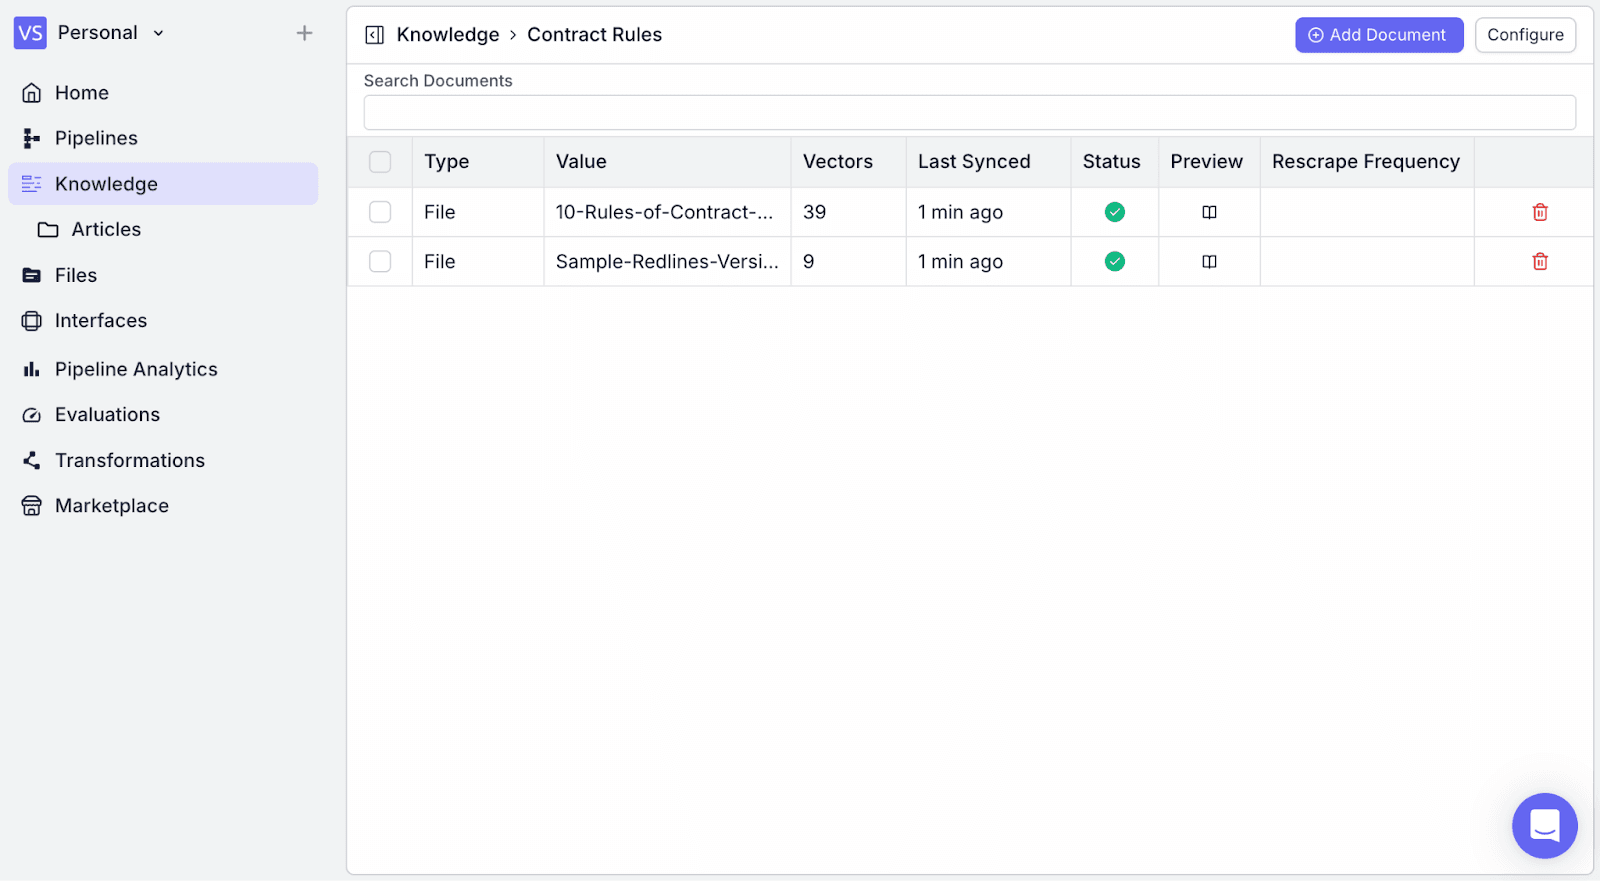
You will see the uploaded document has been added.
2. Designing the Pipeline
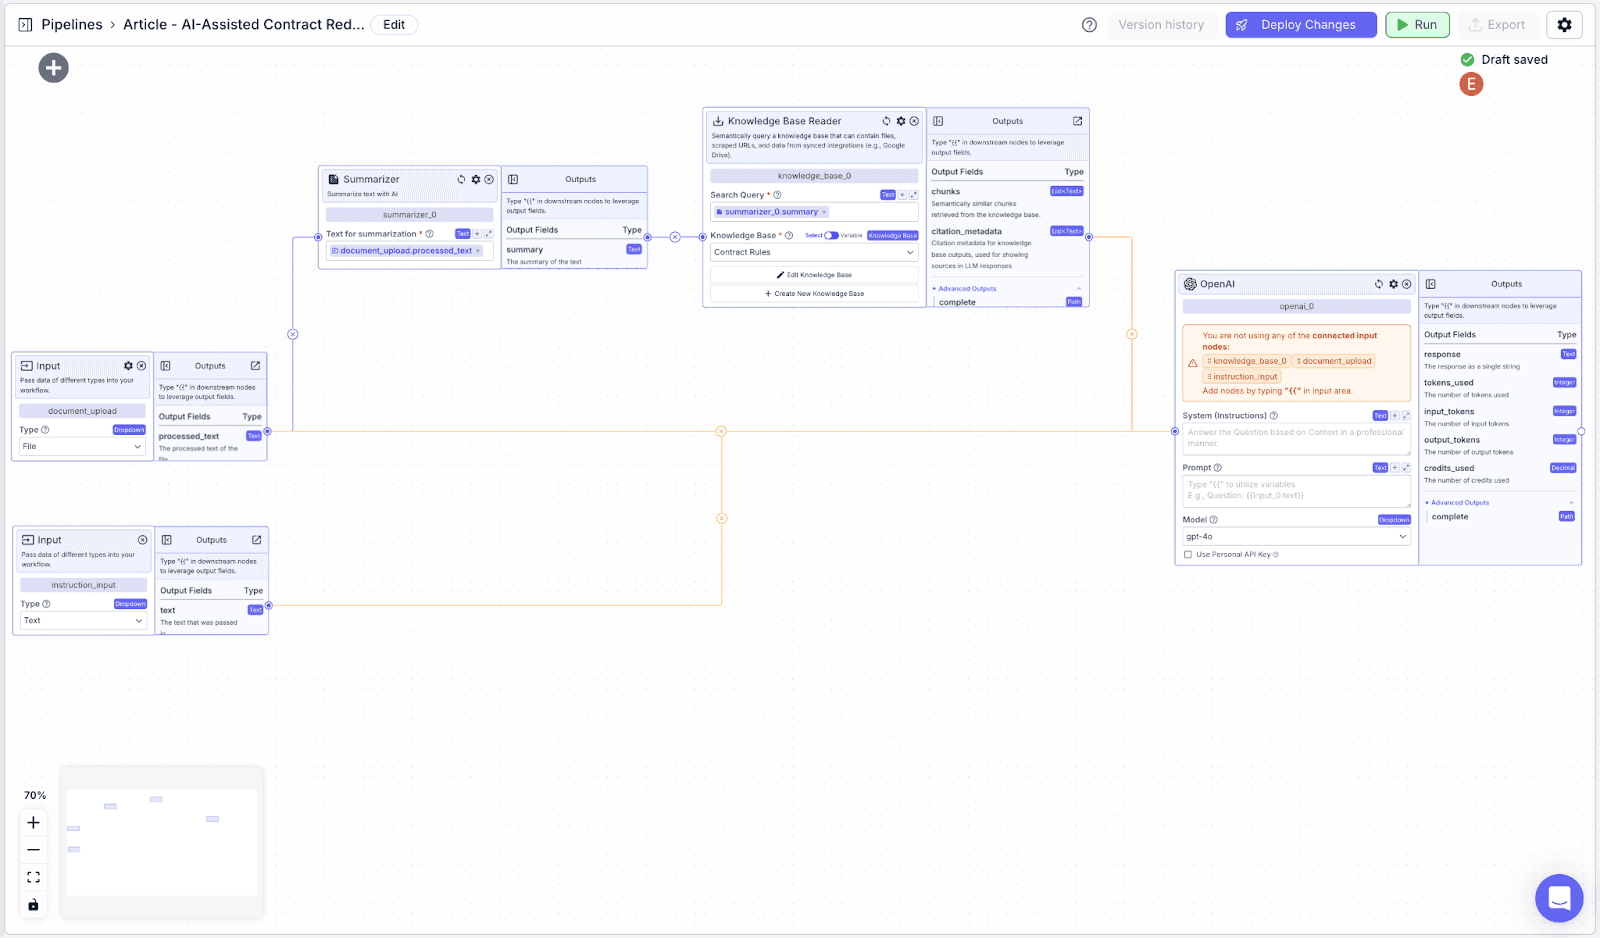
The pipeline consists of several parts of the following nodes:
Input Nodes: We’re going to use two input nodes, one of type file to accept a contract and one of type text for additional input from the user.
Summarizer Node: To summarize the contract.
Knowledge Base Node: Search for relevant compliance guidelines based on files in the knowledge base.
LLM Nodes: To generate the redlining report based on guidelines and user instructions.
Output Nodes: Display the redlining report.
Working with Nodes in VectorShift
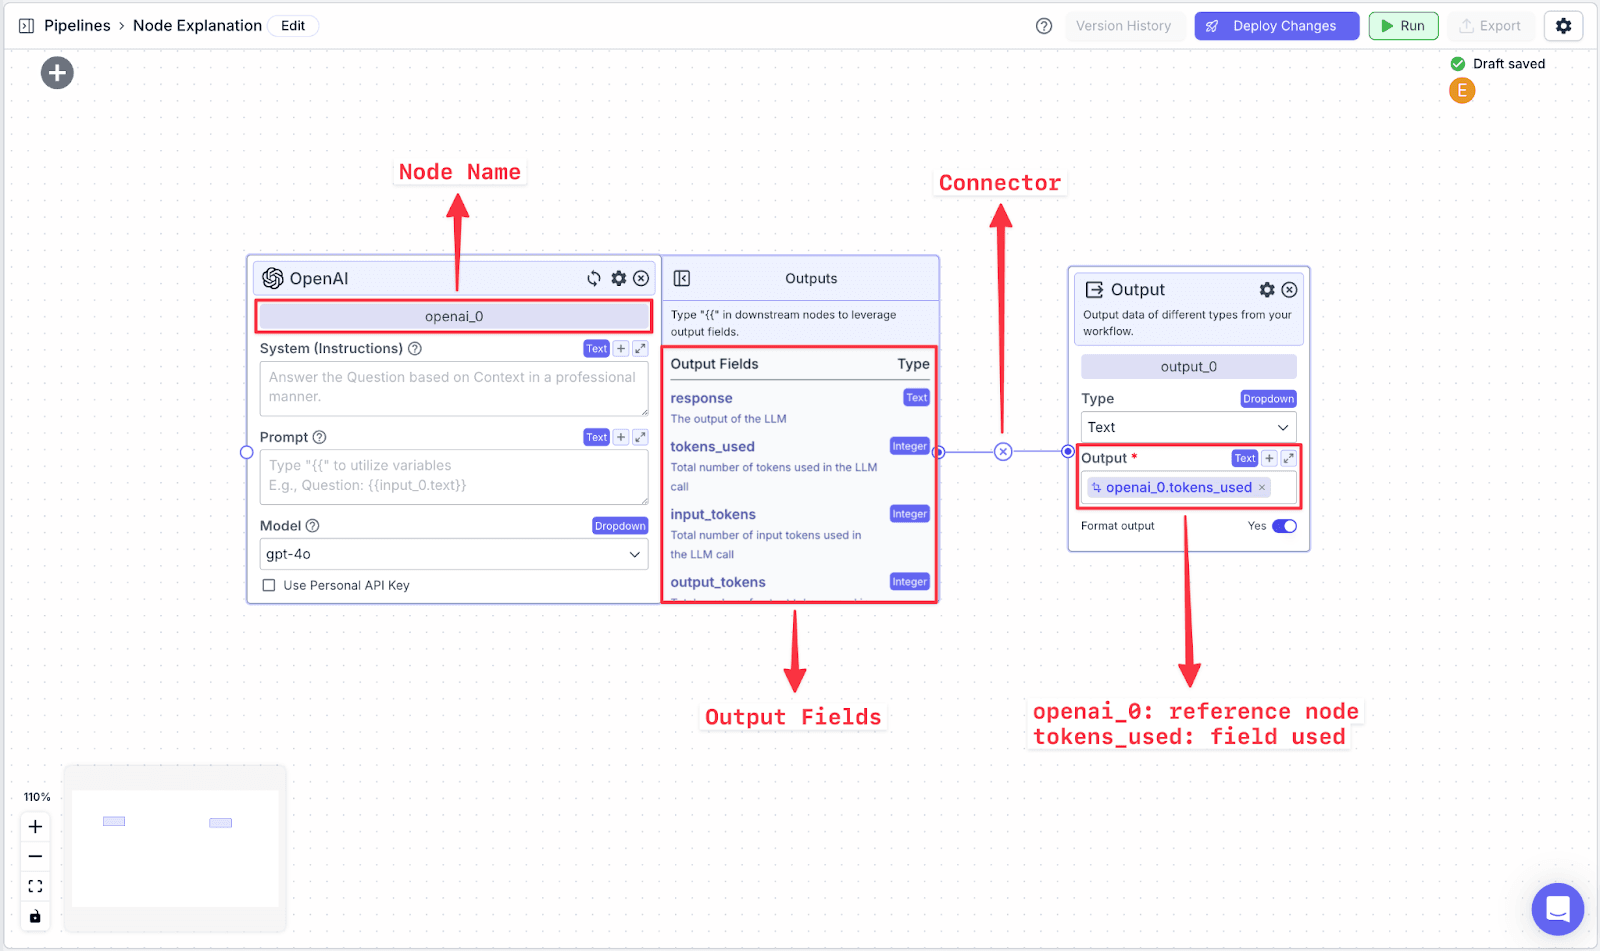
Each node in VectorShift has a name at the top of each node (e.g., openai_0) and output field(s), which are found in the right-hand pane of each node (e.g., the OpenAI LLM node has various output fields: response, tokens.used, input_tokens, output_tokens).
To reference specific data fields from other nodes, you have to do two things:
Connect the two nodes.
Reference the data from the previous field using a variable.
Variables in VectorShift all have the same structure:
You can also create variables by typing “{{“ in any text field, which opens the variable builder. To reference the text from the OpenAI node, you call the variable on the Output node:
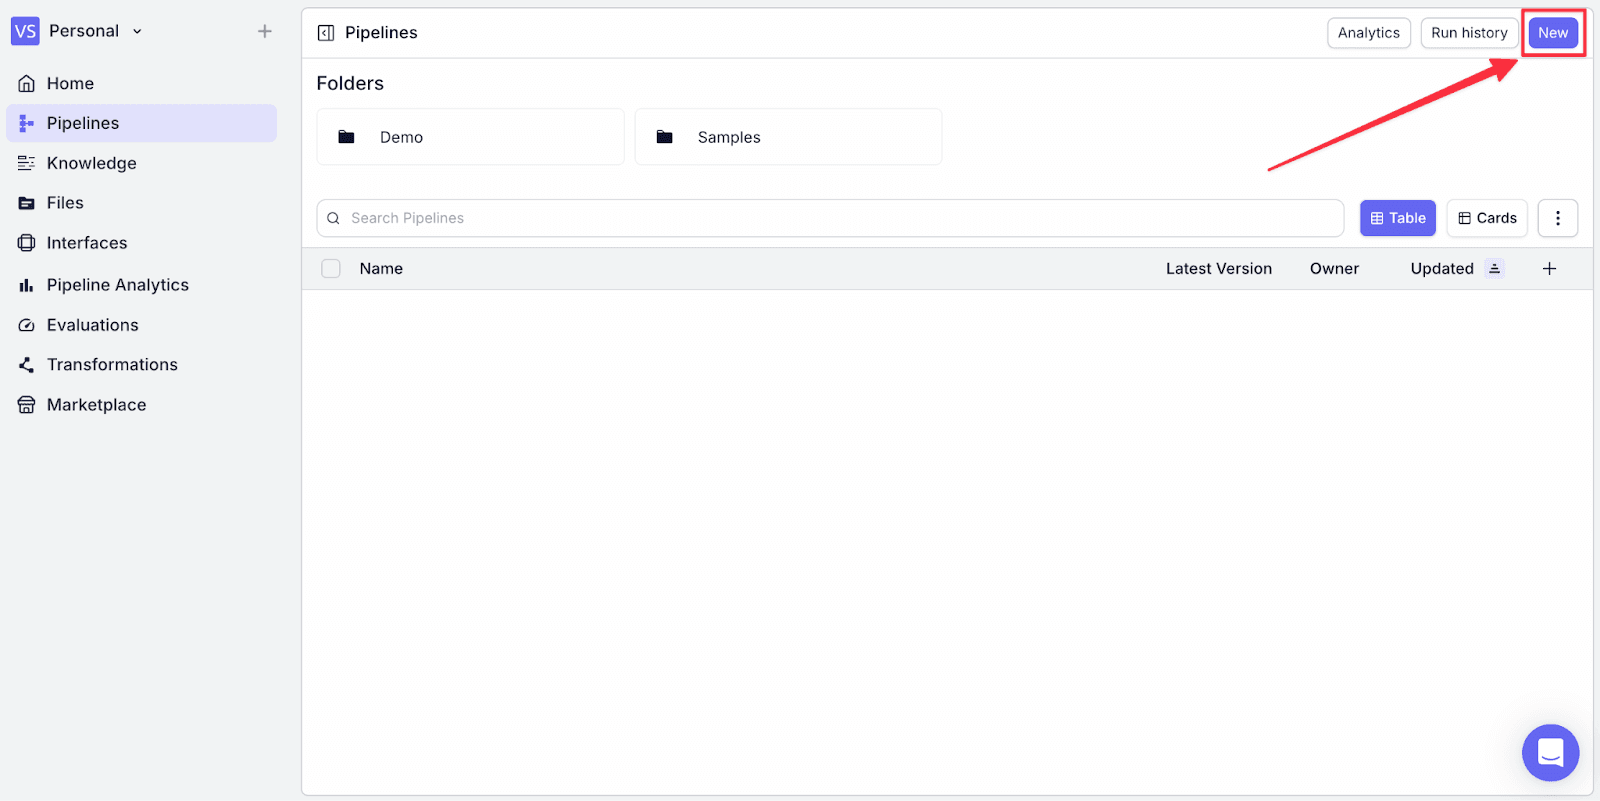
To start creating a new pipeline, go to the “Pipeline” menu, and click “New” on the top-right
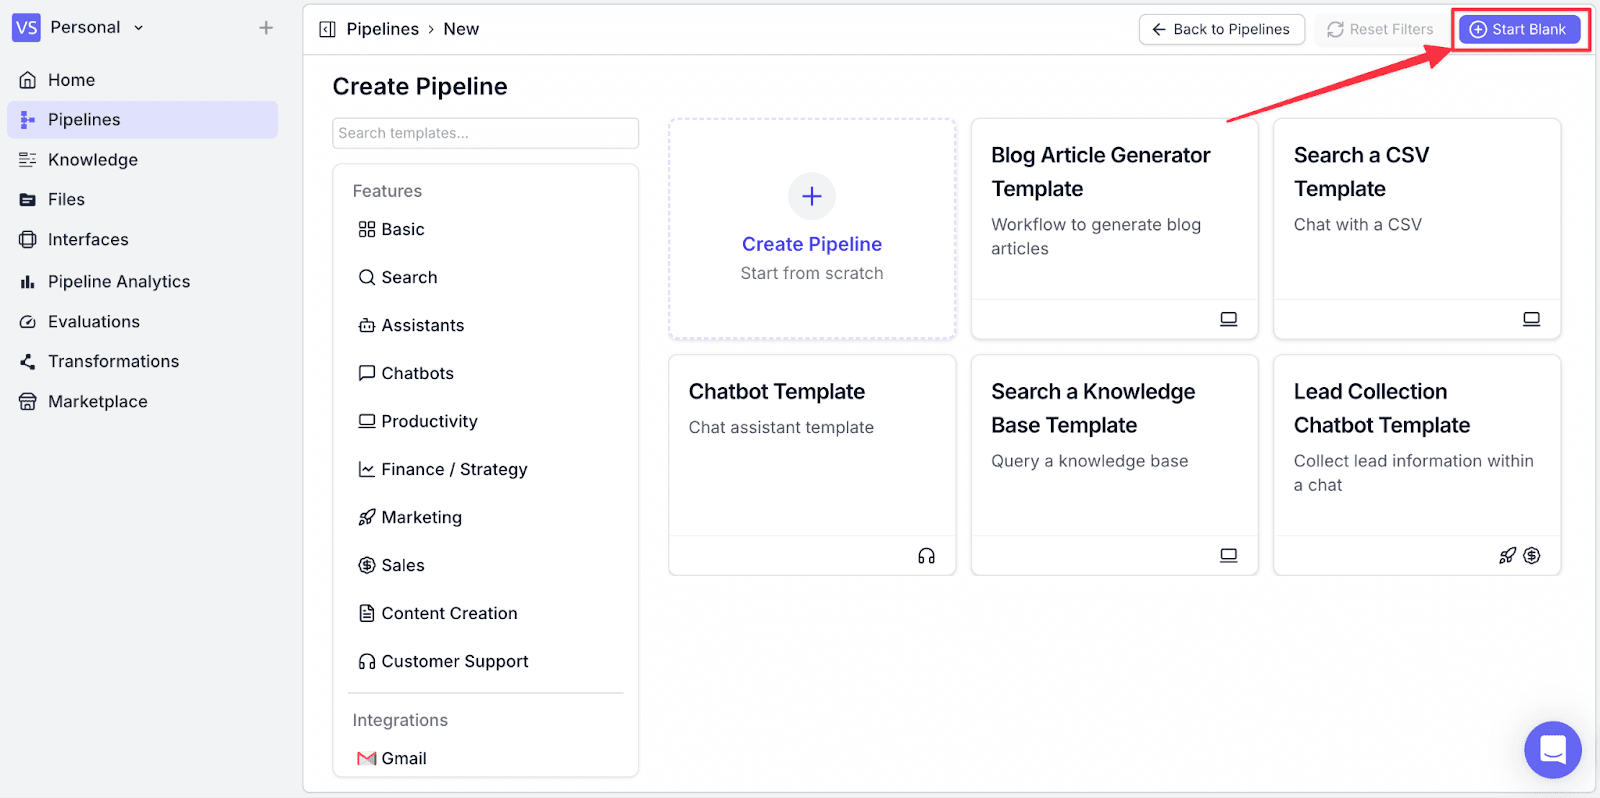
You will see some options, so go with “Start Blank” on the top right.
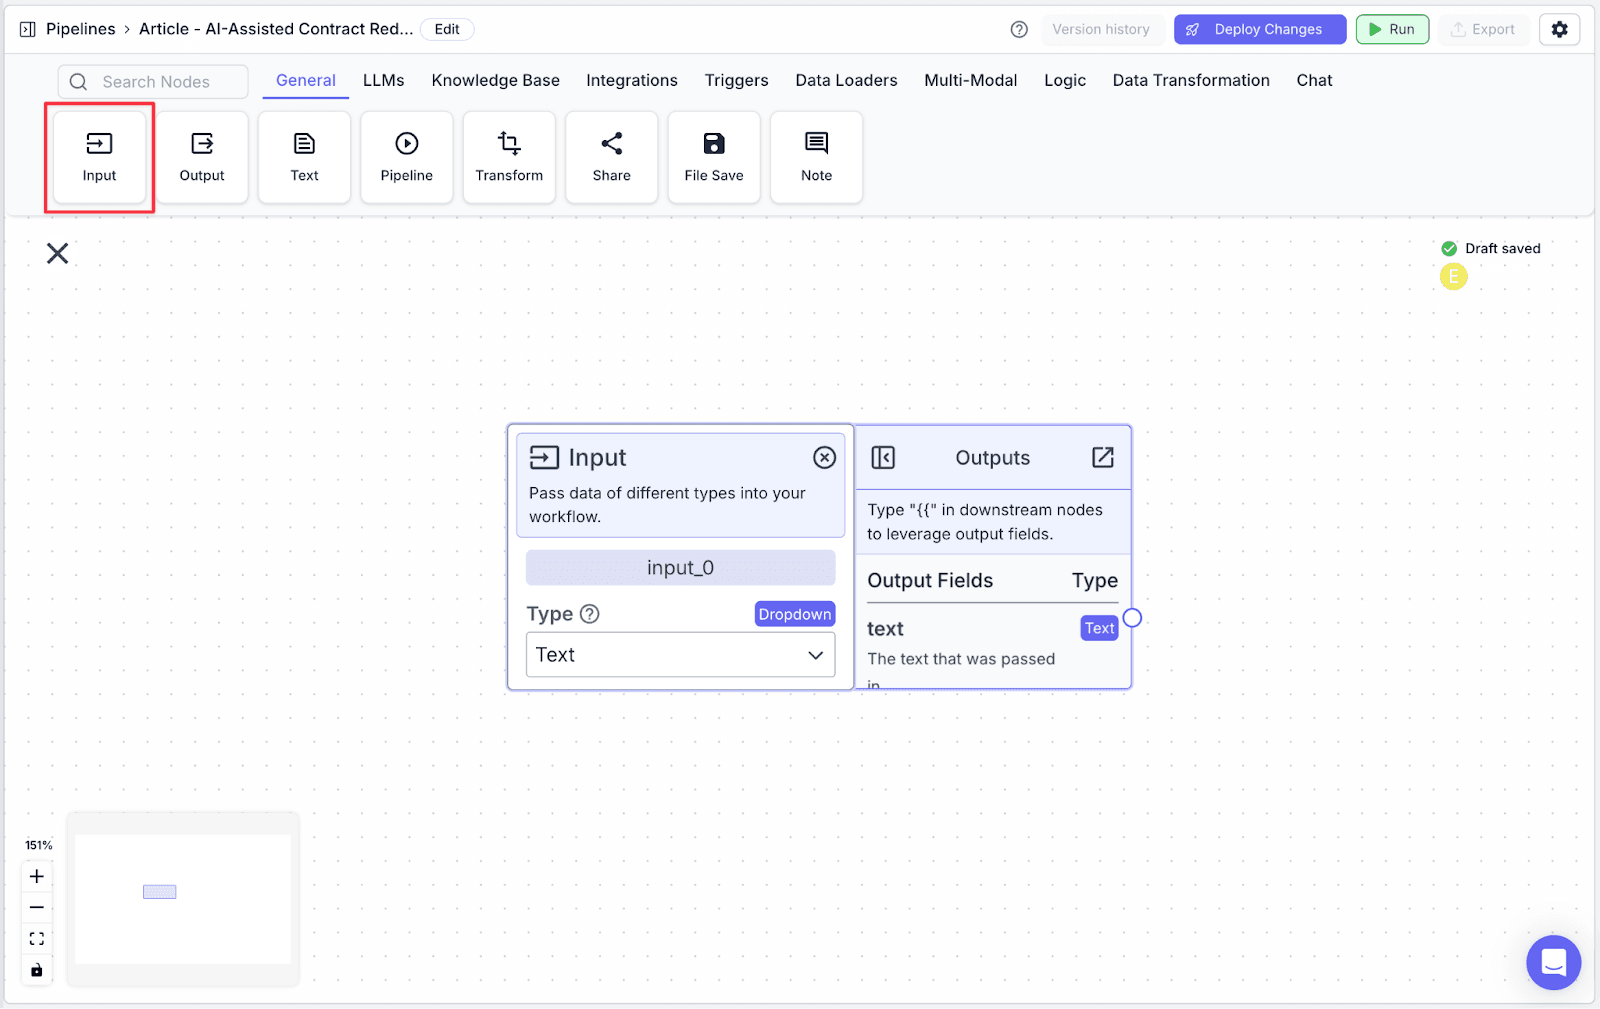
Input
We will use two input nodes as described above (one for the contract, and another for accepting instructions from the user).
Step 1: Take an Input node (“input_0”) from the General tab.
Step 2: Take another Input node. Click the dropdown below “Type” and choose “File”.
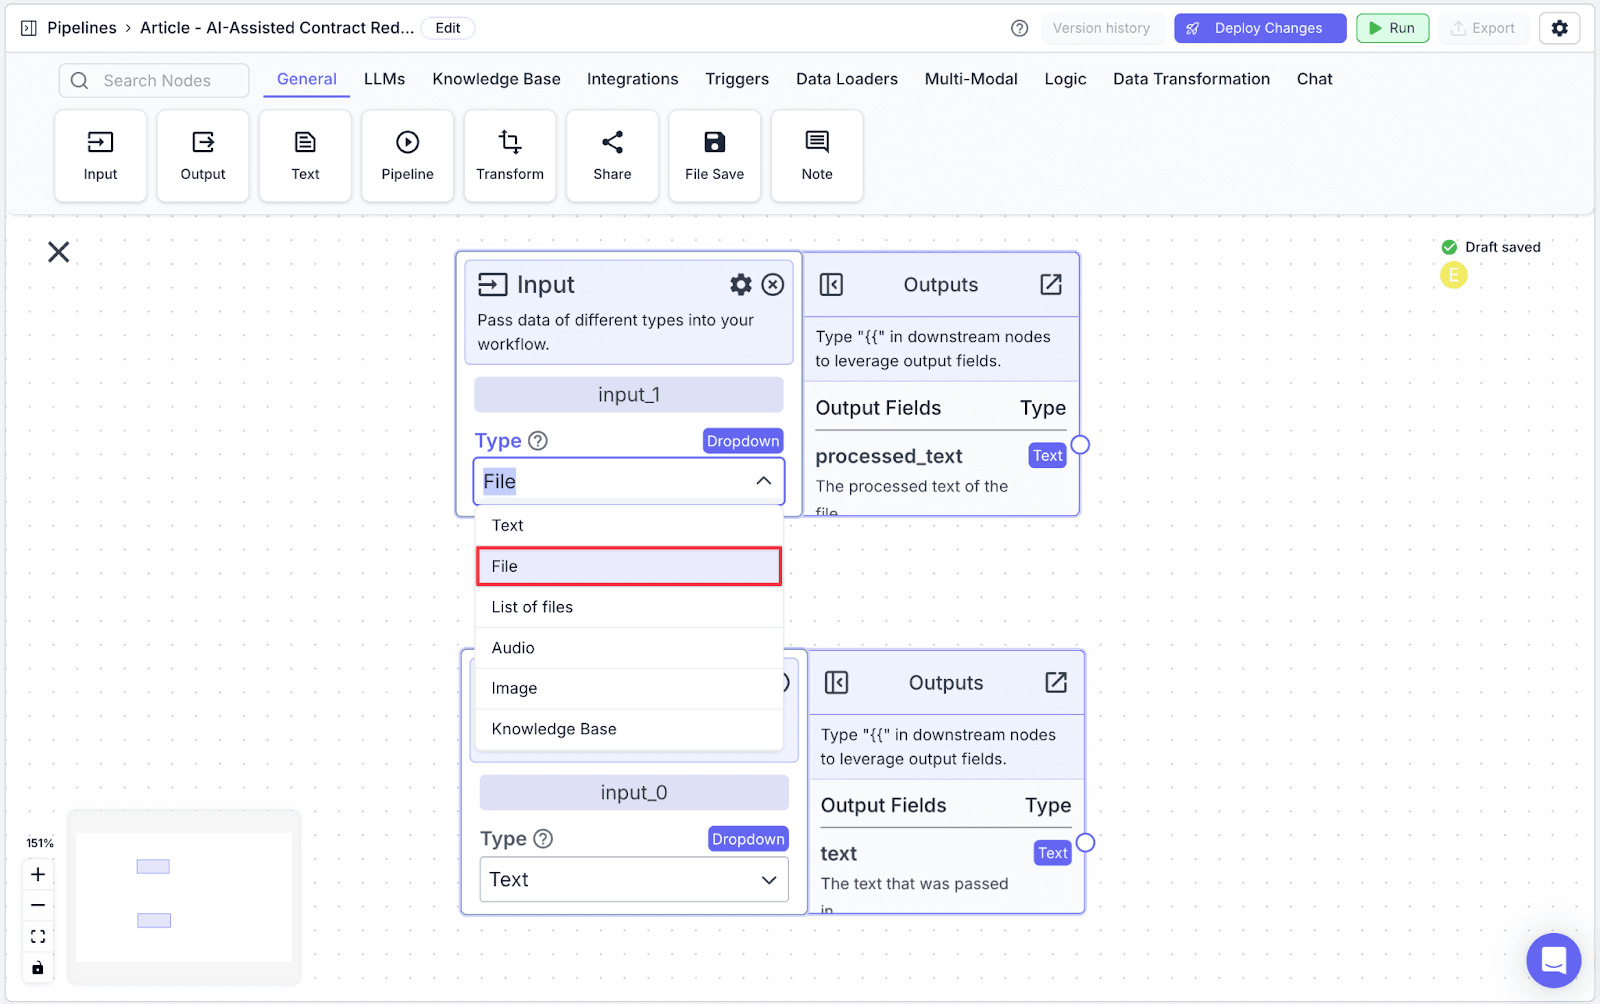
Optional: You can rename the nodes in the area highlighted by the red box below.
We rename the input node that will be used to accept the contract: document_upload
We rename the input node that will be used to accept additional user input: instruction_input

Summarizer Node
The Summarizer Node summarizes a piece of content.
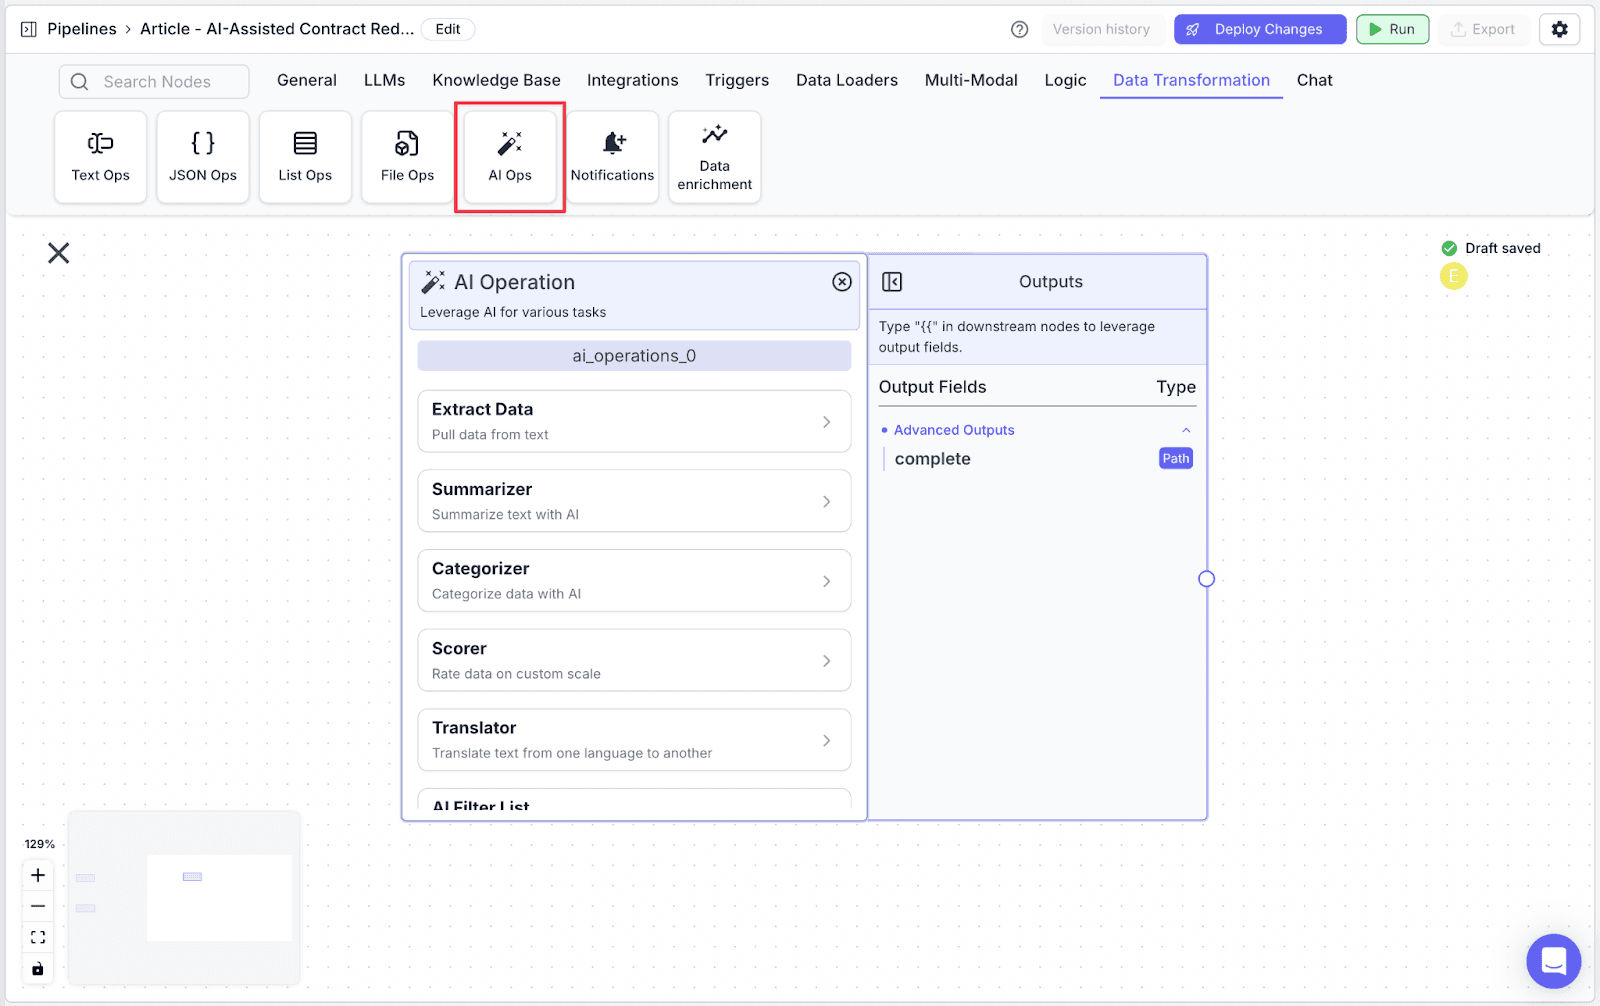
Step 1: Go to the “Data Transformation” tab and click click on “AI Ops”.
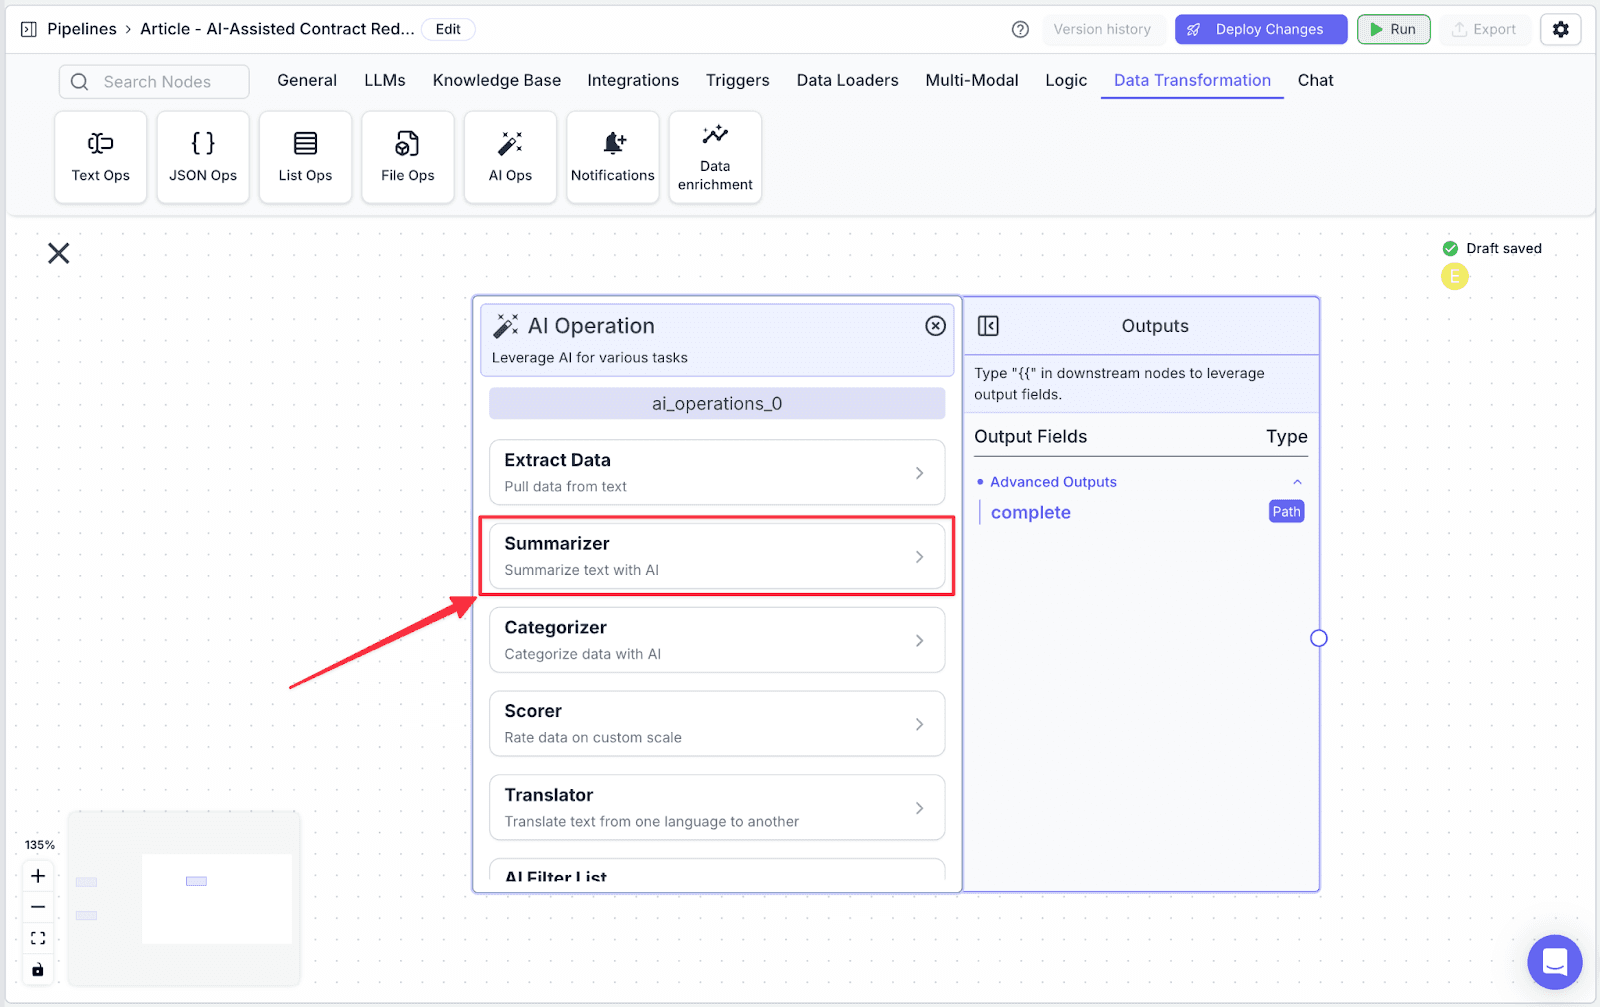
Step 2: Click on “Summarizer”. It will turn into a “Summarizer” node. Then, connect the input node with the type file selected to the summarizer node (this will summarize the contract).
Knowledge Base Node
Step 1: Take a Knowledge node under the “Knowledge Base” tab.
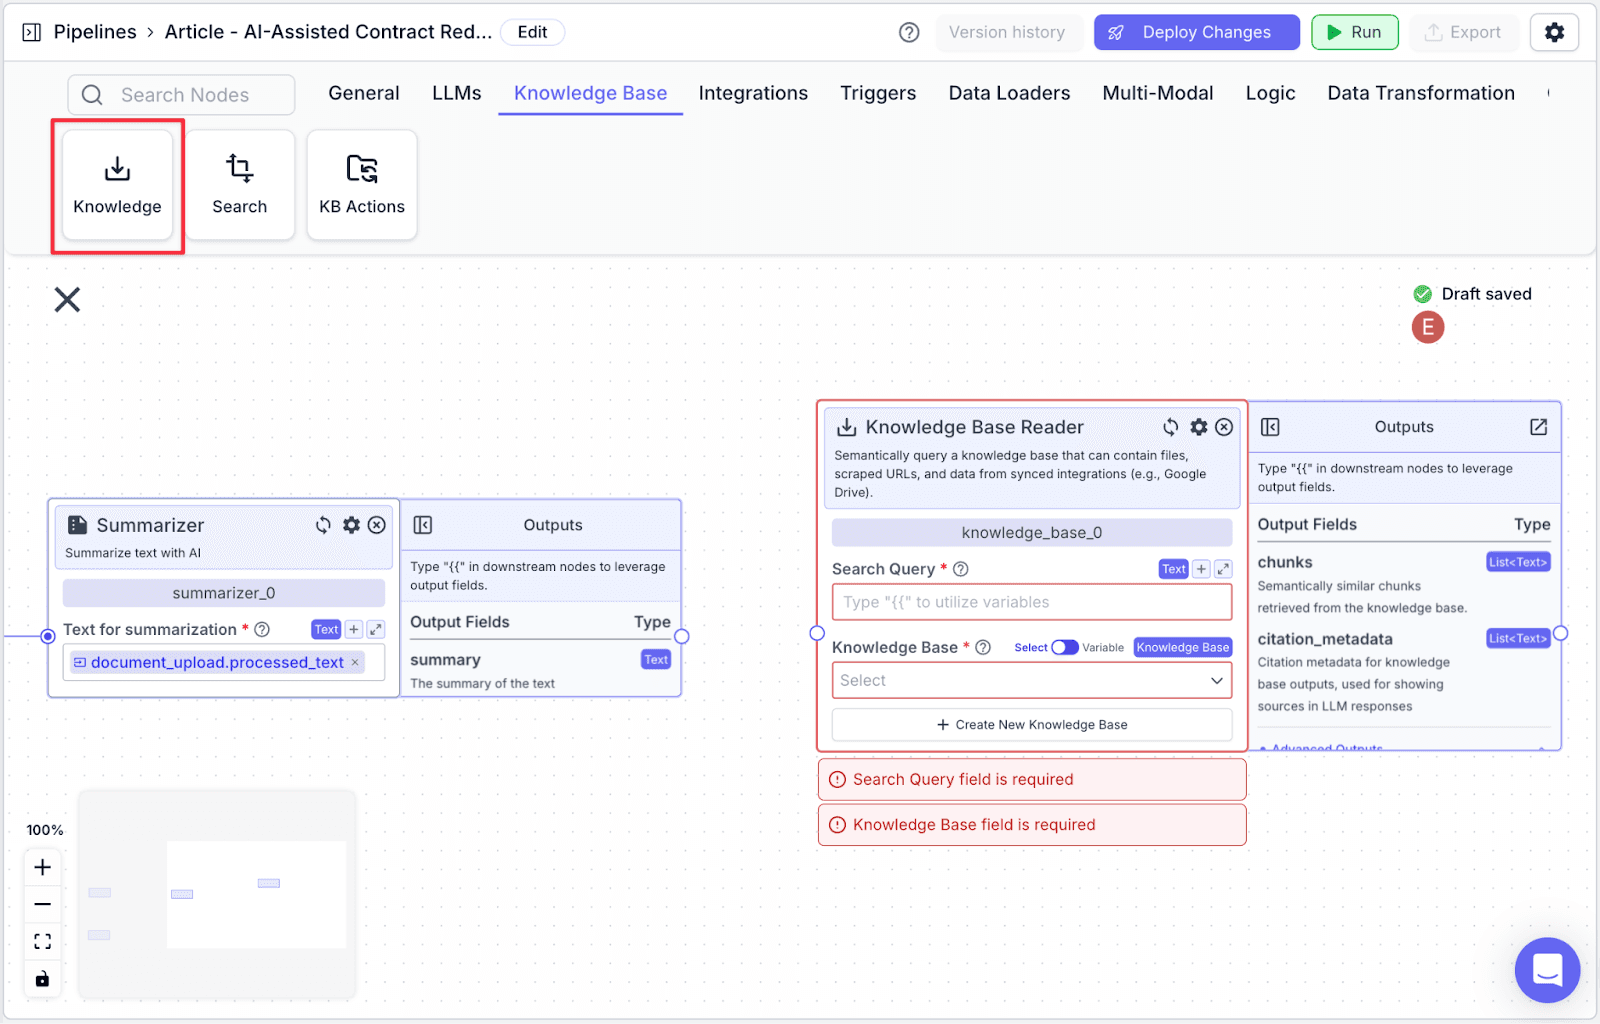
Step 2: Connect node “summarizer_0” with “knowledge_base_0”, then under the “Search Query” you will see {{summarizer_0.summary}} automatically added.
By doing this, the knowledge base will return any relevant information / guidelines related to the summary of the contract.
The reason why we are utilizing the summary as the search query instead of the contract itself is because it will likely produce more relevant results (given we will be querying against a more concise version of the text).
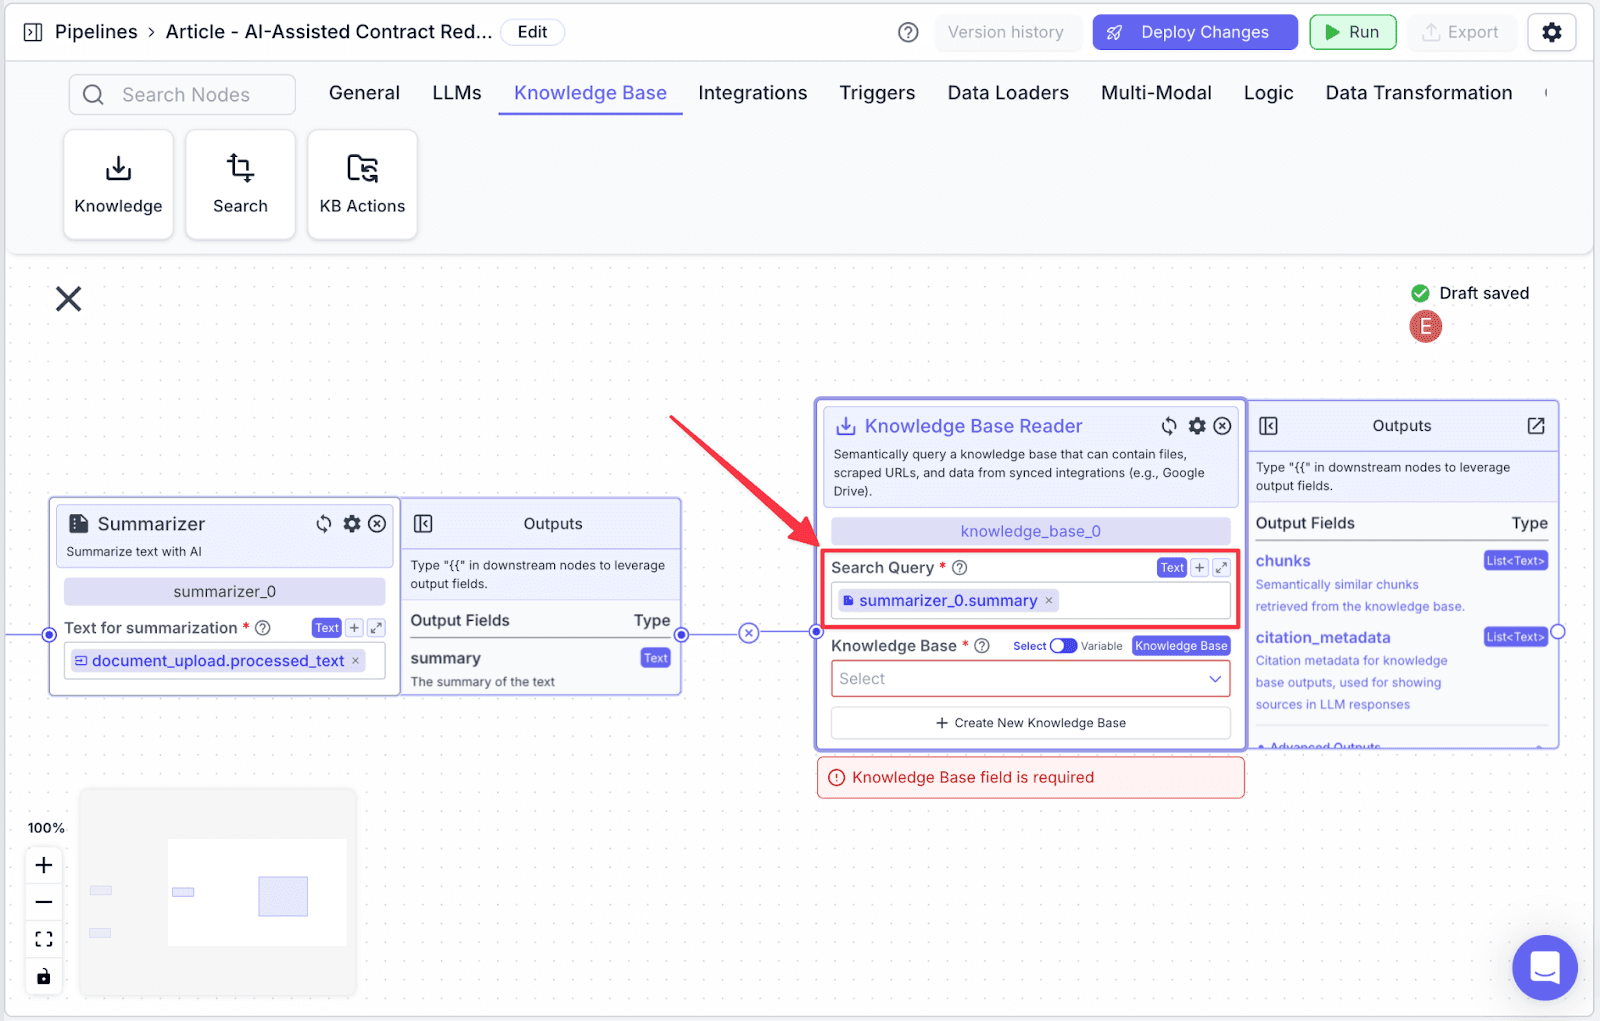
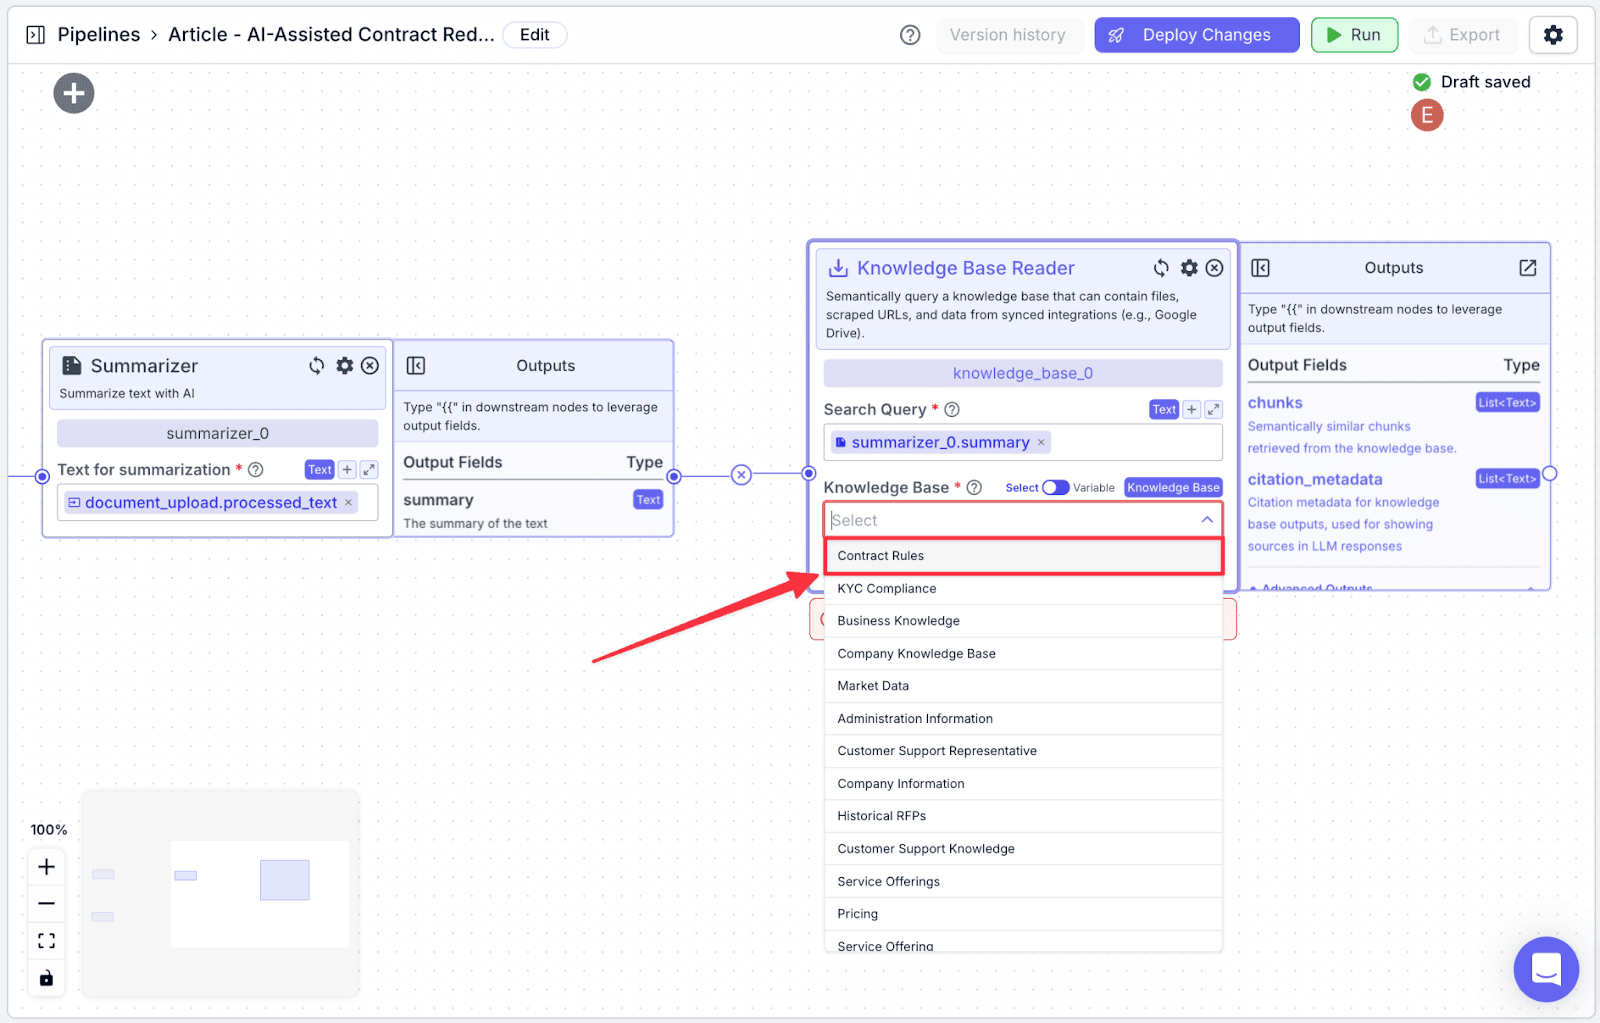
Step 3: Click the dropdown under the “Knowledge Base”, then choose the knowledge base we’ve created previously.
LLM Node
The LLM node will be utilized to produce the final redlining report.
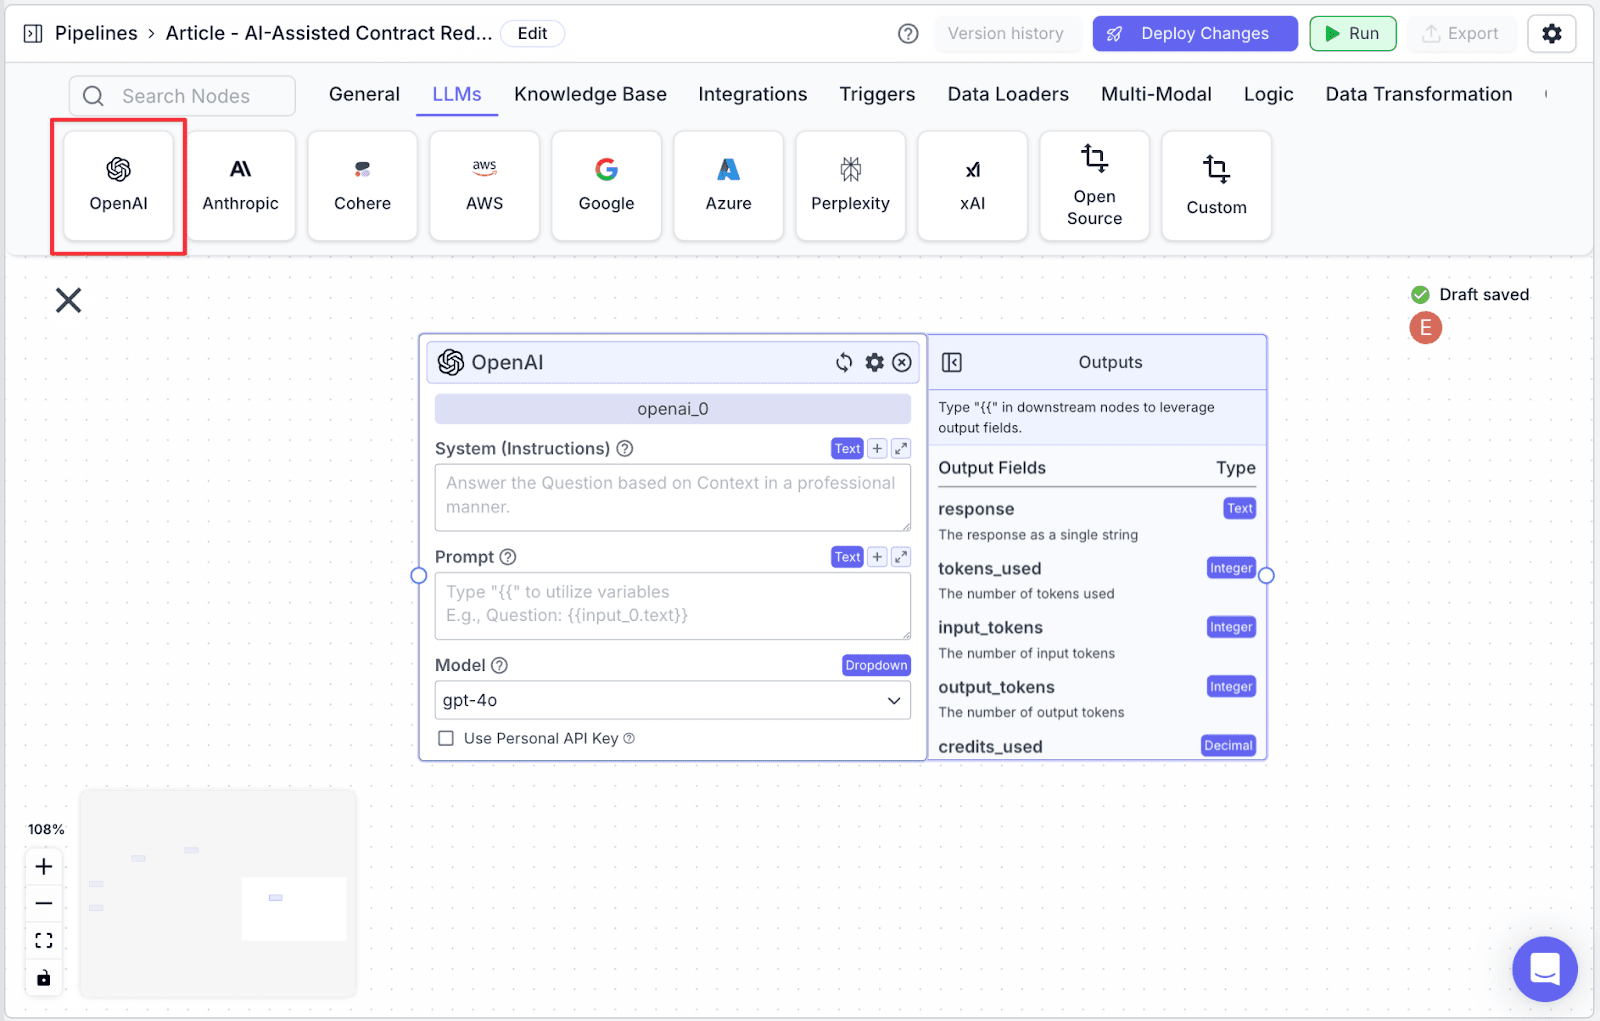
Step 1: Take an “OpenAI” (“openai_0”) node under the “LLMs” tab.
Step 2: Connect the knowledge base and two input nodes to the openAI node.
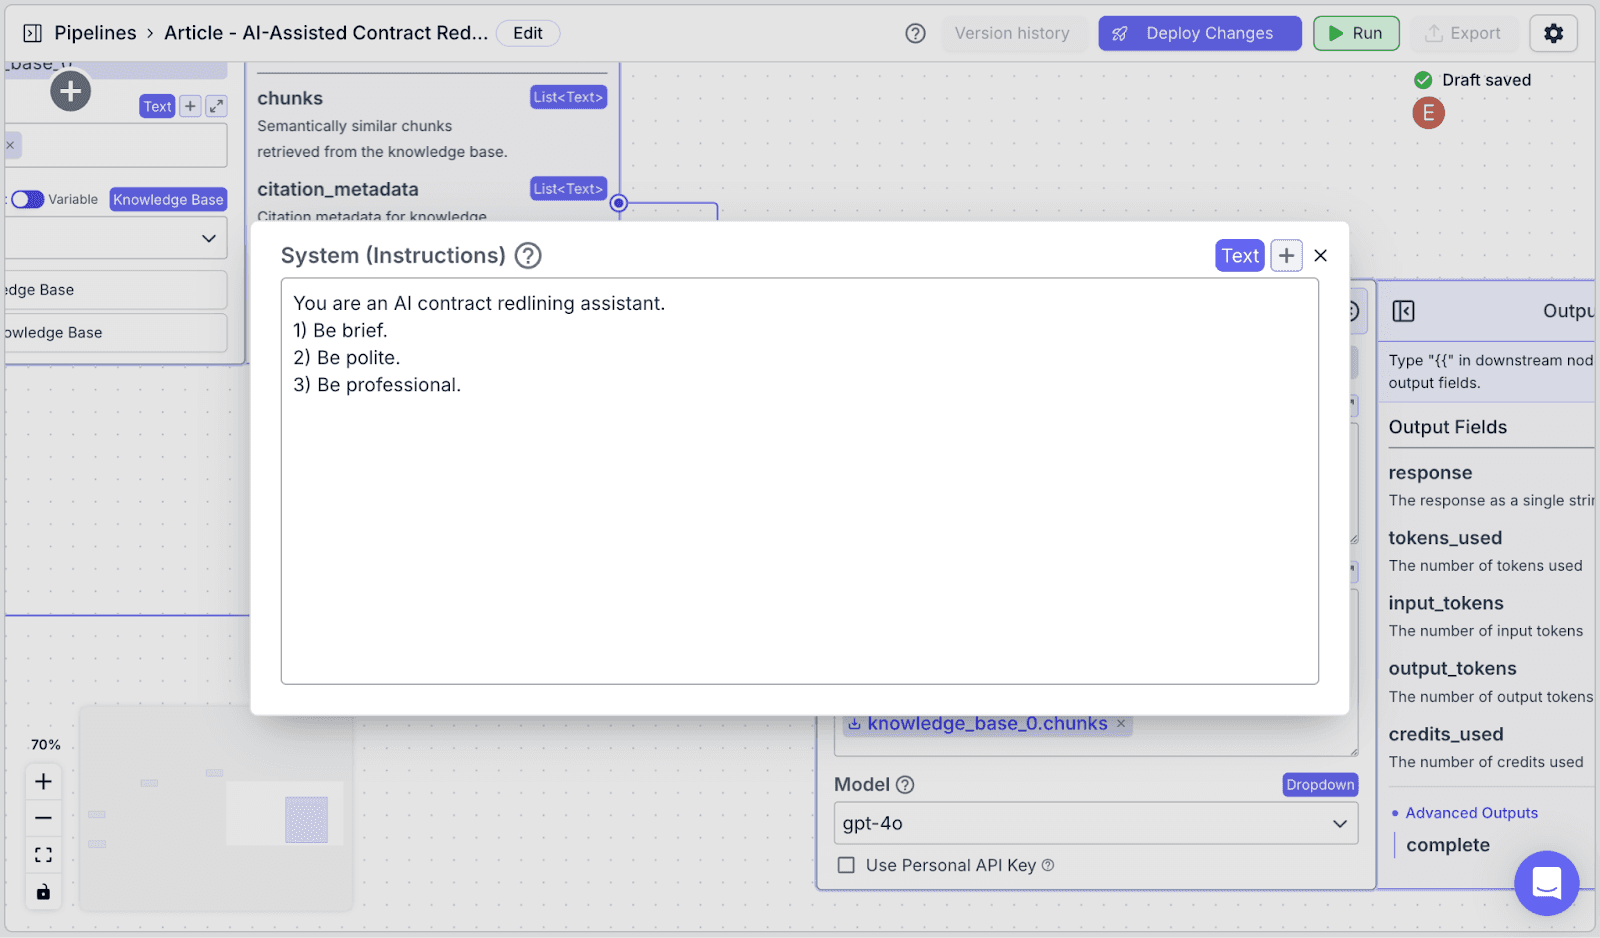
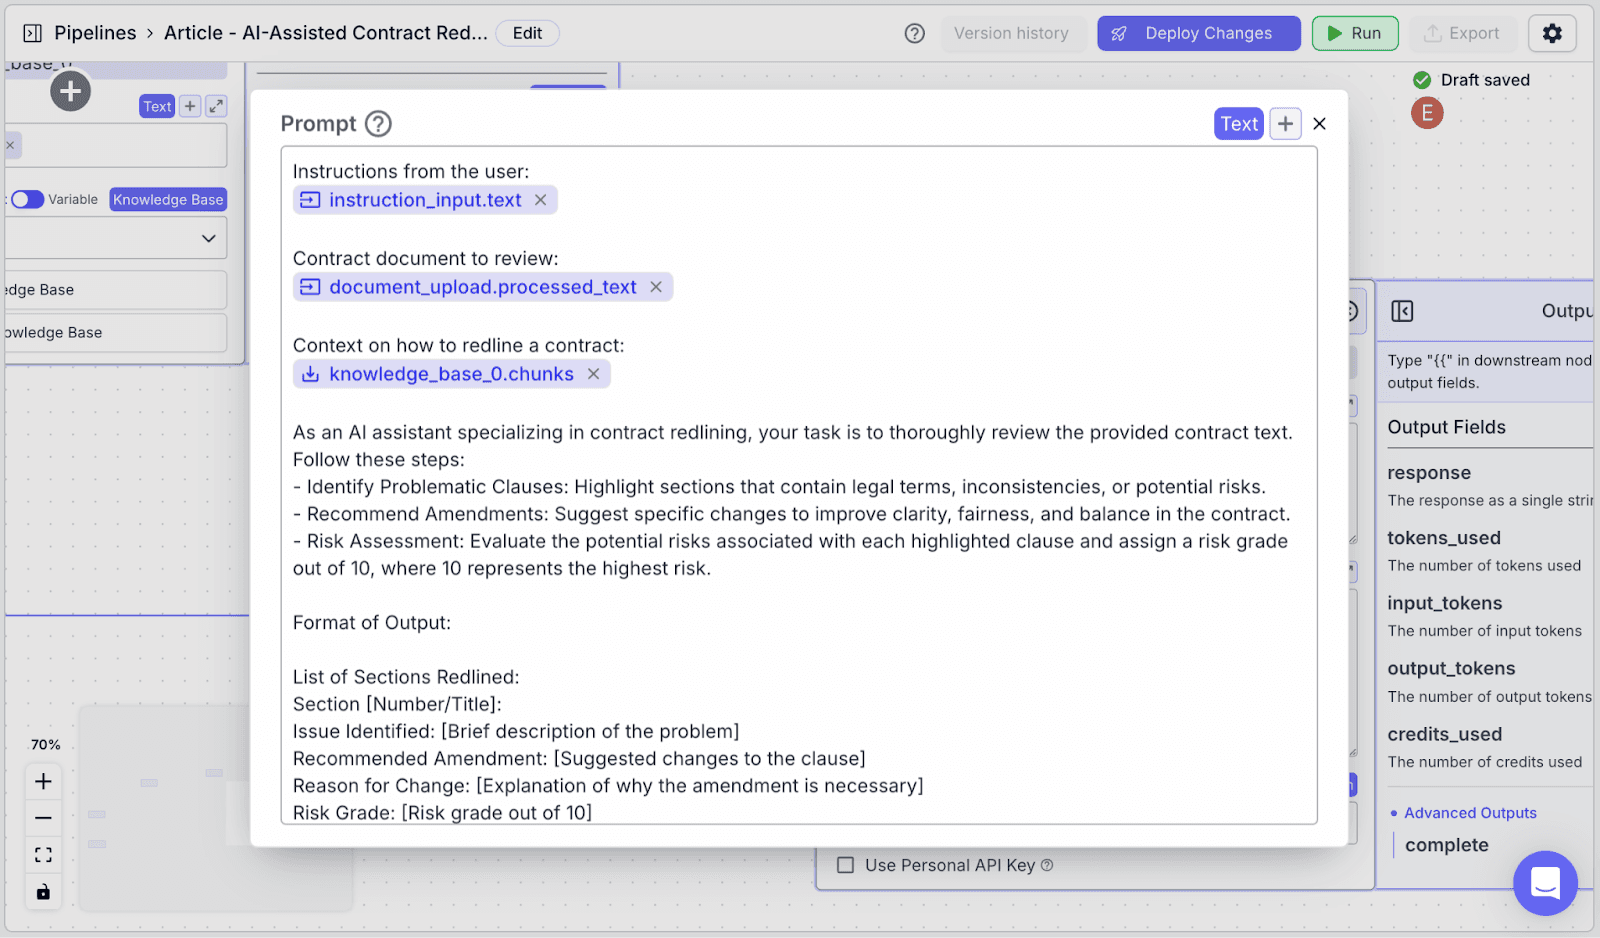
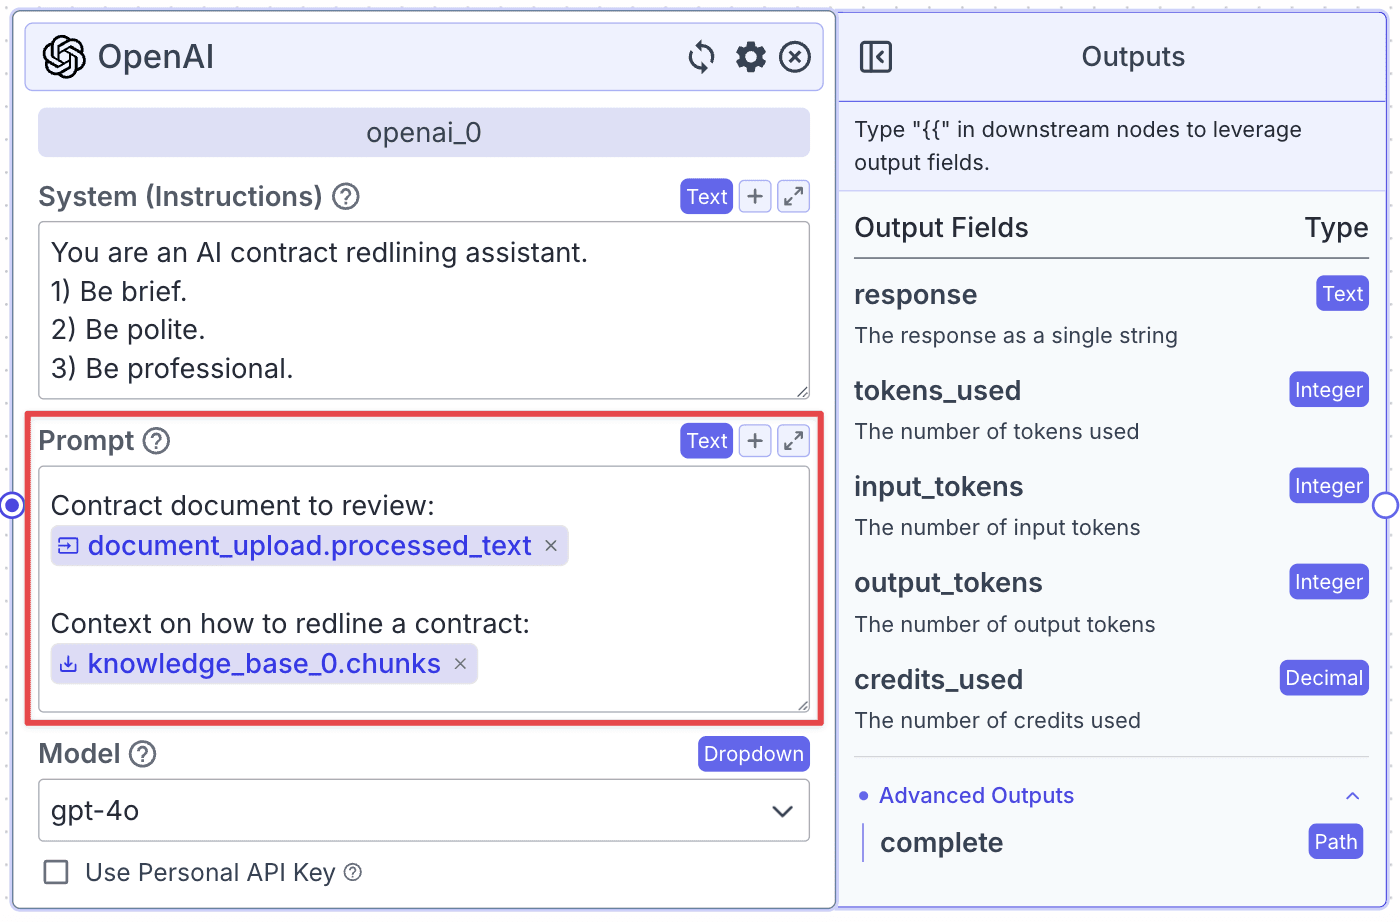
Step 3: The LLM node has two fields: “System (Instructions)” and “Prompt”.
“System (Instructions)” defines how you want the LLM to behave. You can use the instructions below:
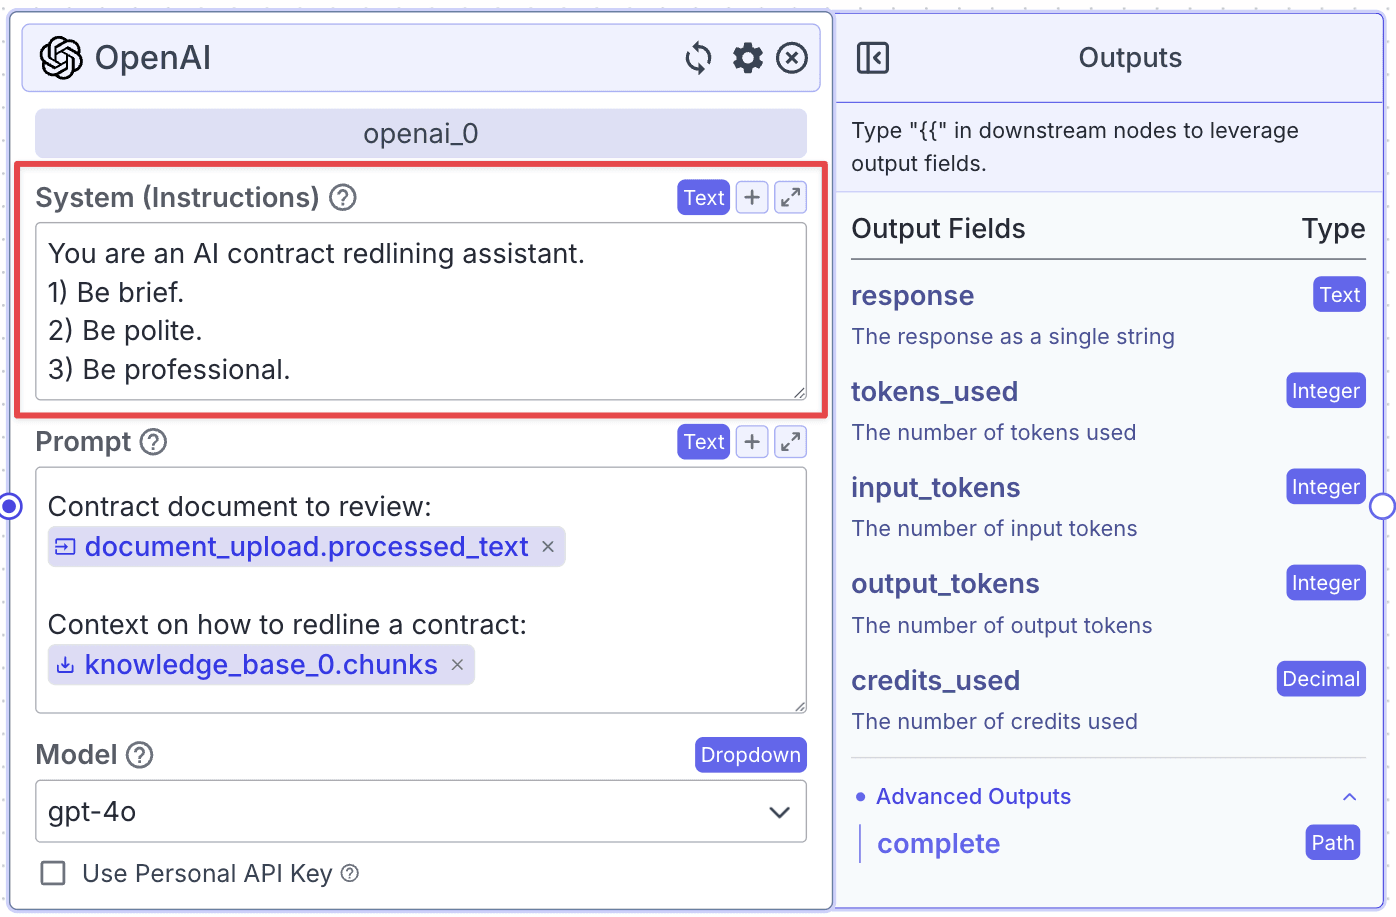
Within the “Prompt”, you can pass data from other nodes:
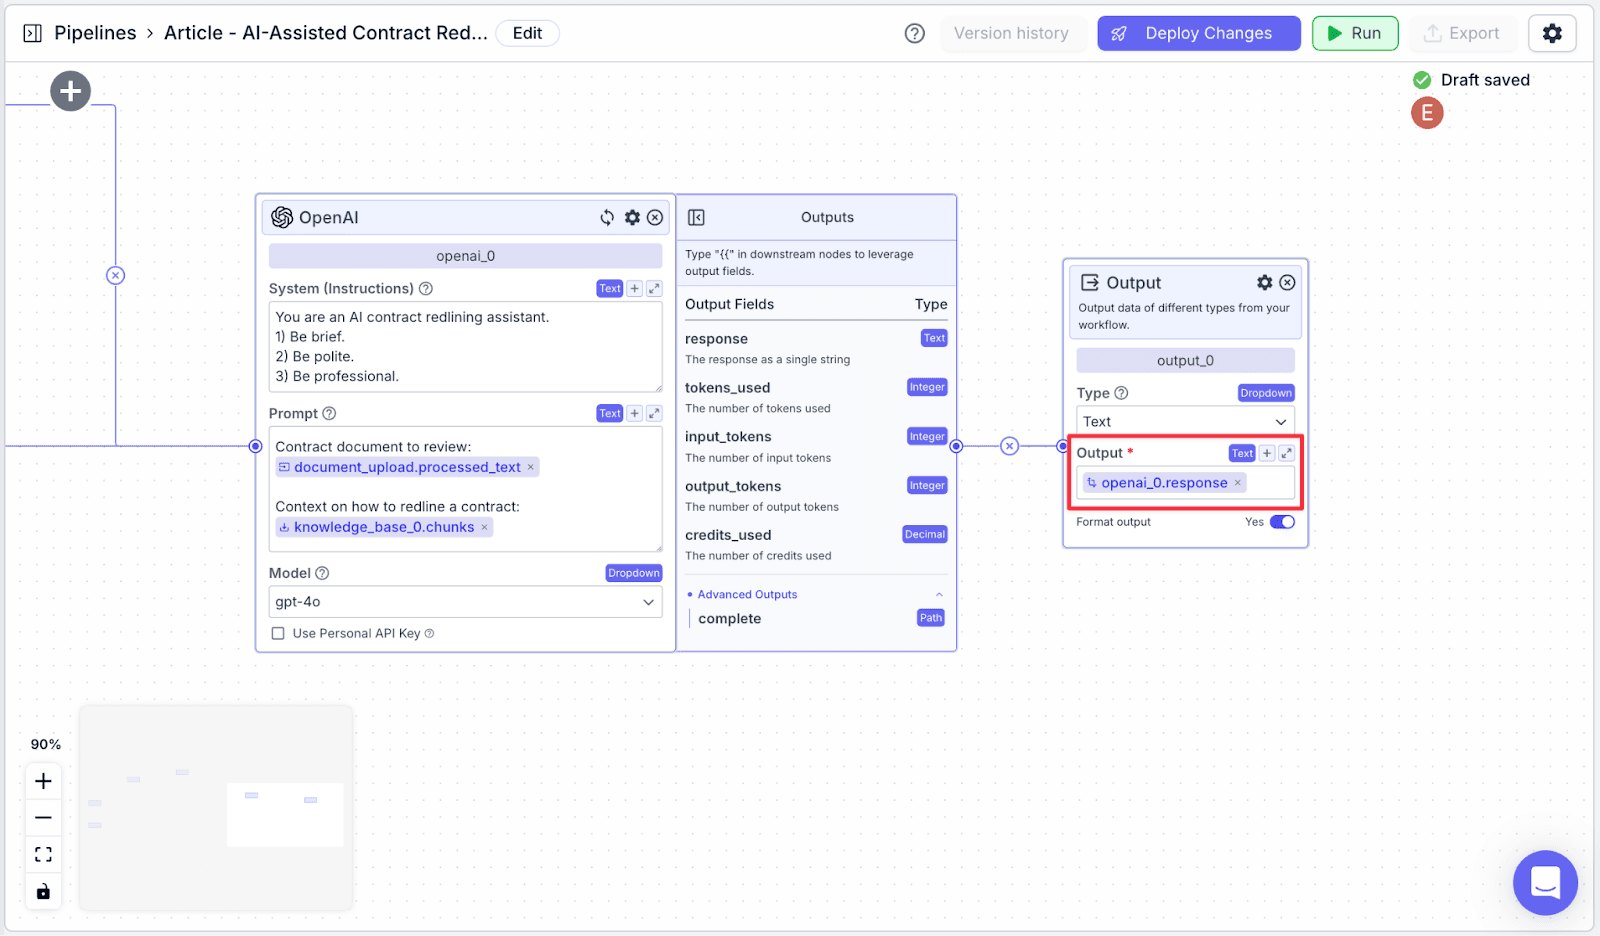
Output Node
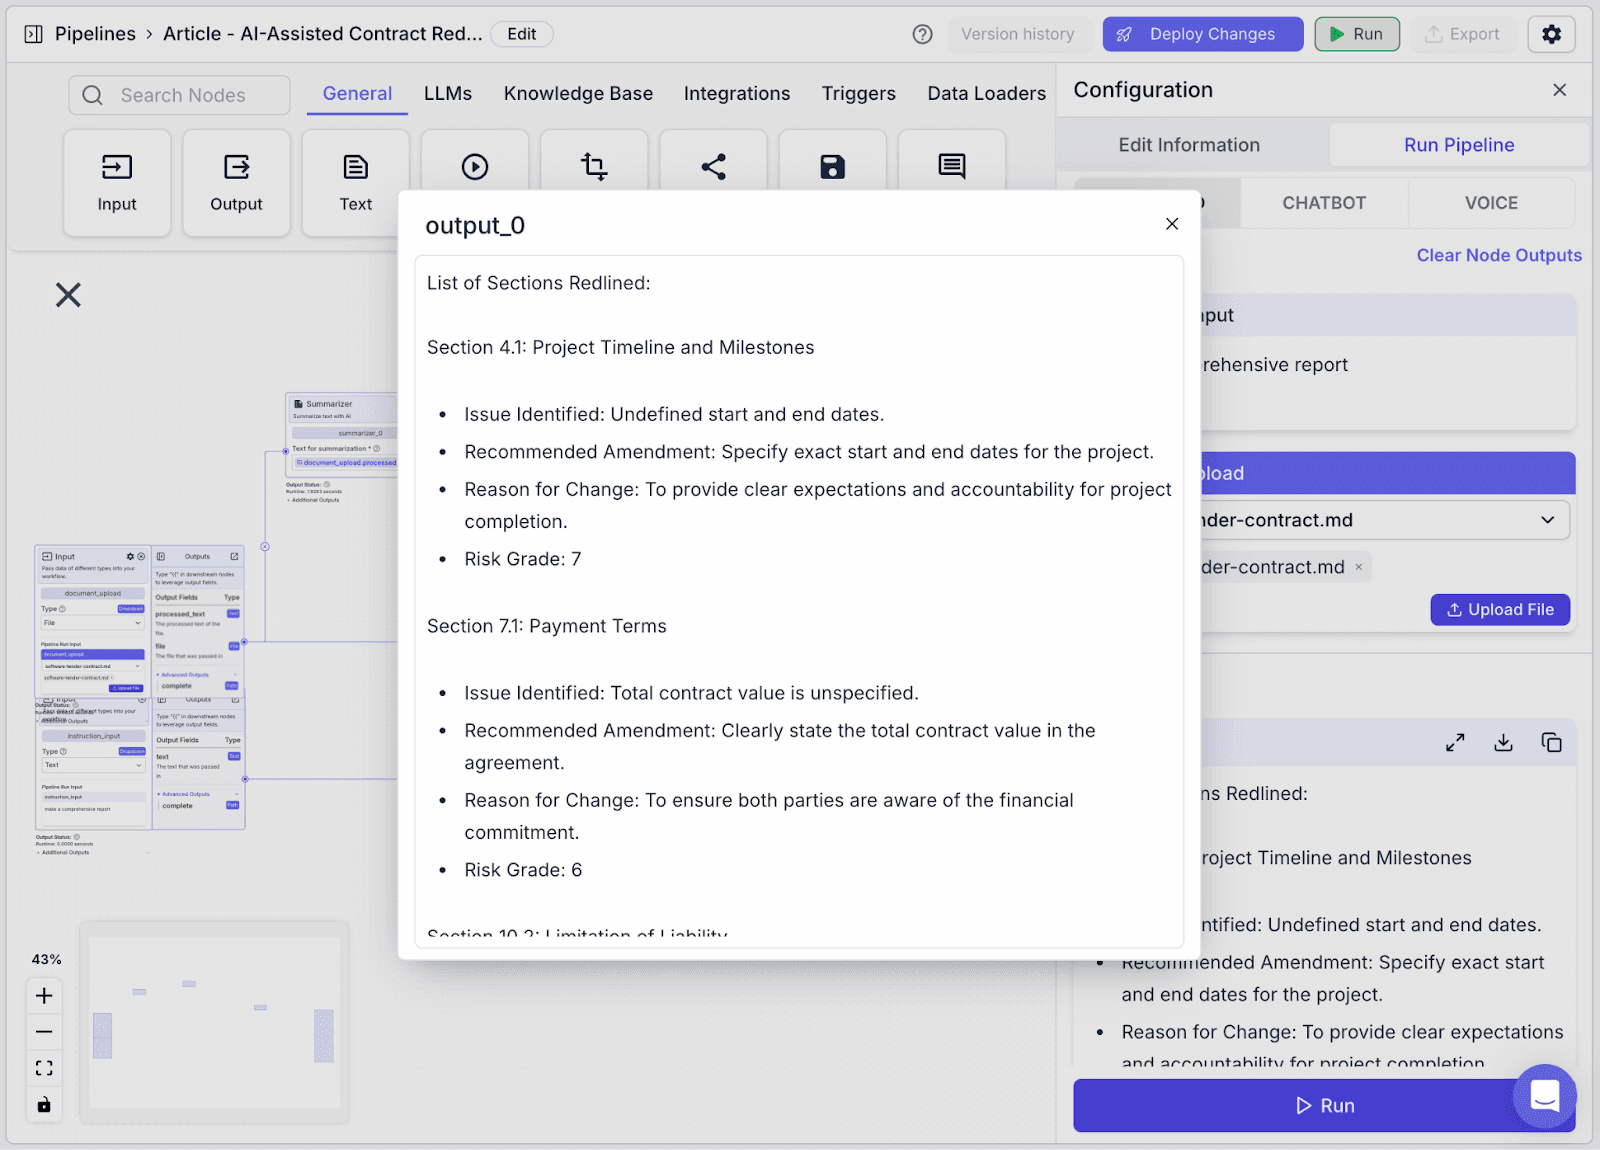
The Output node job is to display the result from the “openai_0” node.
Step 1: Take an Output node “output_0” from the “General” tab.
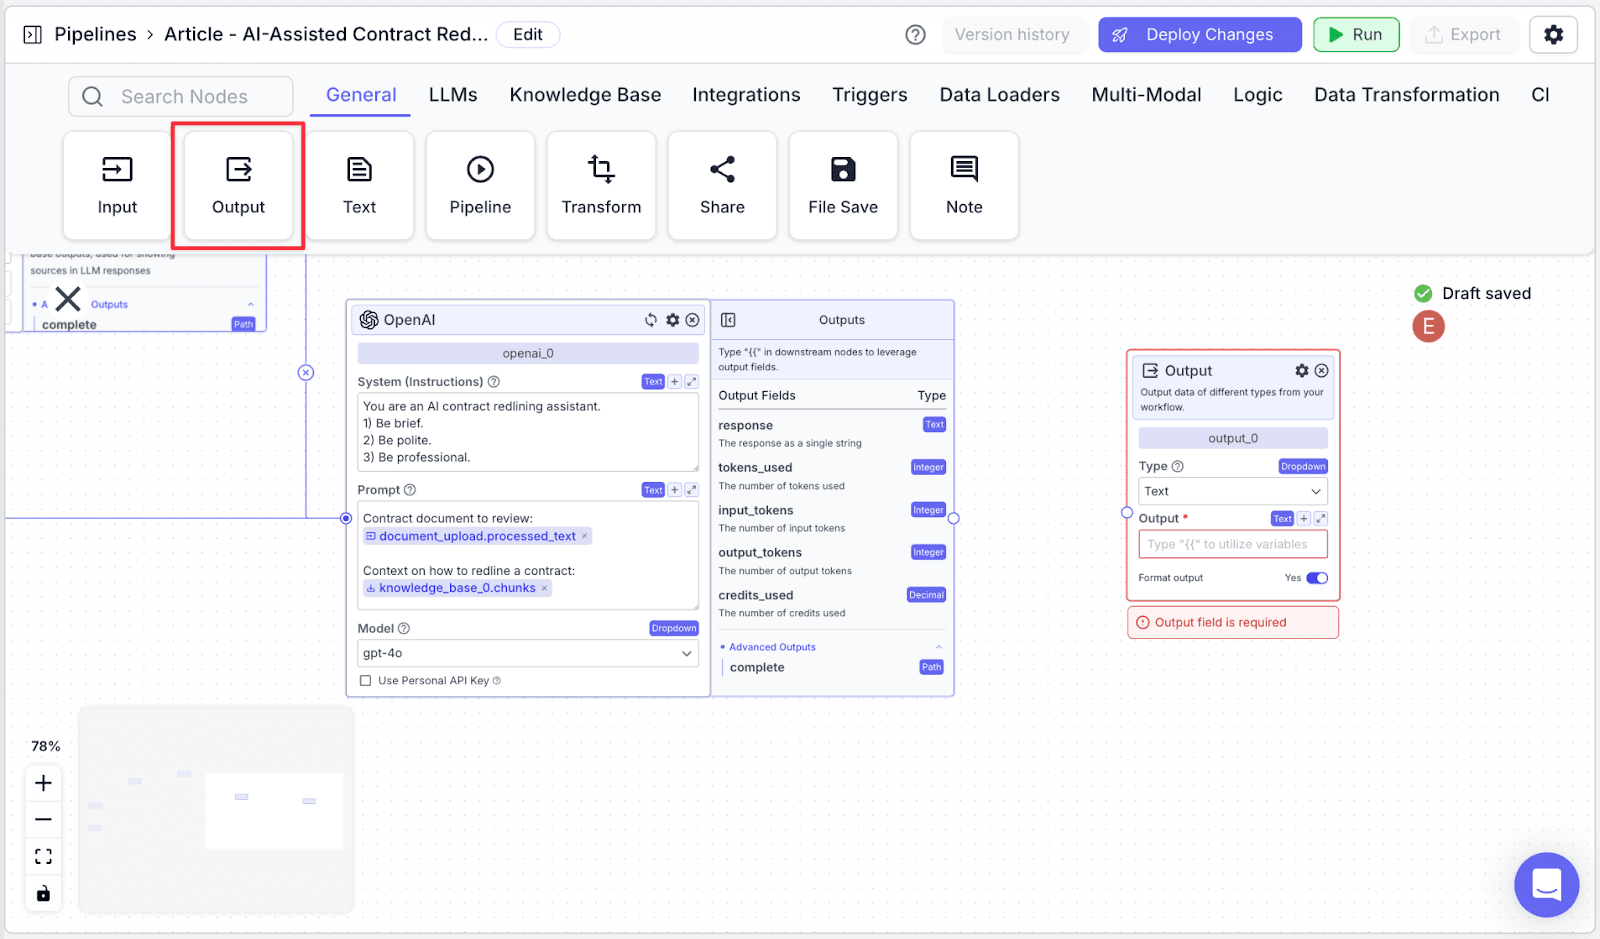
Step 2: Connect “openai_0“ with “output_0”. Under the “Output” field, the {{openai_0.response}} will automatically be assigned.
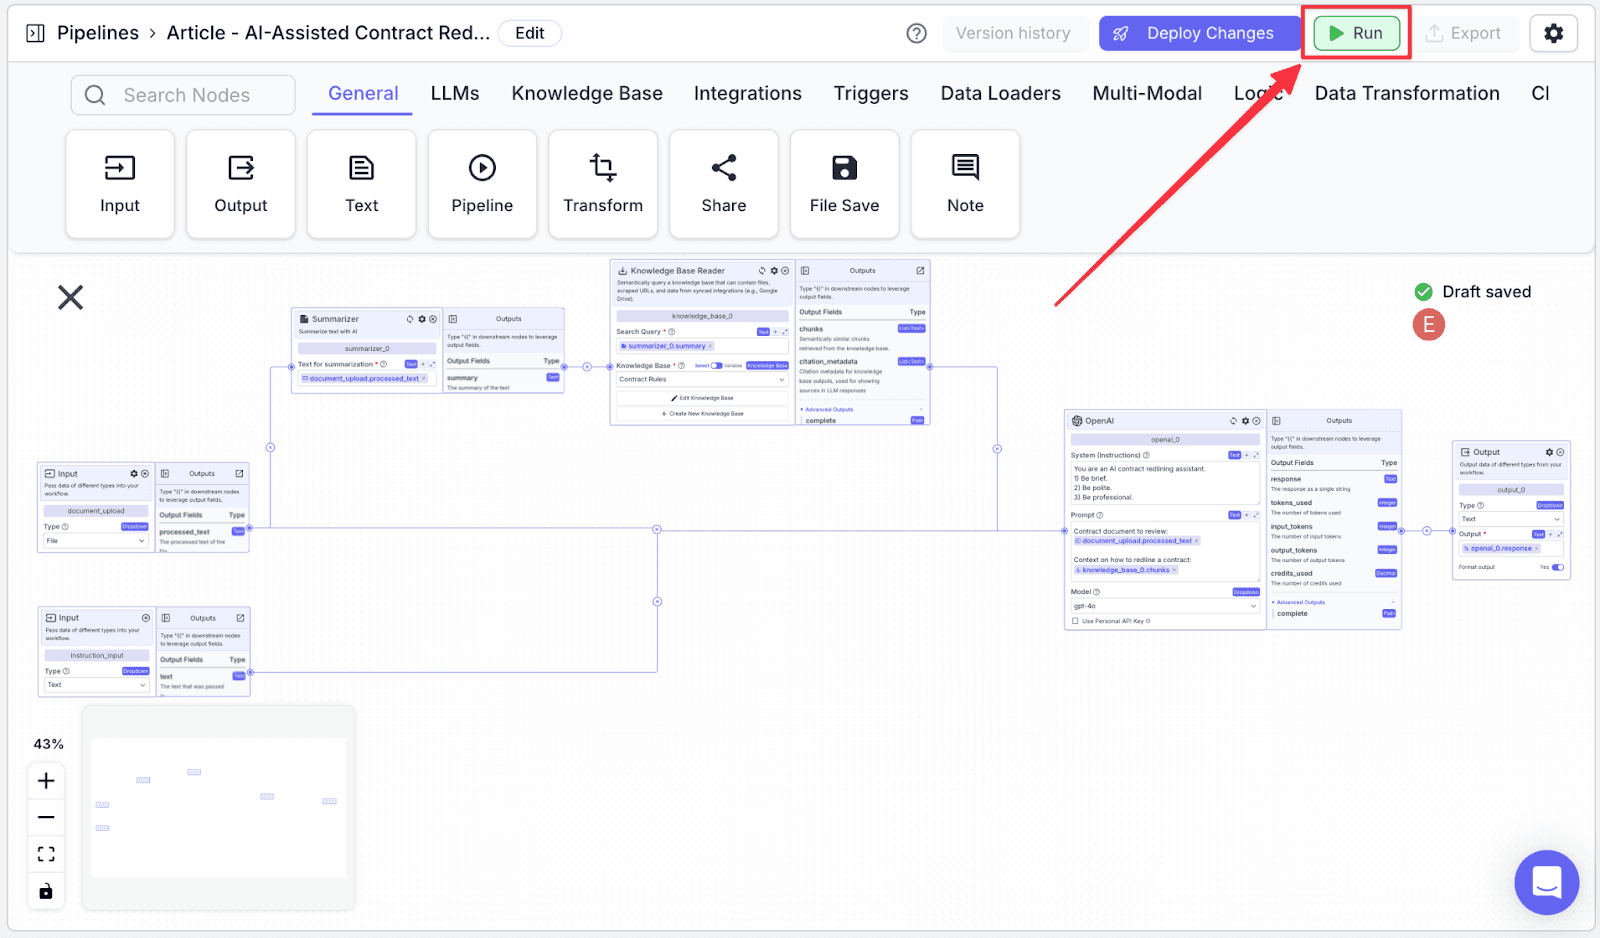
Running the Pipeline
Click “Run” on the top-right of the window. You will show the “Run Pipeline” pane on the right part of the screen.
Fill all of the inputs, then click on the “Run” button at the bottom.
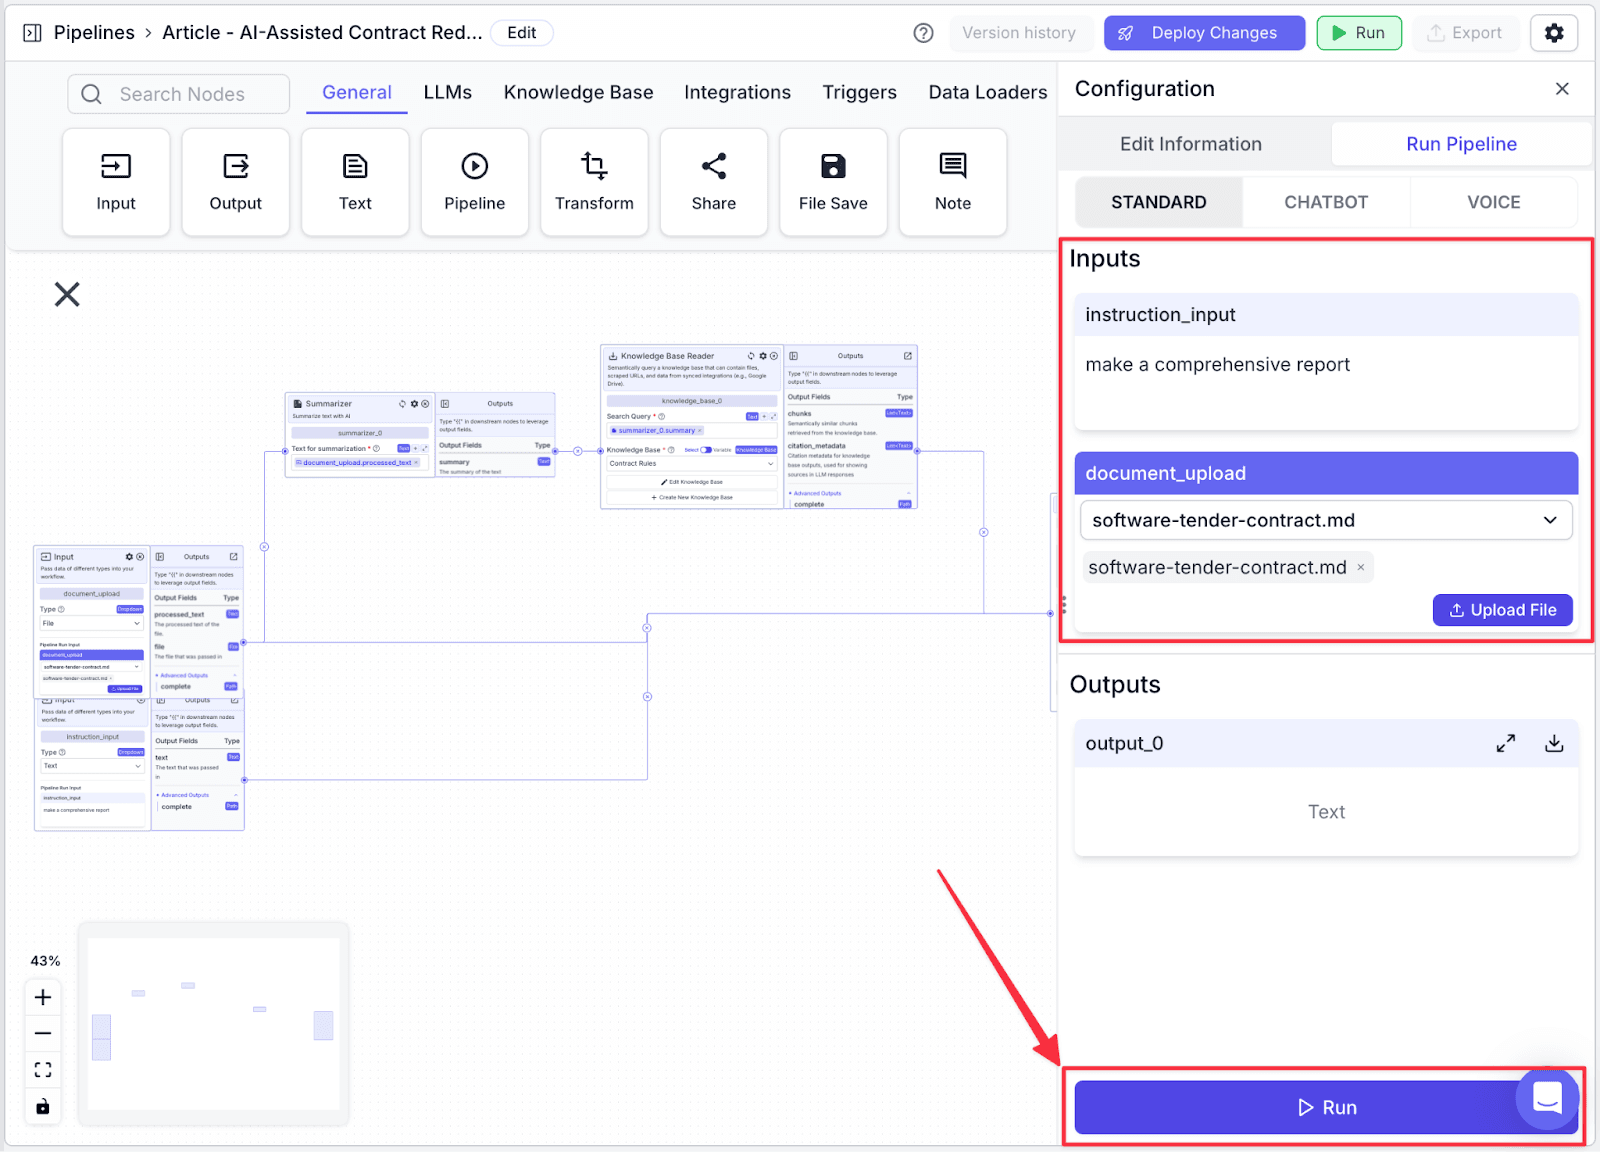
You can see the result in the “Output” tab.
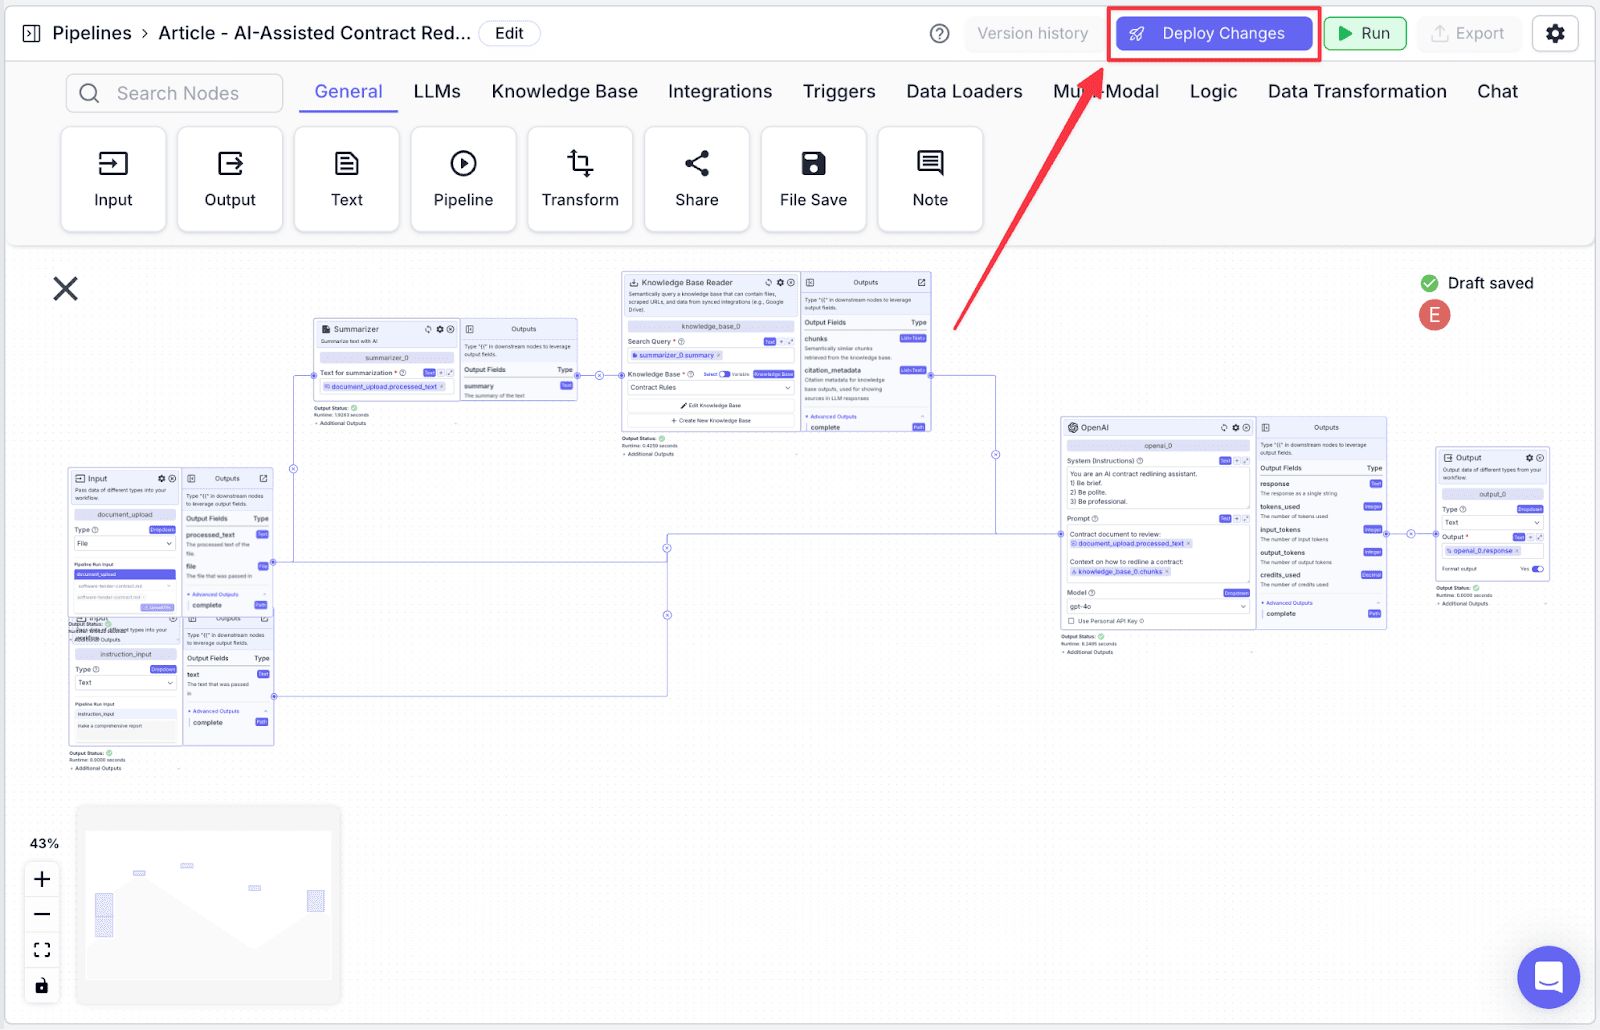
Deploying the Pipeline
The last thing you need to do is to deploy the pipeline. This allows you to track your pipeline versioning in case you want to revert to the previous version. Click “Deploy Changes” to continue.
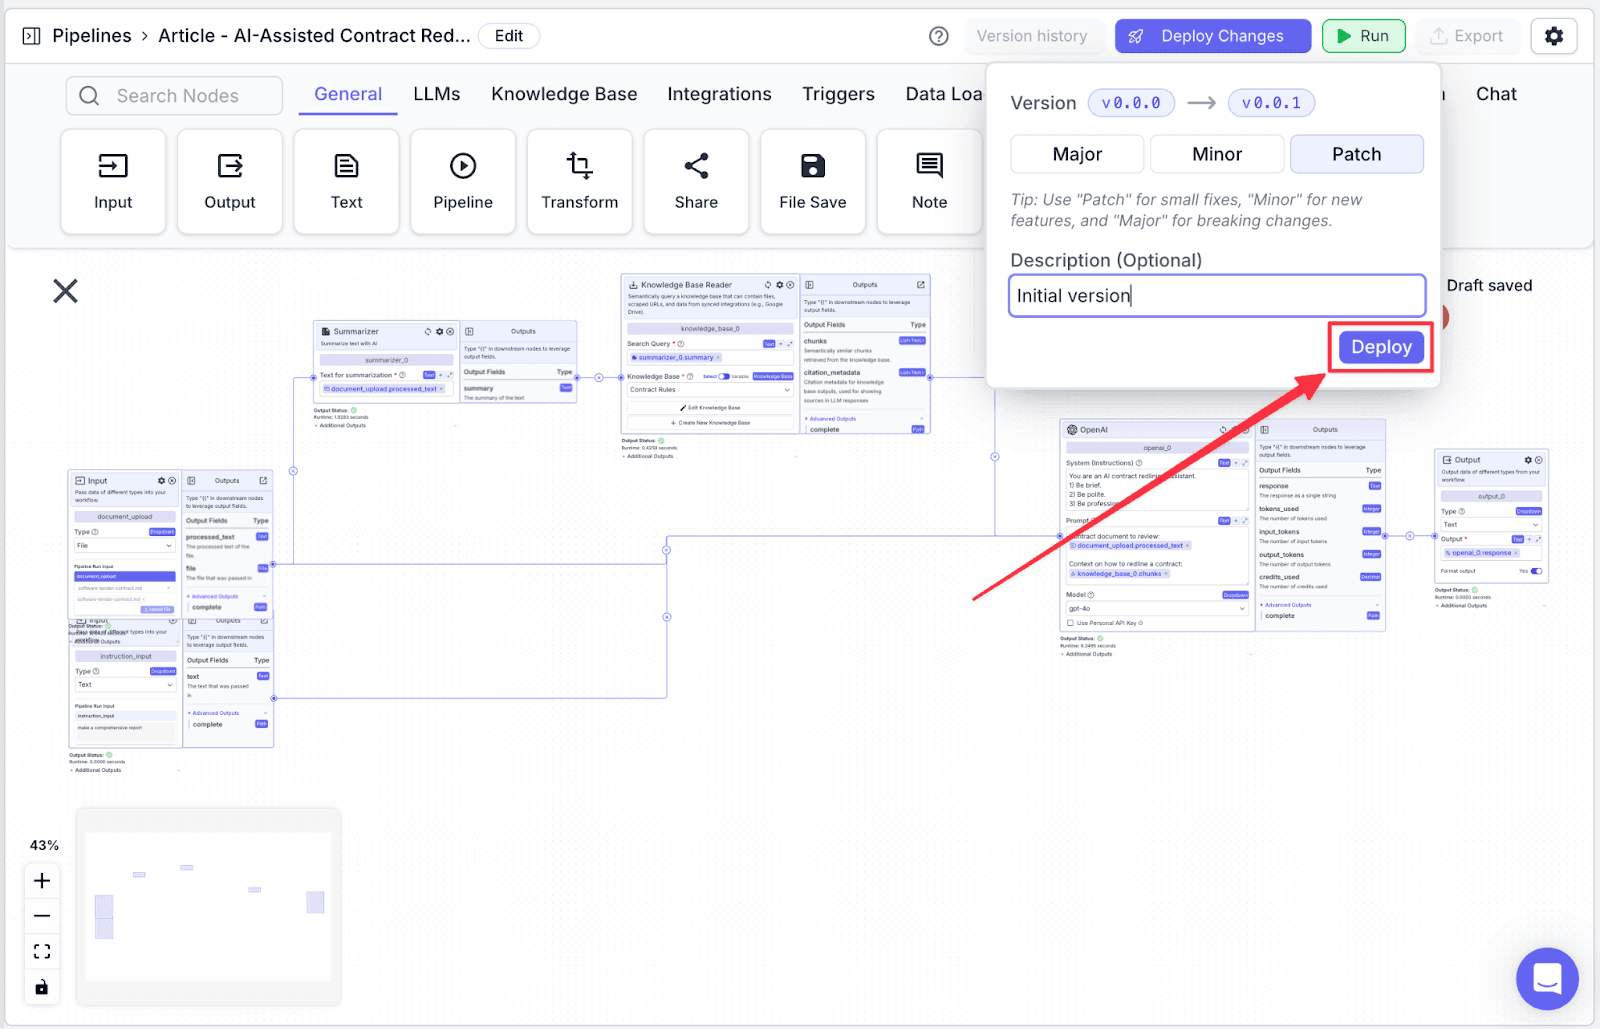
In the deployment interface, you will be given the option to add a “Description (Optional)” to your deployment and its version. This helps you to track what changes each version. Click on the “Deploy” button to apply the changes.
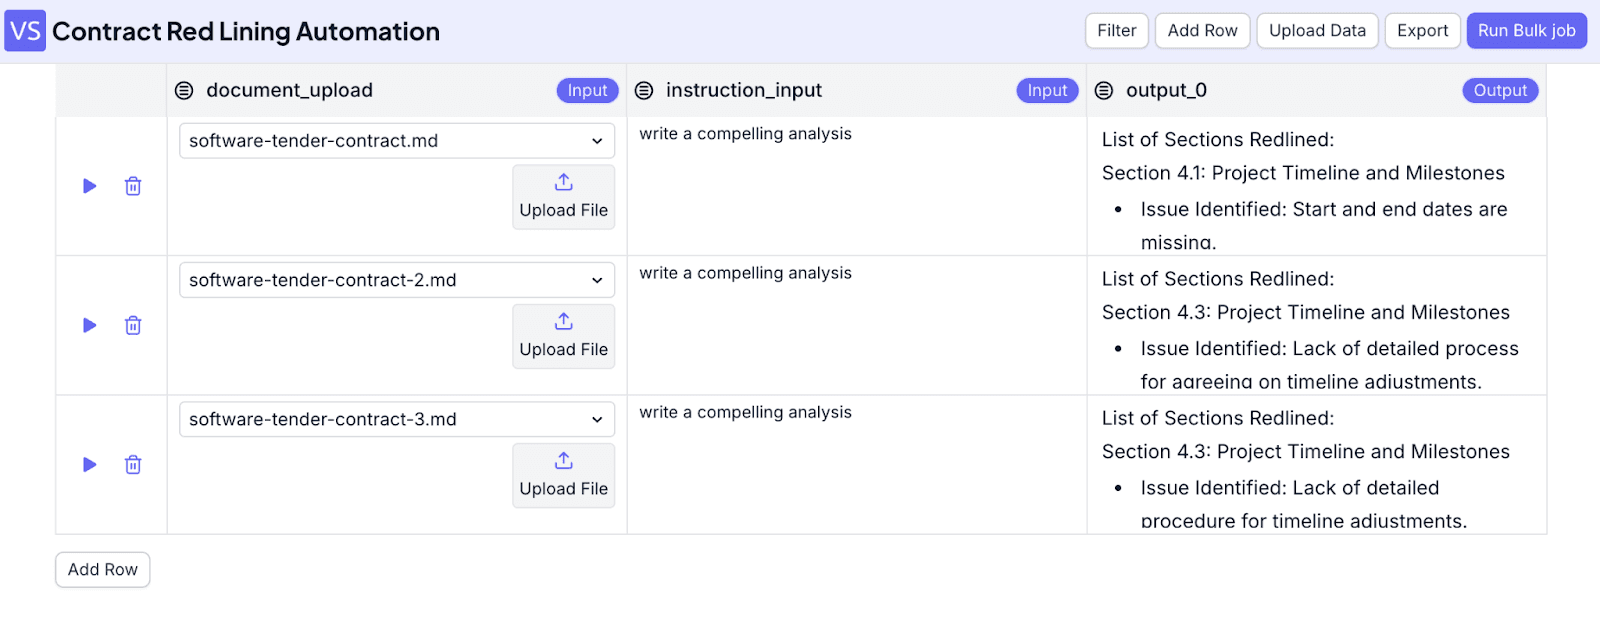
3. Exporting the Pipeline
Exporting the pipeline allows our pipeline to be easily used by integrating it with a built-in VectorShift interface.
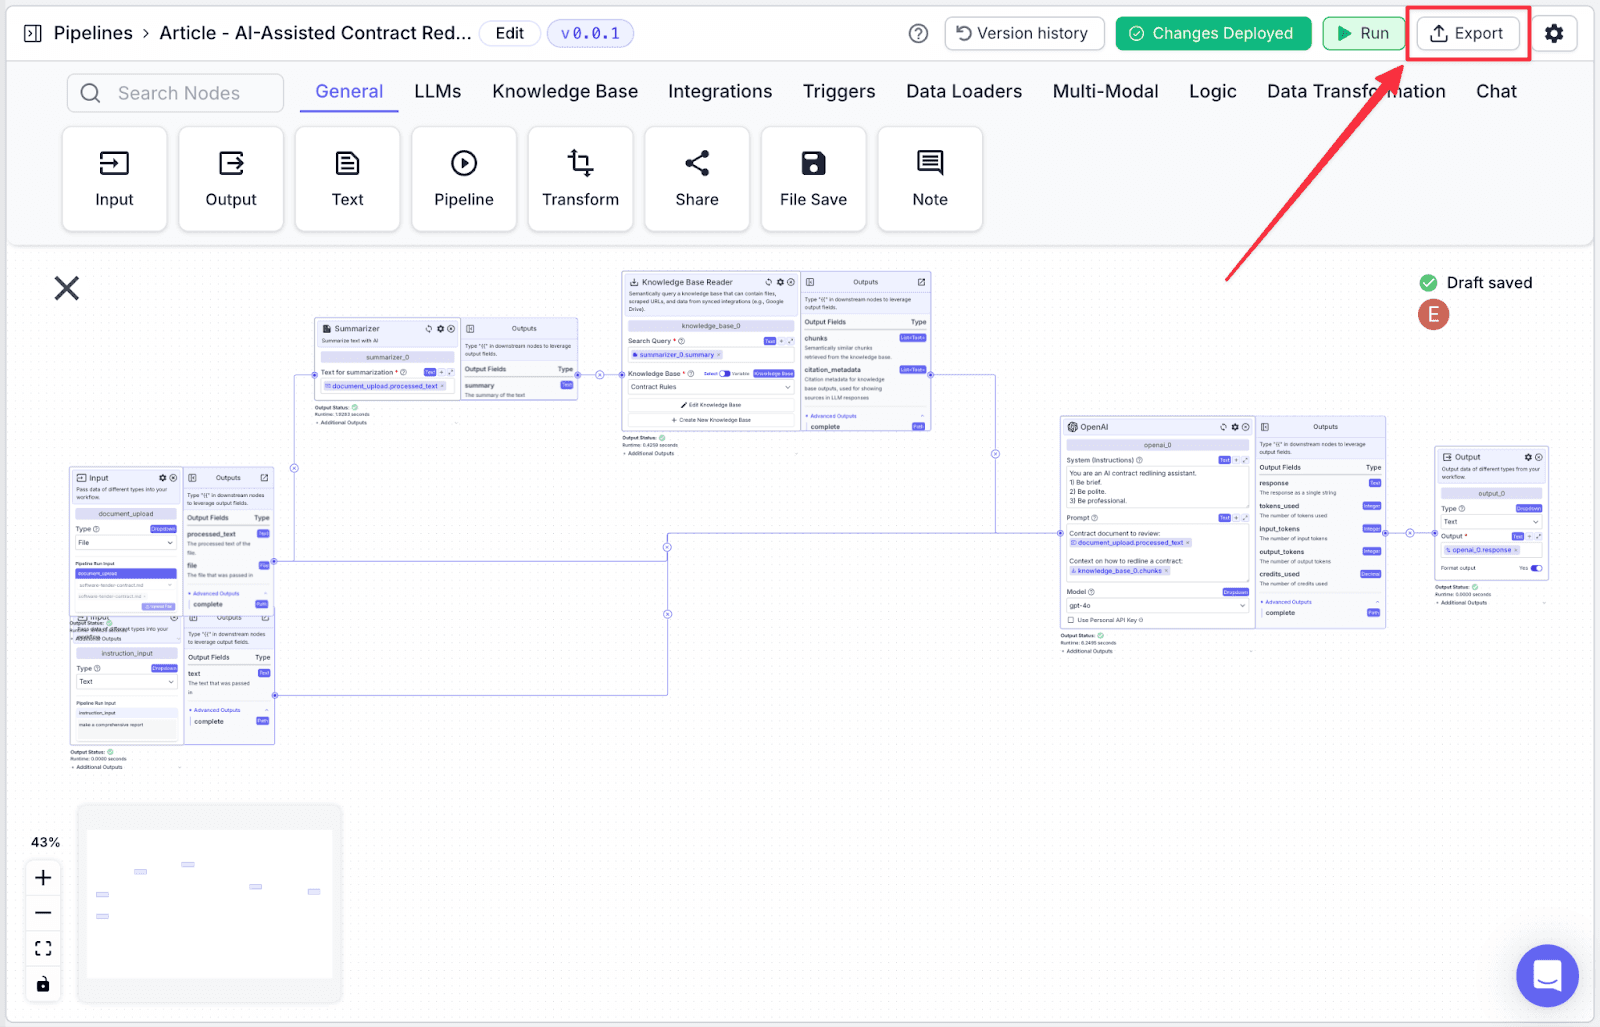
Step 1: Click on “Export” on the top right.
Step 2: You will see some options to export your pipeline. For this pipeline, click on “Bulk Jobs”.
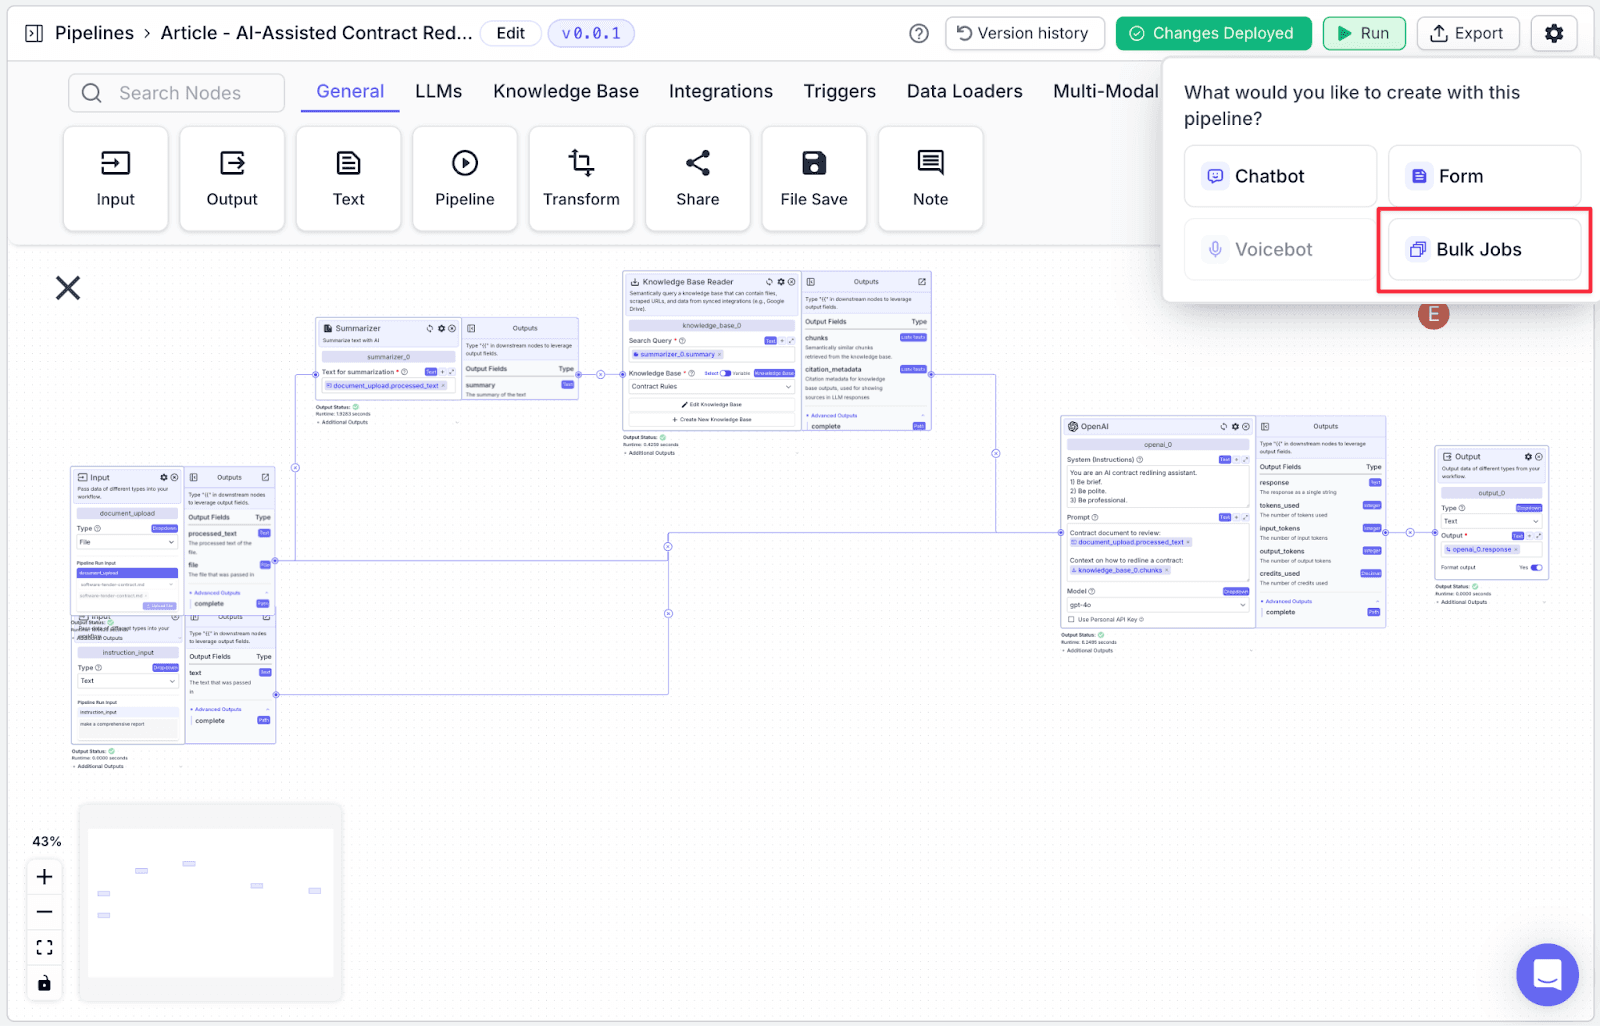
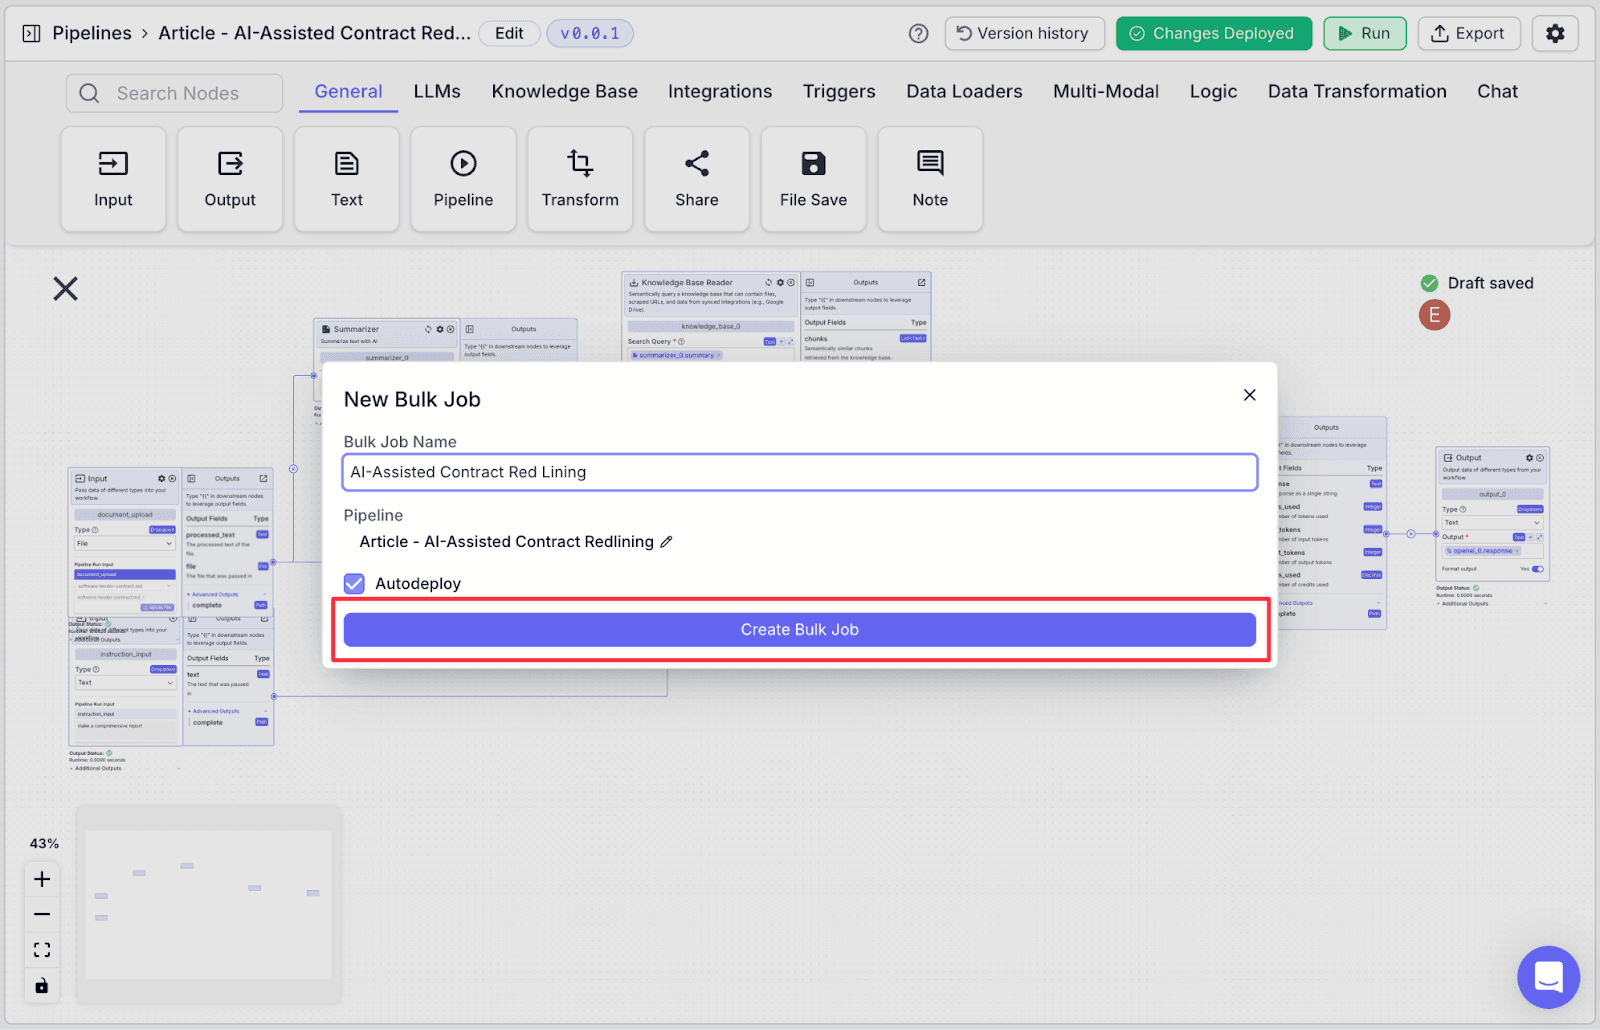
Step 3: Add name and click on “Create Bulk Job”.
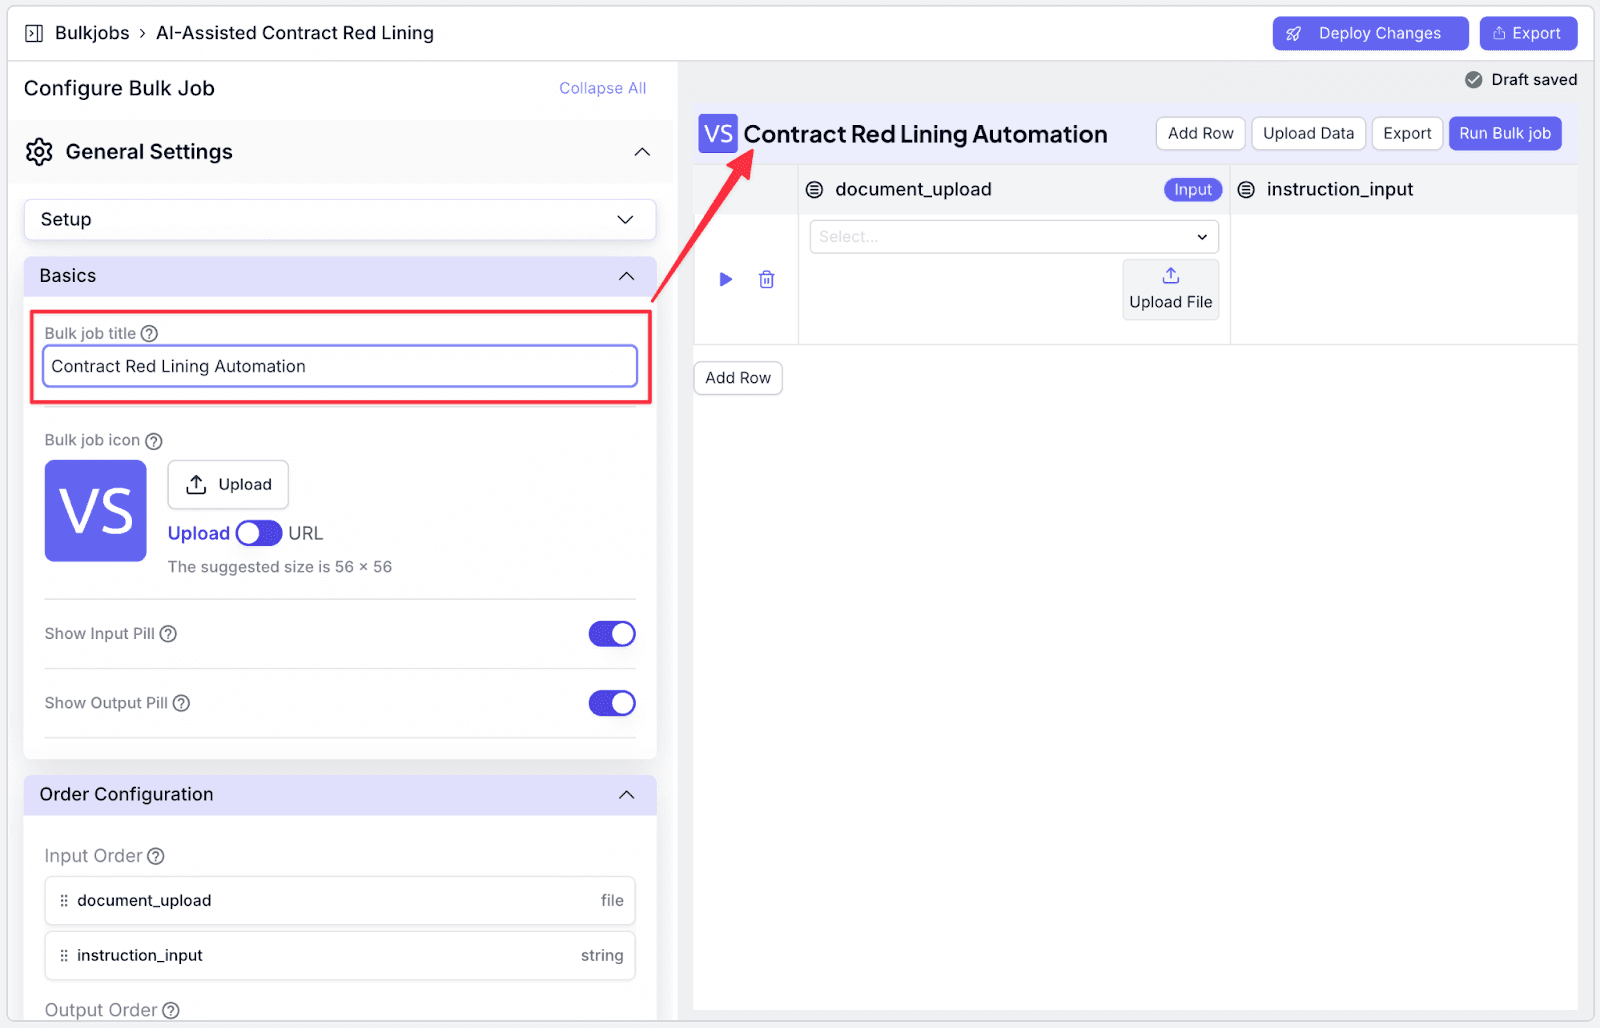
Step 4: Make any necessary cosmetic changes on the left pane. For example, you can change the title of the interface. When you’re done, click on “Deploy Changes”.
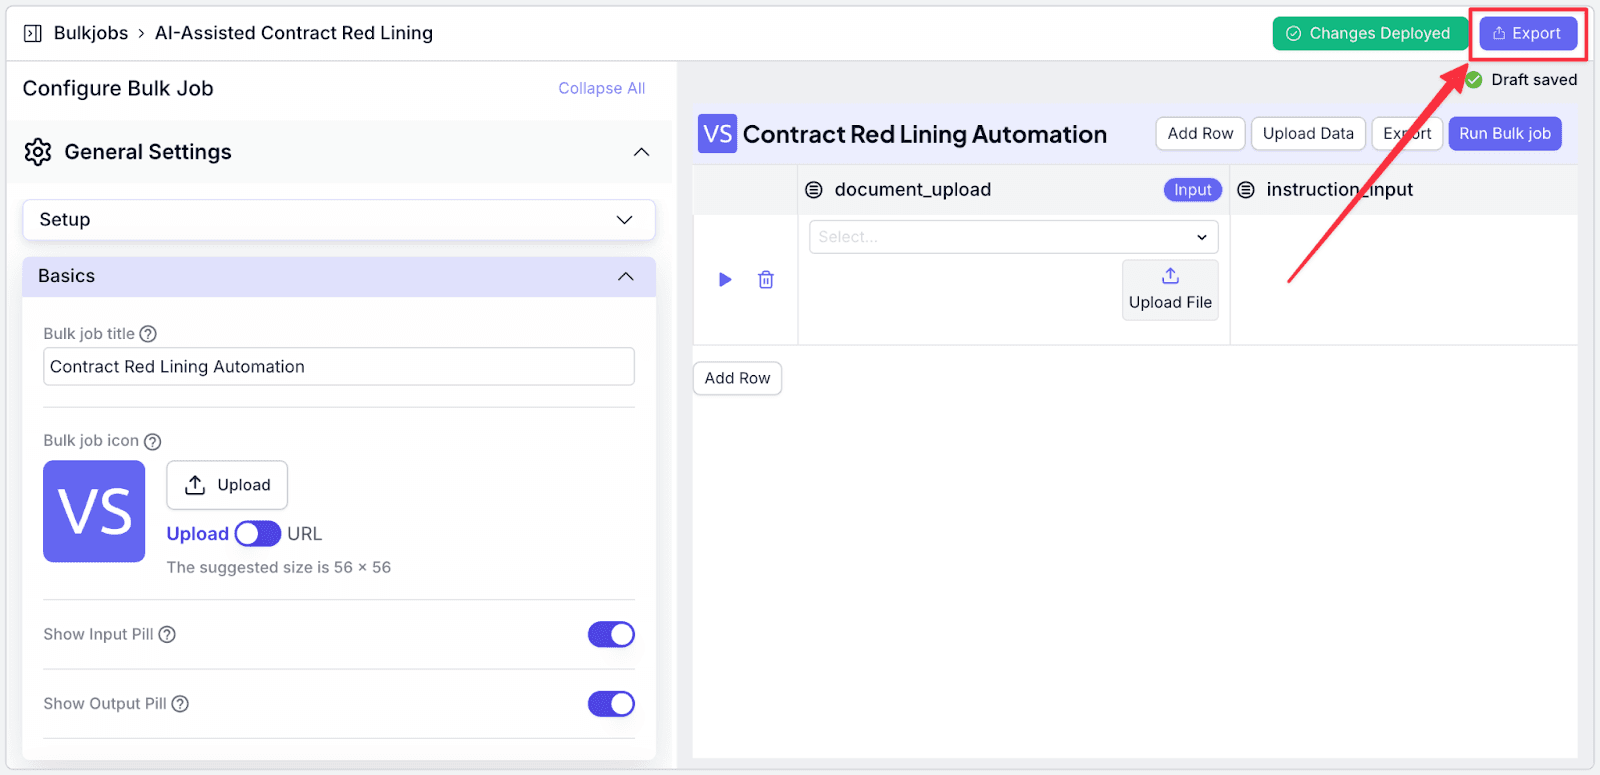
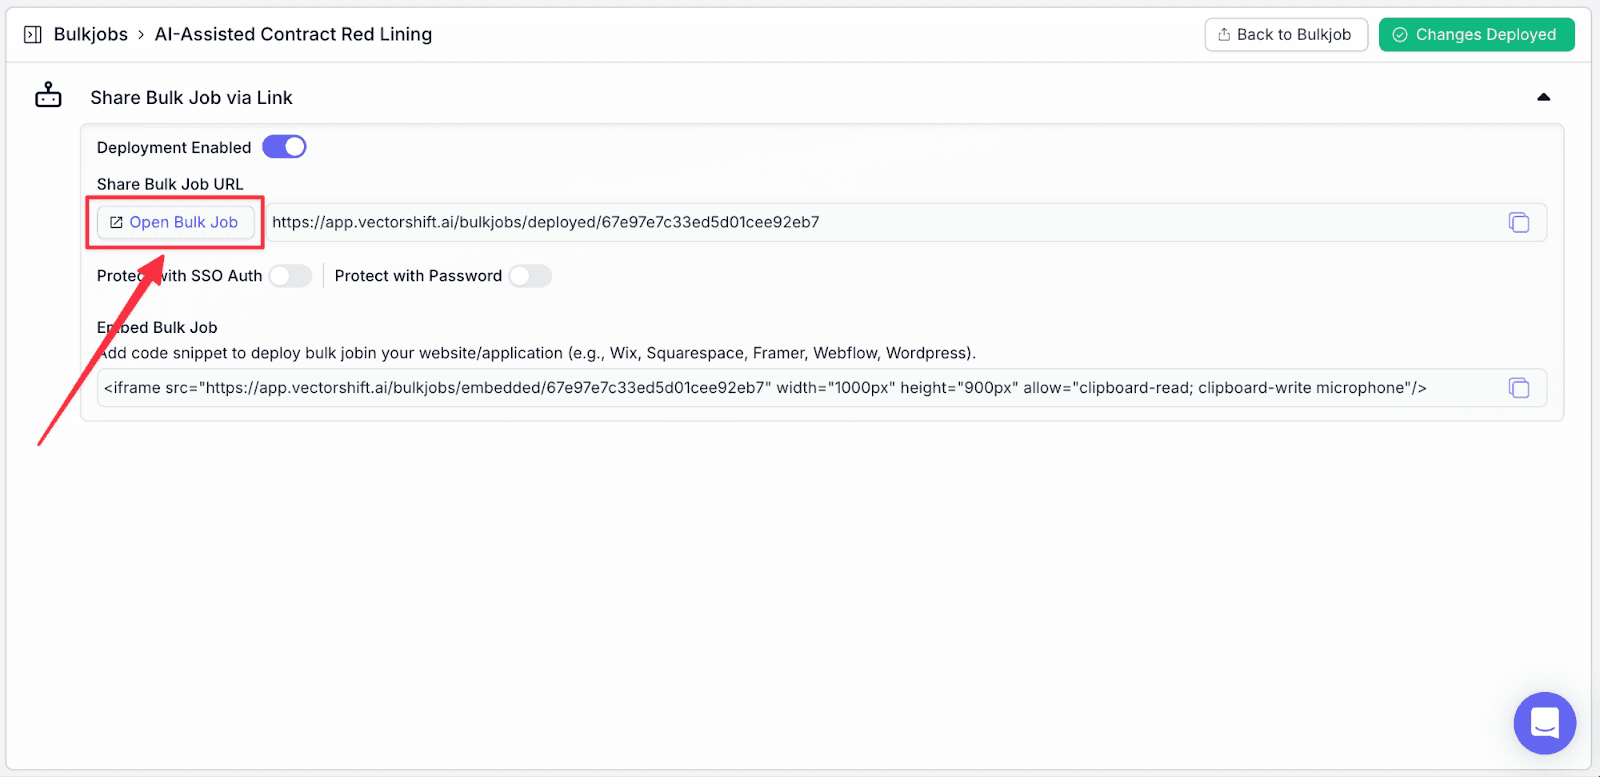
Step 5: After finishing deploying the pipeline, click on “Export”.
Step 6: Click on “Open Bulk Job” or copy and paste the link to open the bulk job. You can also share the link with your team as well and protect it using a password.
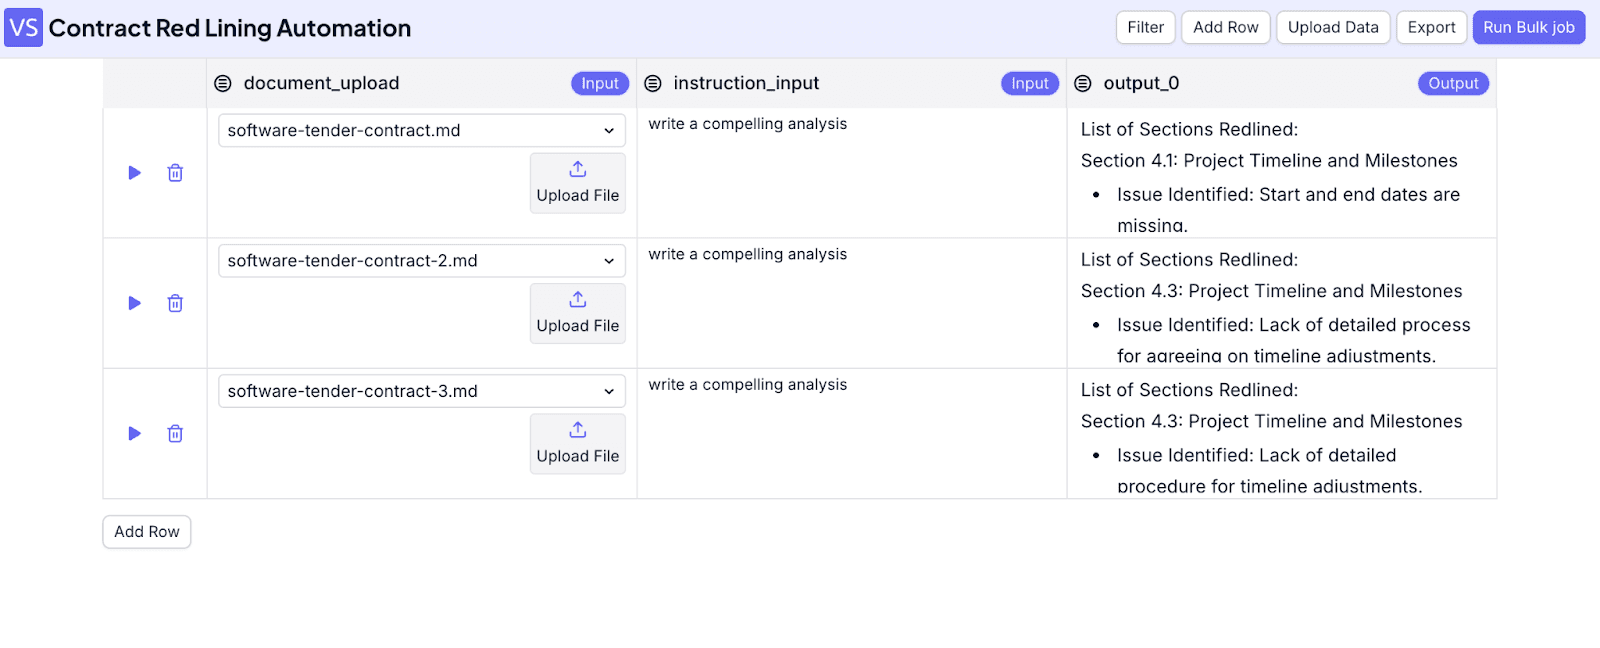
Step 8: With the interface open, you can upload files and fill in “instruction_input” (user input). If you need more rows, click on “Add Row”. When you finish, click on “Run Bulk Job”.

After the job is finished, you will see the result.
Keep Tracking of the Pipeline Usage
To keep track of any of your pipeline usages, you can go to “Pipeline Analytics”.
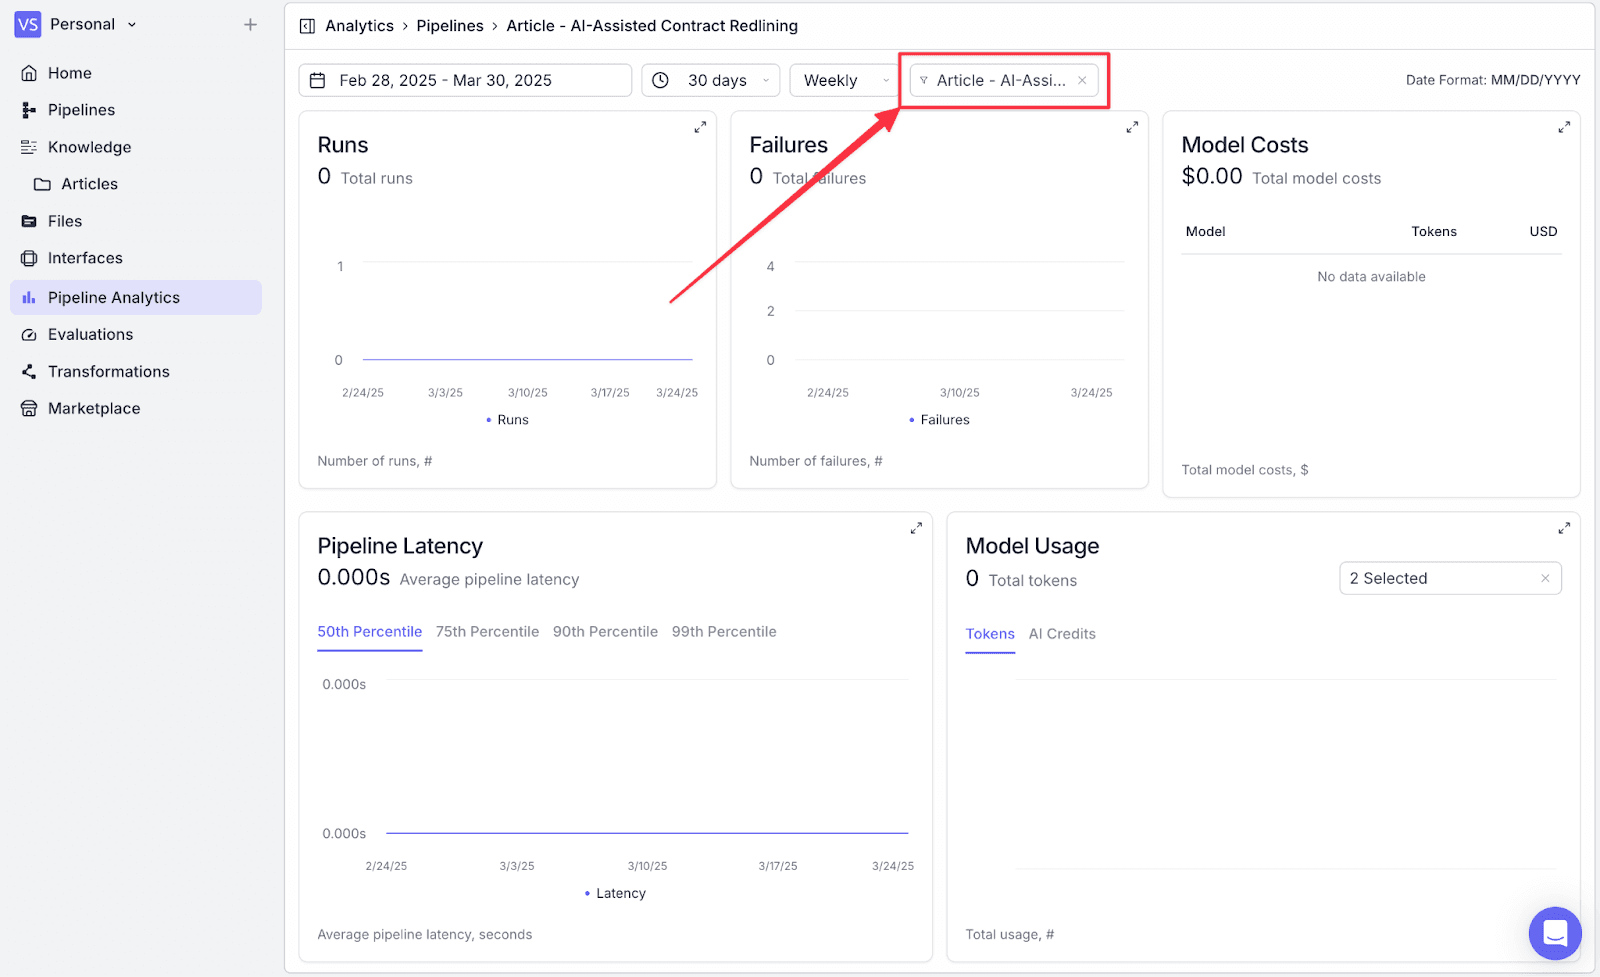
Go to filter, then select the pipeline you’ve just created, and the analytics will show the details of # of runs, # of failures, model costs, latency, and token usage. As you deploy your solution into production, this helps monitor and track your usage across your organization.
Conclusion: Scalable contract review and redlining using VectorShift
You can extend the functionality of this pipeline further by integrating it with Google Drive, OneDrive, and any other services. VectorShift allows you to compile all of those functionalities and integration into only one platform!
Looking to get started? Create your free account and start scaling your business, or talk with our team!

Albert Mao
Co-Founder
Albert Mao is a co-founder of VectorShift, a no-code AI automation platform and holds a BA in Statistics from Harvard. Previously, he worked at McKinsey & Company, helping Fortune 500 firms with digital transformation and go-to-market strategies.