
Guides
Mar 26, 2025

Albert Mao
Co-Founder
Transform your organization with AI
Discover how VectorShift can automate workflows with our Secure AI plarform.
In today's competitive business landscape, organizations often turn to competitive bids to reduce cost. One common strategy to increase negotiating leverage is to increase the number of suppliers being evaluated. However, this results in increased burn on operations teams to evaluate the bids.
AI automation can analyze hundreds of bid documents simultaneously, extracting critical insights about scope, financials, timelines, and compliance with just a single click.
VectorShift built a tool to help a mid-market plastics company evaluate 50+s bids across 500+ SKUs.
This guide will walk you through creating a custom bid analysis tool using VectorShift.

Designing the Workflow
At a high level, we need to:
Compile and centralize all the relevant data useful for evaluating bids in a knowledge base (e.g., evaluation criteria, feedback provided to other bids, etc.).
Build a workflow to orchestrate the bids.
Deploy an interface on the workflow (here, we will use a bulk jobs interface which will allow you to evaluate many bids at once).

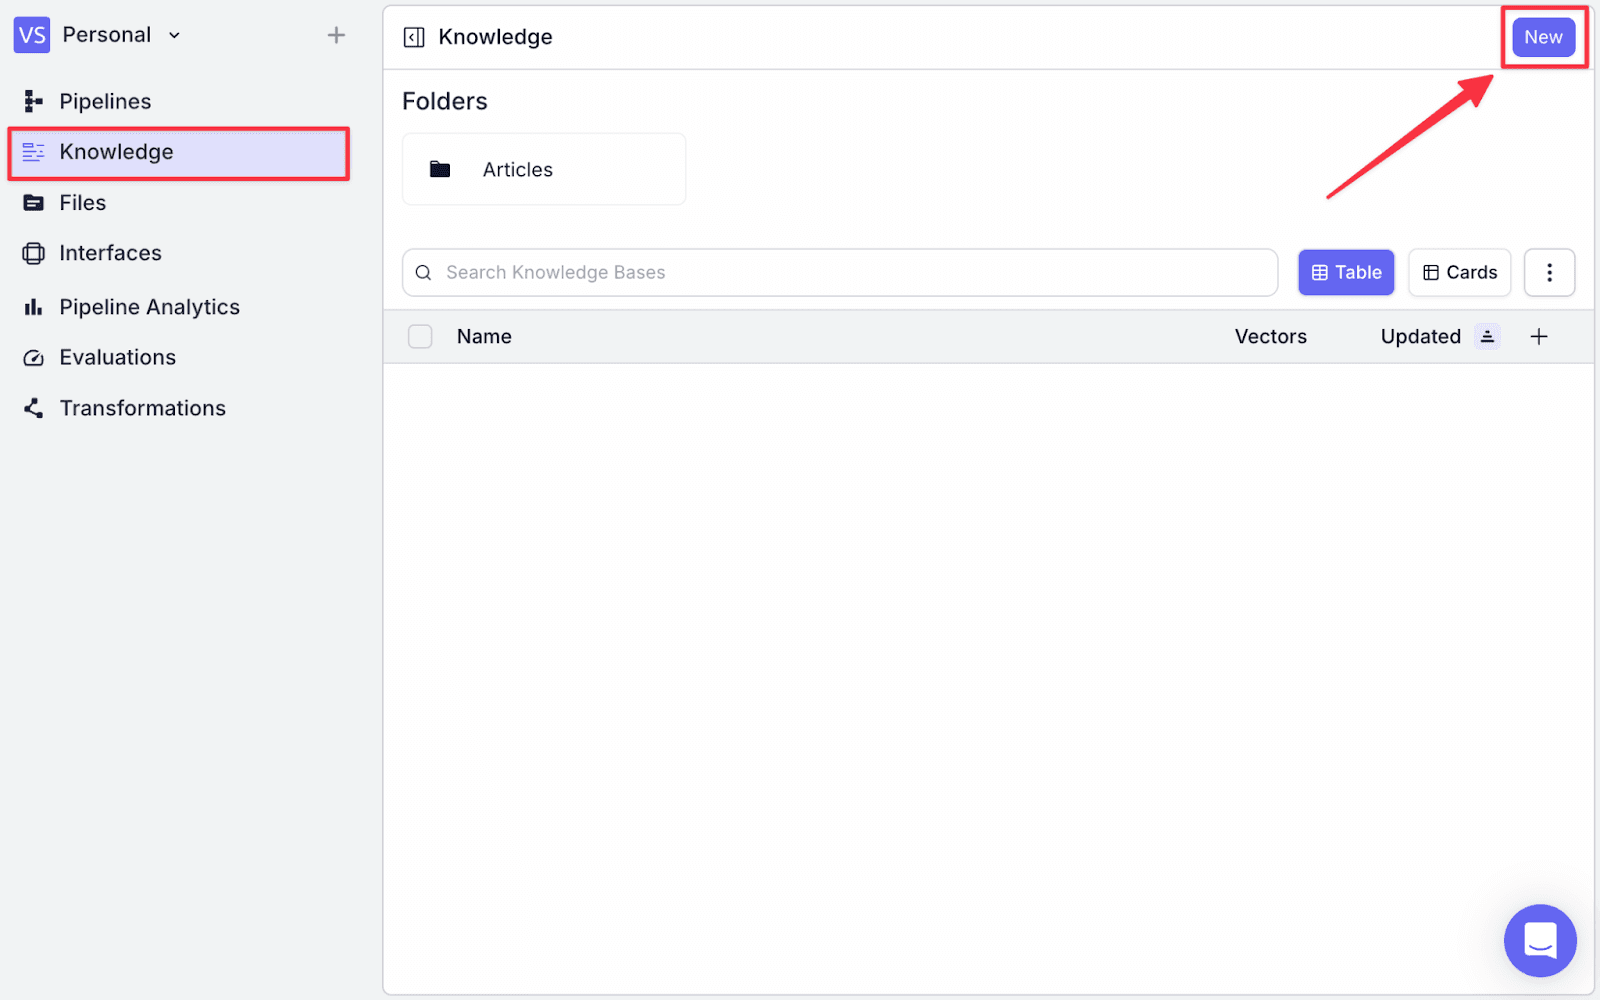
1. Building A Knowledge Base
We will build a knowledge base with relevant information that can help with a bid review (e.g., evaluation criteria, feedback provided to other bids, etc.).
Step 1: Go to the “Knowledge” menu on the left, and click “New” on the top right.
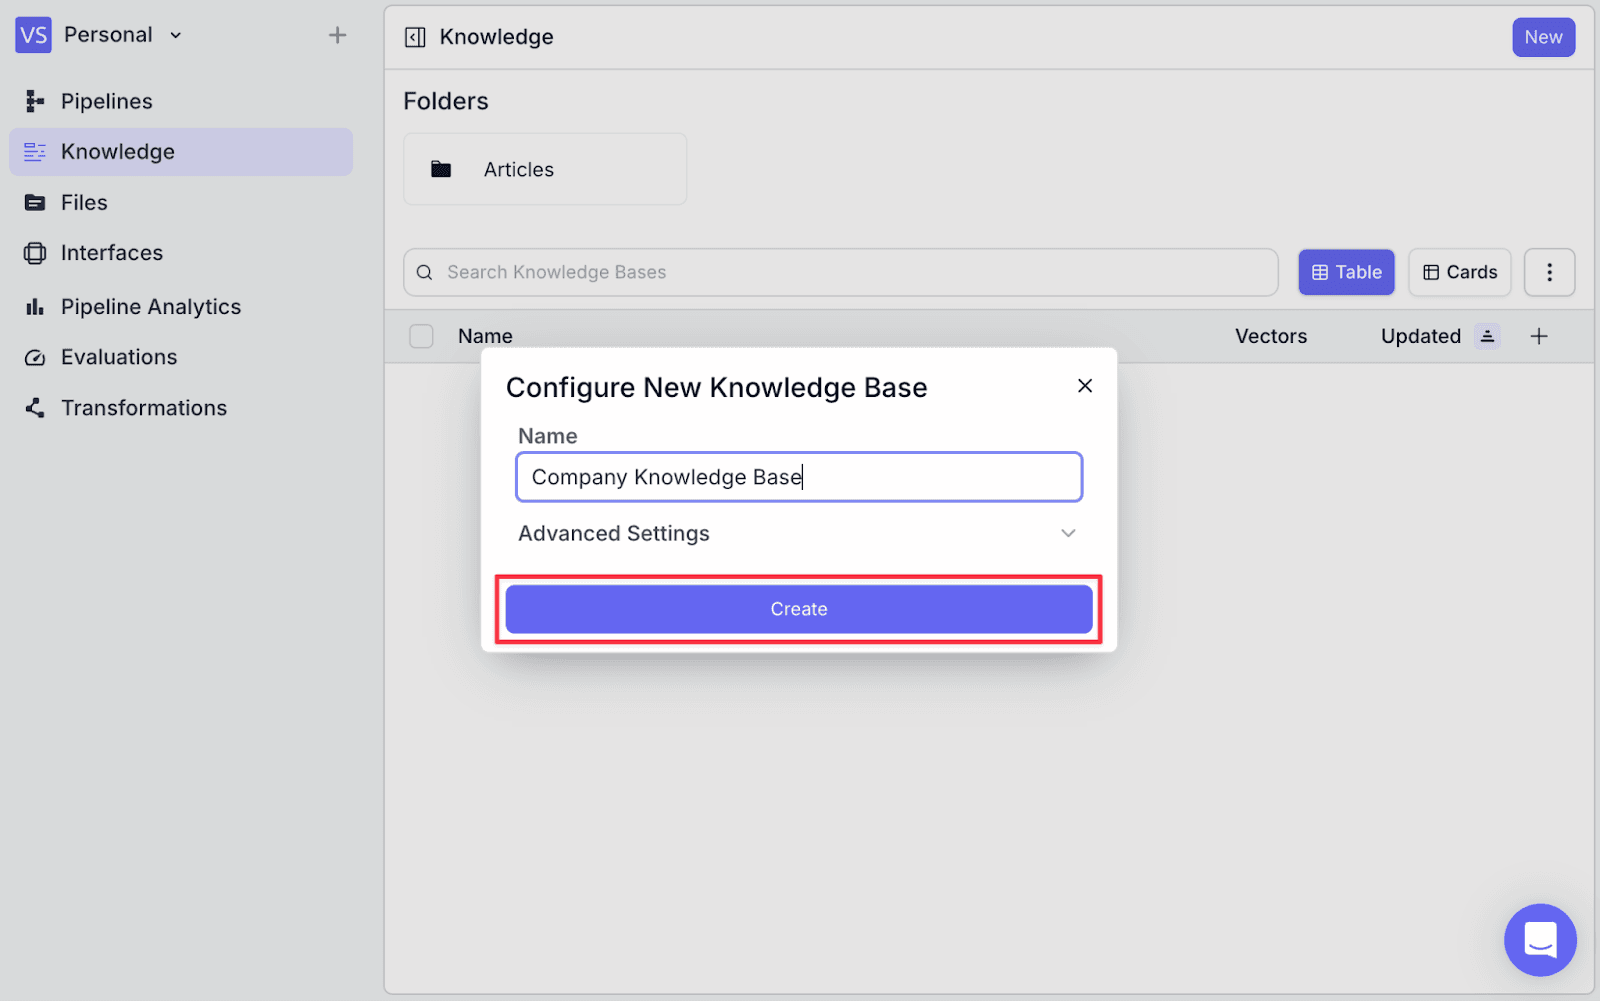
Step 2: Give the knowledge base a name and click on “Create”
Step 3: Go to “Add Document” on the top right, then click on “Choose/Add Integration” (here we will be syncing with relevant data that is stored in google drive).

Step 4: Click on “Connect New App”.

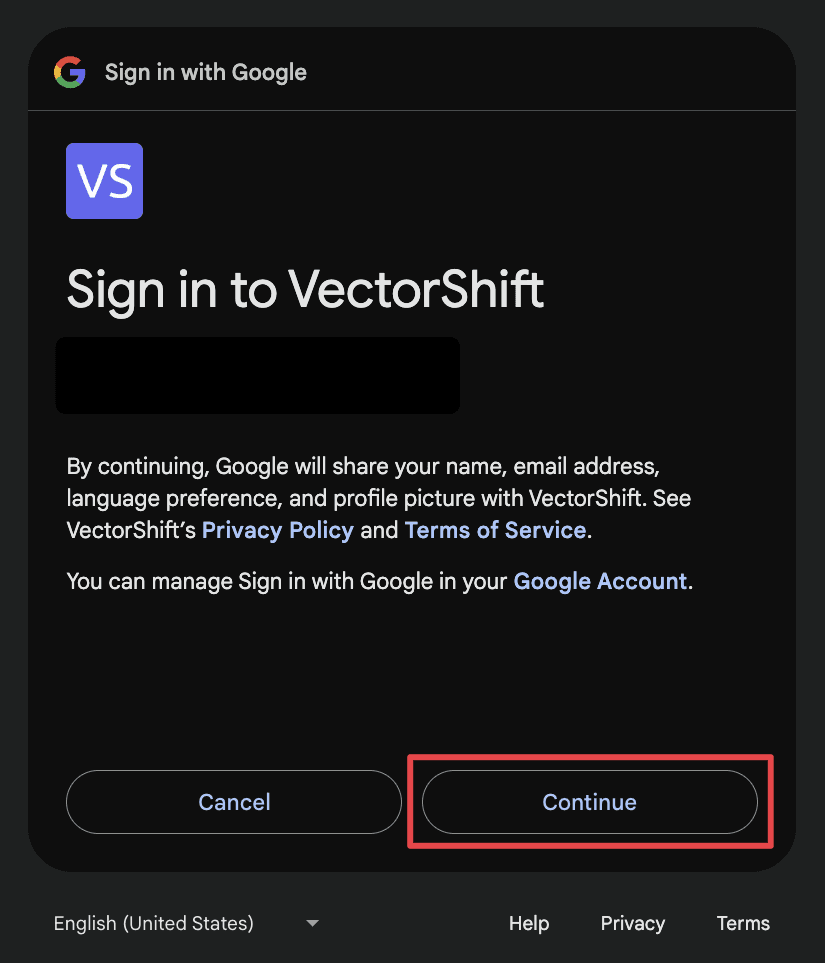
Step 5: Click “Connect” on Google Docs integration.

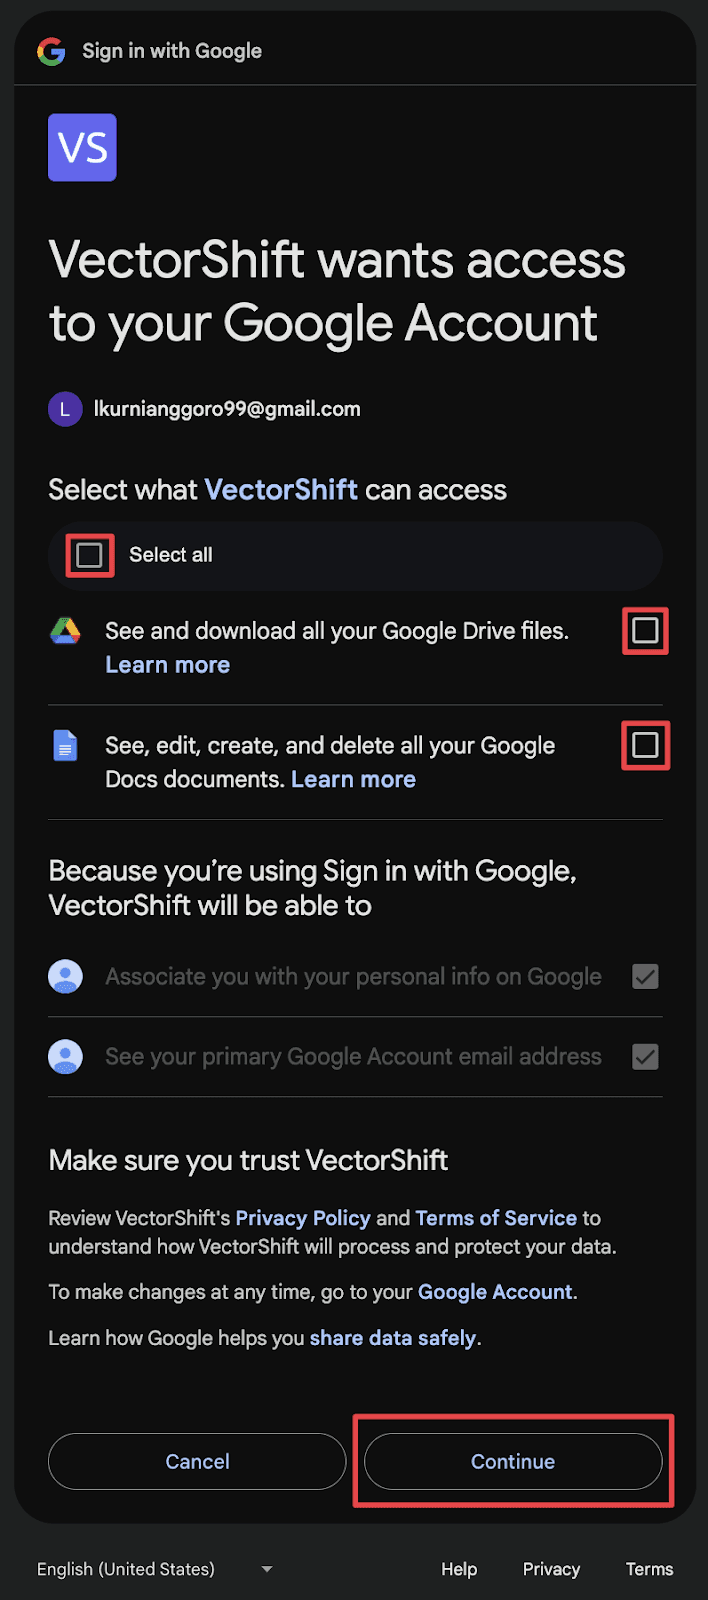
Step 6: You will be asked to grant permission. Click “Select All” to grant permissions. Then click “Continue”.
Step 7: Click on the file(s) / folders you want to add then click “Confirm Selection” at the bottom right.

You will see the document has been added to the knowledge base.

2. Designing the Pipeline
The pipeline has 4 nodes: an input node, a knowledge base node, an LLM node, and an output node.
Input Nodes: To ingest bids into the pipeline.
Knowledge Base Node: Store relevant data that can be useful in evaluating bids.
LLM Node: Generate a review of the bid.
Output Node: Display the pipeline results.

Working with Nodes in VectorShift
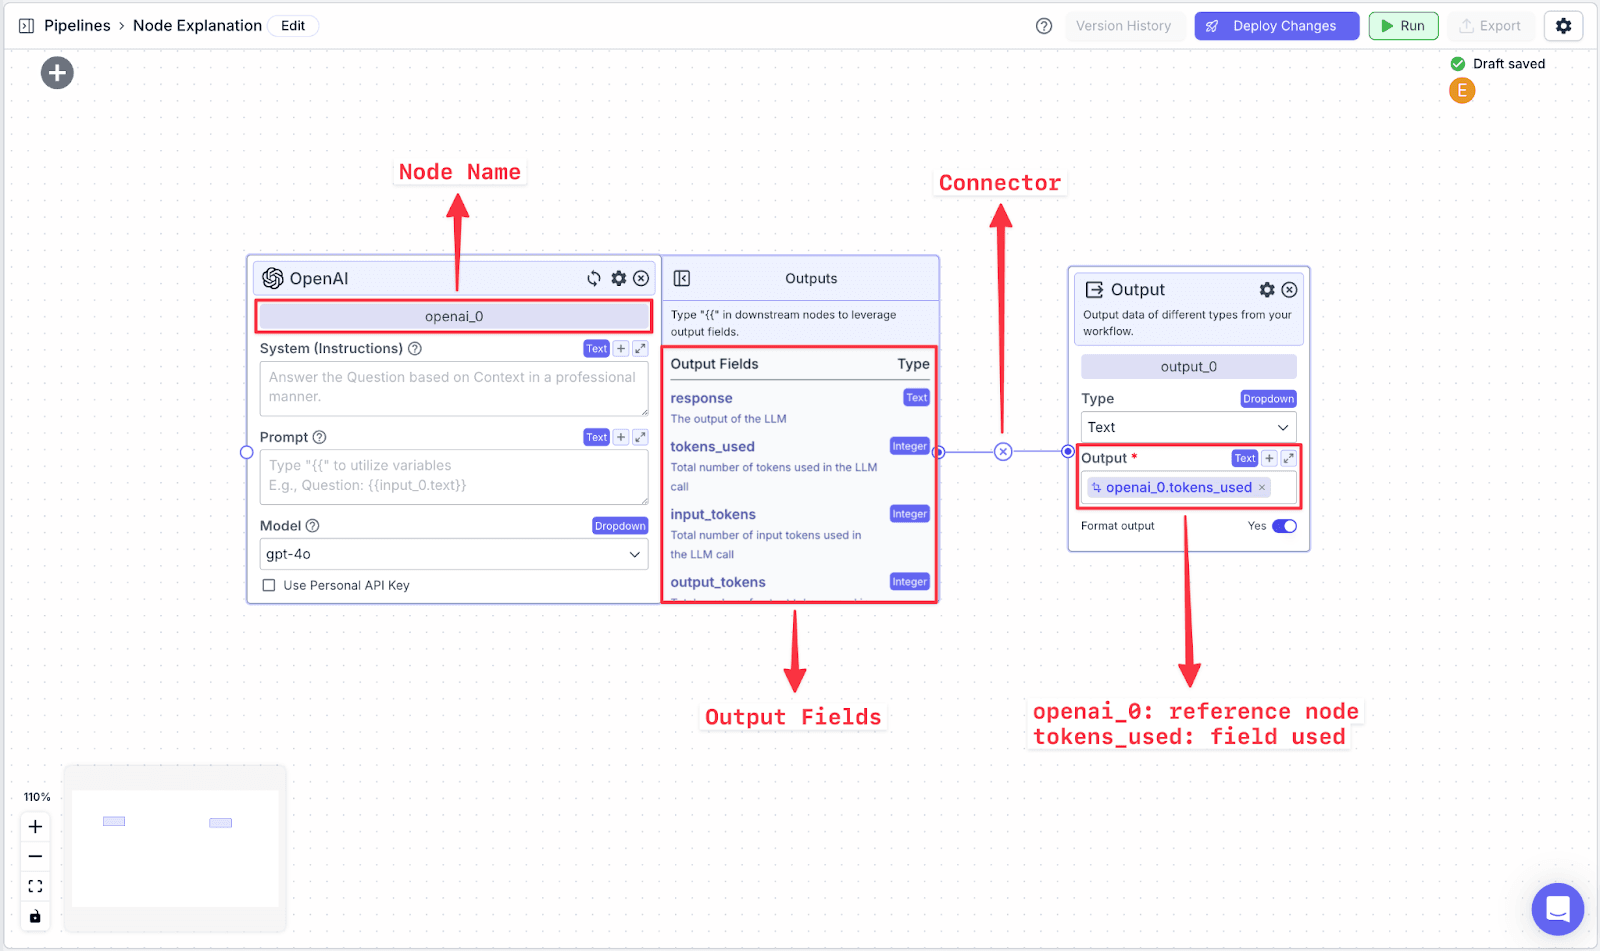
Each node in VectorShift has a name at the top of each node (e.g., openai_0) and output field(s), which are found in the right-hand pane of each node (e.g., the OpenAI LLM node has various output fields: response, tokens.used, input_tokens, output_tokens).
To reference specific data fields from other nodes, you have to do two things:
Connect the two nodes.
Reference the data from the previous field using a variable.
Variables in VectorShift all have the same structure:
You can also create variables by typing “{{“ in any text field, which opens the variable builder. To reference the text from the OpenAI node, you call the variable on the Output node:
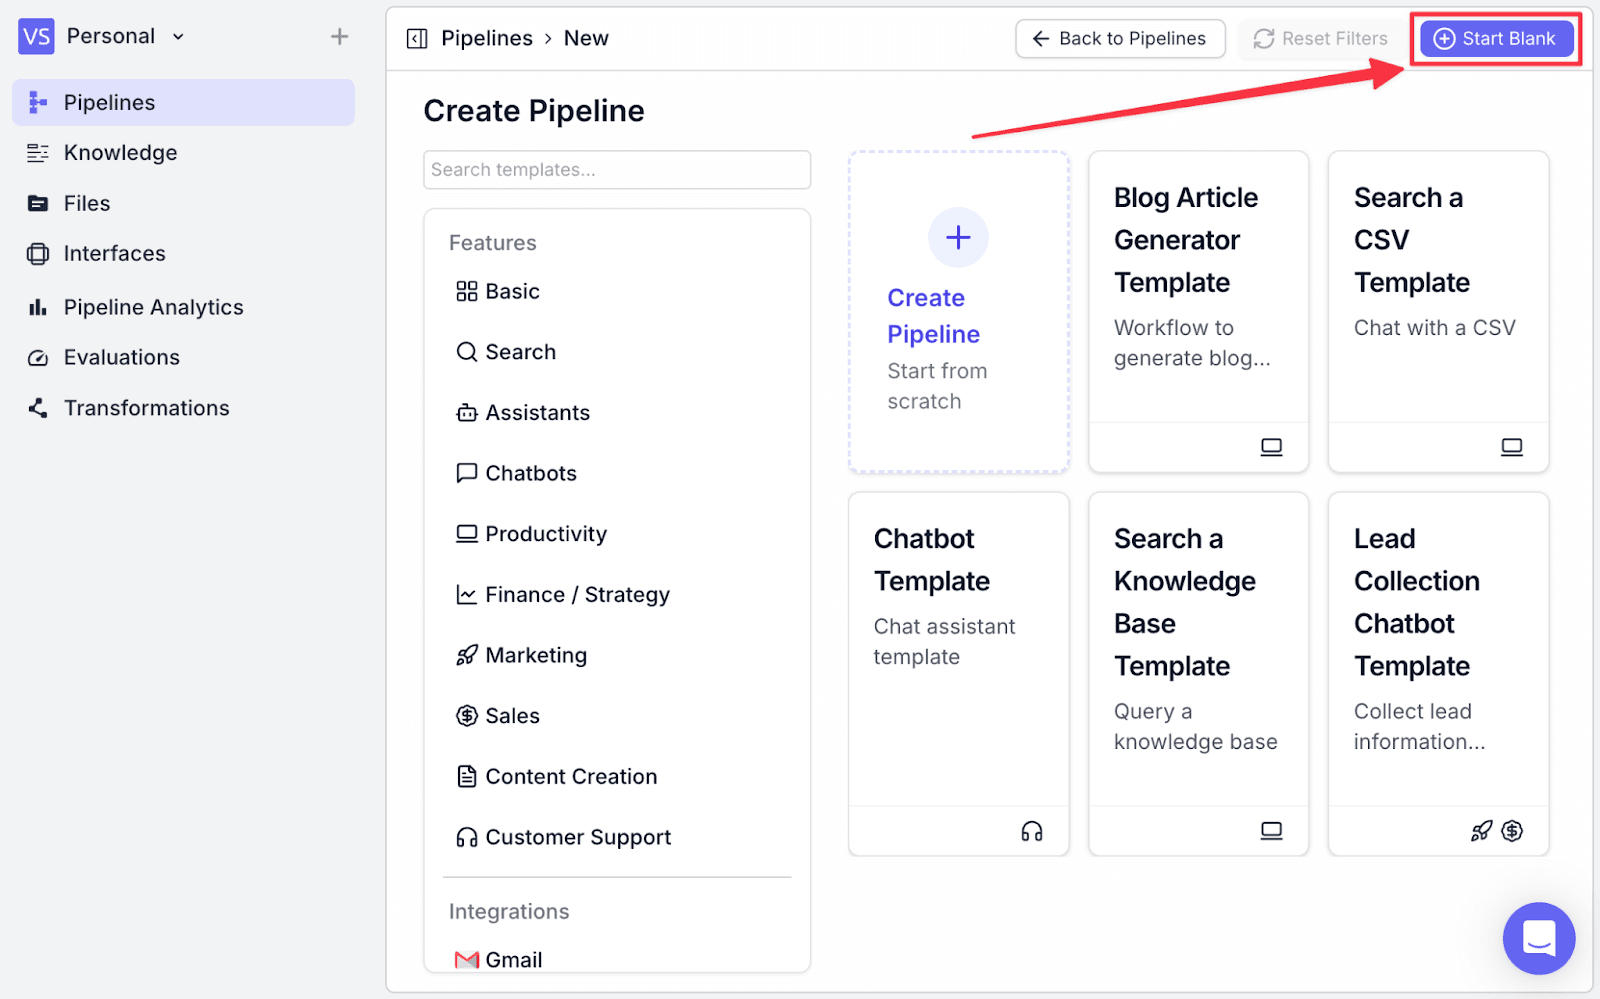
To start creating a new pipeline, go to the “Pipeline” menu, and click “New” on the top-right.

You will see some options, go with “Start Blank” on the top-right.
Input
In the pipeline editor, we will see some options. For the first step, drag out an “Input” node.
Step 1: From node options under the “General” tab drag out an “Input“ node.
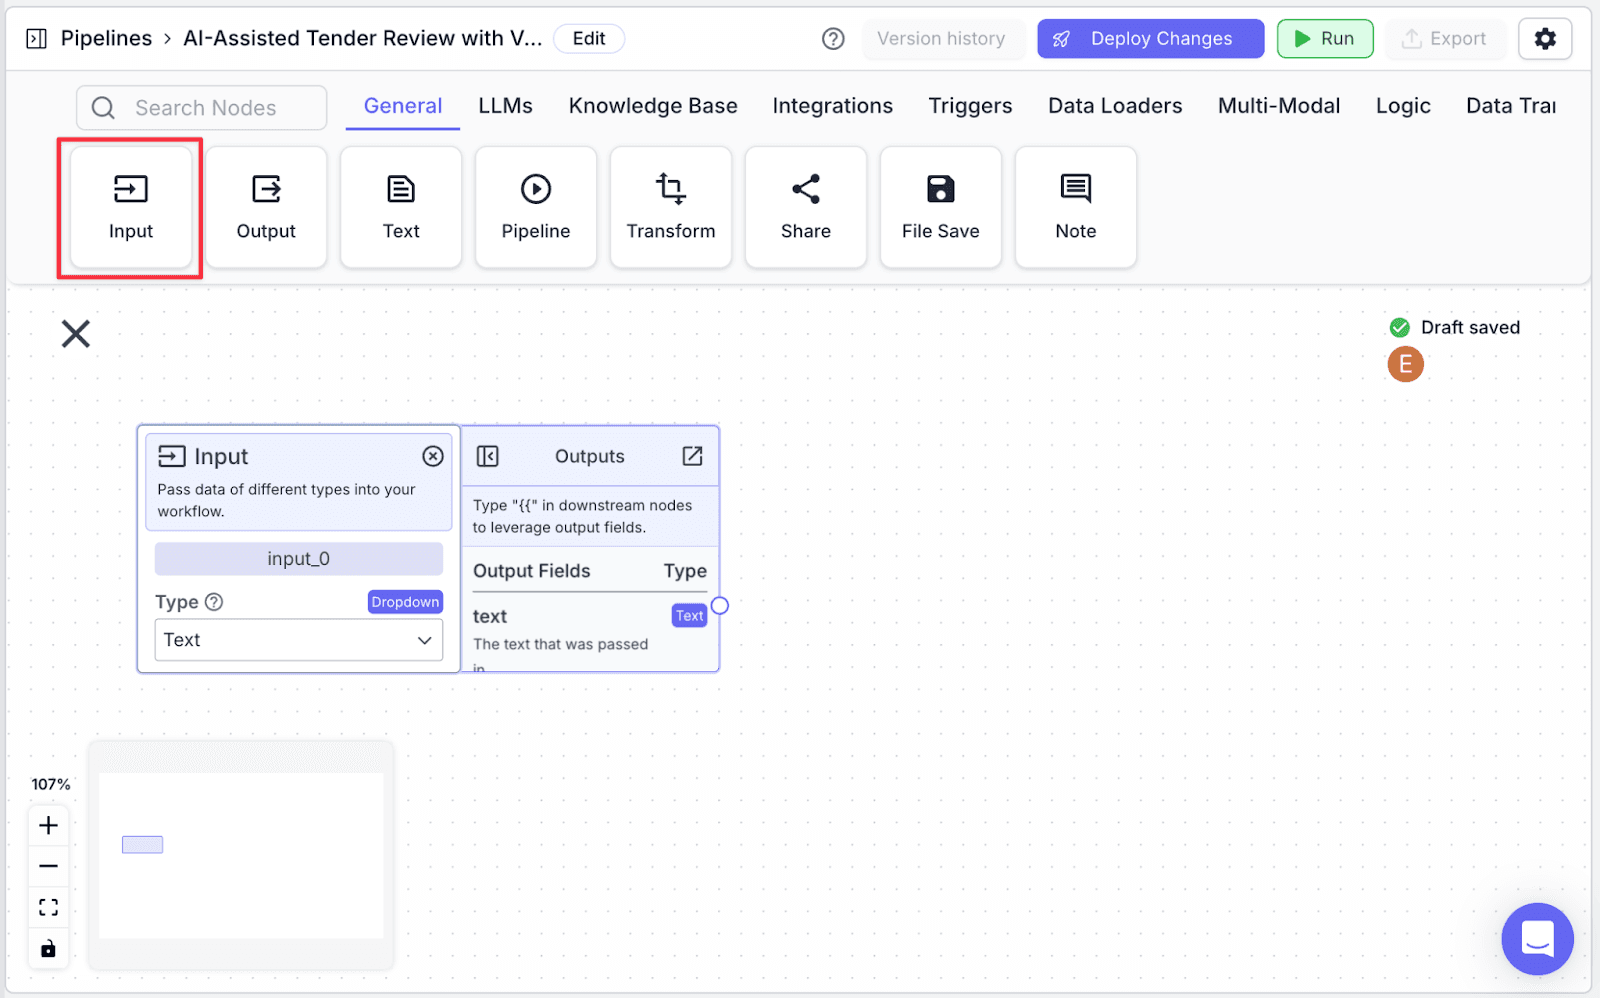
Step 2: Change the type of the node to “File” (bids are files).

Knowledge Base
The knowledge base node allows our pipeline to access the existing knowledge base we’ve just made.
Step 1: Under the Knowledge Base section, drag out the “Knowledge” node.

Step 2: Connect the Input node with the “Knowledge Base” node.
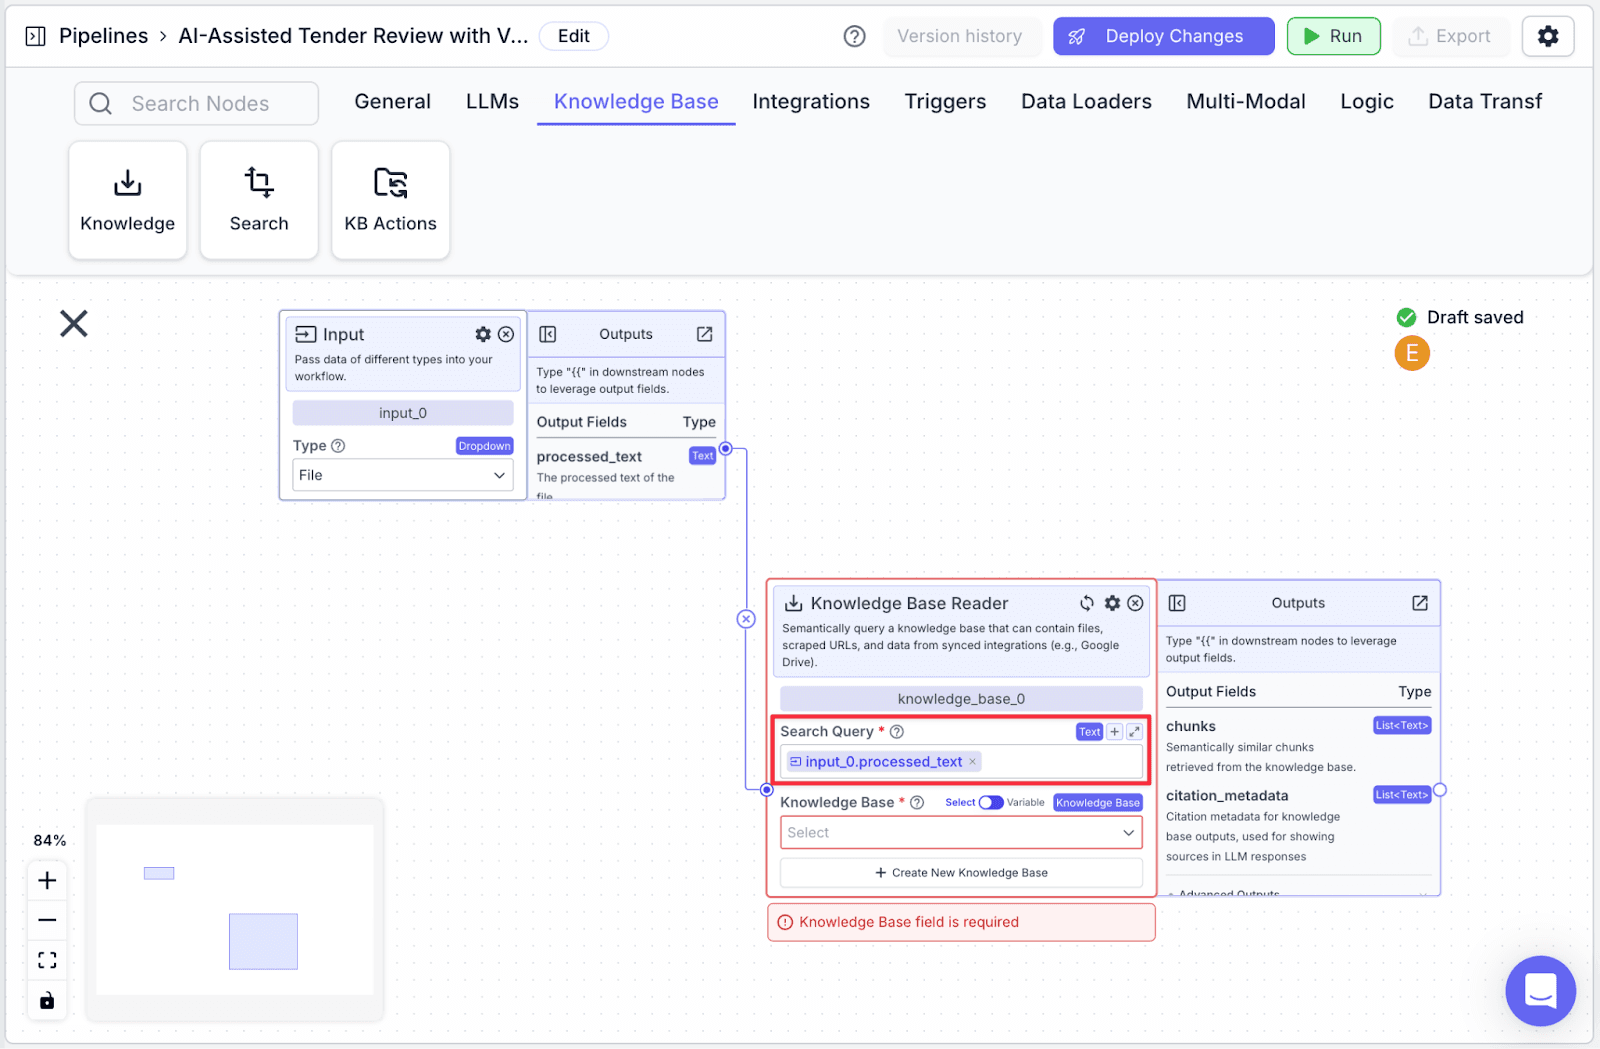
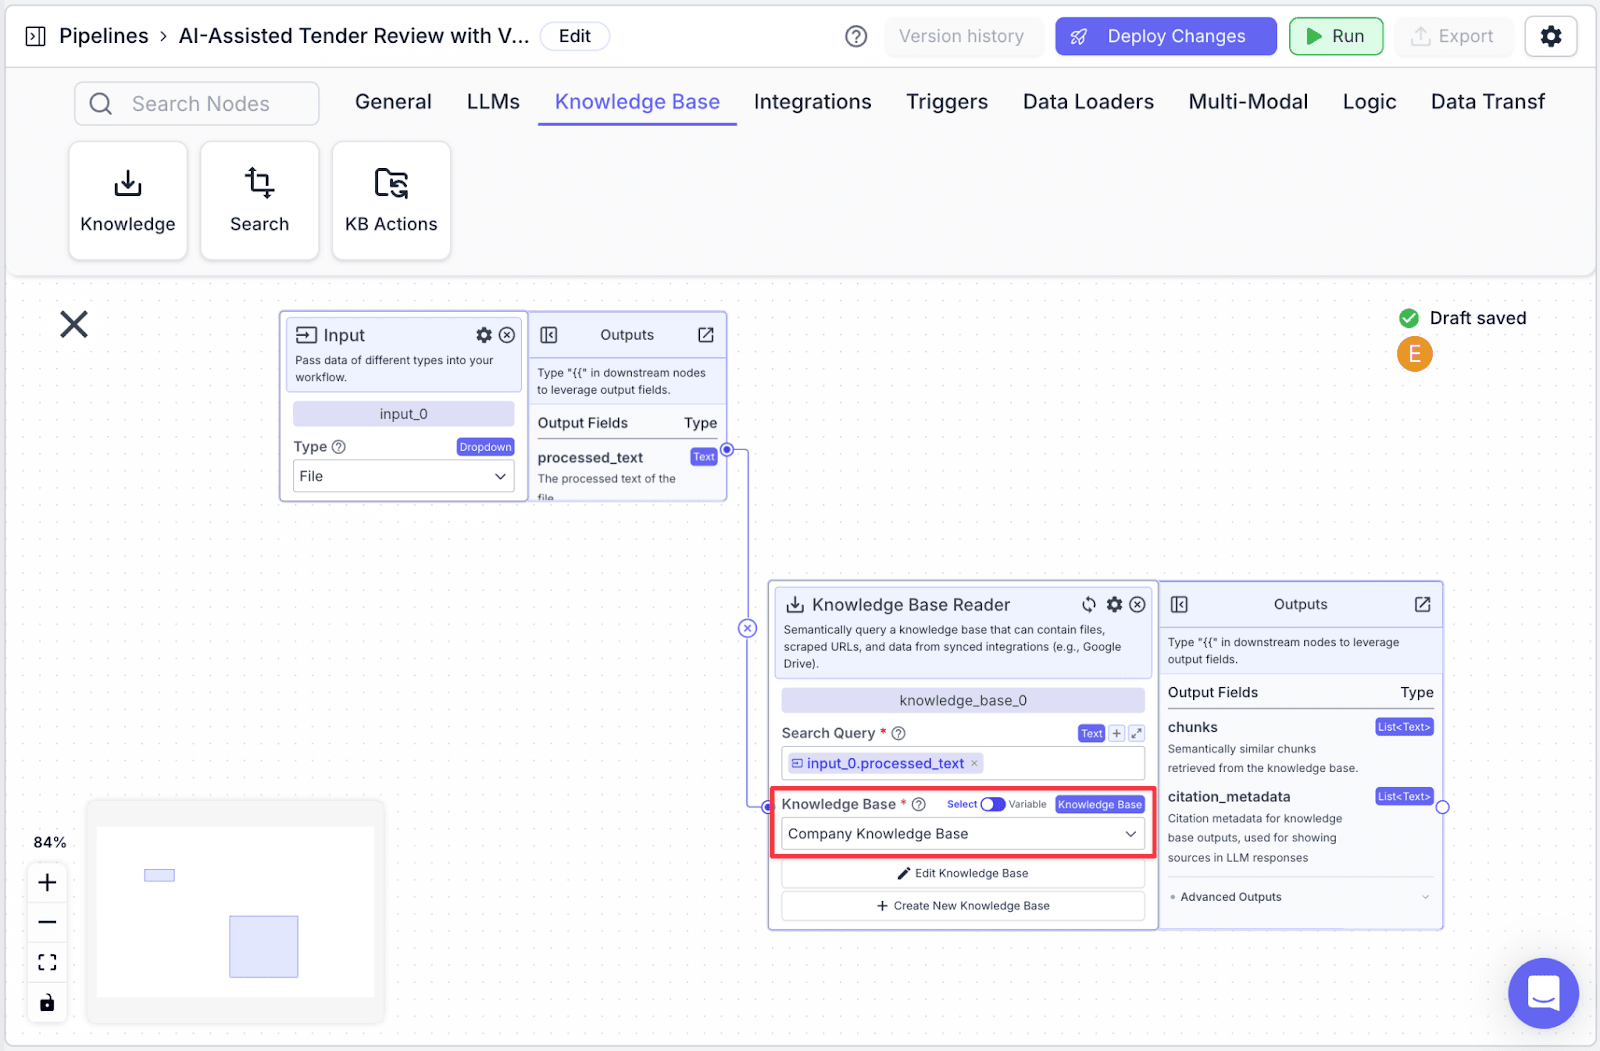
Step 3: At the “Knowledge Base” field, choose the knowledge base we’ve just created.
LLM Node
LLM node allows the pipeline to generate answers based on the query and context input.
Step 1: Take the “OpenAI” node under the “LLMs” section.

Step 2: Connect both input_0 and knowledge_base_0 nodes to openai_0.

The LLM node has two fields: “System (Instructions)” and “Prompt”.
“System (Instructions)” defines how you want the LLM to behave. You can use the template below:

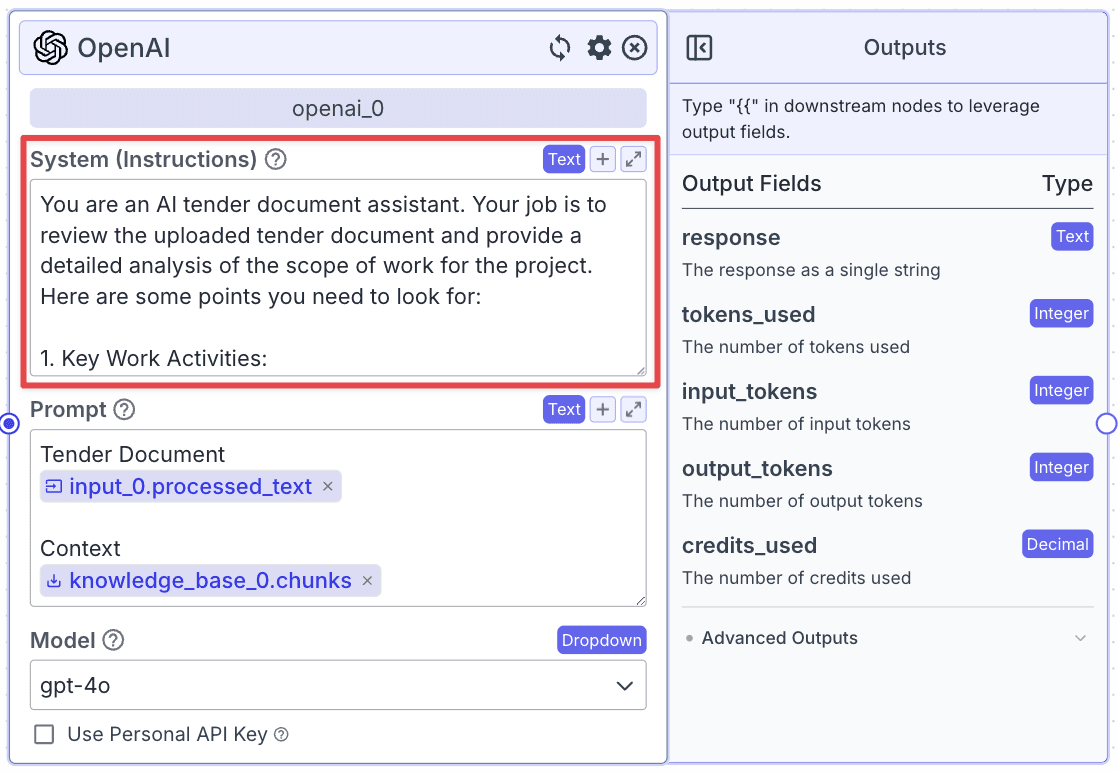
Within the “Prompt”, you can pass data from other nodes:


Here’s what the pipeline so far looks like.

Output Node
The output node allows the pipeline to show the LLM result. Connect the “Output” node with the “LLM” node.

Running the Pipeline
Click “Run” on the top-right of the window. You will show the “Run Pipeline” pane on the right part of the screen.
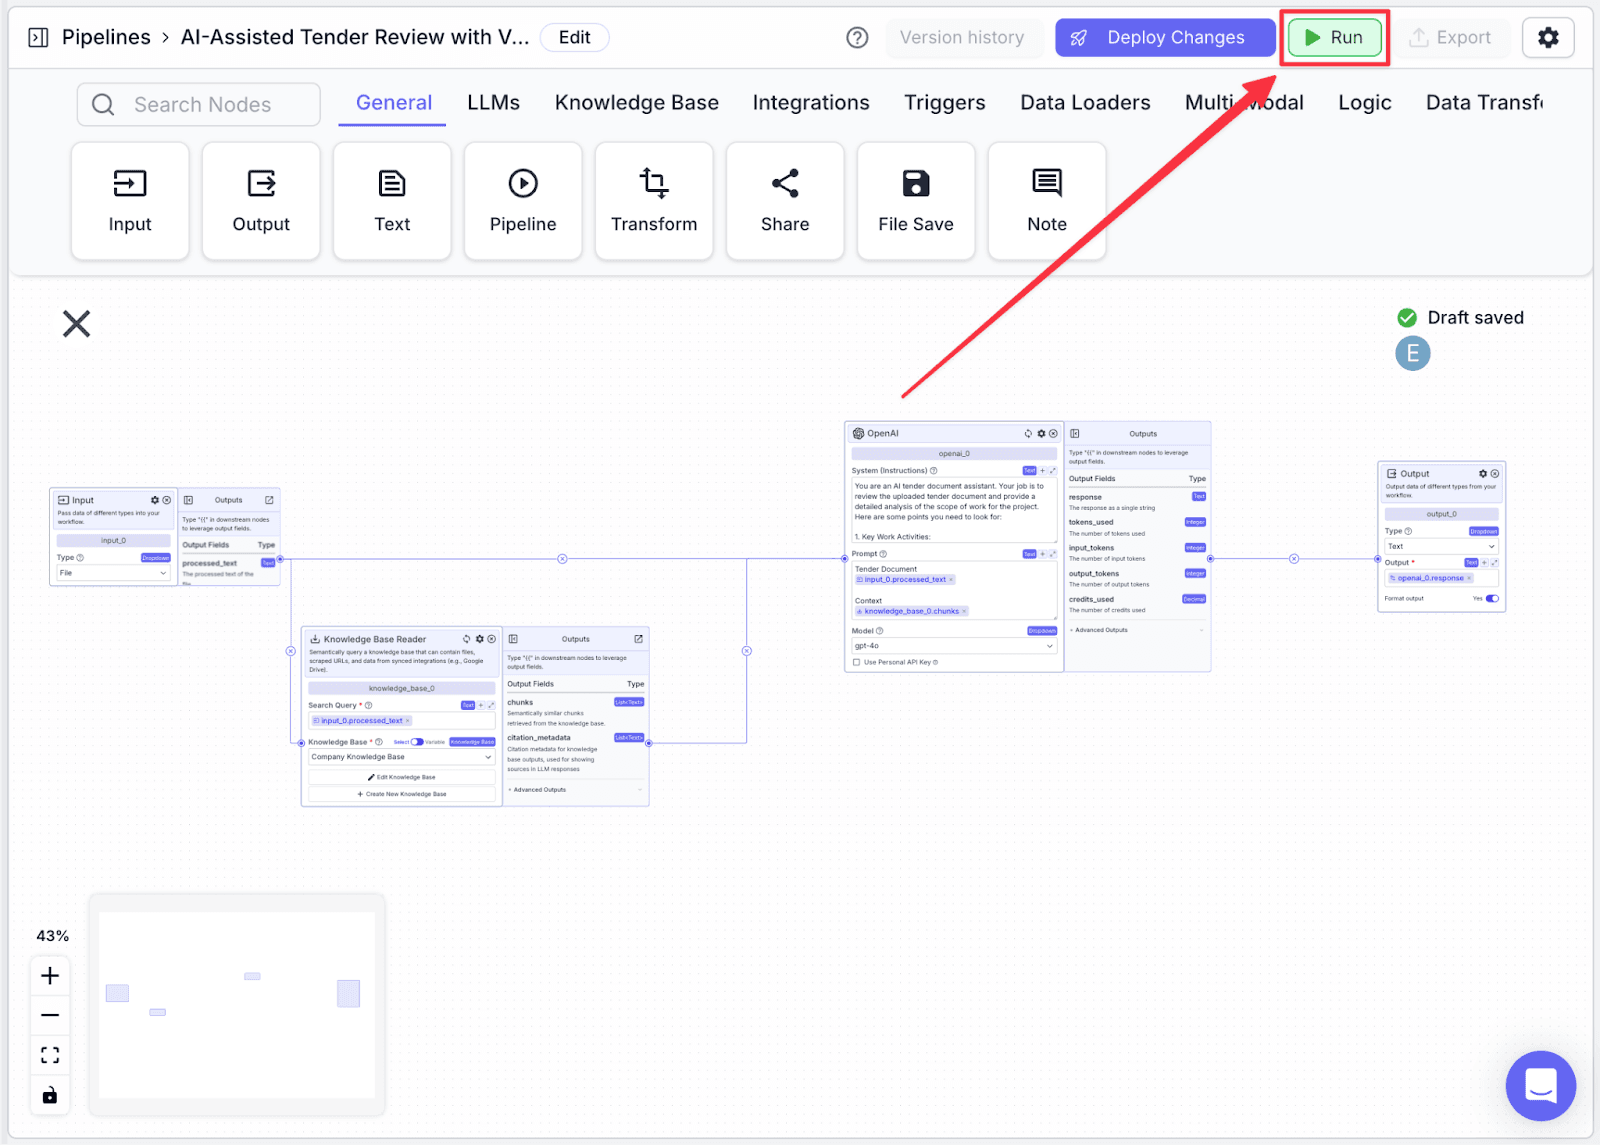
Upload the document and click “Run” at the bottom right to execute the pipeline.

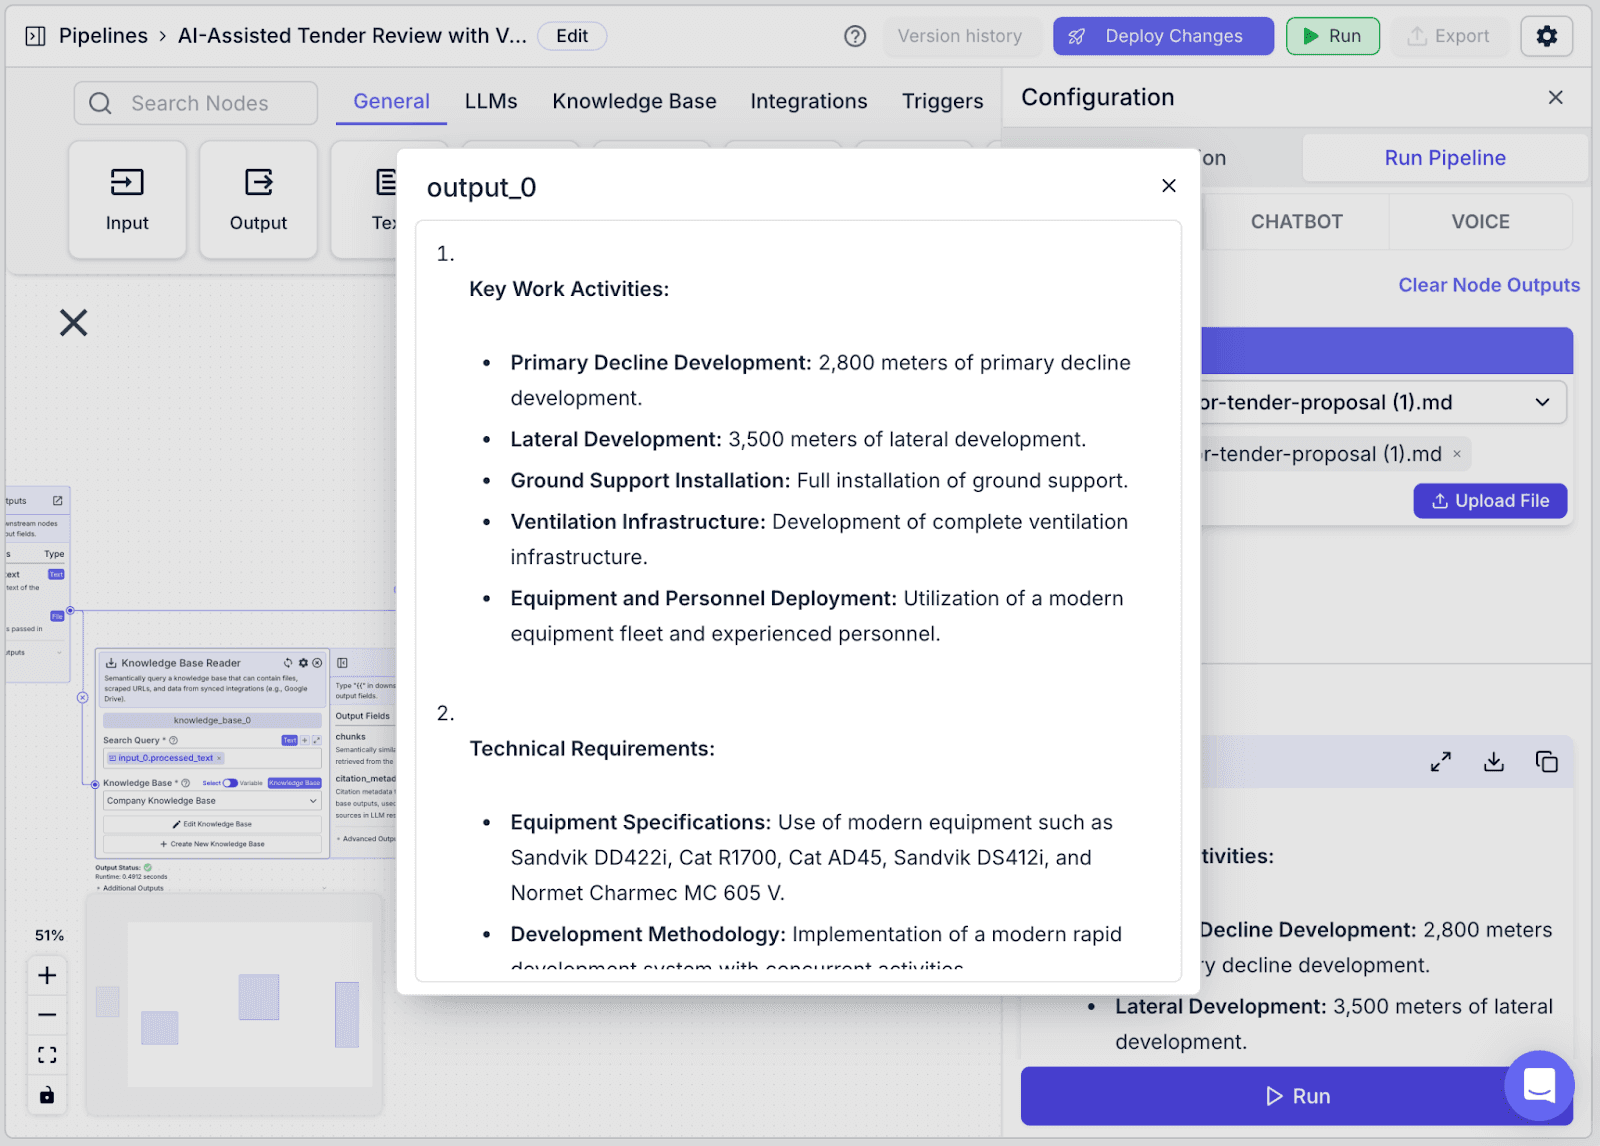
You can see the result in the output section.
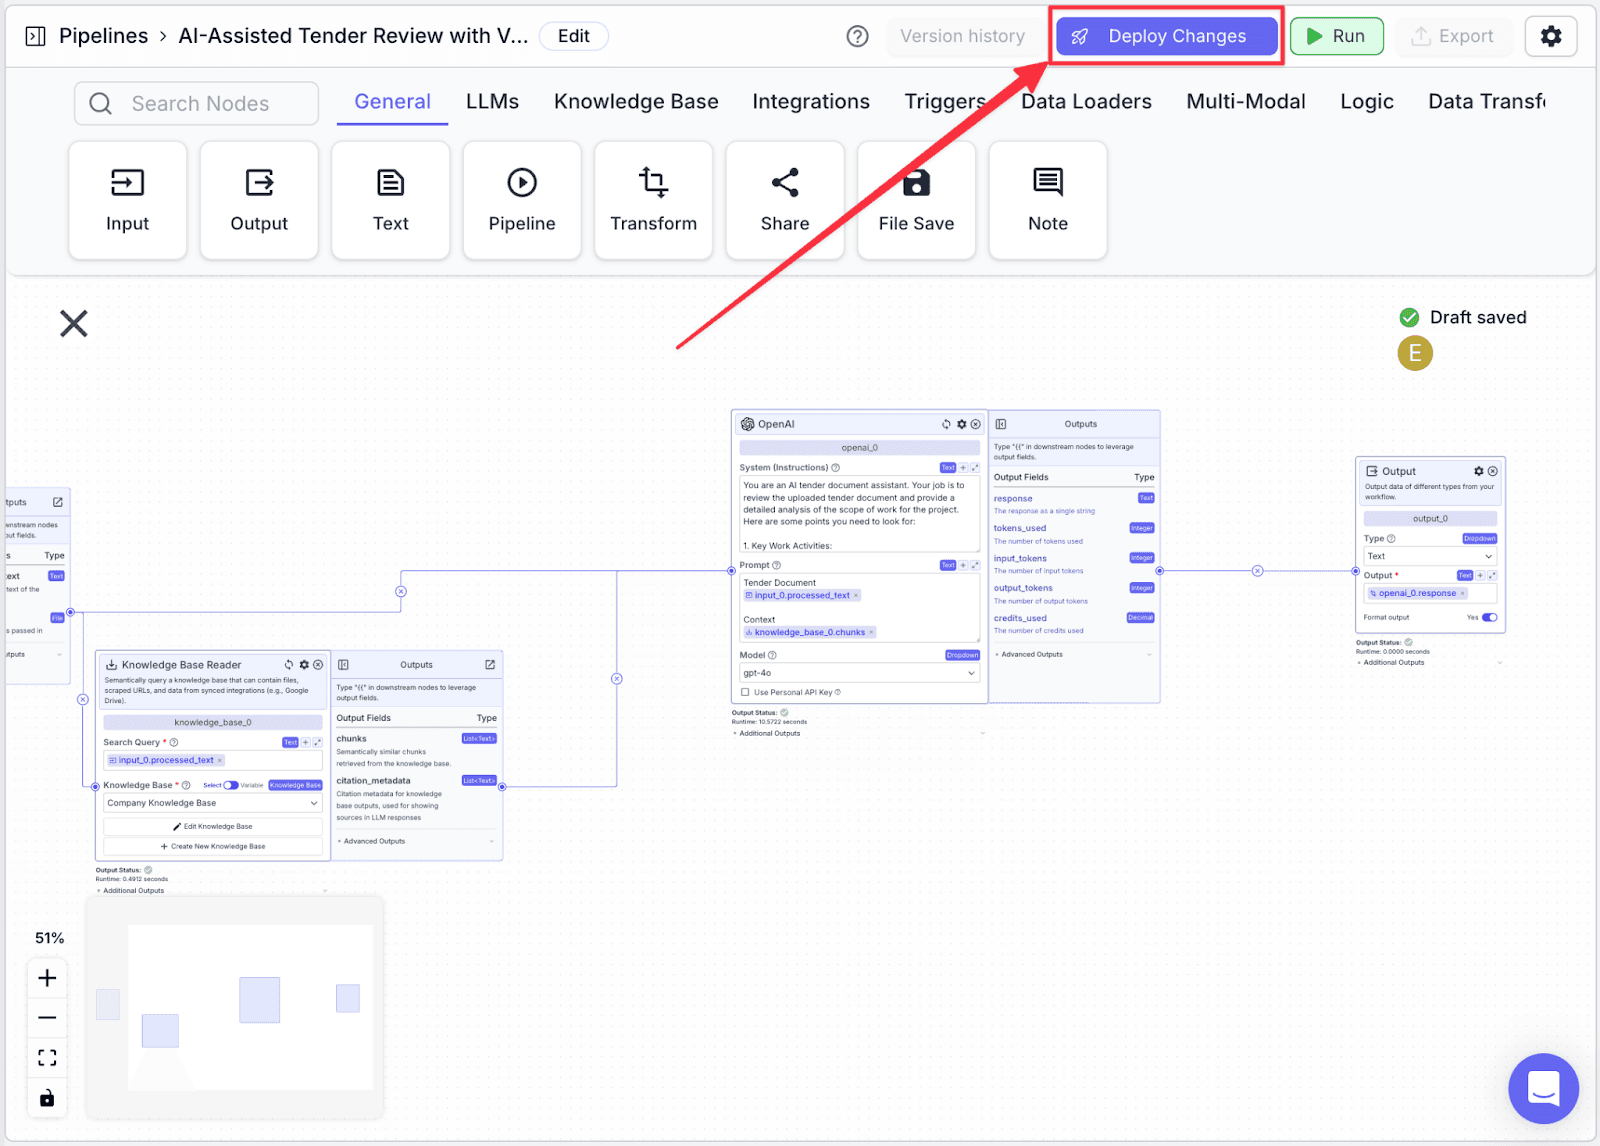
Deploying the Pipeline
The last thing you need to do is to deploy the pipeline. This allows you to track your pipeline versioning in case you want to revert to the previous version. Click “Deploy Changes” to continue.
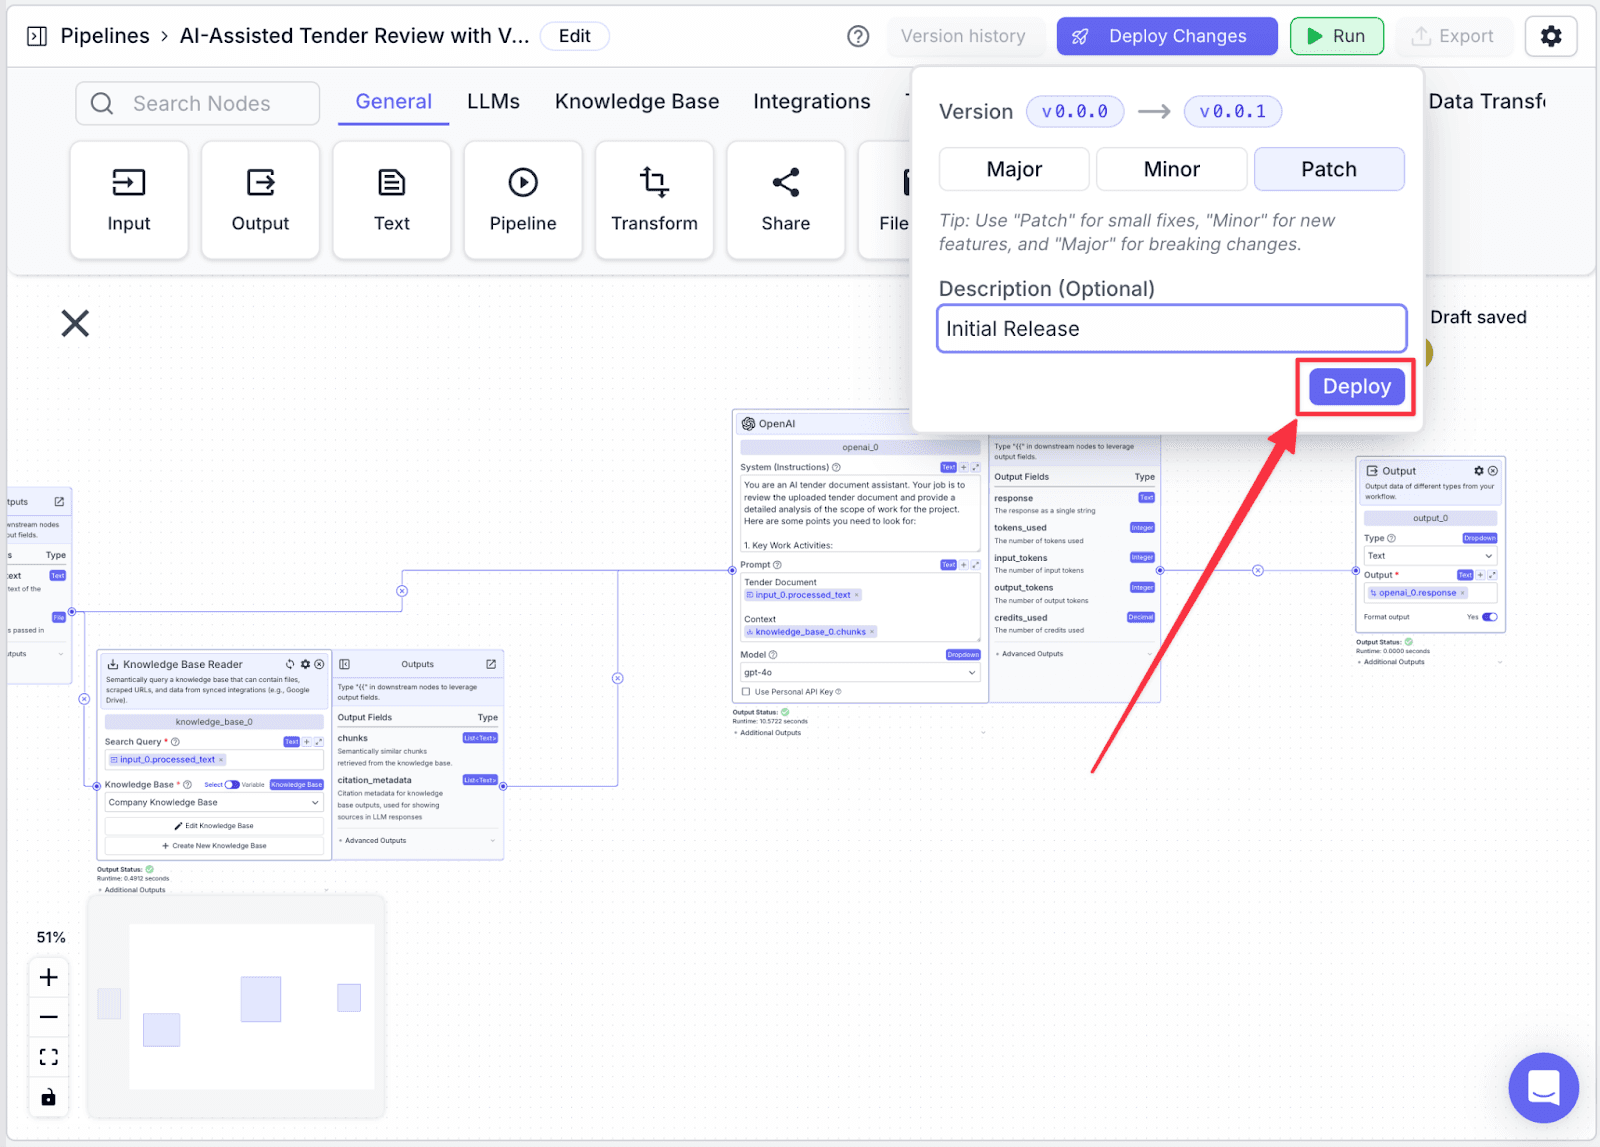
In the deployment interface, you will be given the option to add a “Description (Optional)” to your deployment and its version. This helps you to track what changes each version. Click on the “Deploy” button to apply the changes.
3. Exporting the Pipeline
Exporting the pipeline allows your pipeline to be easily used by integrating it with a built-in VectorShift interface.
Step 1: Click on the “Export” on the top right.
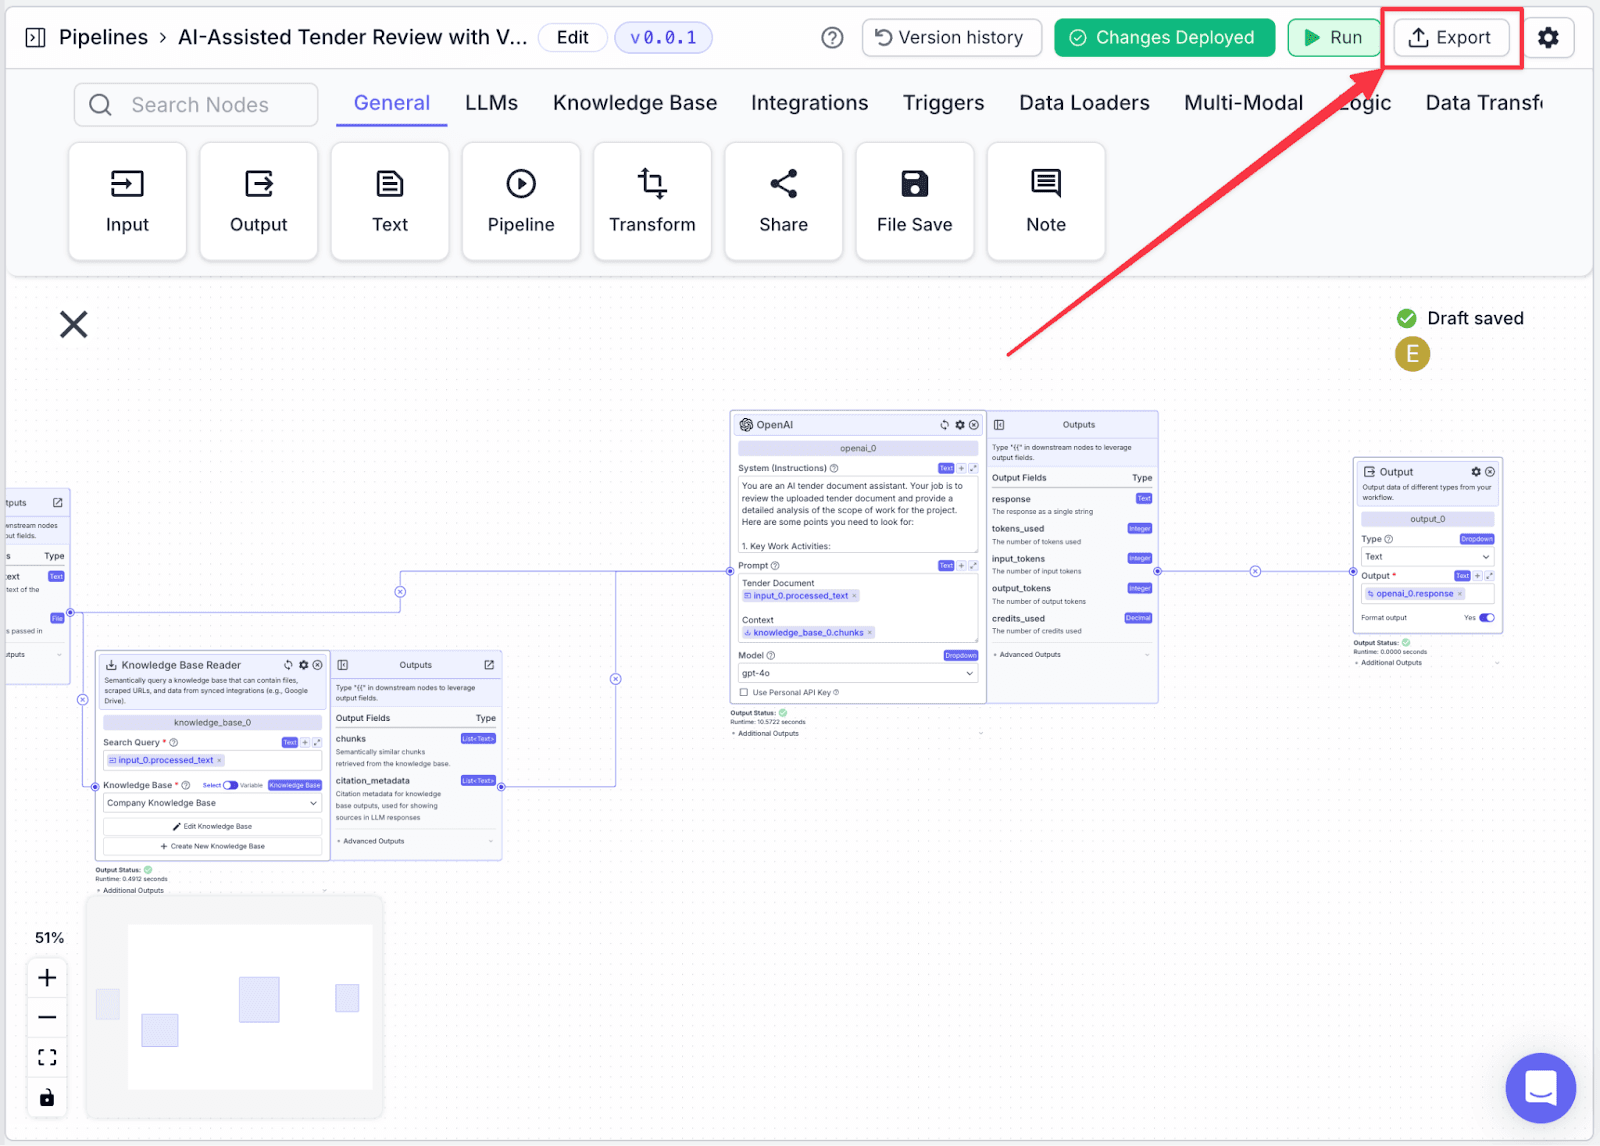
Step 2: You will see some options to export your pipeline. Click on “Bulk Jobs”. This allows you to evaluate multiple bids in parallel.

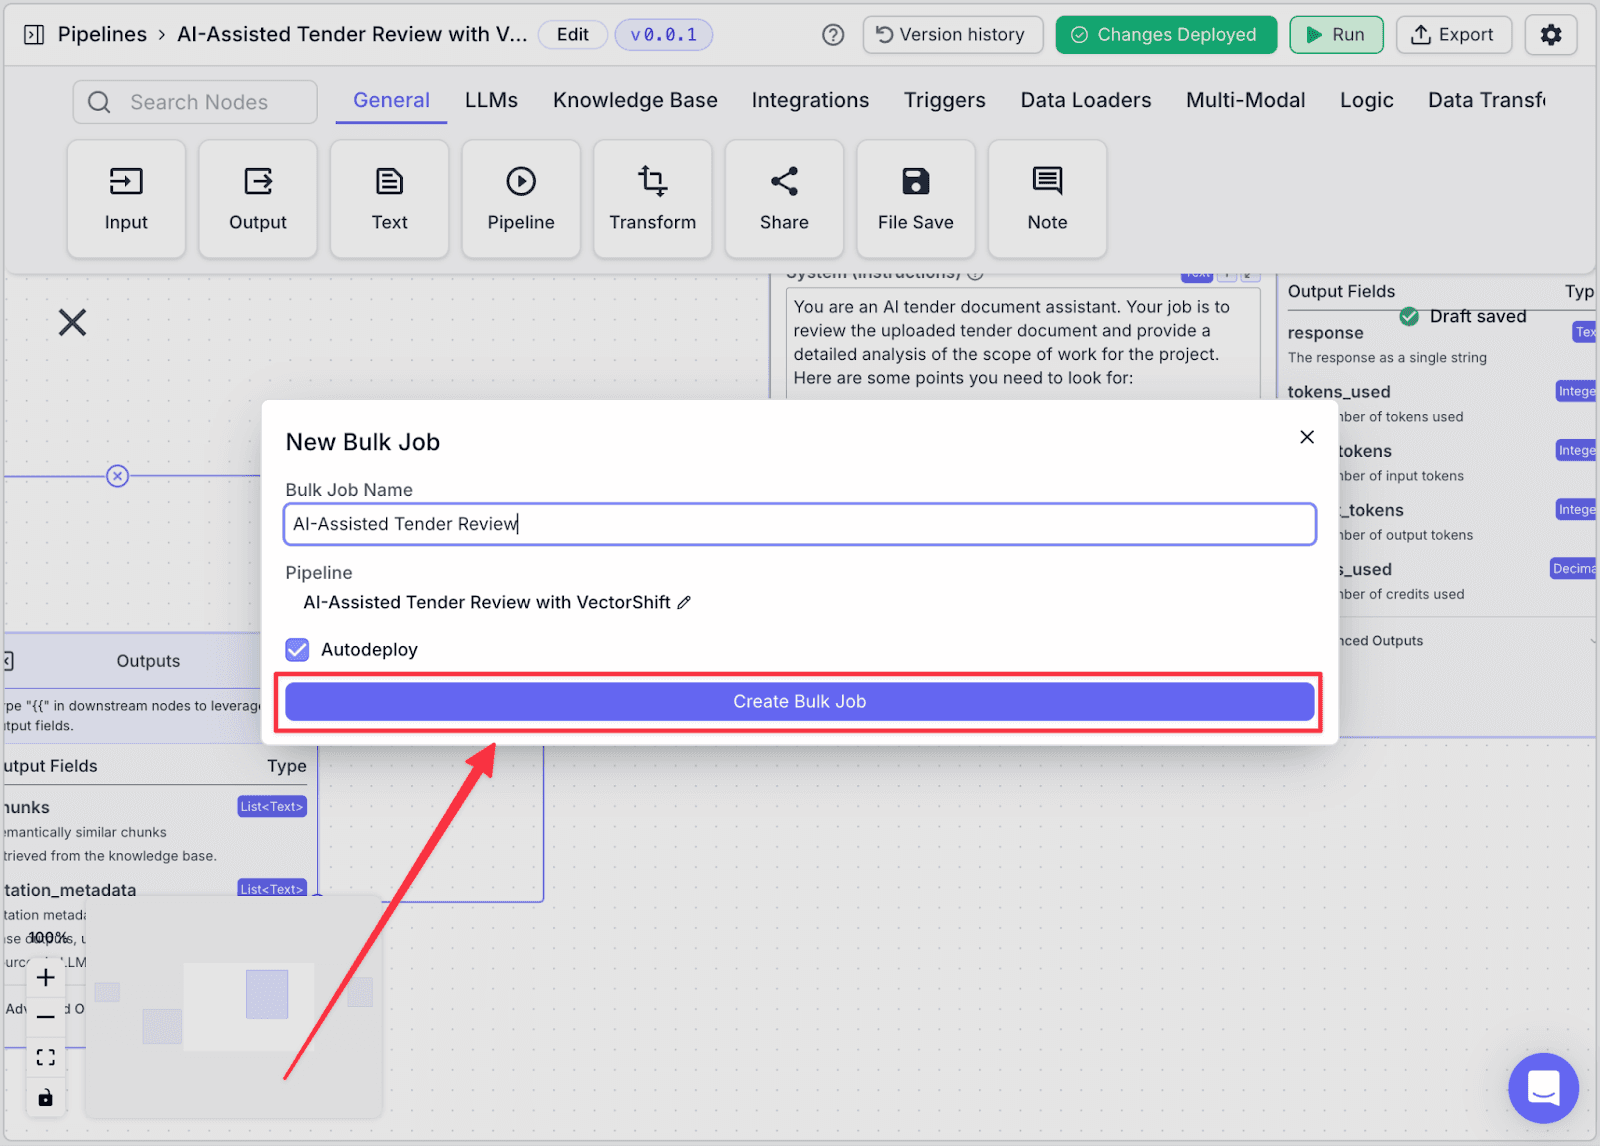
Step 3: Give a name to the bulk job name then click “Create Bulk Jobs”.
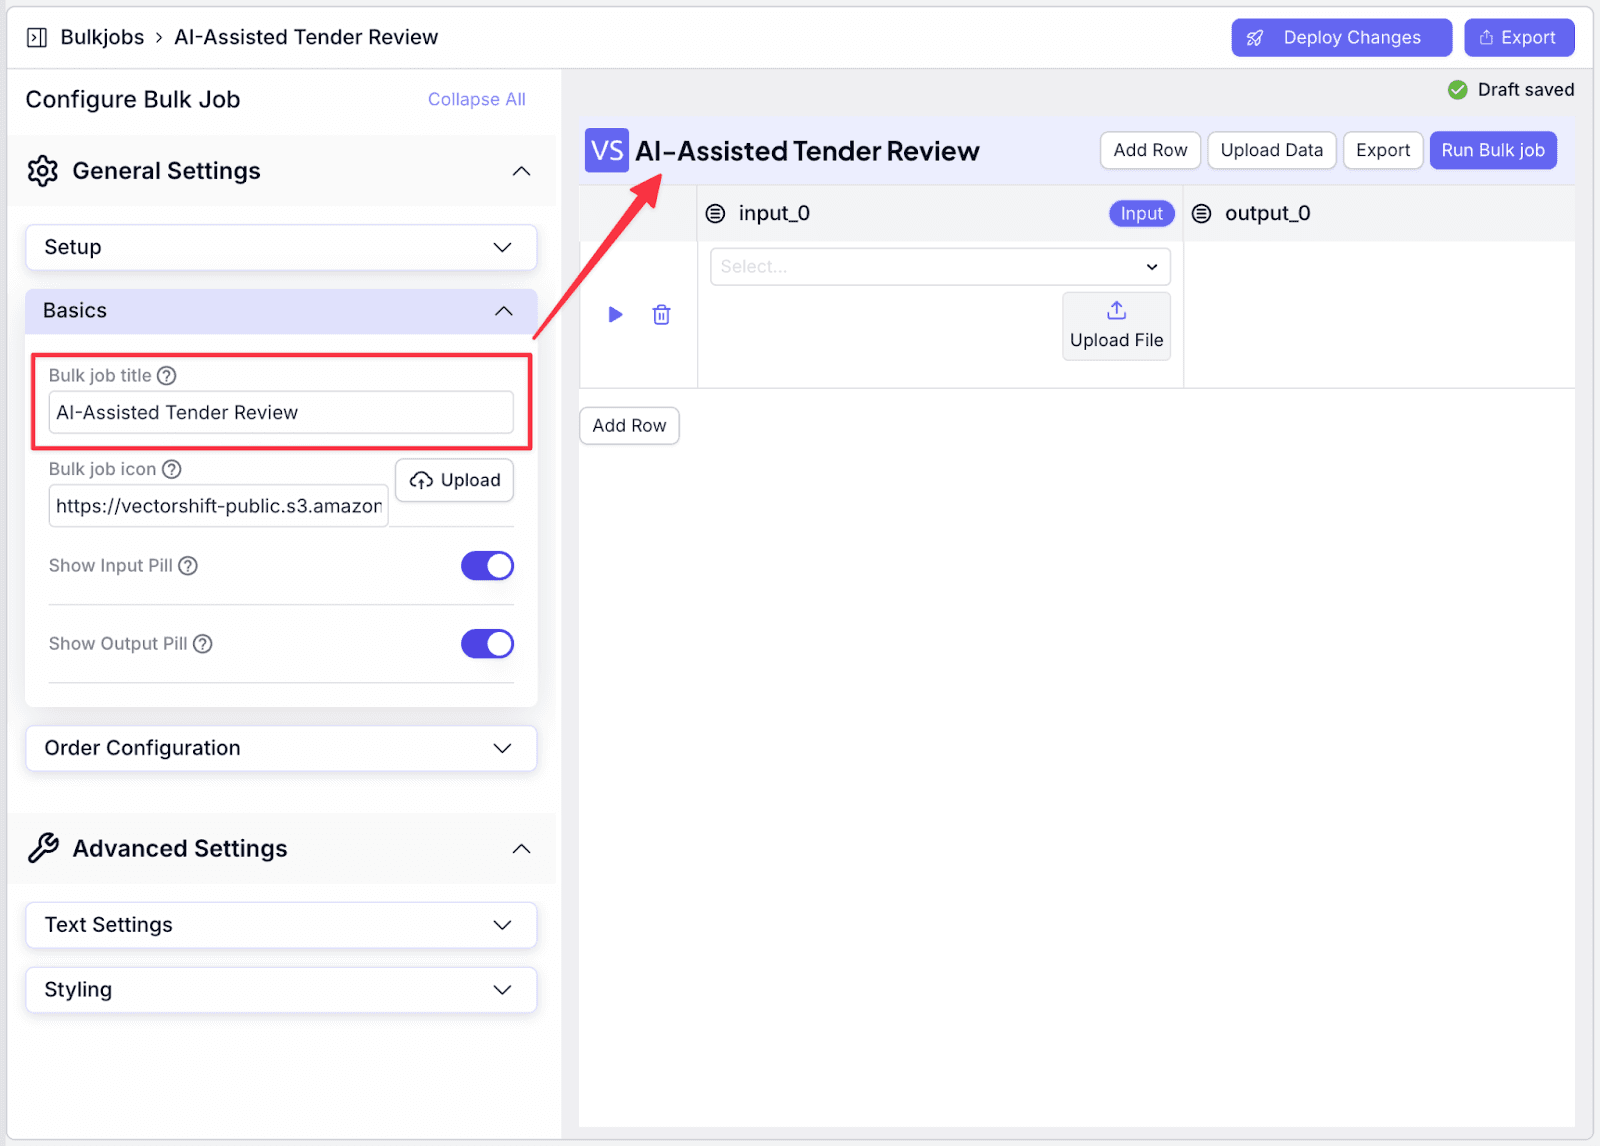
Step 4: Make any relevant changes in the left pane. For example, under “Basics”, change the “Bulk job title” accordingly. You will see the changes immediately.
Step 5: After finishing making changes, click on “Deploy Changes” to deploy the updates.
Just like deploying a Pipeline, you can also add “Description” to the version you want to deploy. After that, click “Deploy”.

Step 6: After deploying the changes, click “Export” to proceed to the next step, which is launching the bulk jobs.

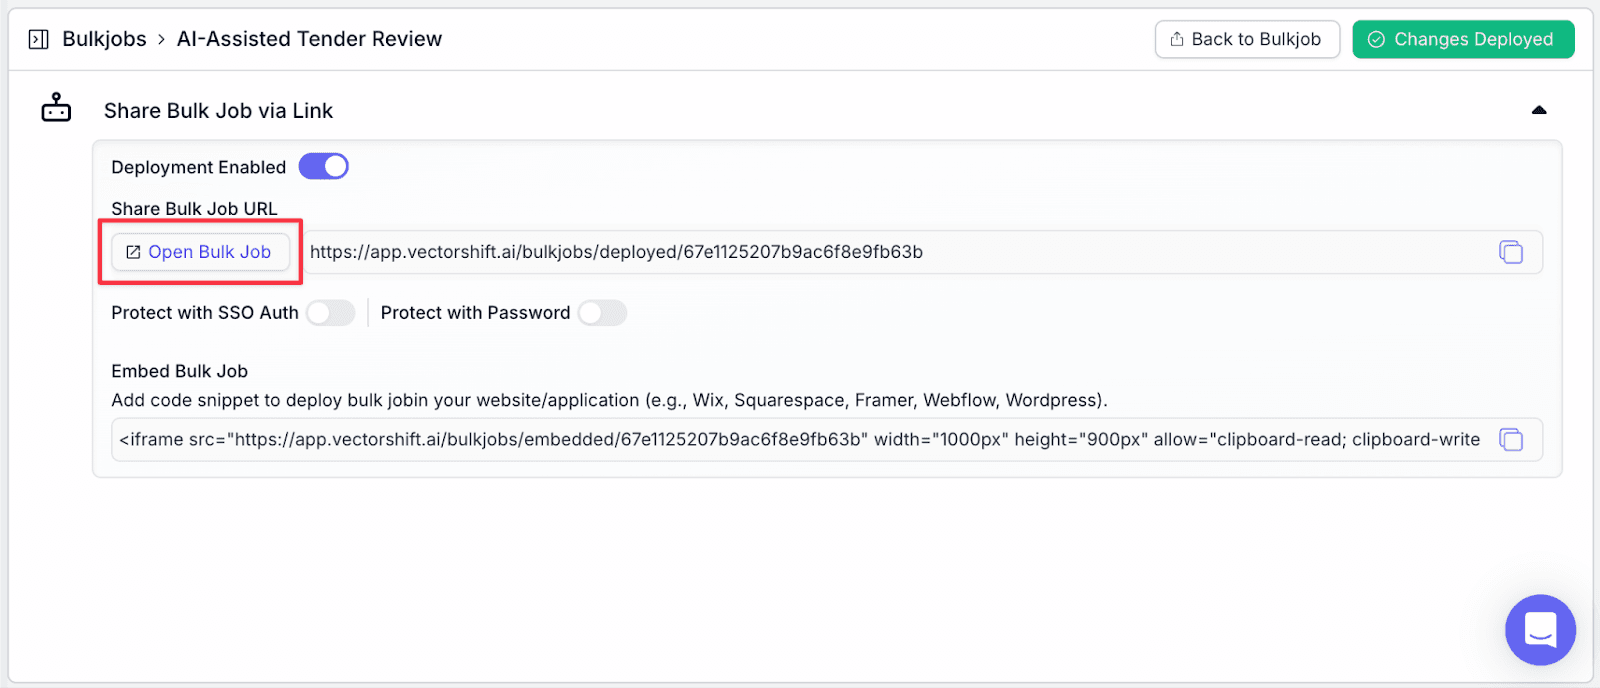
Step 7: Click on the “Open Bulk Job” button, or you can paste the link.
Step 8: Upload the bid document by clicking the “Upload File” button. You can add additional documents to review in parallel by clicking “Add Row”.

Step 9: Click “Run Bulk Job” on the top right to execute the job.
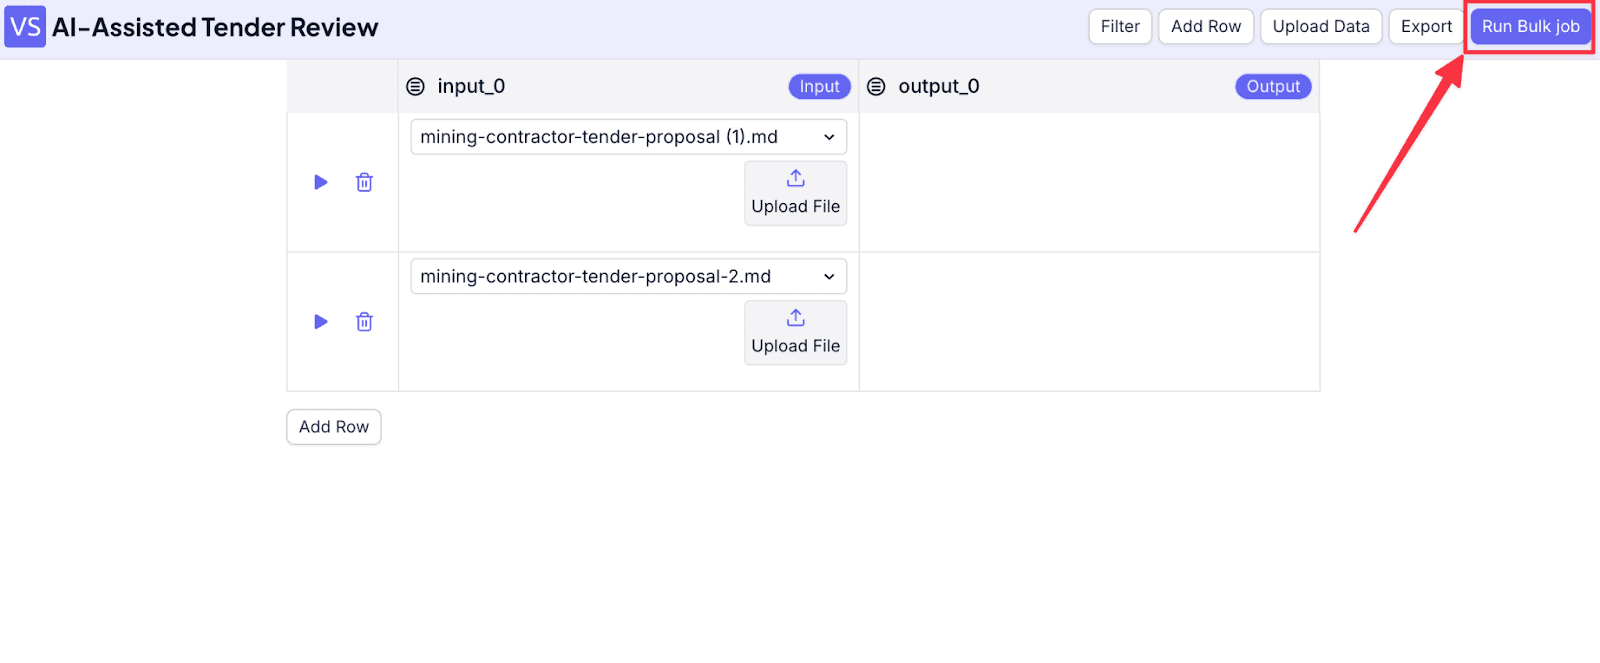
You can see the result in the “output_0” column.

To download the document summary, you can go to “Export” and then click on “Download”

Keep Track of Usage with Pipeline Analytics
To keep track of any of your pipeline usages, you can go to “Pipeline Analytics”.
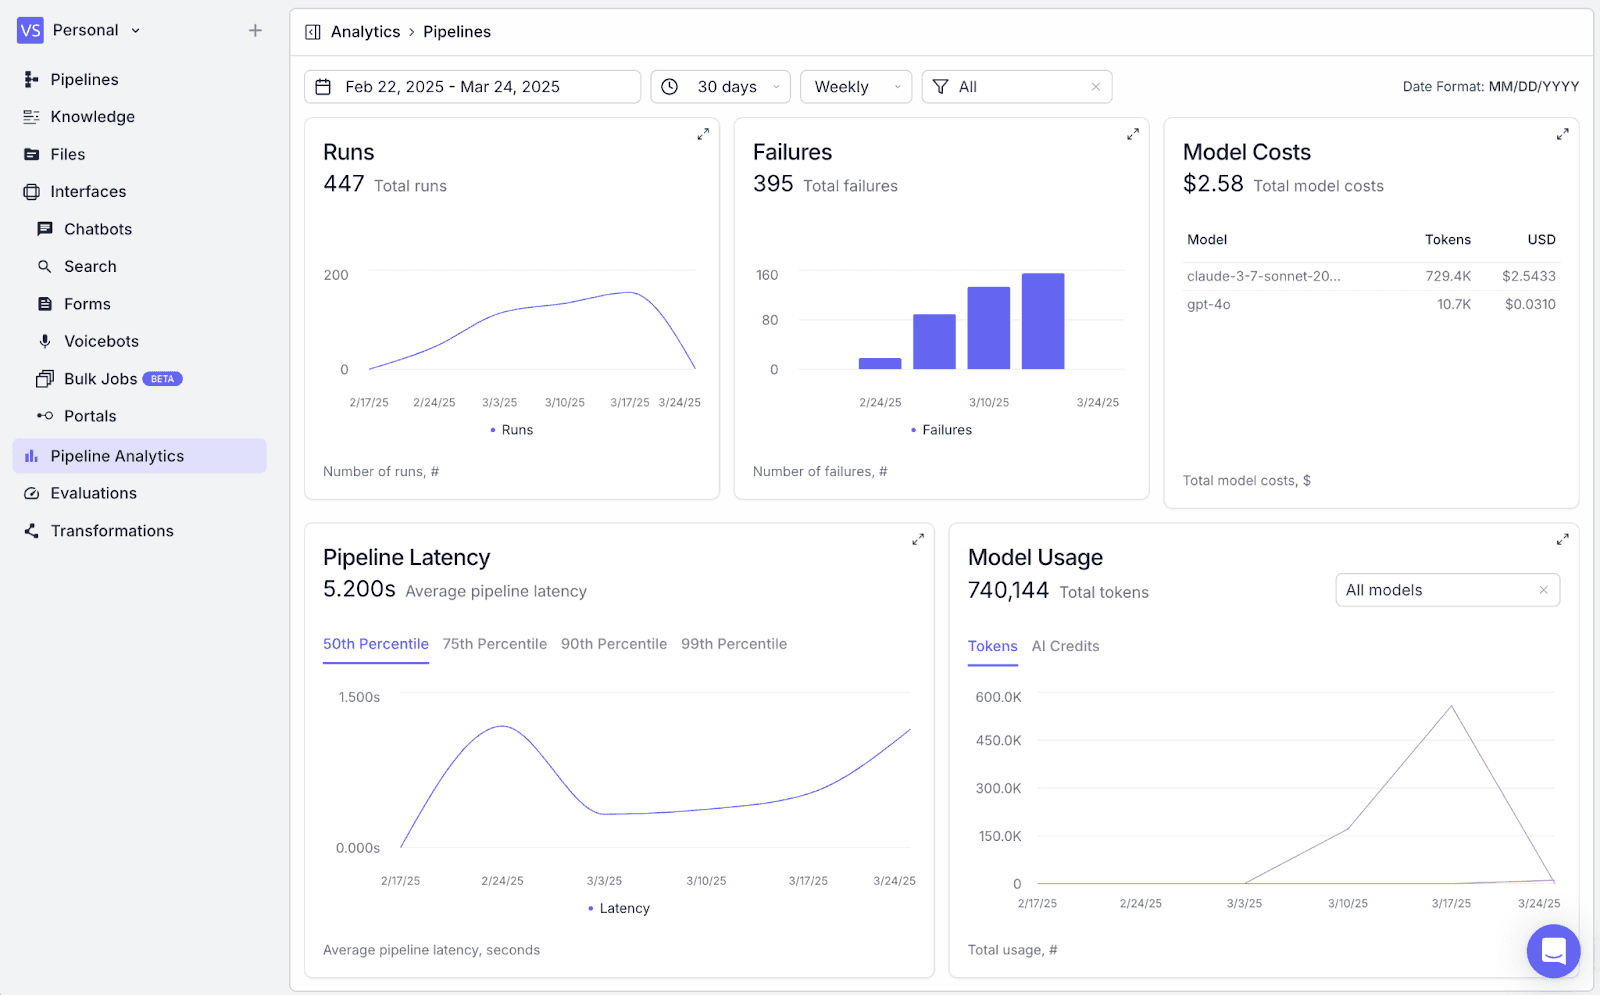
Go to filter, then select the AI-Assisted Tender Pipeline, the analytics will show the detail of how many times this pipeline has been executed, failures, model costs, latency, and token usage. As you deploy your solution into production, this helps monitor and trace your usage across your organization.
Conclusion: Automate bid document review, scalably, without code.
Congratulations, with VectorShift, you can significantly streamline your bid review process.
Looking to automate back office processes? Create your free account and start scaling your business, or talk with our team!

Albert Mao
Co-Founder
Albert Mao is a co-founder of VectorShift, a no-code AI automation platform and holds a BA in Statistics from Harvard. Previously, he worked at McKinsey & Company, helping Fortune 500 firms with digital transformation and go-to-market strategies.