
Guides
Mar 9, 2025

Albert Mao
Co-Founder
Transform your organization with AI
Discover how VectorShift can automate workflows with our Secure AI plarform.
Responding to Request for proposals (RFPs) consume significant time for sales teams. A standard 100-150 question RFP takes 50-75 hours to complete. Sales team report that 1) RFPs take away time from closing additional deals and 2) they turn away many RFPs every year because they don’t have time to complete all of them.
A B2B Enterprise Customer Service software company uses VectorShift to build an RFP automation tool to ingest RFPs and produce first drafts of the responses.
In this article, we will walk through how to build an RFP assistant using VectorShift.
Designing the Solution
We will work on three steps to build the solution.
Create knowledge bases: we will use three knowledge bases each with relevant information: historical RFPs, information about services and products, and pricing.
Building the workflow: the workflow will take in two inputs: 1) the RFP document and 2) user inputs.
We will query all knowledge bases to find relevant information
We will pass the relevant information and user’s inquiry to an LLM to write the first draft of the RFP proposal
Exporting the workflow: export the workflow as a form interface so end-users can submit RFPs, and receive first drafts.
1. Building Knowledge Bases
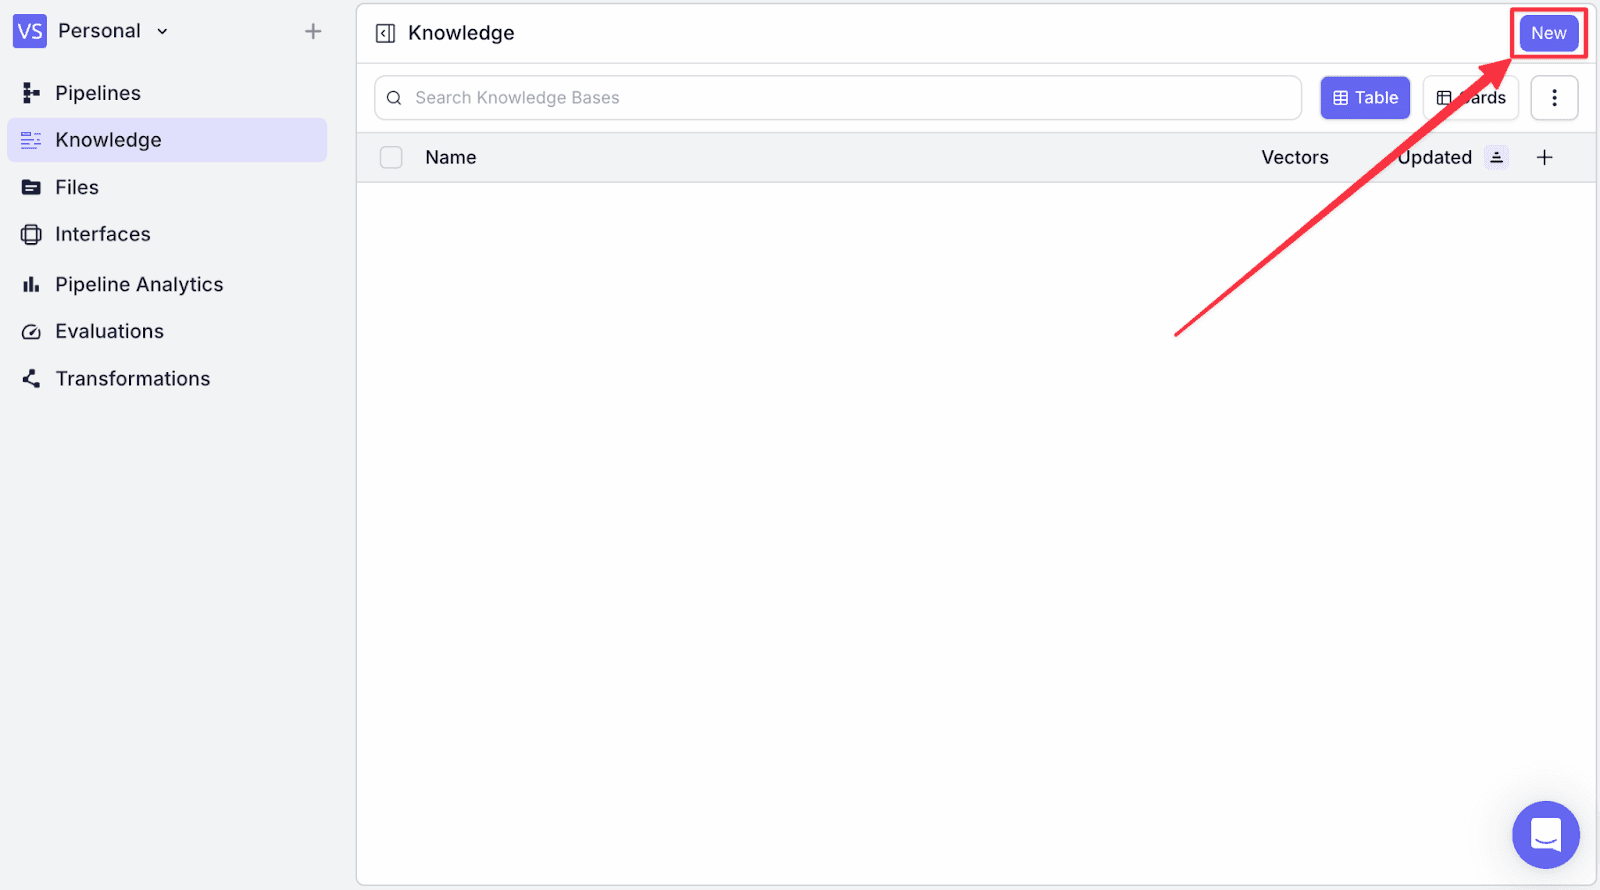
Step 1: Go to the “Knowledge” menu from the left pane, then click on the “New” button on the top-right.
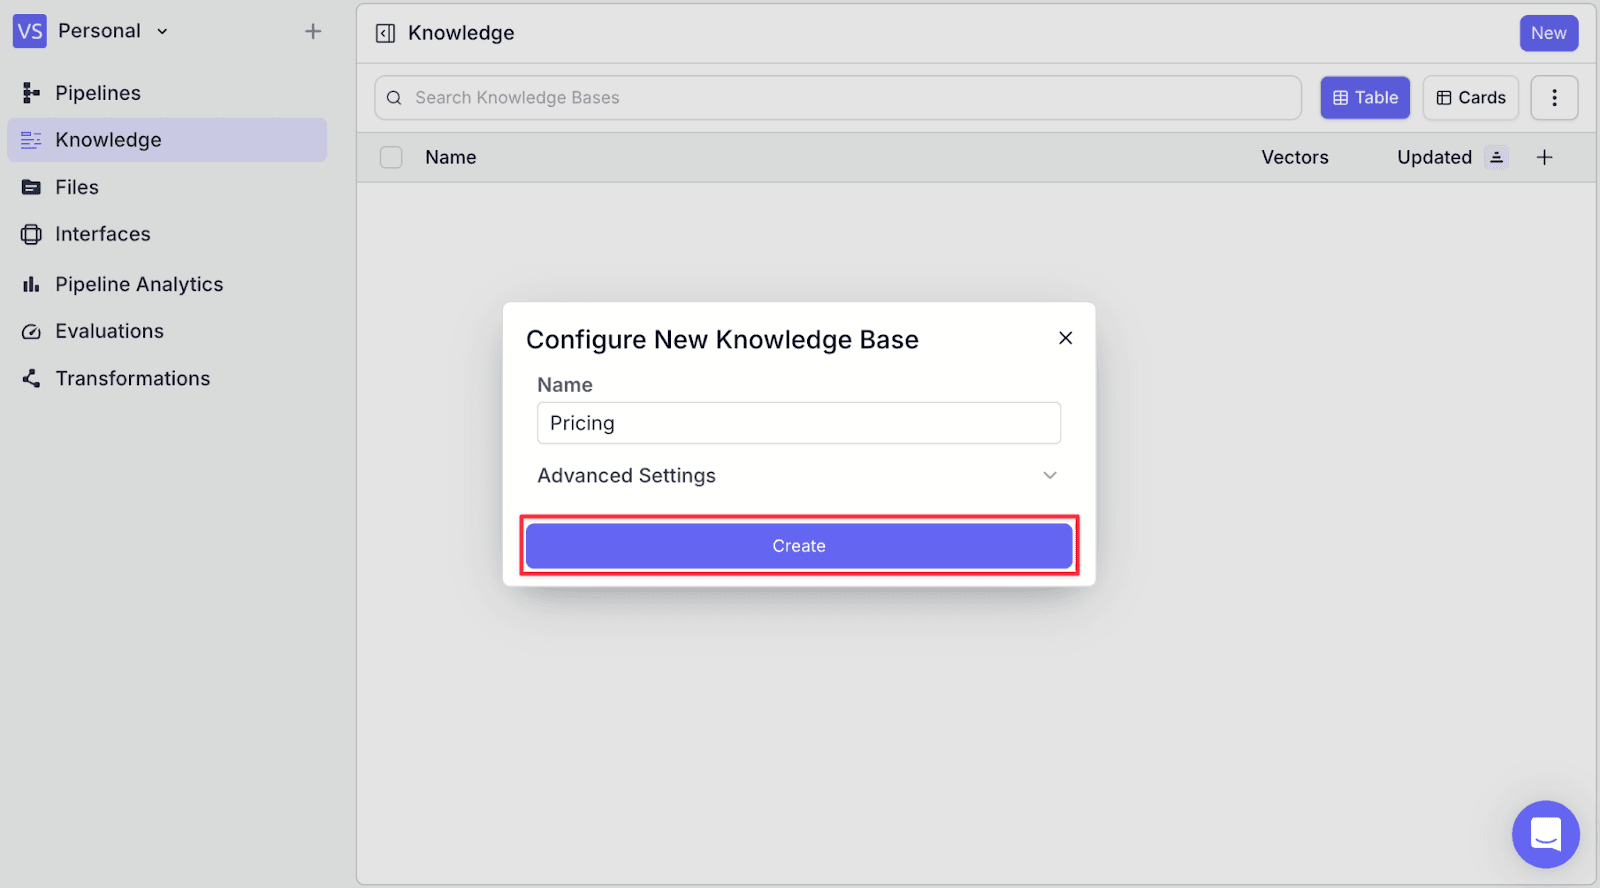
Step 2: Give the knowledge base a name, then click “Create”.
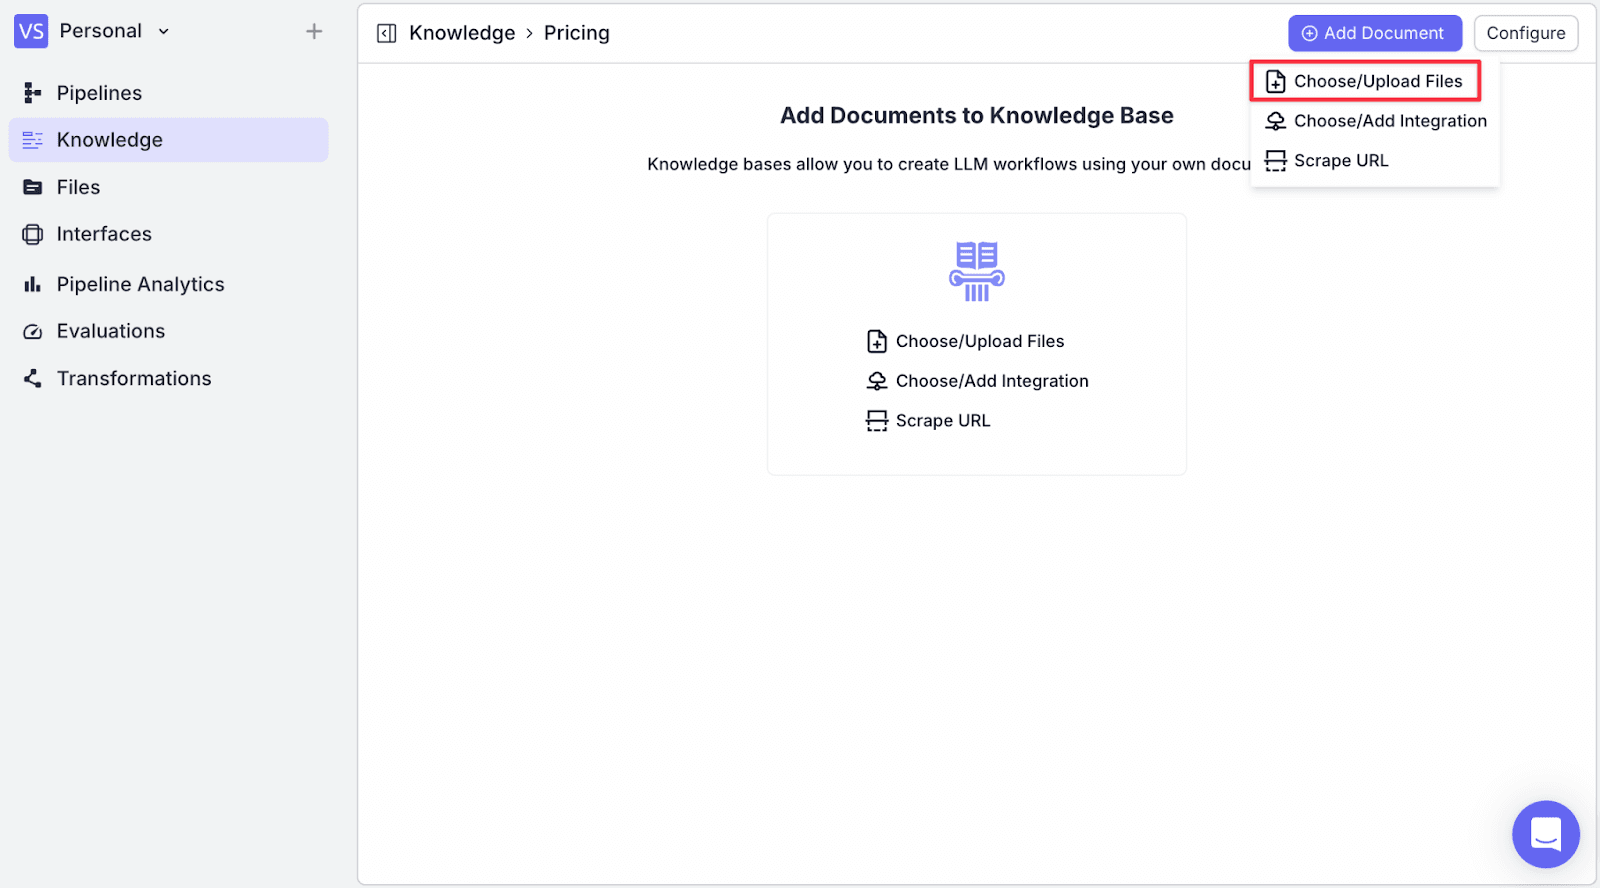
Step 3: Go to “Add Document” on the top-right, you will see three options to add documents to the knowledge base. Click on “Choose/Upload Files”.
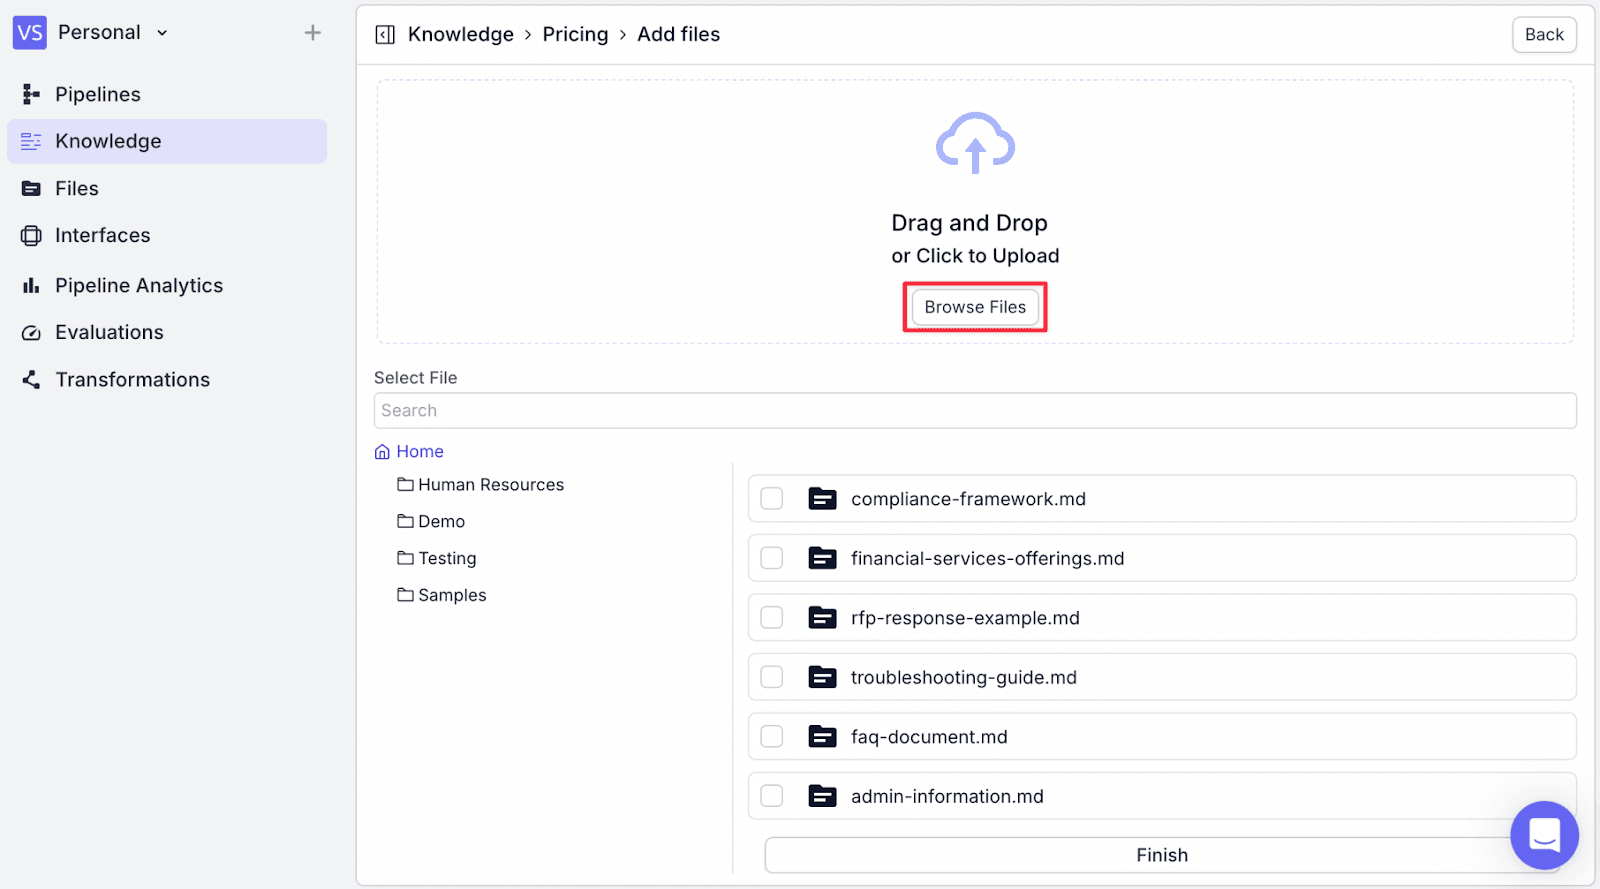
Step 4: Click on “Browse Files”, then choose the relevant document to upload. As this is for the database that will help with pricing/quoting, we upload a Pricing Model document.
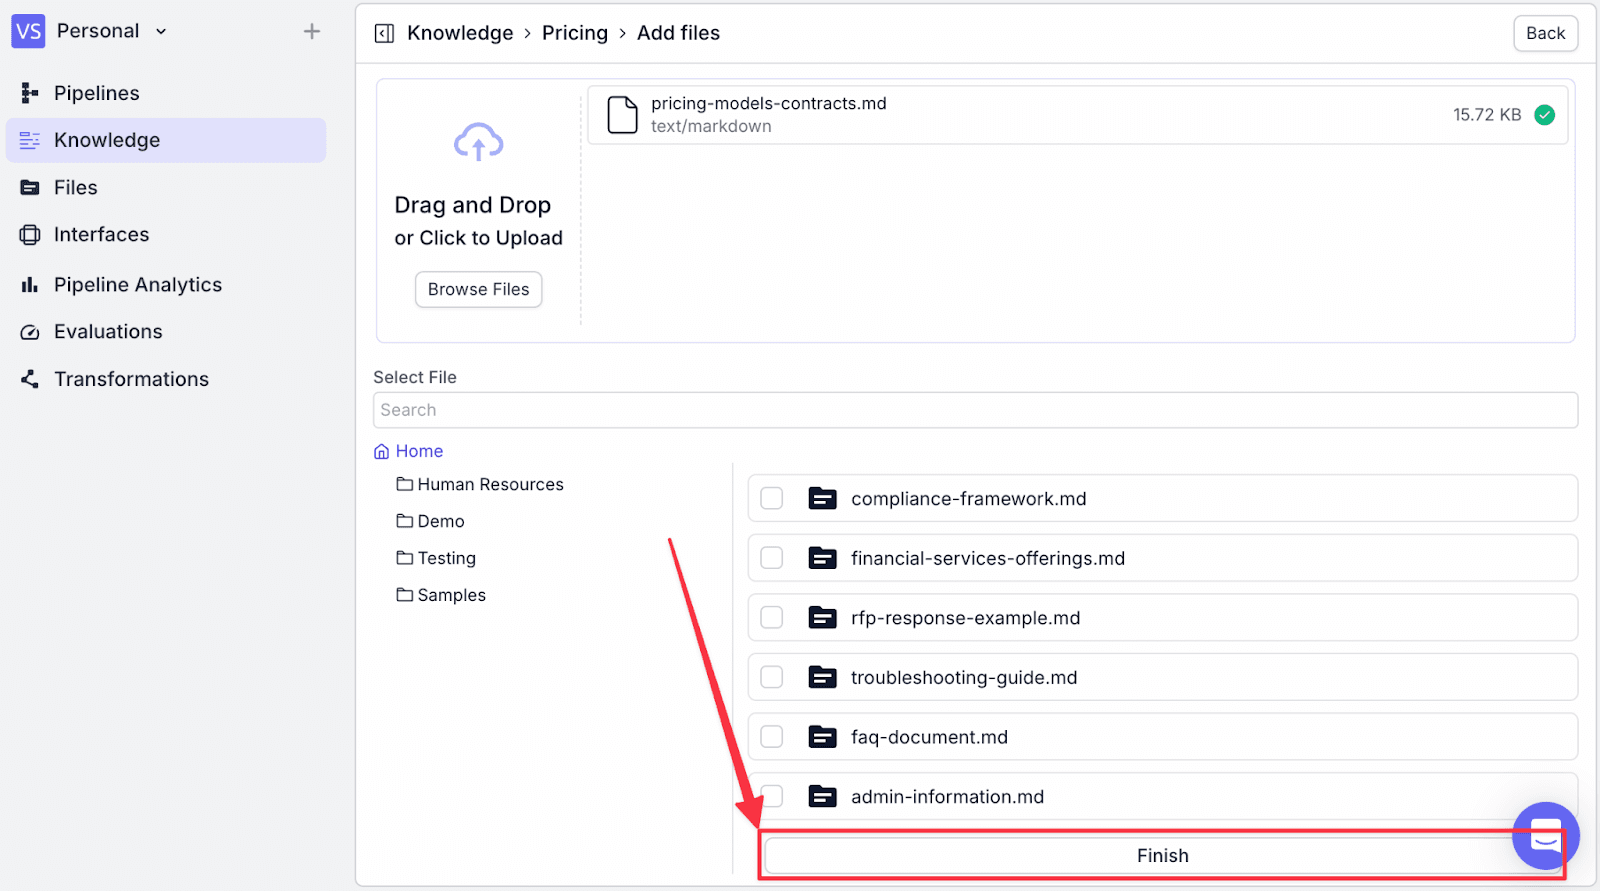
Step 5: Click the “Finish” button on the bottom after you have added all of the relevant documents.
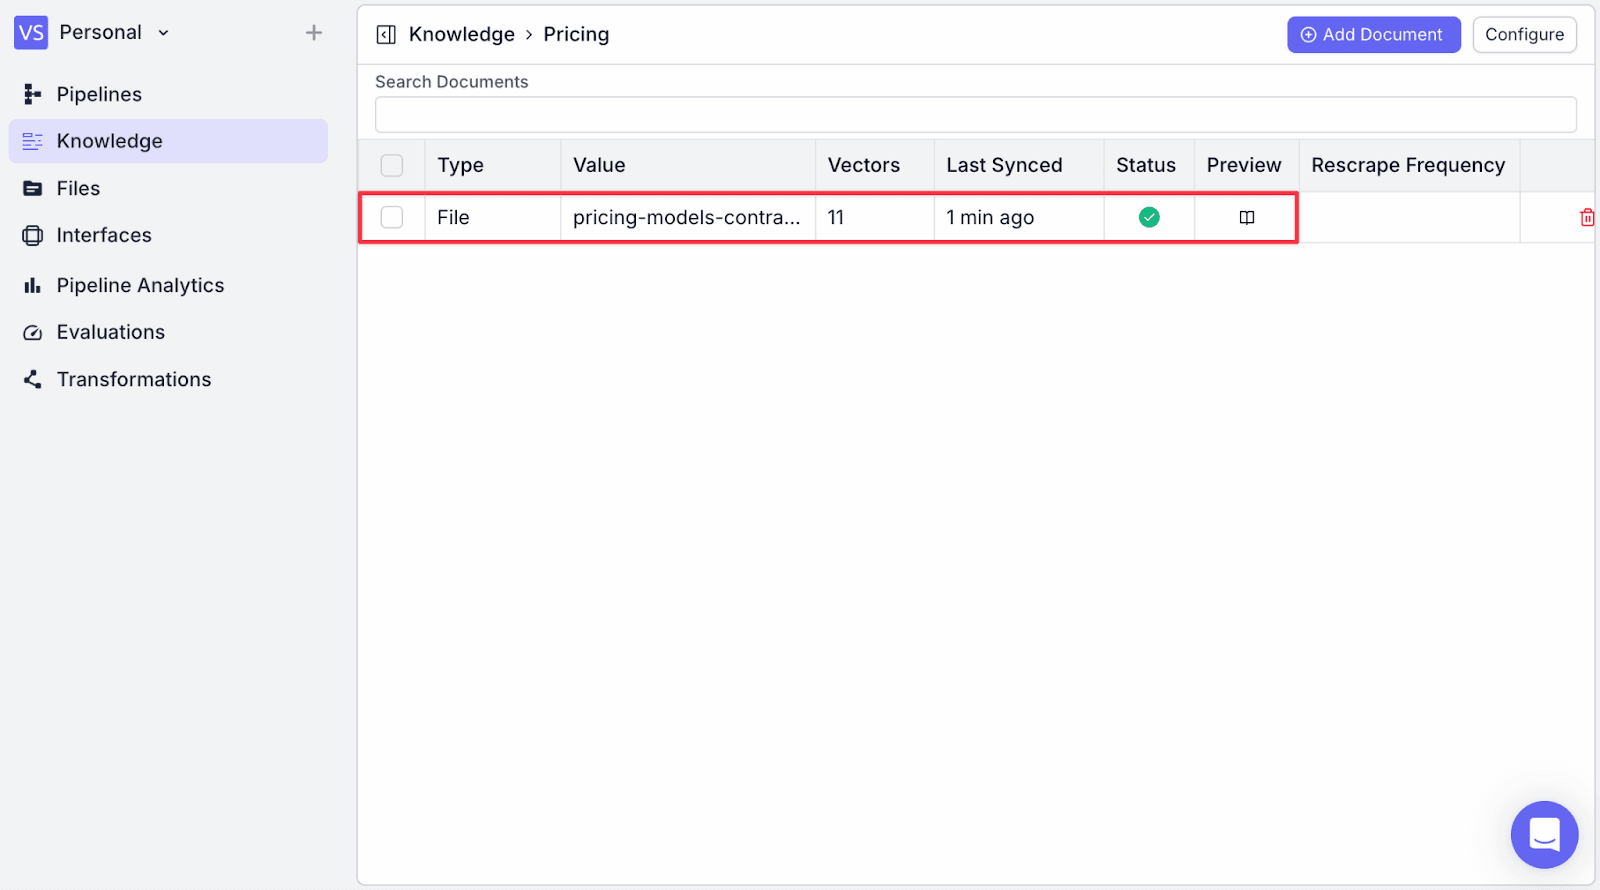
Step 6: You will be brought to a page where you will see the knowledge base successfully added.
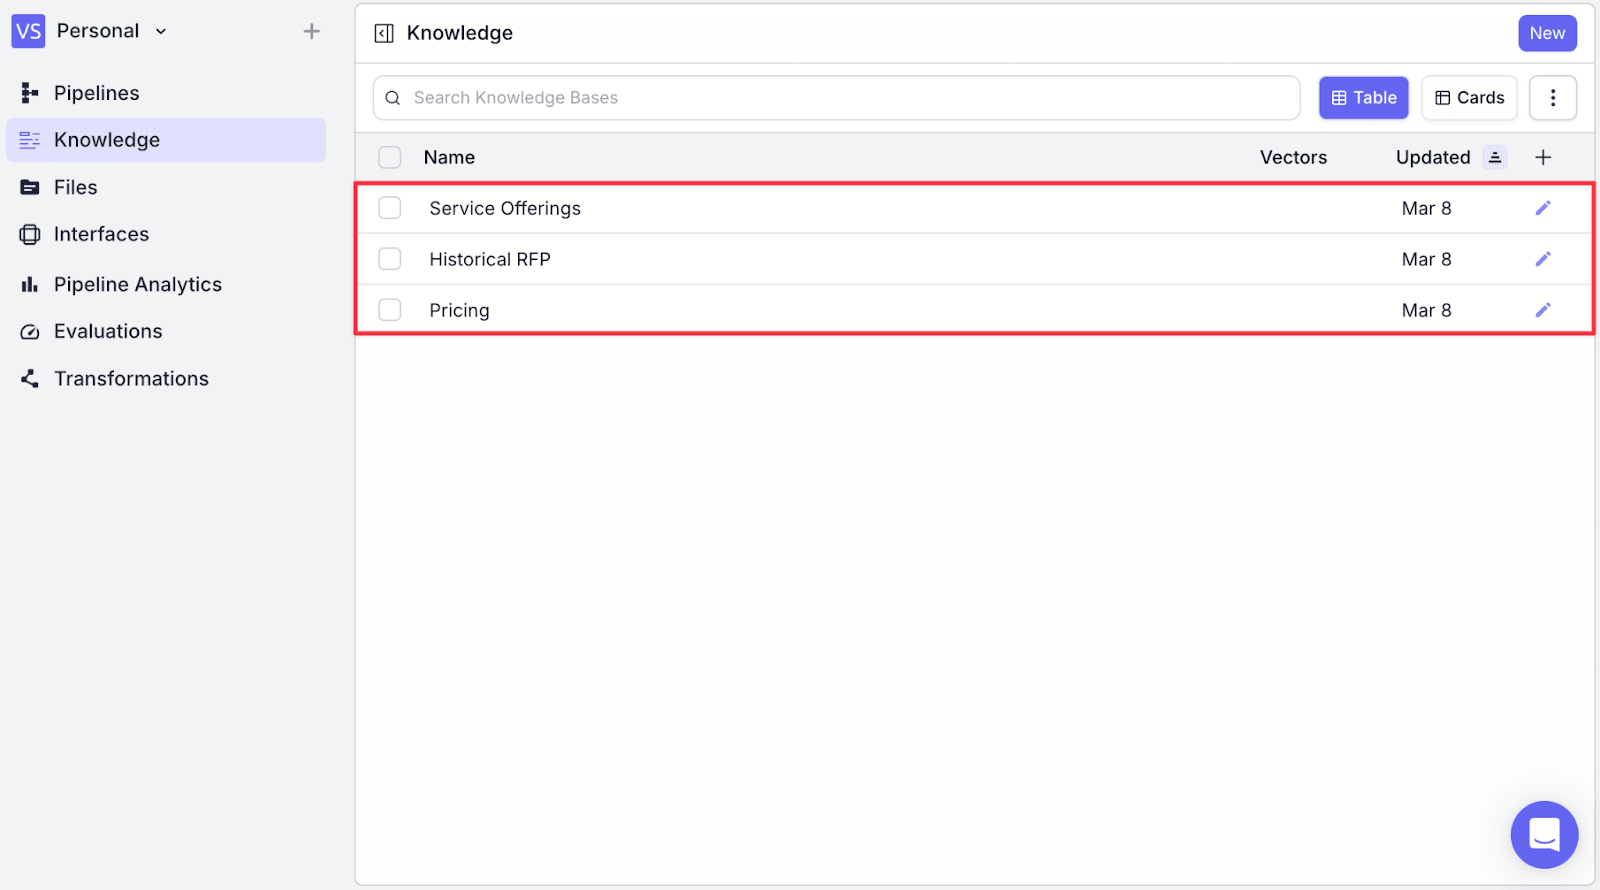
Step 7: Repeat the same steps to create two knowledge bases; Service Offering and the Historical RFPs. At the end of this stage, you will have three knowledge bases; the Historical RFPs, Service Offerings, and the Pricing.
2. Designing the Pipeline
The key requirements for an AI-driven RFP assistant are:
Inputs: The system must accept an RFP document and user instructions.
Knowledge Bases: The assistant must leverage necessary business knowledge: previous RFP responses, company services and products, and pricing.
LLM: The AI must receive relevant information from the knowledge bases, understand the RFP context, and generate a structured response based on user requests.
Output: This allows the user to view the generated response.
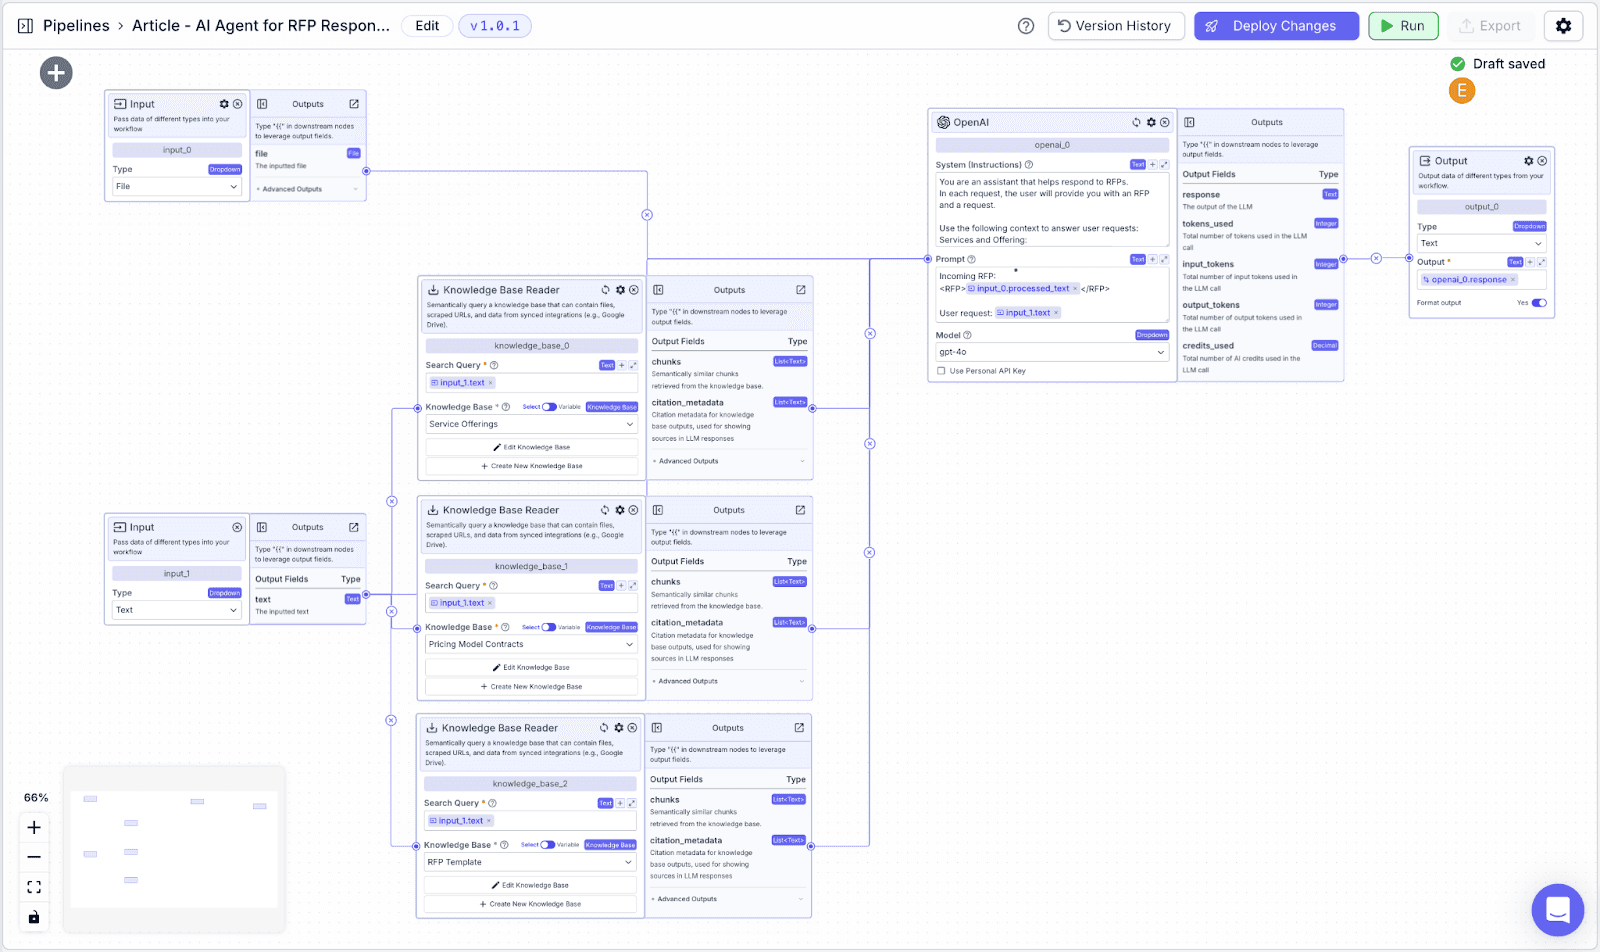
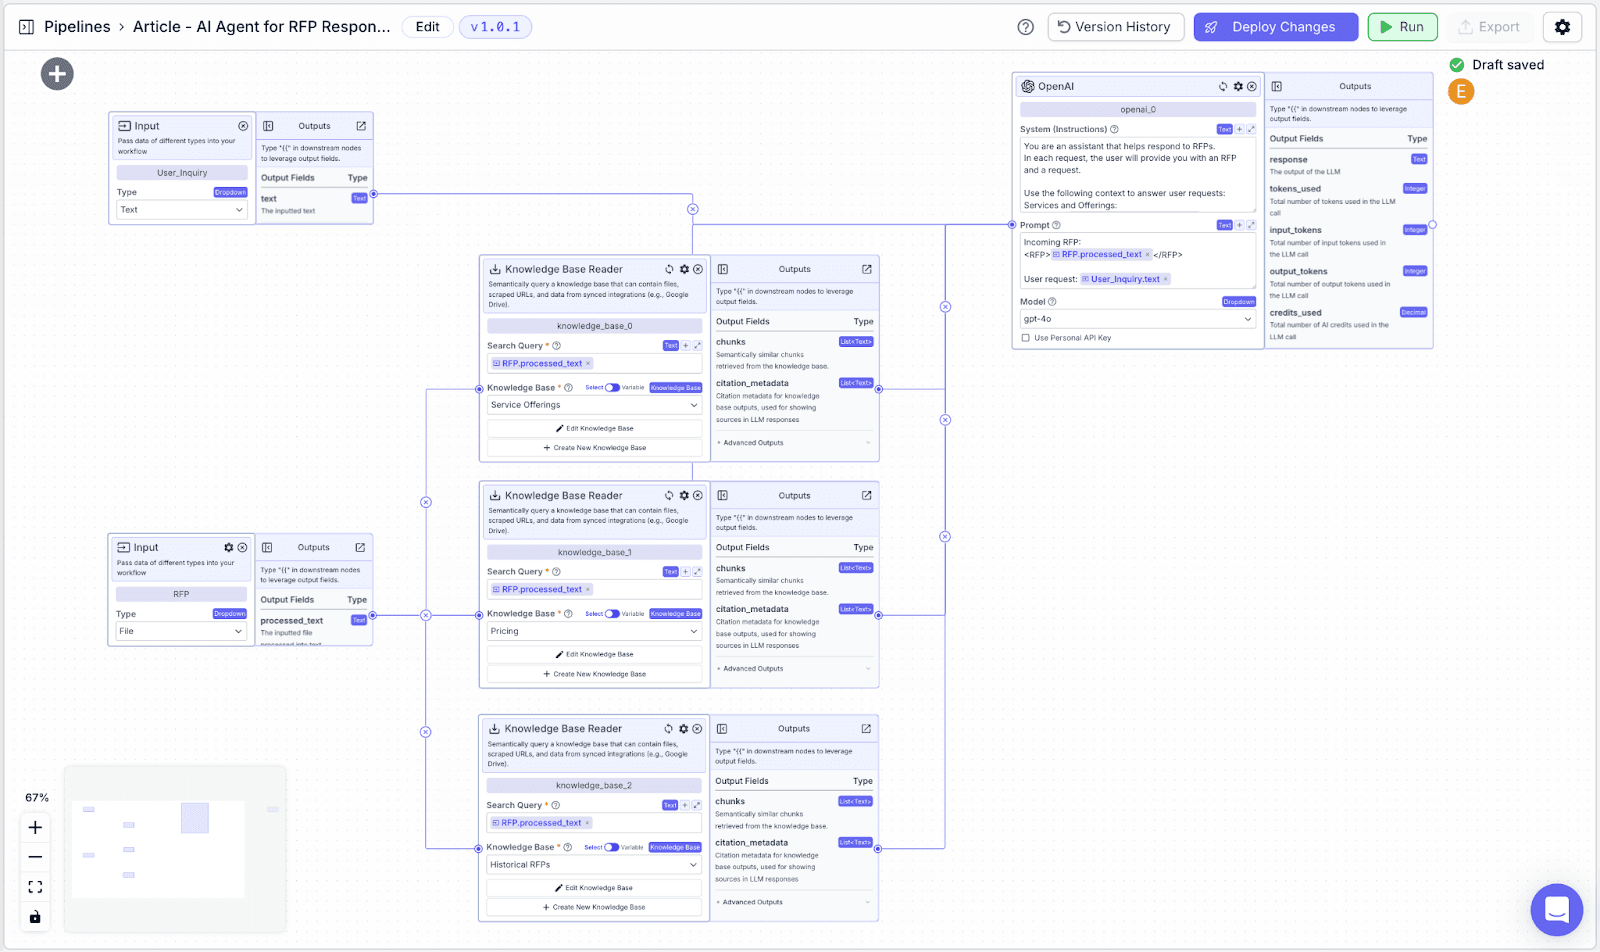
Pipeline Design Overview
Working with Nodes in VectorShift
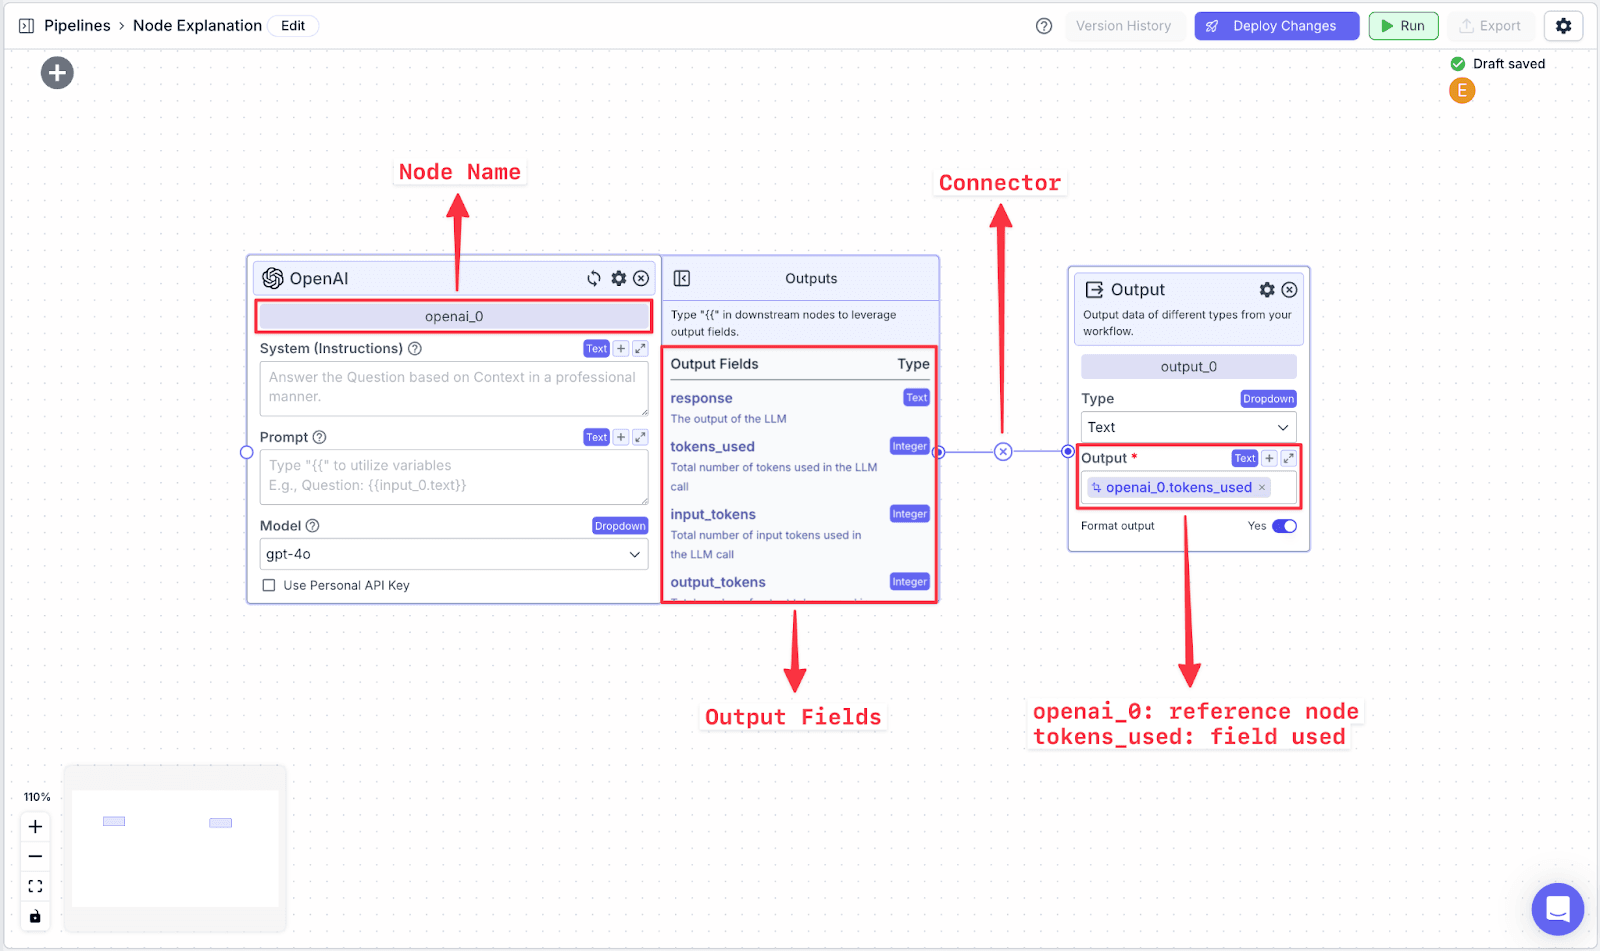
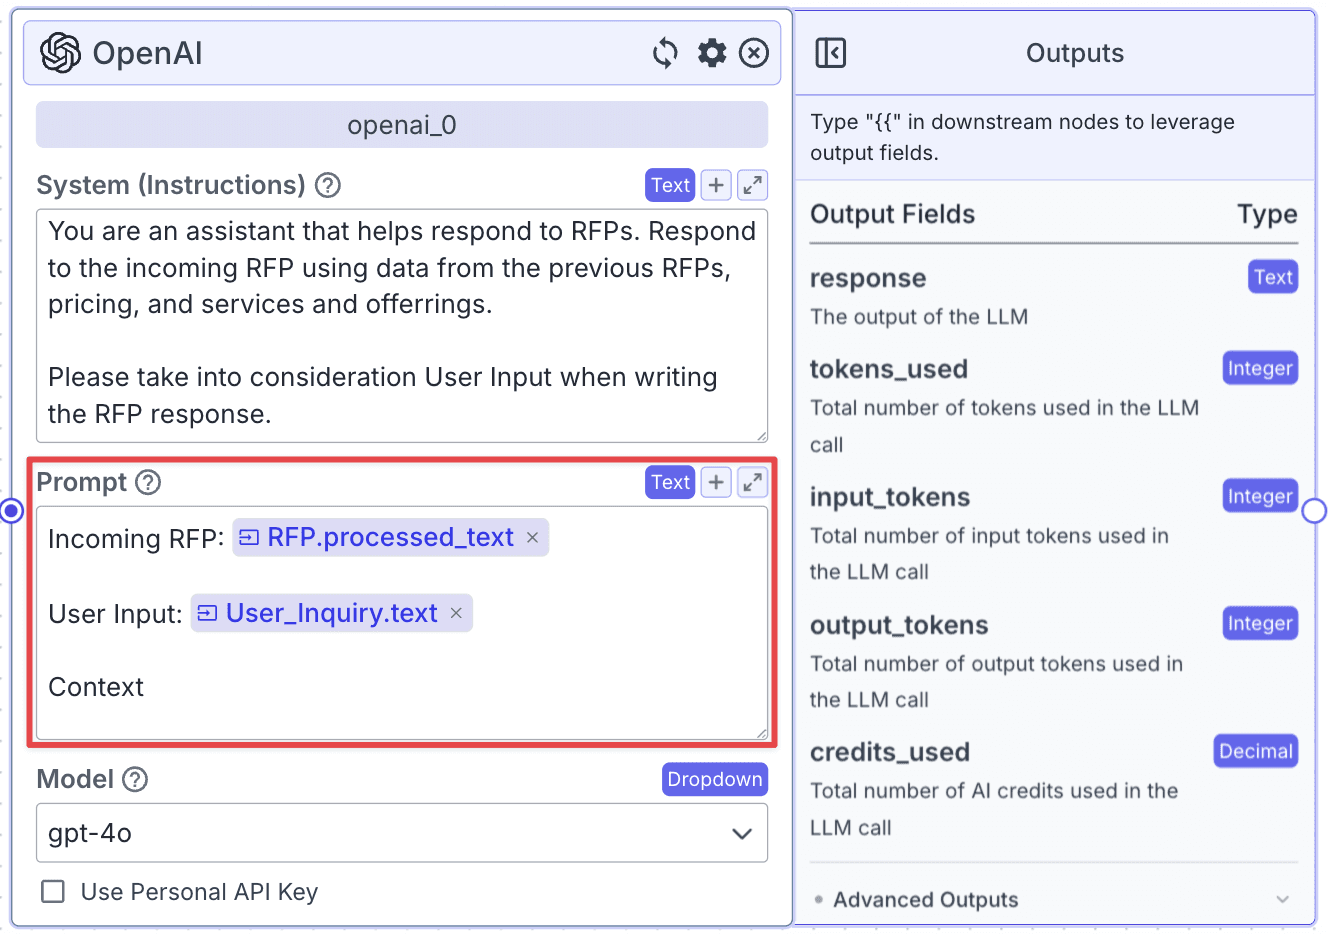
Each node in VectorShift has a name at the top of each node (e.g., openai_0) and output field(s), which are found in the right-hand pane of each node (e.g., the OpenAI LLM node has various output fields: response, tokens.used, input_tokens, output_tokens).
To reference specific data fields from other nodes, you have to do two things:
Connect the two nodes.
Reference the data from the previous field using a variable.
Variables in VectorShift all have the same structure:
You can also create variables by typing “{{“ in any text field, which opens the variable builder. To reference the text from the OpenAI node, you do the following:
Inputs
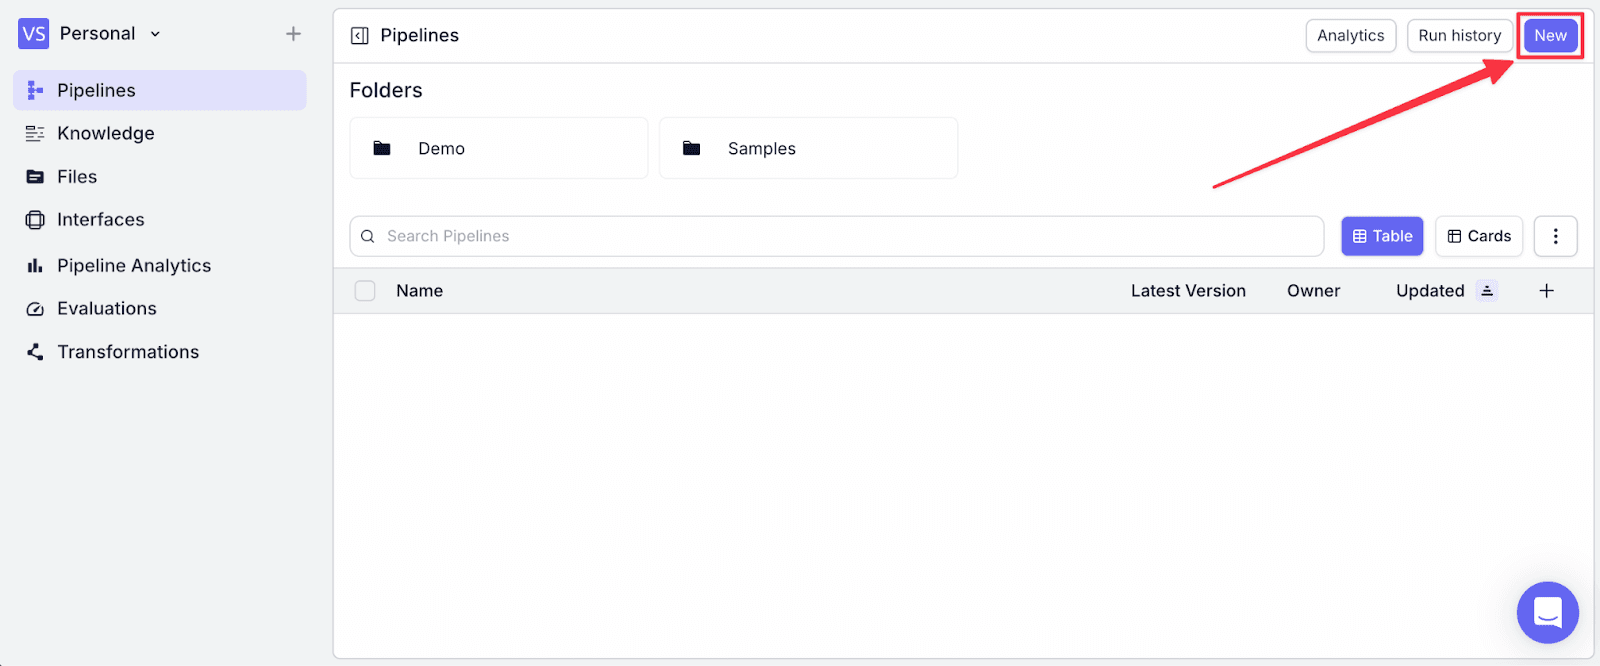
Step 1: Go to the “Pipeline” menu on the left pane, then click on “New” to Create a new pipeline.
Step 2: Drag out two input nodes. Change the name of the nodes at the top bar to “User_inquiry” and “RFP”.
File Input (RFP): Allows an RFP document to be uploaded.
Text Input (User_inquiry): Captures user inputs
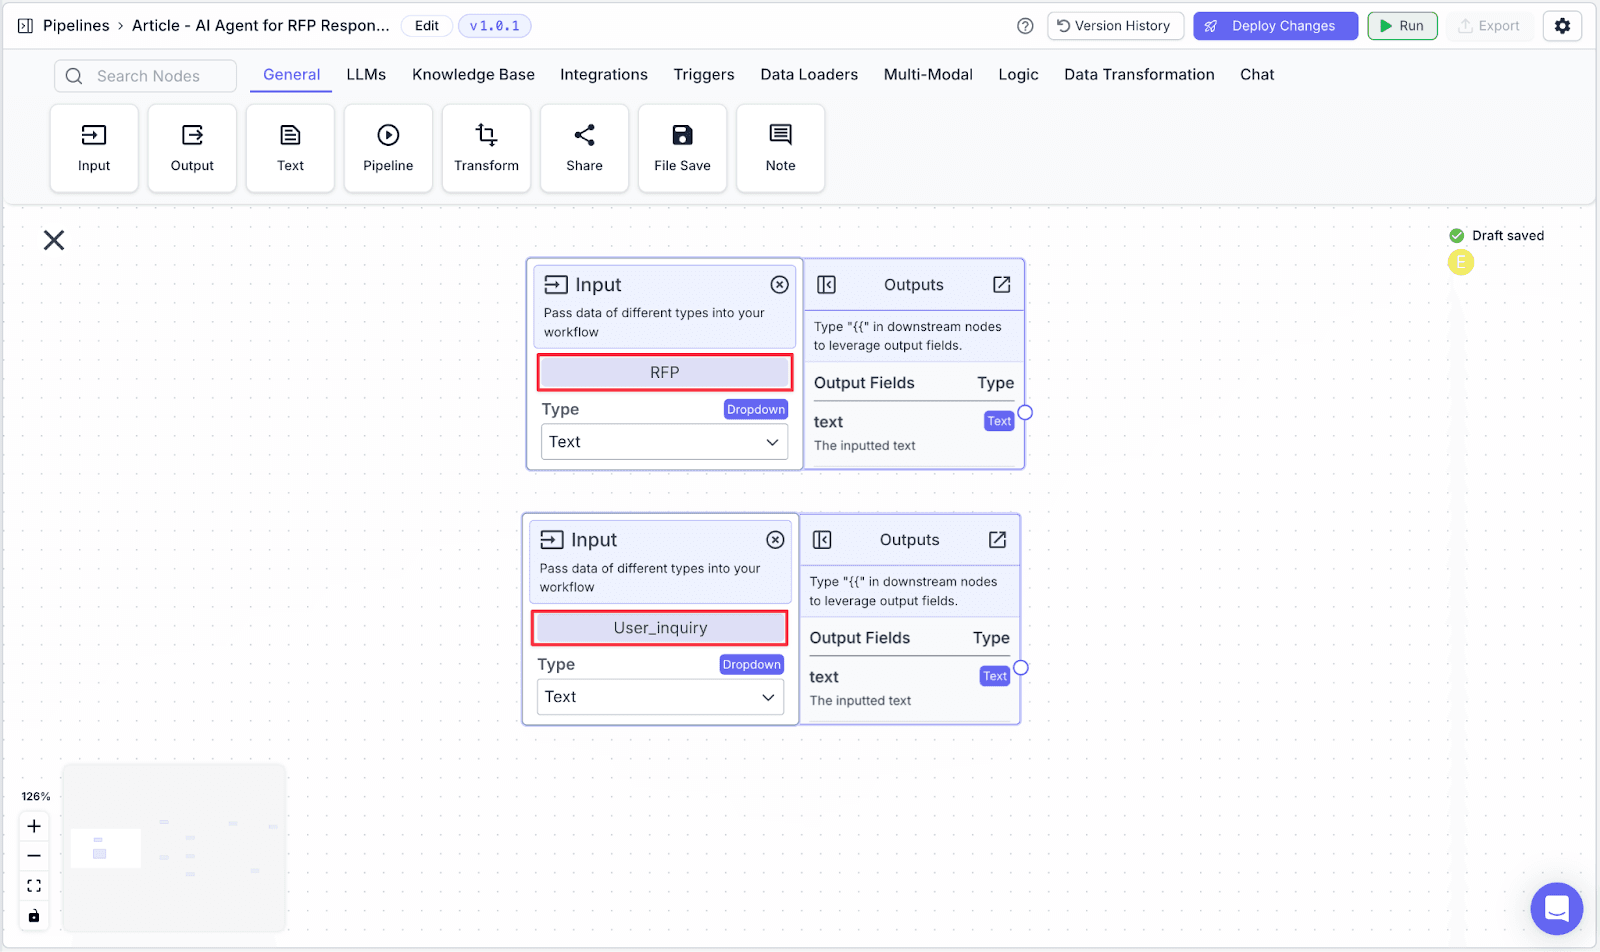
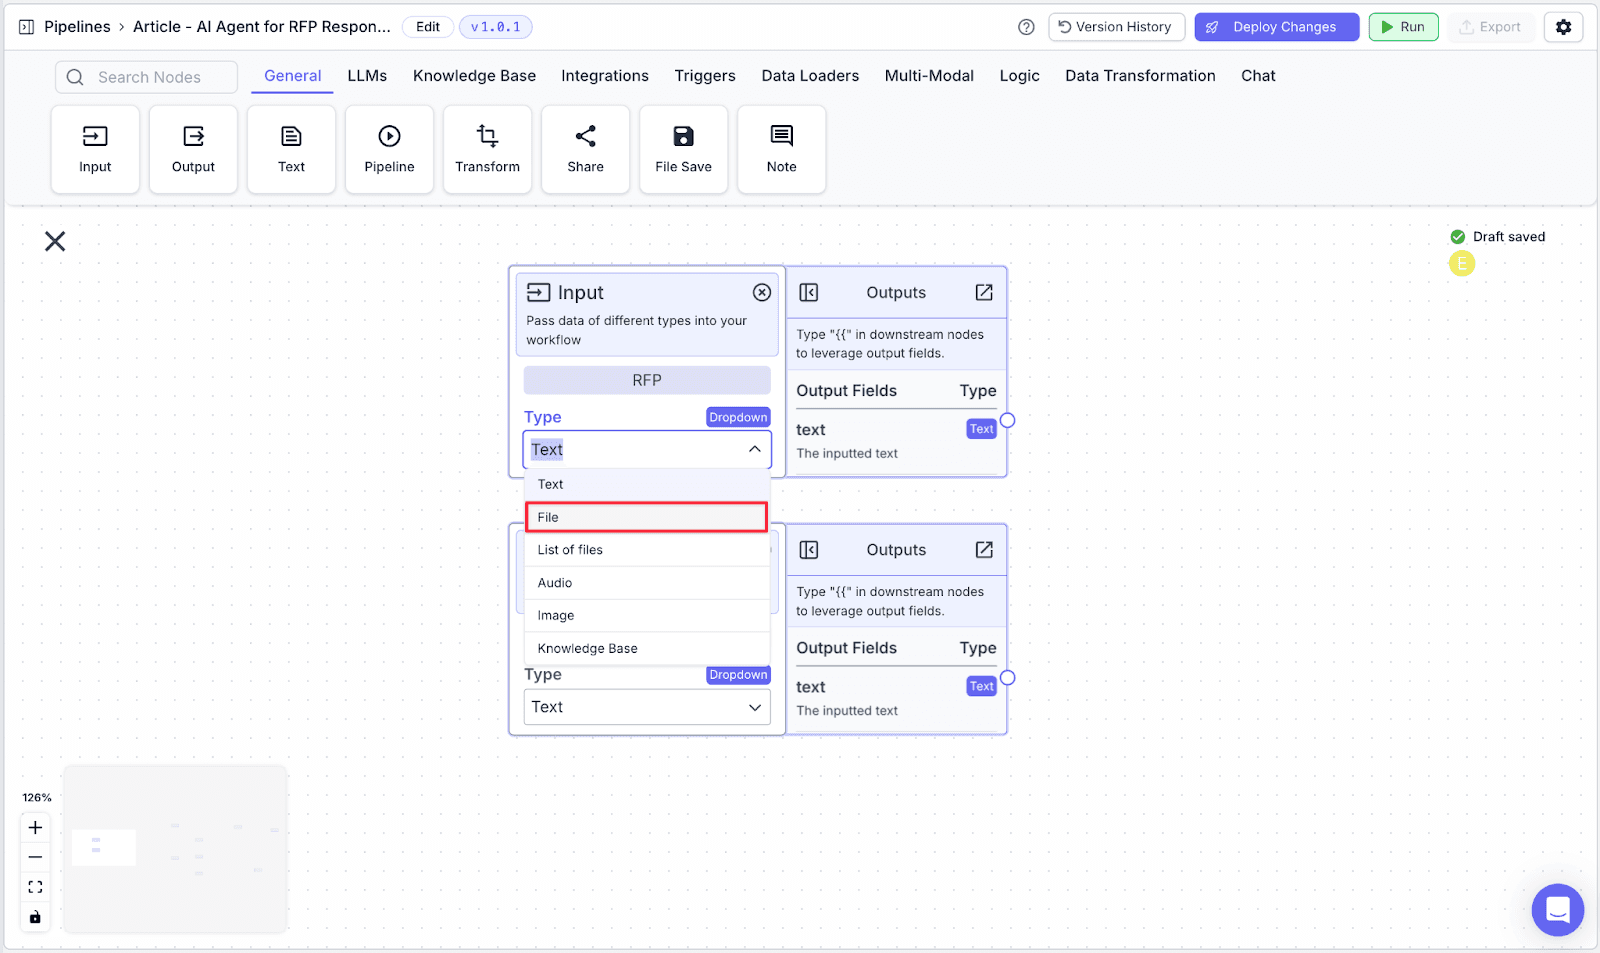
Step 3: Change the type of the “RFP” input node into “File” by clicking the “Type” dropdown and then choosing “File”
Knowledge Bases
We’re going to use three knowledge base nodes, as mentioned above:
Service Offerings: Information about products and services offered.
Services Pricing: Details about pricing structure for the products and services.
Previous RFP Responses: Contains historical RFP responses.
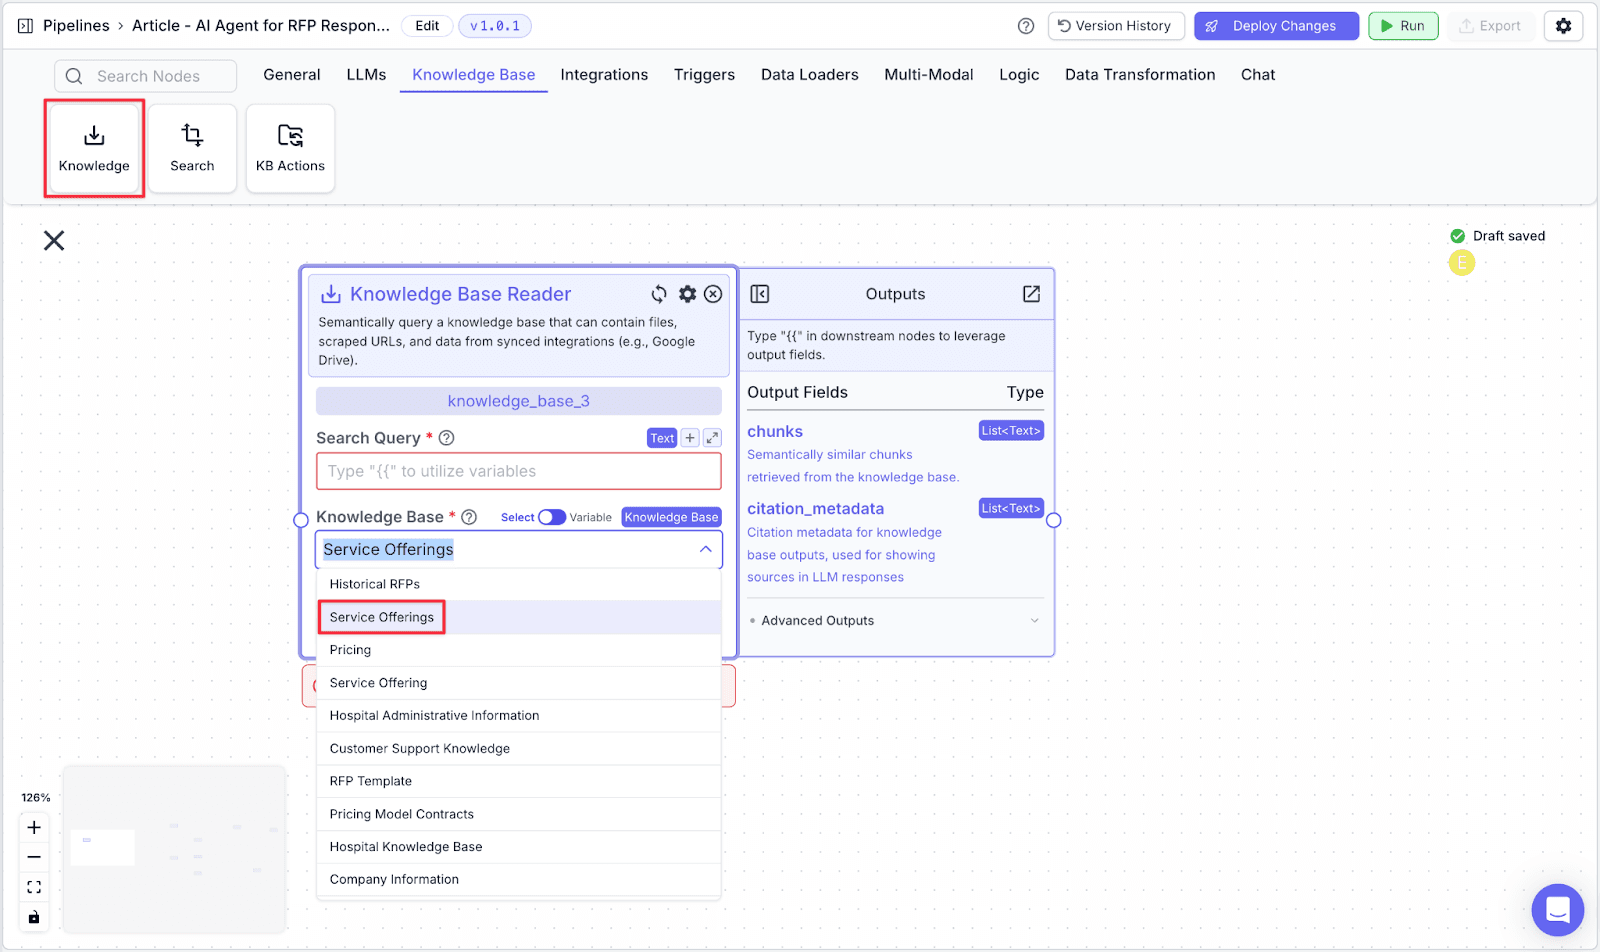
Step 1: Take the “Knowledge Base Reader” node, then click on the “Knowledge Base” dropdown and select the relevant knowledge base. In this node, we will use “Service Offerings”.
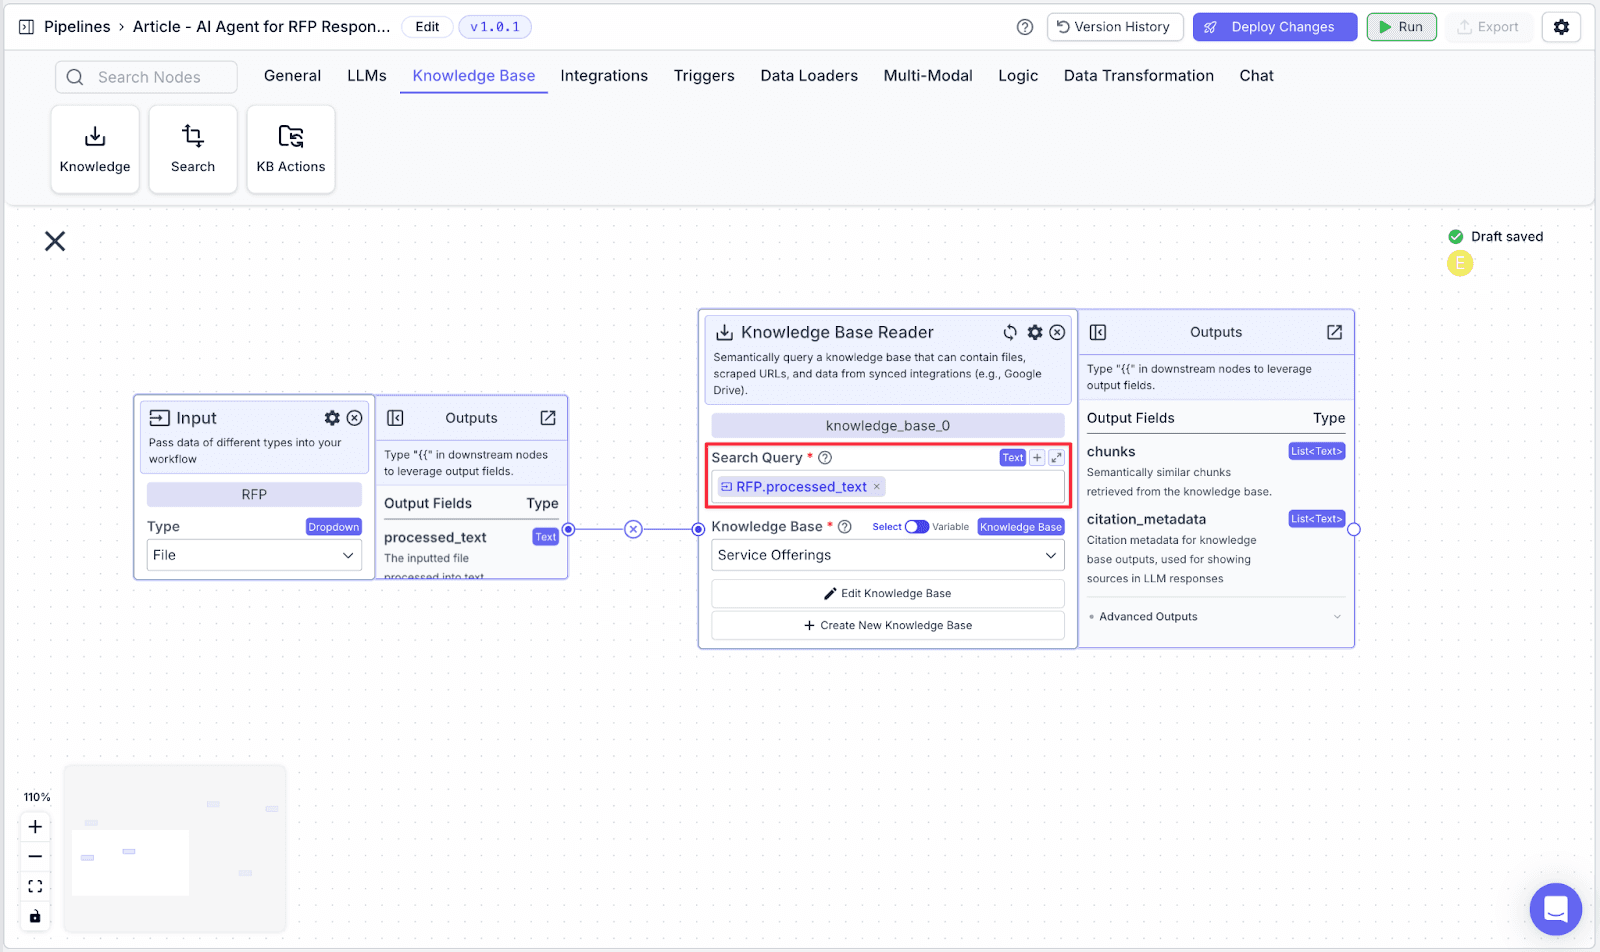
Step 2: Query the Knowledge Base by connecting the “RFP” input node with the “Knowledge Base” node.
To query the knowledge base based on the RFP, we have to pass the text from the RFP to the knowledge base by typing {{RFP.processed_text}} in “Search Query”.
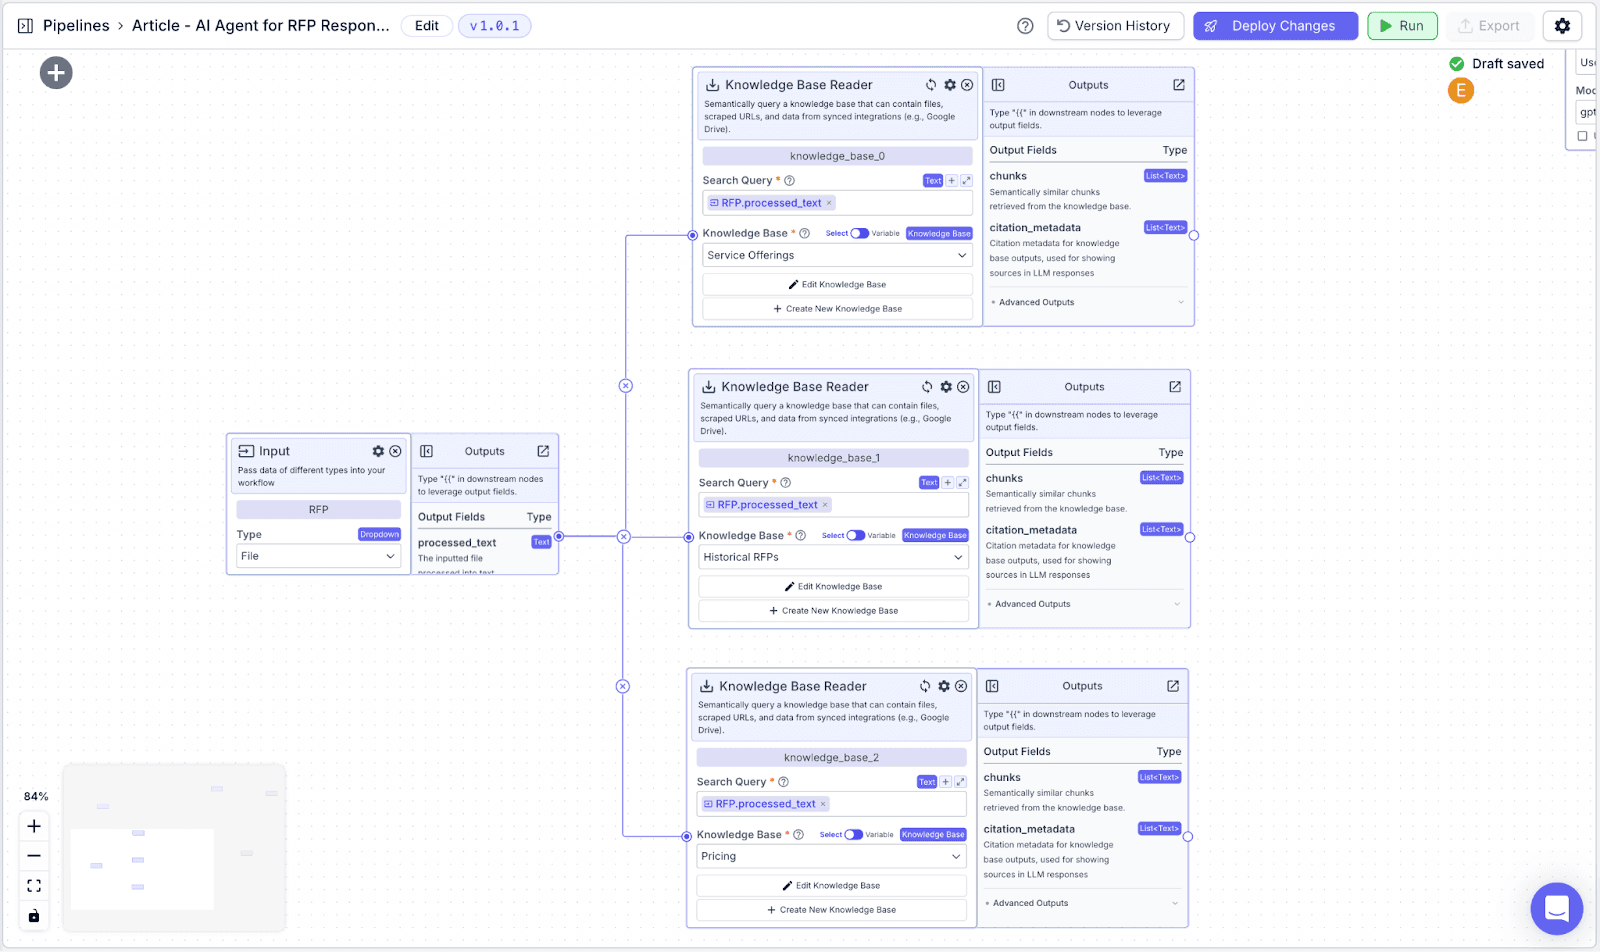
Step 3: Do the same for the “Pricing” and “Historical RFPs” knowledge bases. The result will look like the image below.
LLM Node
The LLM Node will generate the RFP response using context from the knowledge bases while taking into consideration user inputs.
Let's configure the LLM so it knows what to do by defining its behavior in the “System Prompt” and “Prompt” fields.
“System (Instructions)” defines how you want the LLM to behave. You can use the template below:
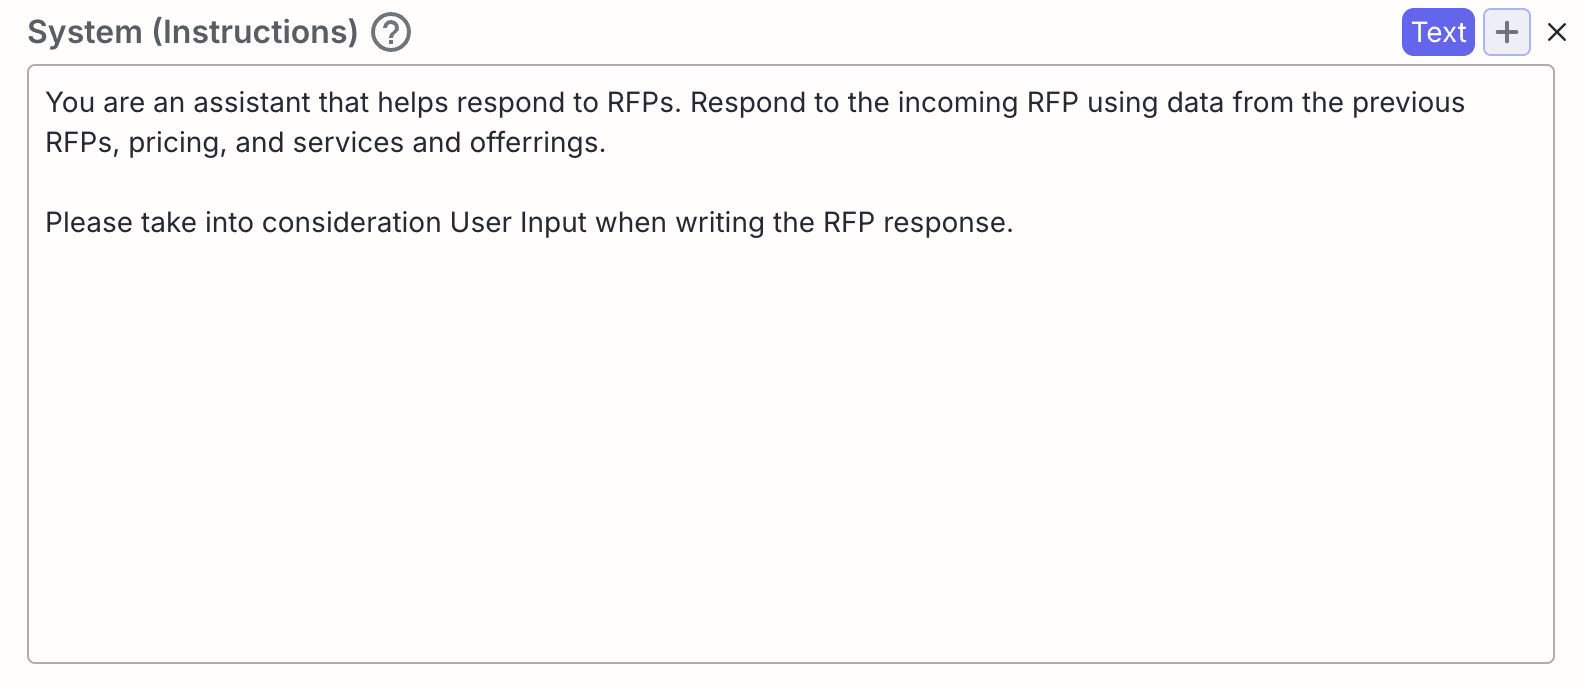

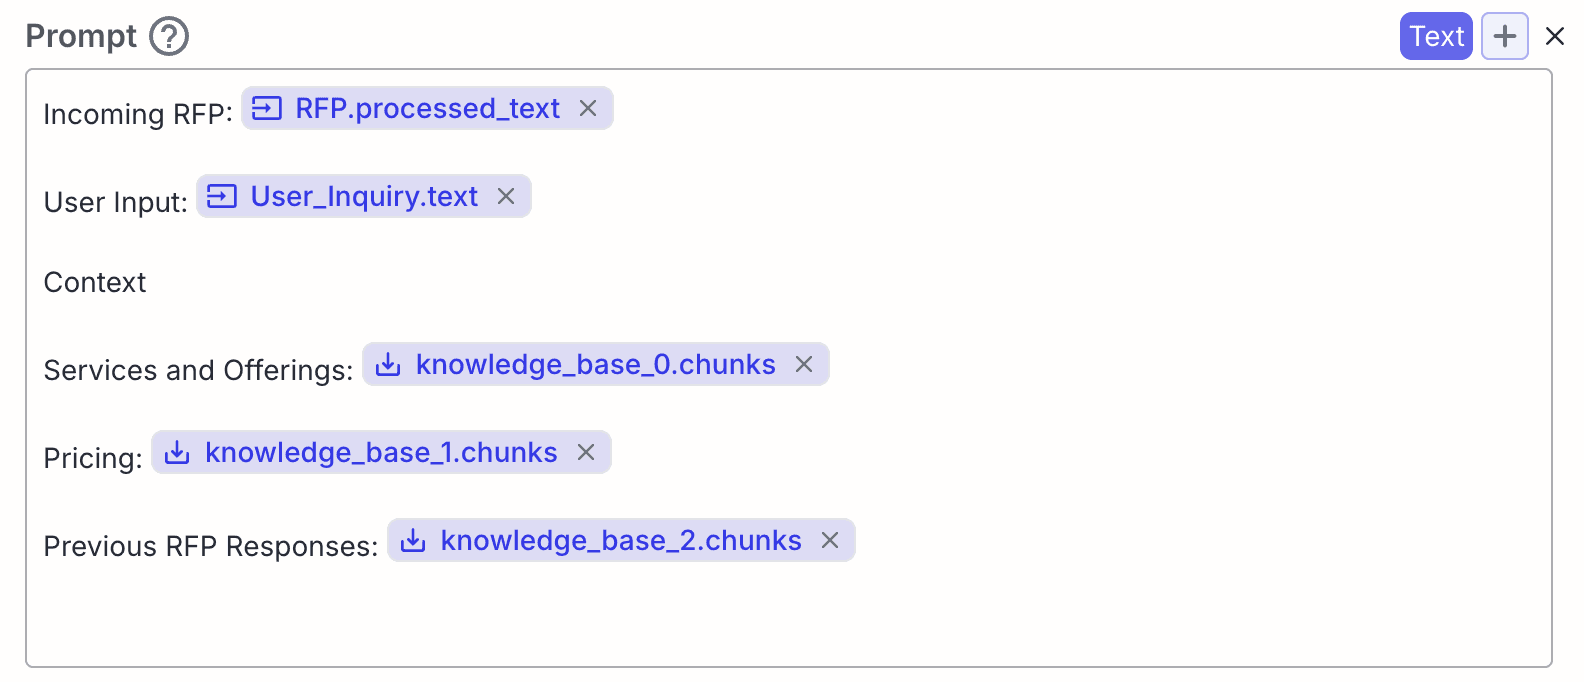
Within the “Prompt”, you pass the data you want the LLM to work with.
Output Node
The last node we need is the Output node. Connect the LLM node with the Output node. On the “Output” field, you can type {{openai_0.response}} to refer to the LLM output (the LLM’s response to the RFP).

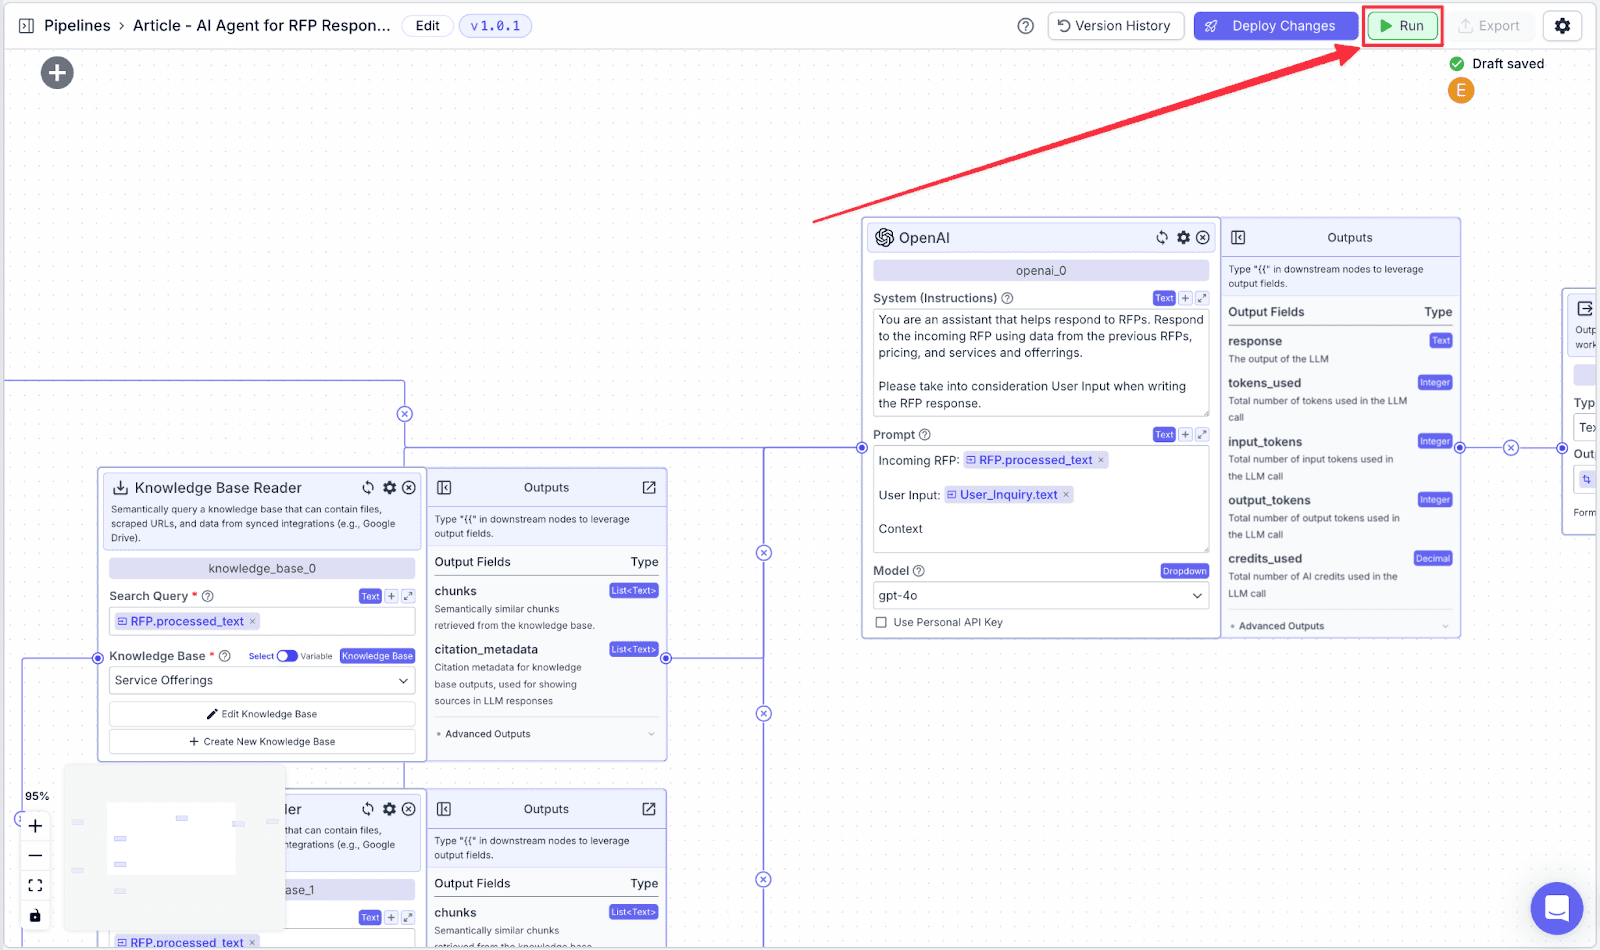
Running the Pipeline
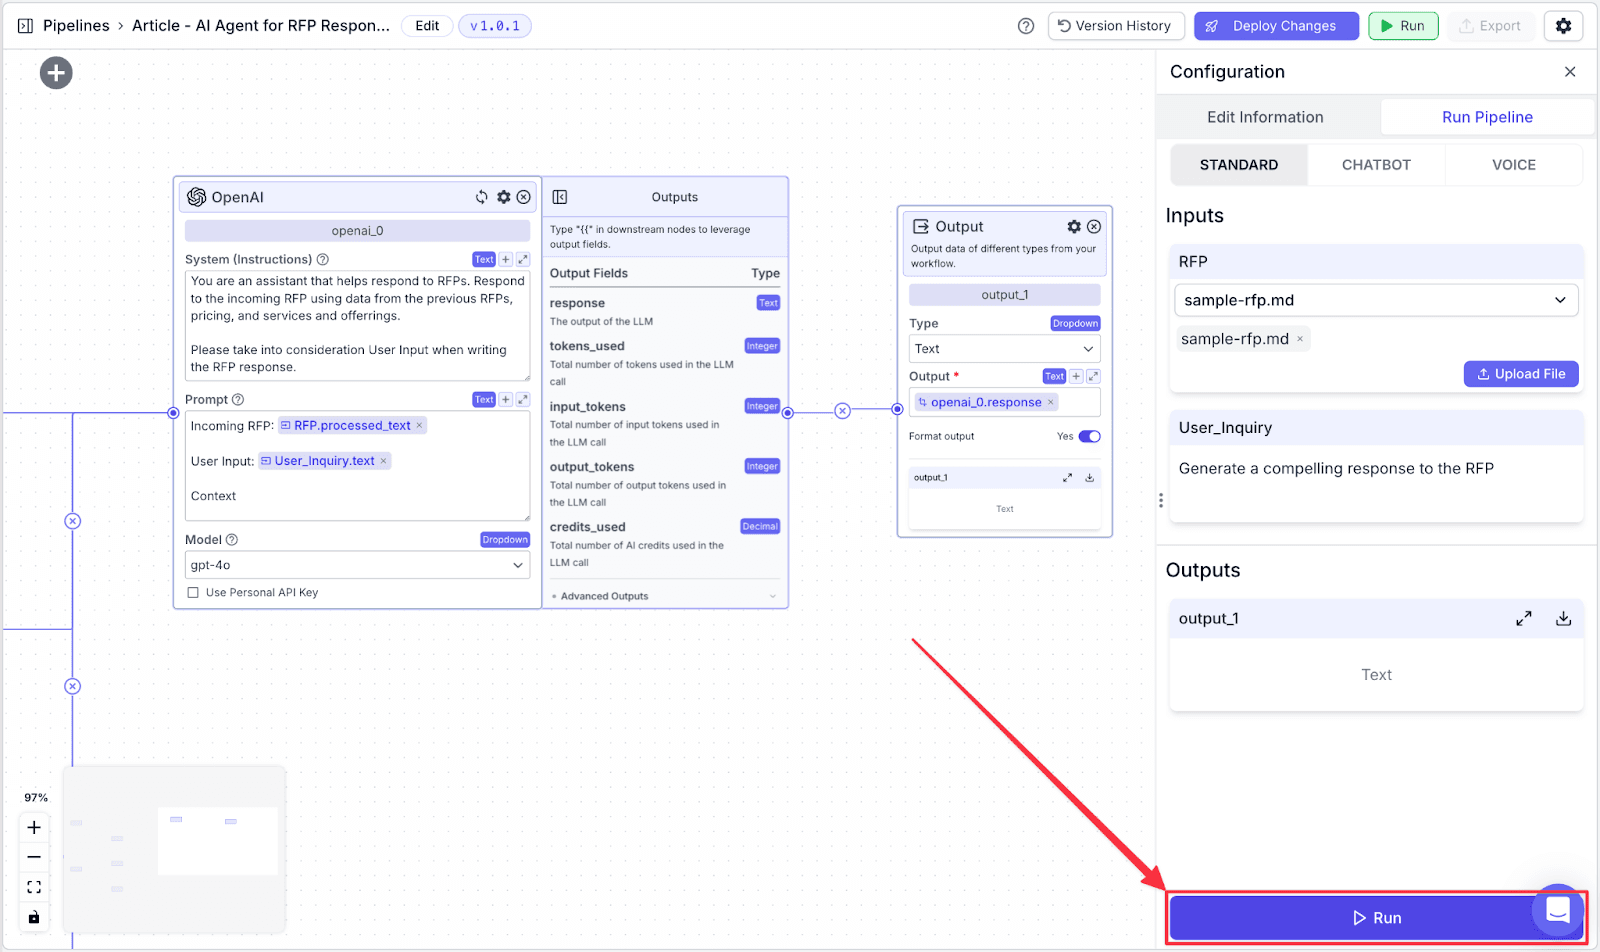
Click “Run” on the top-right of the window. You will be shown the “Run Pipeline” pane on the right side of the screen.
Fill in both User_Inquiry and RFP, then click on the “Run” button on the bottom right.
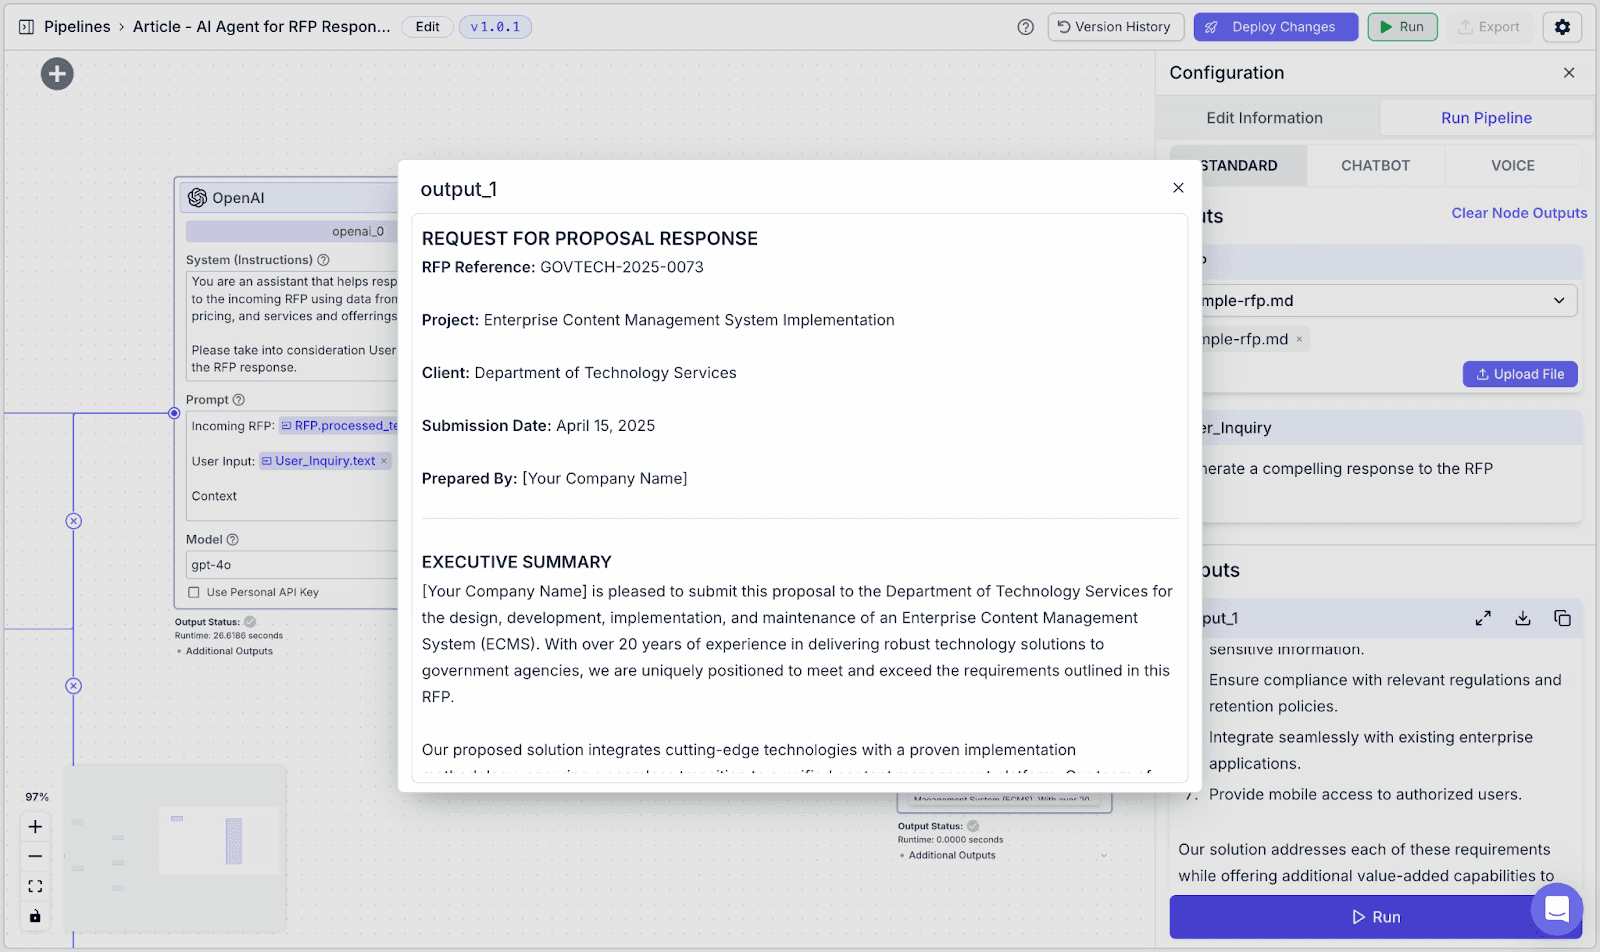
You can then see the result in “output_0”.
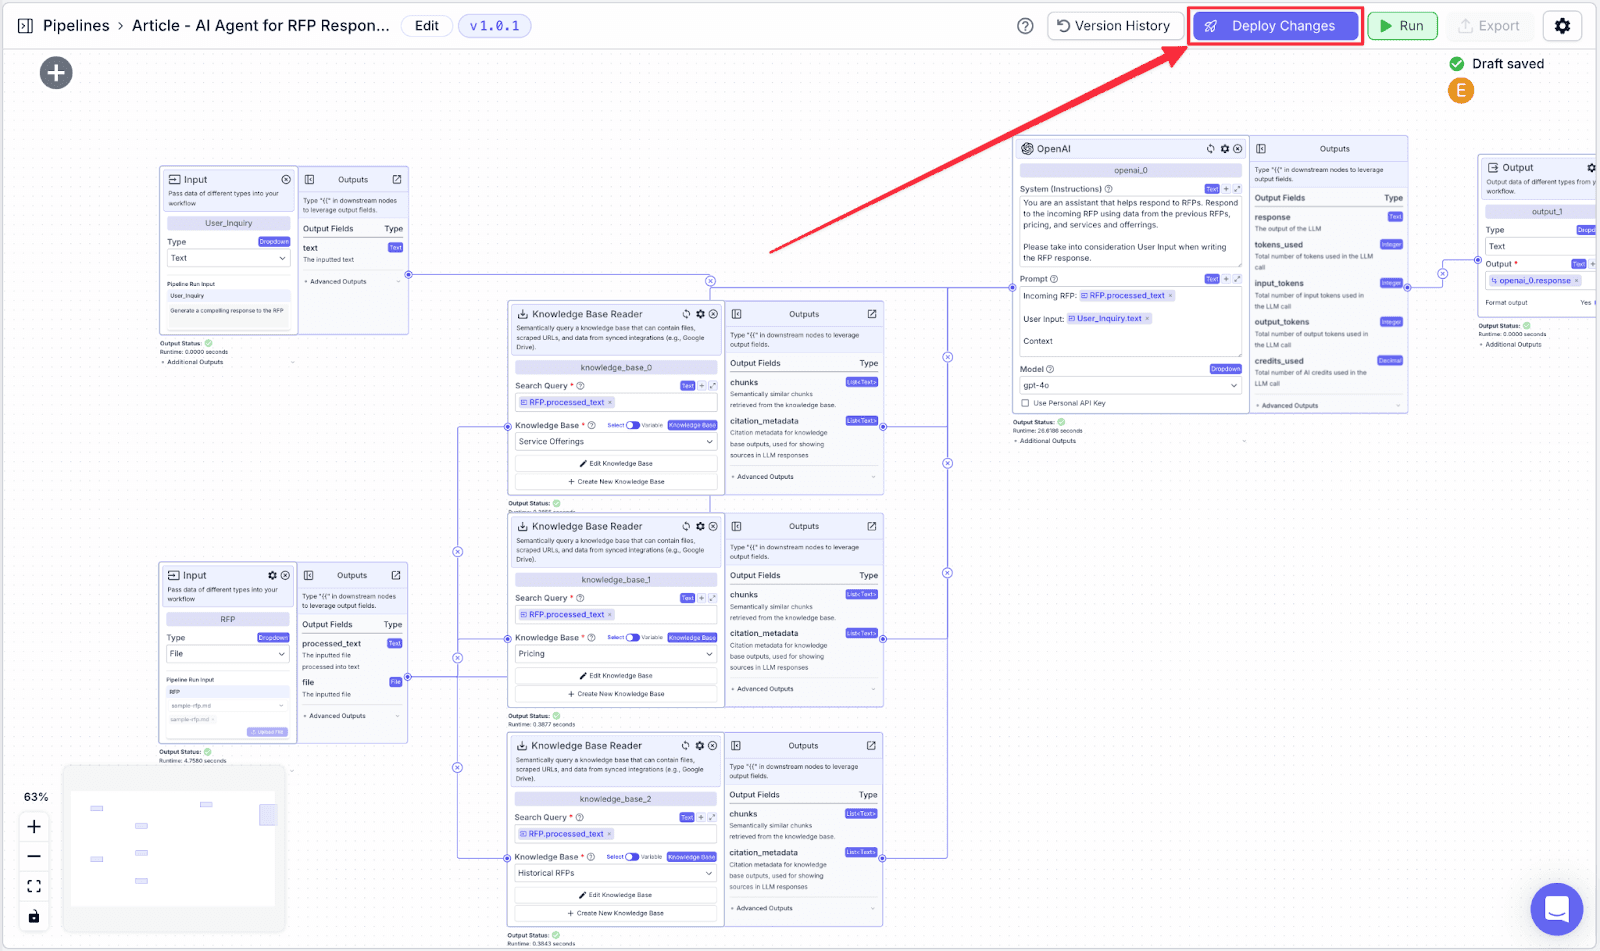
Deploying the Pipeline
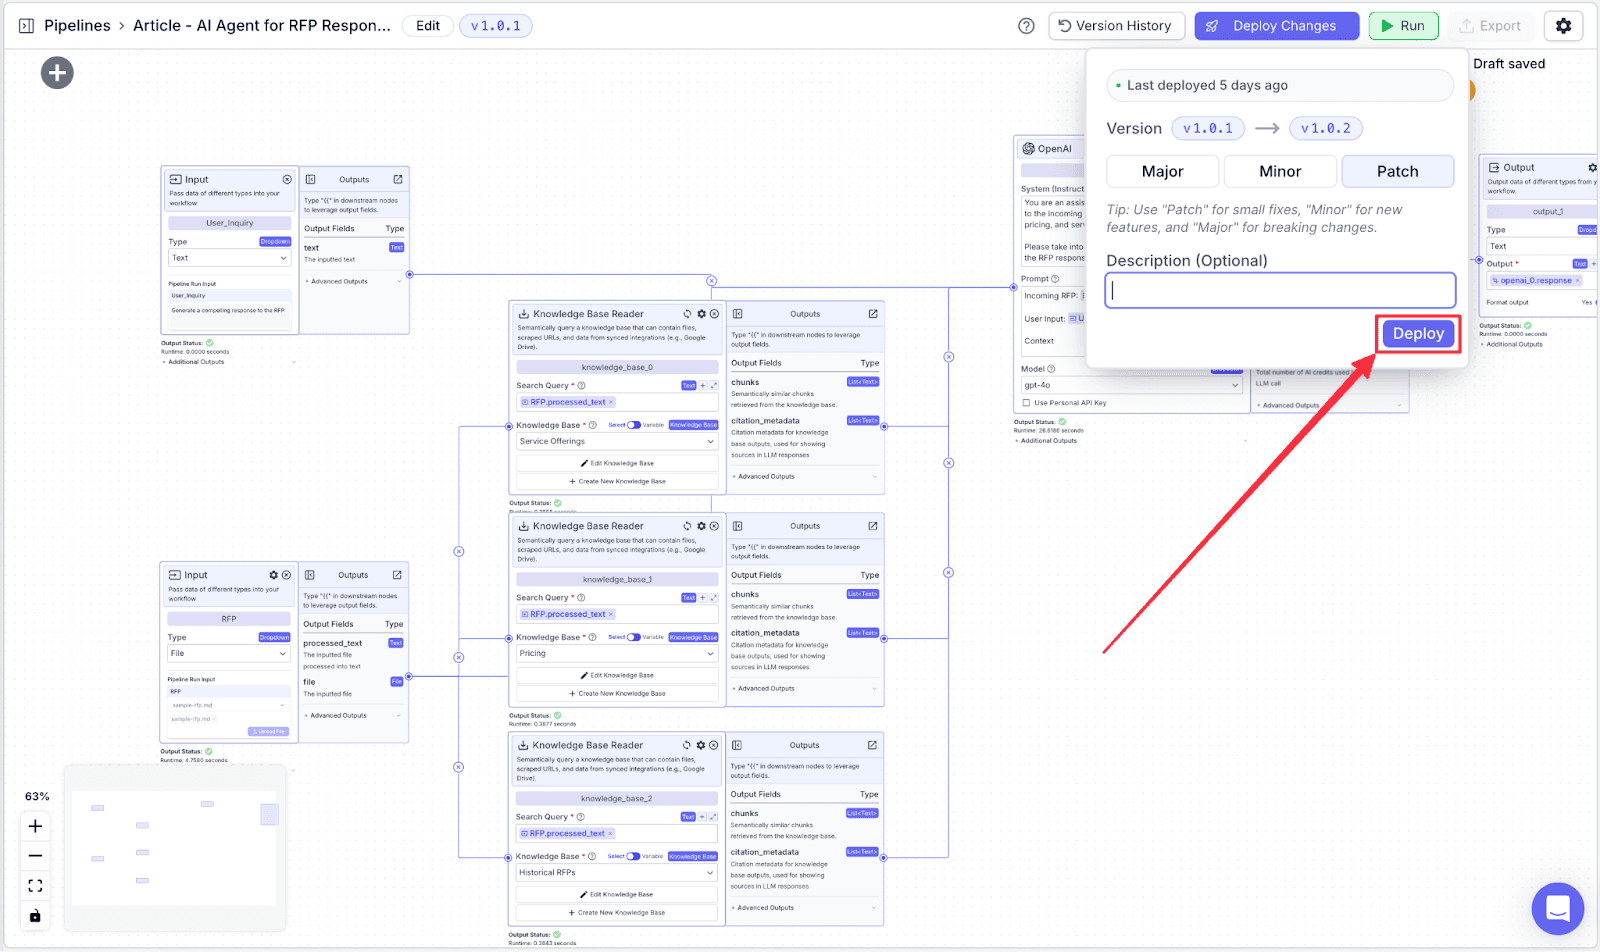
The last thing you need to do is to deploy the pipeline. This allows you to track your pipeline versioning in case you want to revert to a previous version. Click “Deploy Changes” to continue.
Click on “Deploy” to finish deploying.
3. Exporting the Pipeline
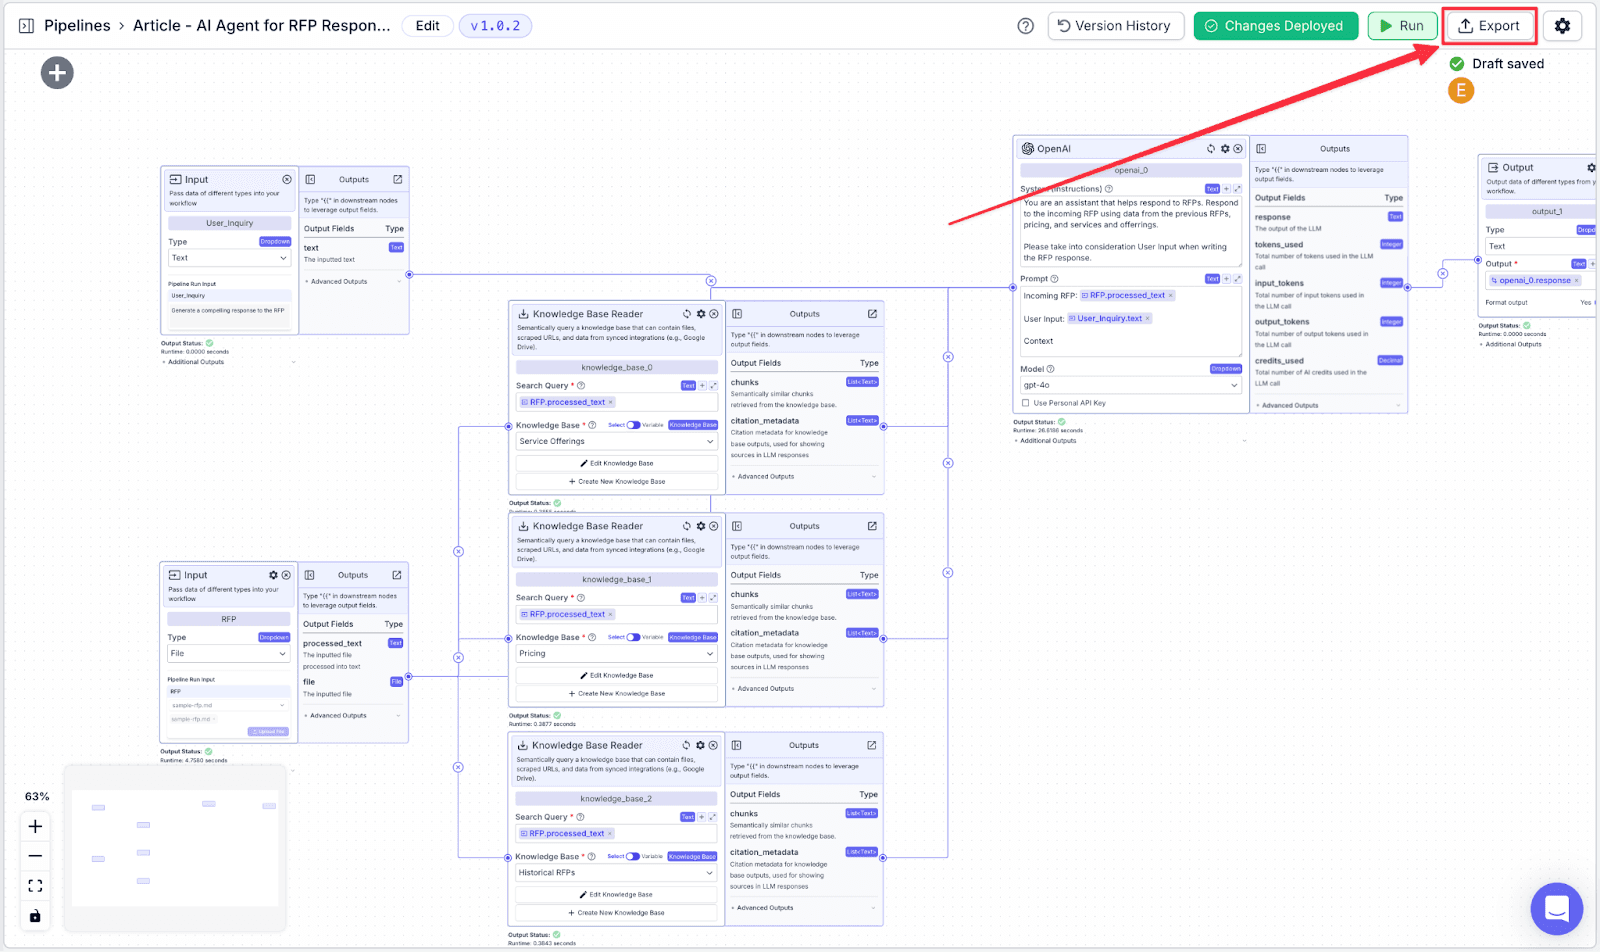
Exporting a pipeline is the easiest way to make the pipeline available for end-users. In this case, we will export the pipeline as a form.
Step 1: Click on the “Export” on the top right.
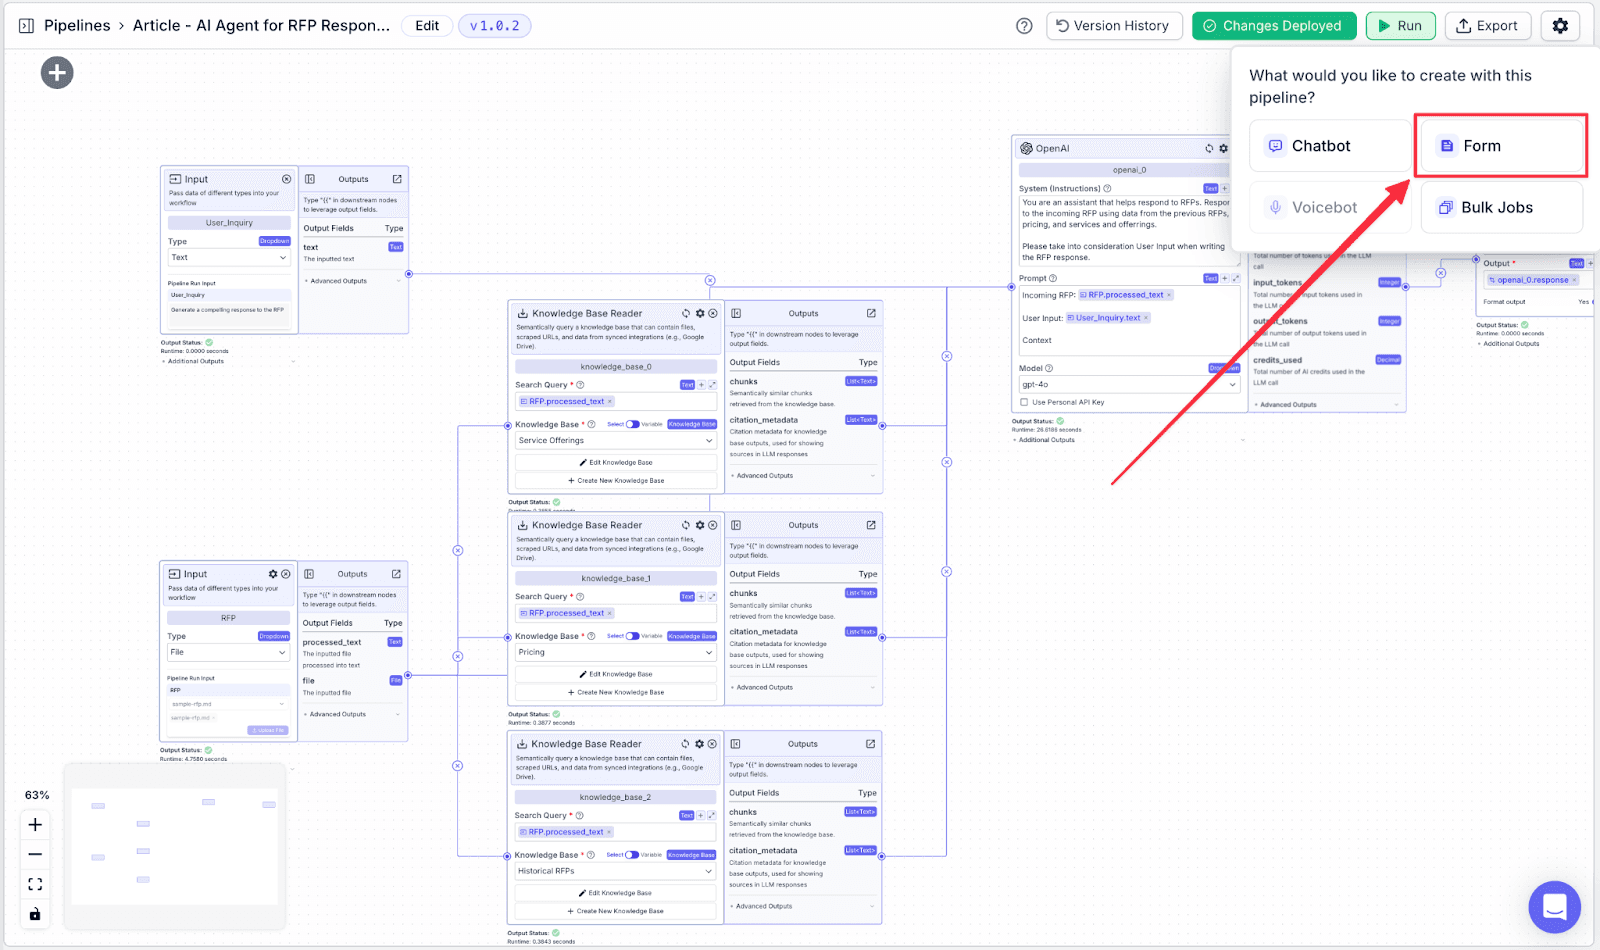
Step 2: You will see some options to export your pipeline. For this article, click on “Form”.
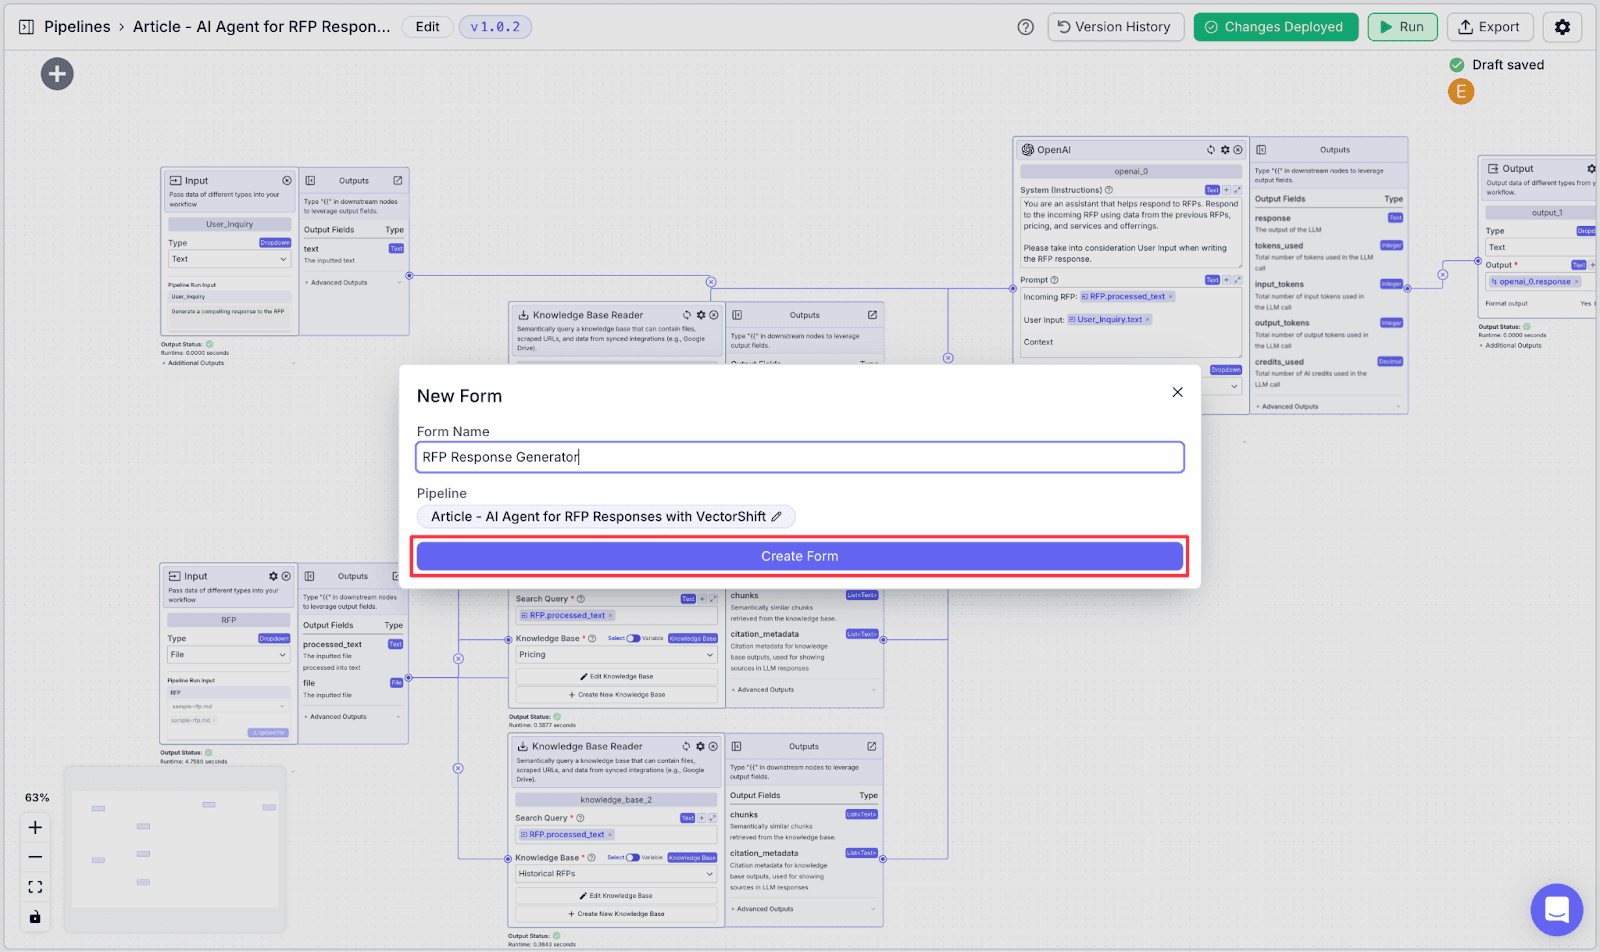
Step 3: Give a name to the form then click “Create Form”.
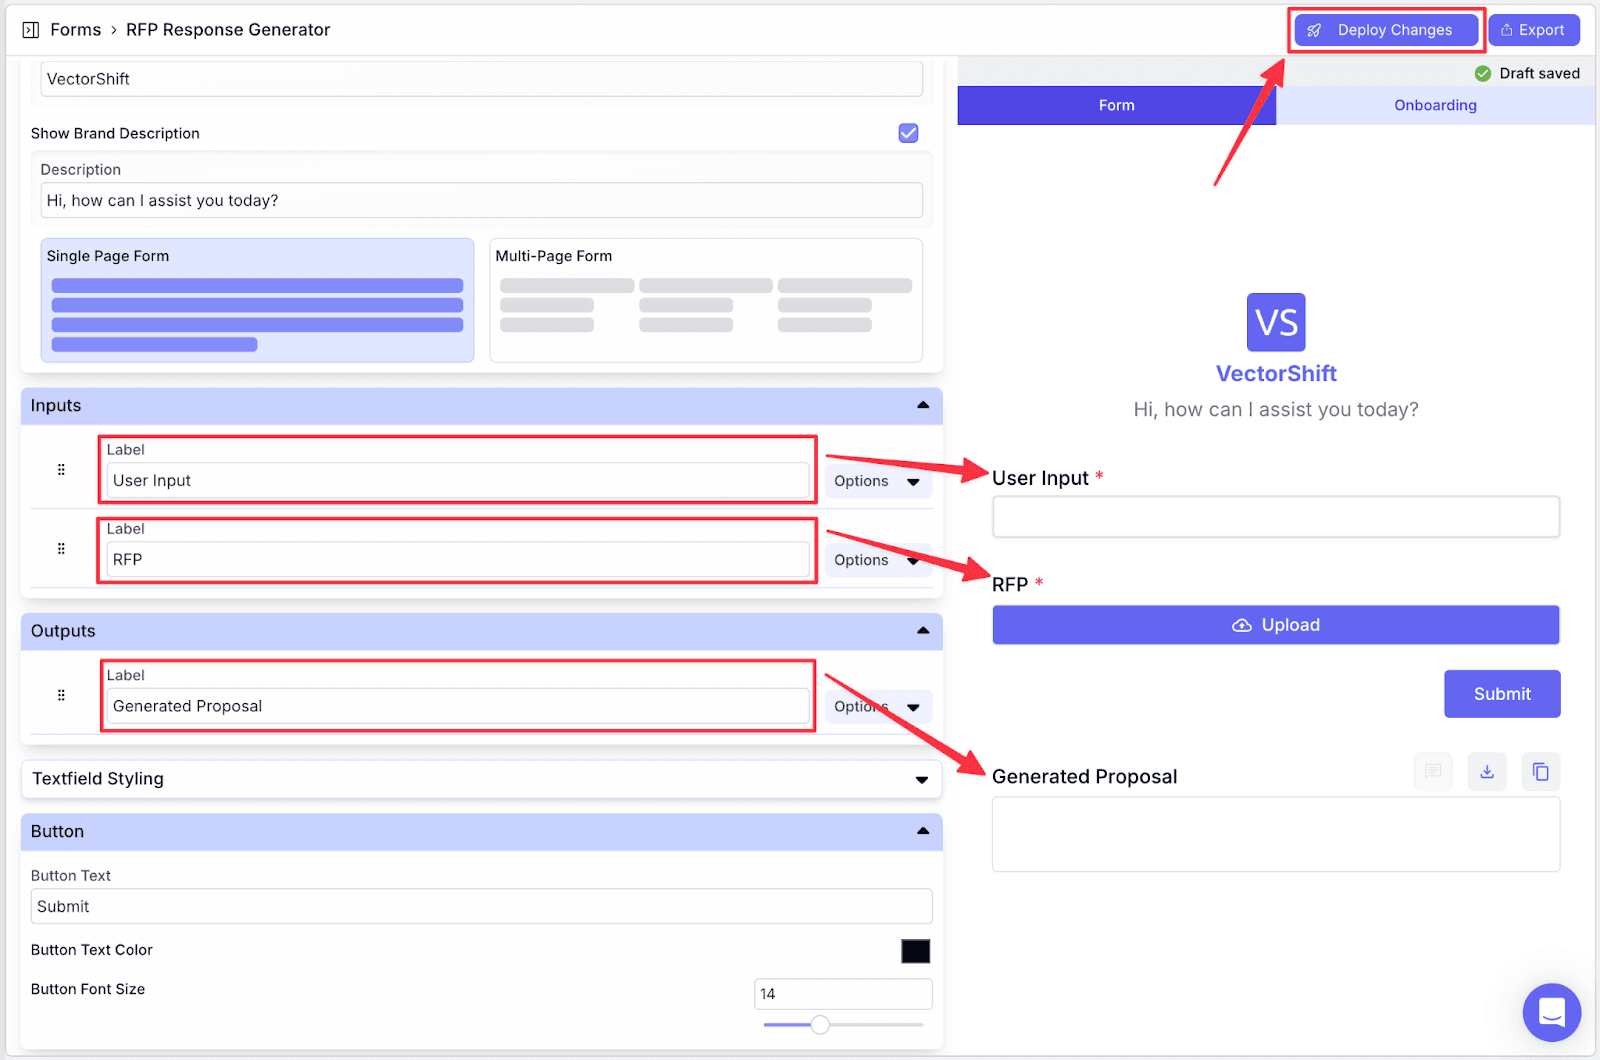
Step 4: Make any cosmetic changes on the left pane. For example, if you want to change the names of the inputs, you can go to the Inputs section, and change the label that represents the interface.
After finishing making changes, click on “Deploy Changes” to deploy the latest update.
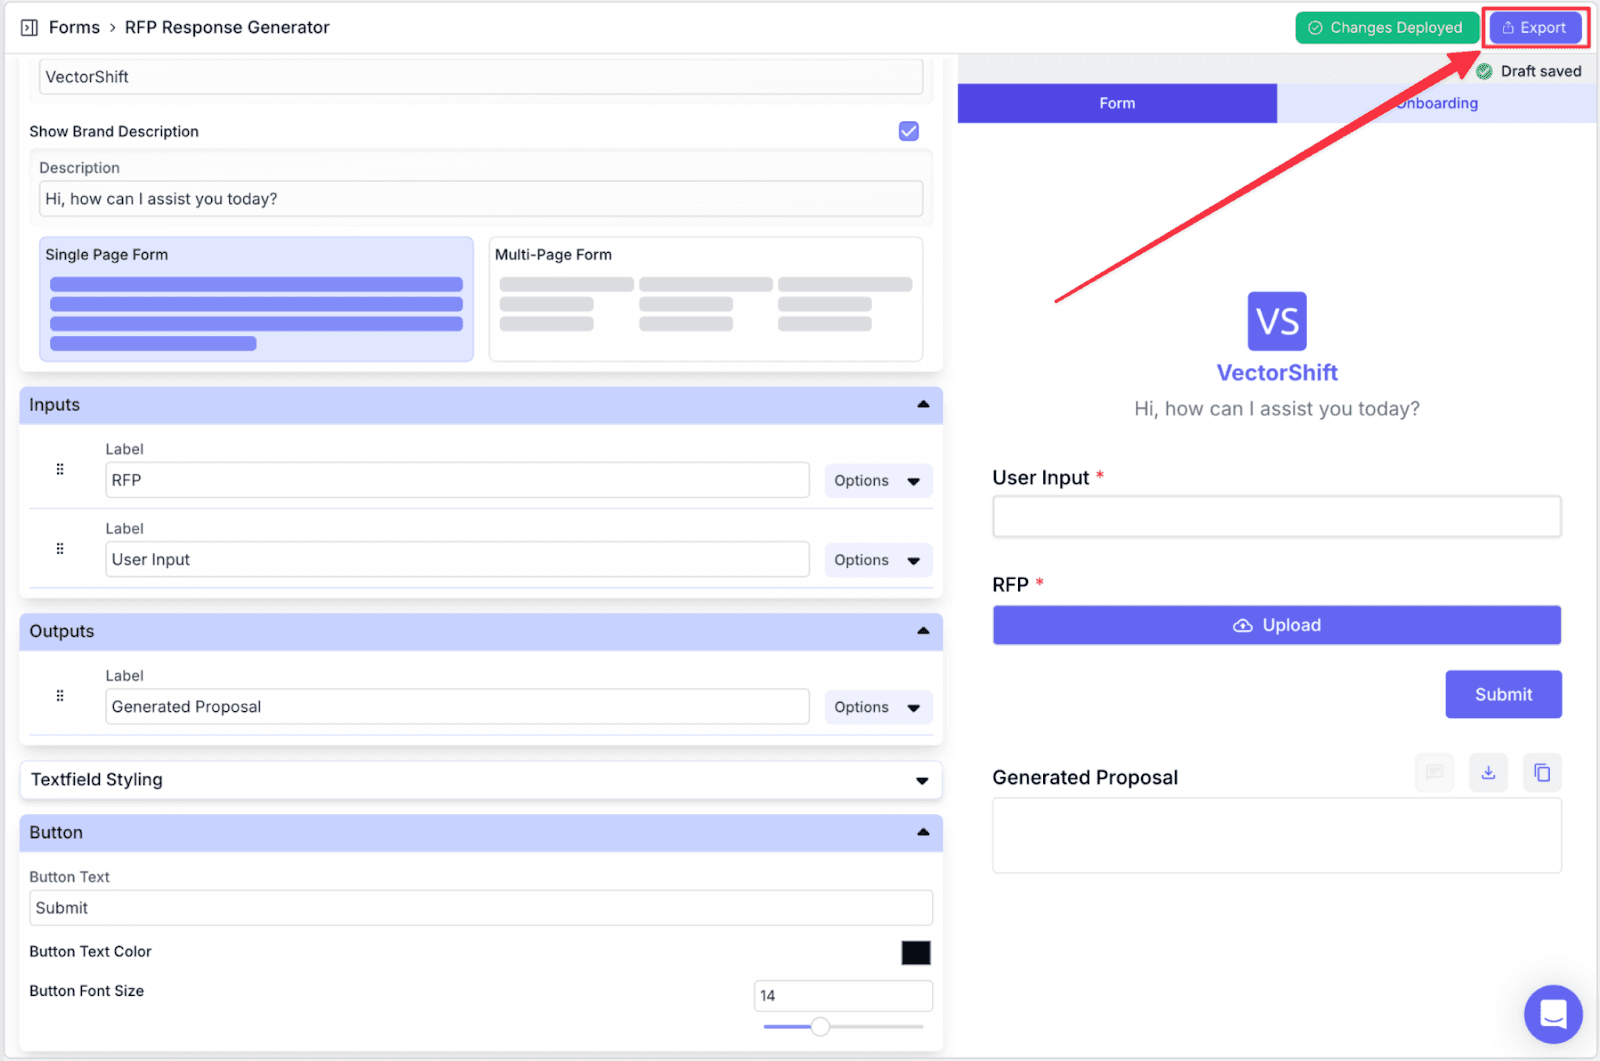
Step 5: Click “Export”
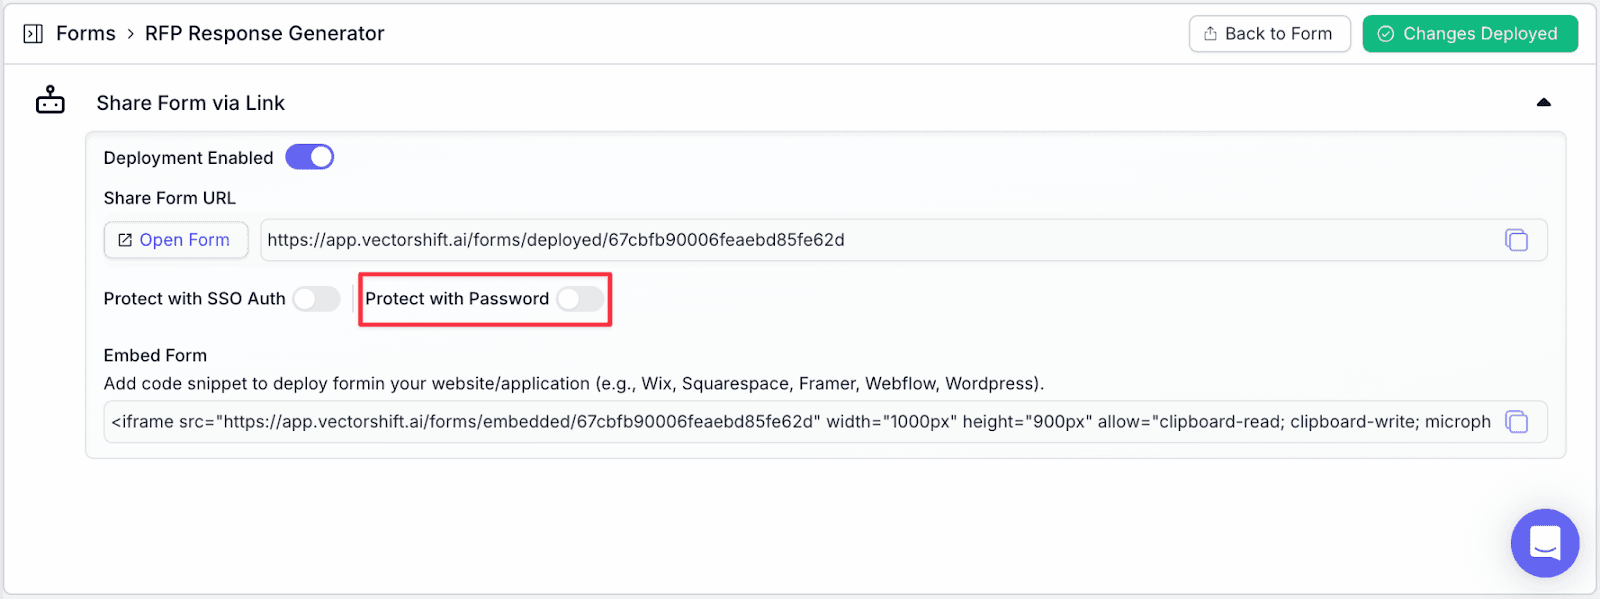
Step 6: Click on “Protect with Password” to create a password for your RFP automation.
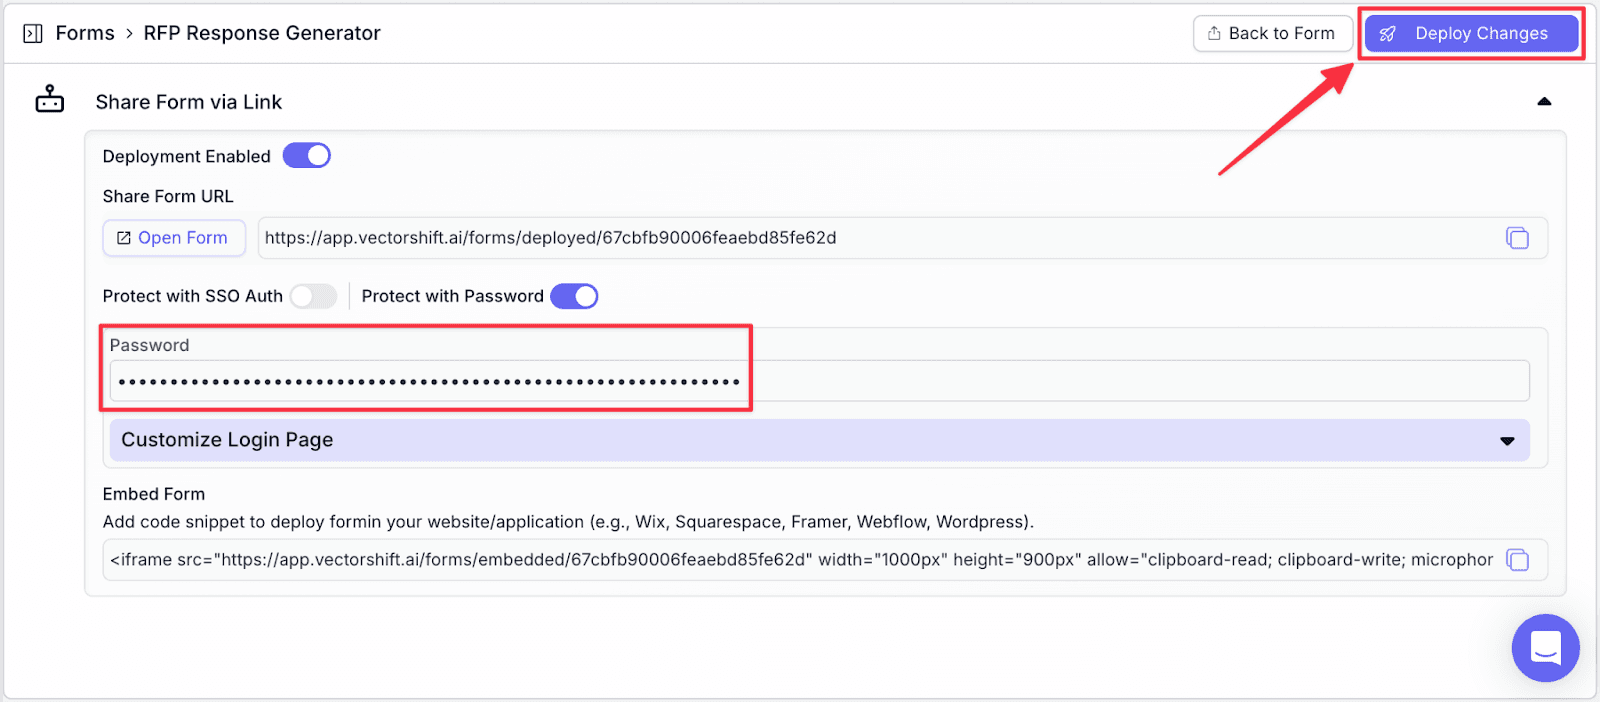
Step 7: Provide a password in the “Password” field, then click “Deploy Changes” to save the changes.
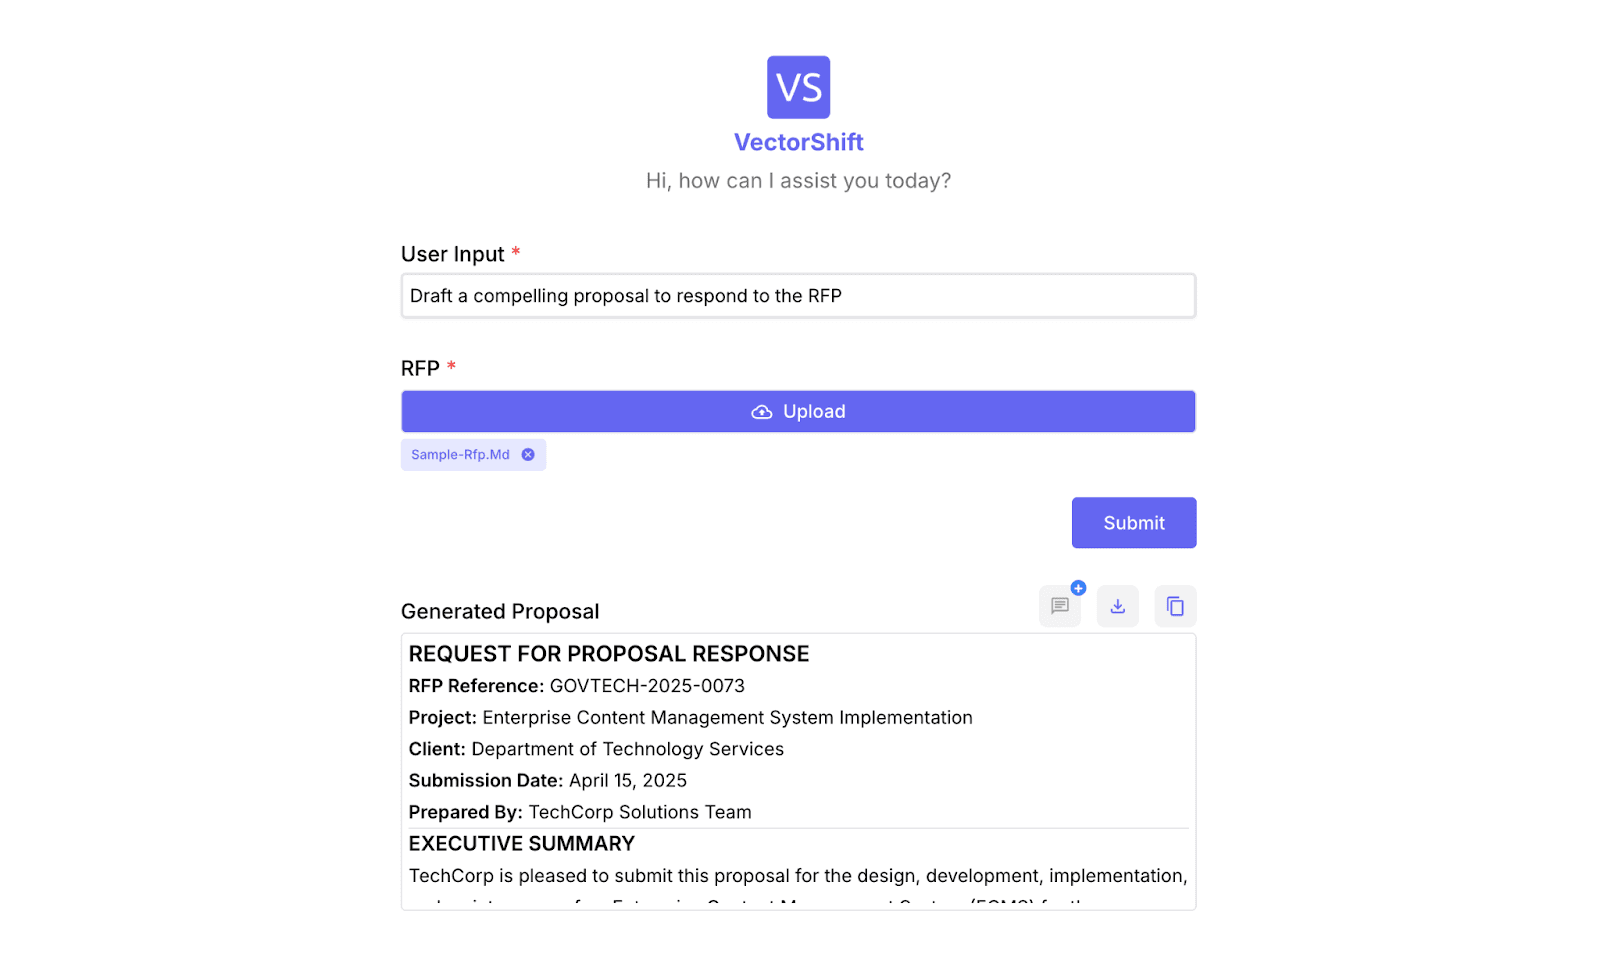
Step 8: Click on “Open Form”. You will see your form is protected by a password.

Enter the password, and you will be able to access the form.
Conclusion: A Smarter Way to Handle RFPs
For further development, you can enhance your AI assistant by integrating additional data sources, such as data from Sharepoint, Google Drive, or any internal documentation all securely in VectorShift!
Looking to exploring more automation use cases? Try VectorShift for free or contact us for a tailored custom solution.
If you want to learn more about how exactly VectorShift can help you, book a demo here or try it for free!

Albert Mao
Co-Founder
Albert Mao is a co-founder of VectorShift, a no-code AI automation platform and holds a BA in Statistics from Harvard. Previously, he worked at McKinsey & Company, helping Fortune 500 firms with digital transformation and go-to-market strategies.